After finishing the installation of our cabinets and it was now time to cut our countertops. I think we always envisioned our kitchen with butcher block countertops, but there was a brief moment when we did consider other options. One important element that pushed us back to butcher block was the price of other typical materials (quartz, granite, and soapstone). These were easily $80-160 per square foot. Even so, we did visit a countertop place just to discover we didn’t even really like the look of quartz and granite for our kitchen. It just seemed way too fancy. We only have 40 square feet of countertop, but still – there was no way we were going to pay $3000 to $6000 for counter tops we weren’t even excited about.
So why butcher block? Every countertop has it’s pros and cons. Butcher block is less expensive, can be installed yourself, and can bring warmth and character to a kitchen. Some people worry about the maintenance required with butcher block. It needs to be sealed, treated, or oiled regularly. It can also absorb stains, water spots, or burn with high eat. But to me, the very nature of butcher block that can make it prone to damage is also the thing that makes it easy to use. If something does happen to it, you can always just sand it and seal it again. Plus, minor imperfections with butcher block just add to the character…. I’m not sure you could say that about a stain on marble.
We eventually decided on an American Walnut butcher block that we found at Lumber Liquidators. It was a nice dark color and had plenty of warmth. We ordered two 12′ pieces and spent a total of $1000, or $25 per square foot. Still a chunk of change, but much more affordable compared to the other options.
Amy and I knew that each cut of the butcher block was going to be critical and that we couldn’t afford to make any mistakes. This meant there was A LOT of measuring, thinking, re-measuring…
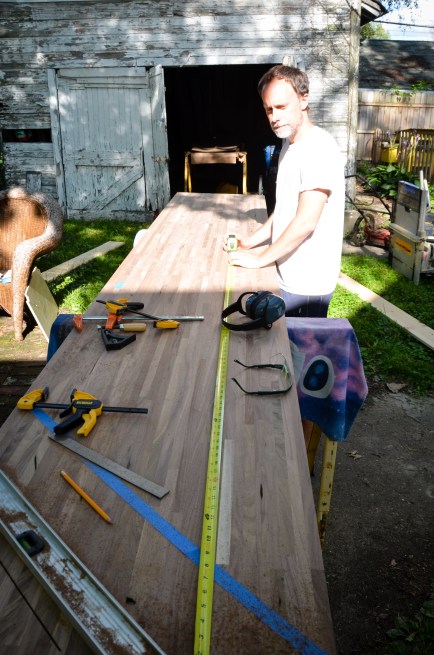
…and even more thinking.
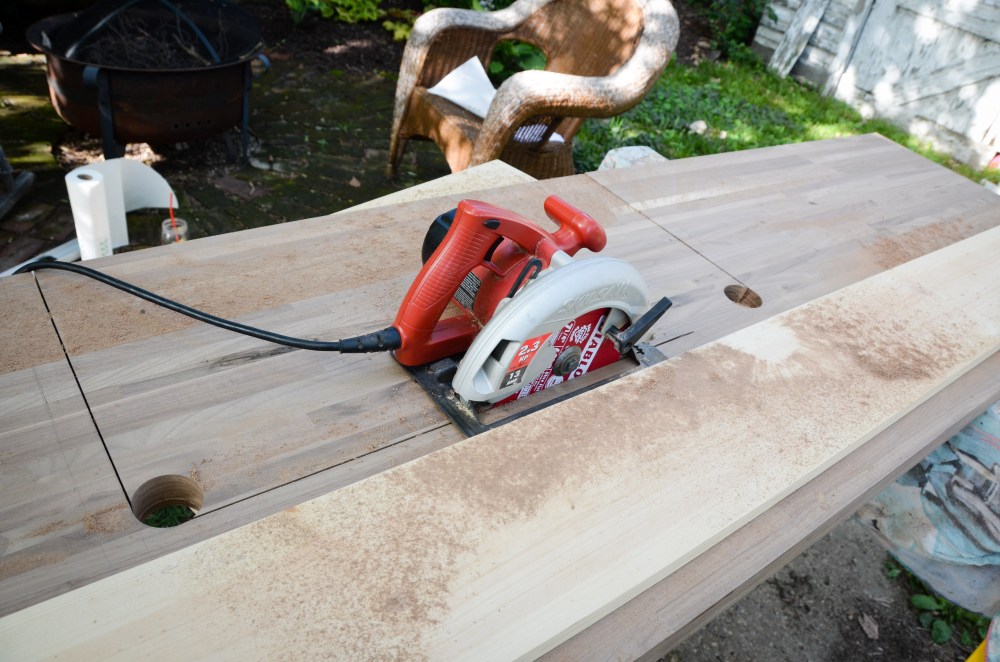
I don’t have any pictures of this, but Amy and I actually did a practice run with plywood before making the first cuts on the sink. This helped tremendously because it forced us to think through everything and learn about the tendencies of the blades and how critical every details is – like the thickness of the pencil line, width of the blade, and figuring out which side of the cut produces the best result. About 2 hours later (yes, two hours) we were ready to make the first cut.
[Edit from Amy: In short, we ran through this whole process twice.]
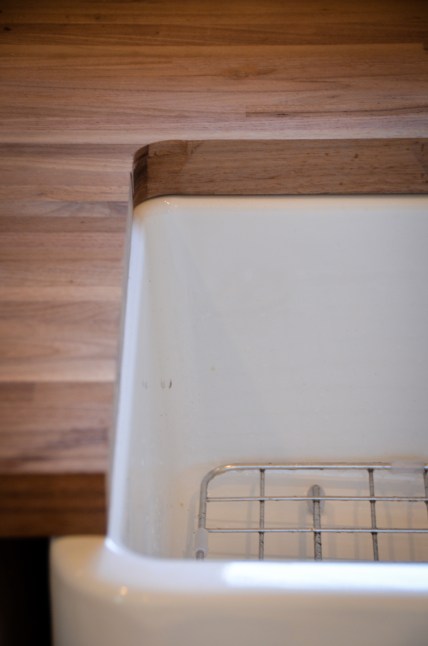
Our sink is a farmhouse sink that we are going to mount under the countertop. But, since the sink is fireclay and every fireclay sink is slightly different, there was no template to cut the countertop like there are with most other sinks. In addition, drop-in sinks cover up the hole that you cut, so the accuracy and quality of the cut doesn’t matter as much. We did not have that luxury.
Since the sink was going to be under the countertop, we needed to flip the countertop over, lay the sink upside down on the countertop, trace the countertop, then measure in the distance we wanted the countertop to overlap the sink. In short, we had to create our own custom measurements.
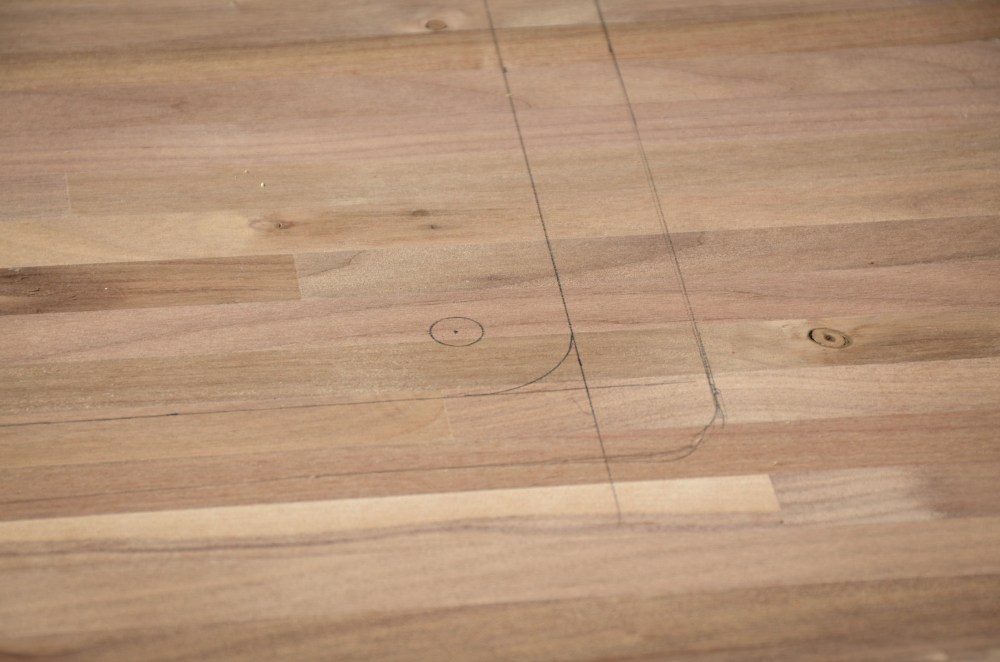
We also needed to round the corners of our cutout to mirror the curves in the sink. In our practice round, we figured out it was best to start with the hole cuts in the corner.
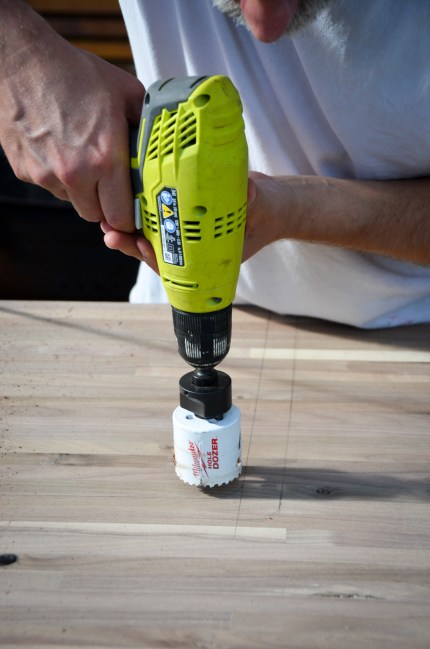
The hole-cutting went smoothly, as well as the initial cuts from outside of the butcher block. I should mention at this point that we also practiced cutting the holes and making plunge cuts on the actual butcher block before making our first cuts. Making sure the plunge cut lined up perfectly with the outer wall of the corner circles was the hardest part. It wasn’t absolutely perfect, but it turned out close enough that I can make it right with a little bit of sanding later on.
And at this point, Amy distracted us for a good 10 minutes with the discovery of this odd bug. I have to say that I never seen this particular type of insect.
[Edit from Amy: Walter.]

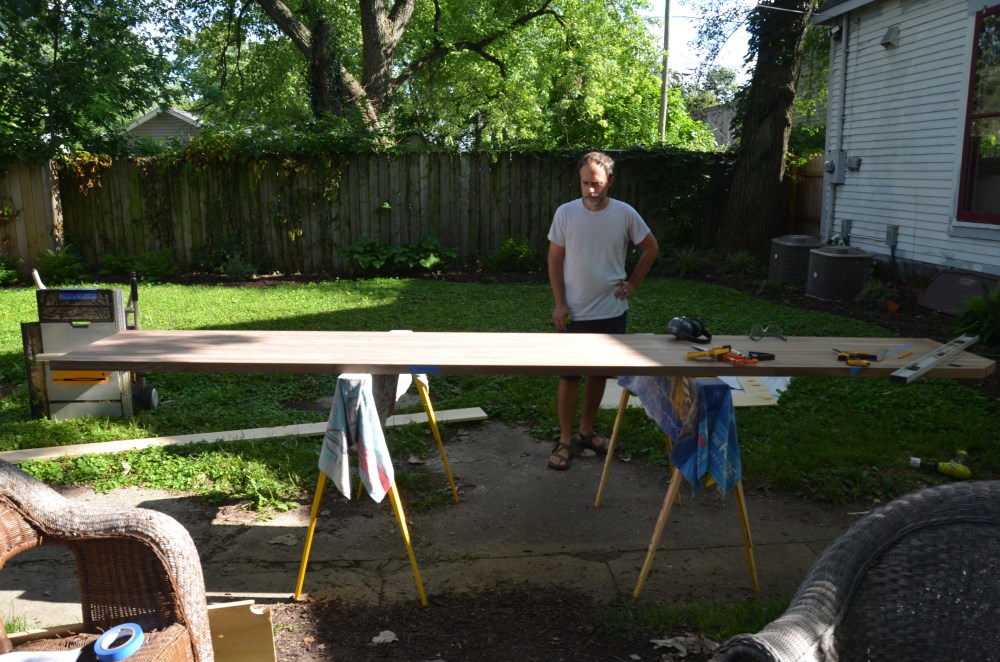
Once the sink cutout was complete, we moved onto the other cuts. We have three walls in our kitchen that will have countertops, which means that there will be two spots that meet with angle cuts.

But it wasn’t as simple as just cutting a 45 degree angle on each countertop and then lining them up. I was worried that the slightest error would result in a gap, so we decided to cut one angle, then line up the piece to be cut underneath the angle that it would match. Still, we weren’t convinced this would work. What if the corner of the wall wasn’t square or there was something else that affected the angle and then also caused the countertop to not be square with the cabinets?
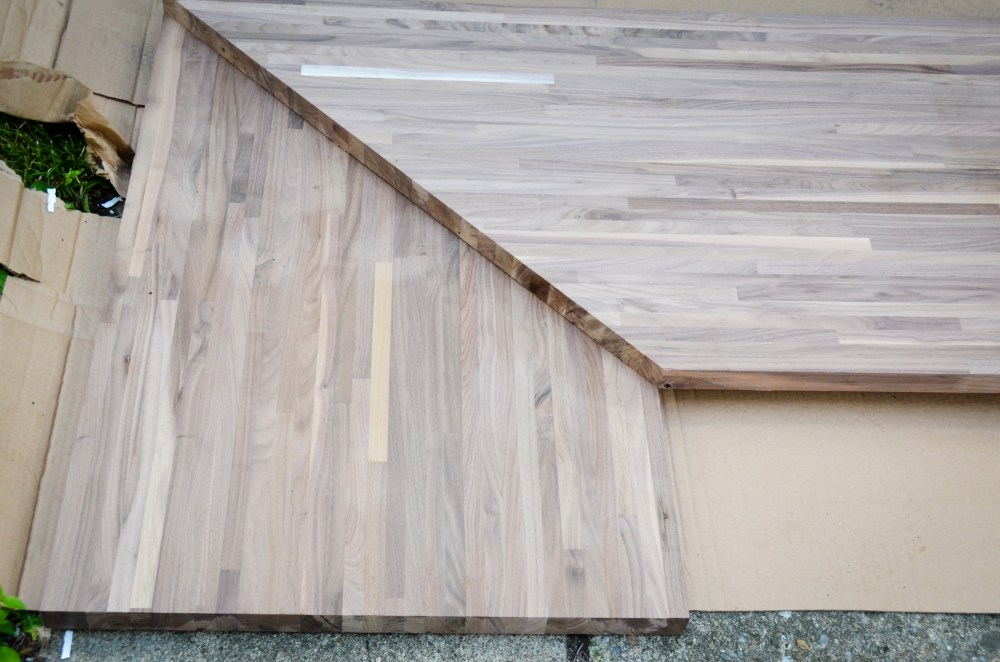
We ended up bringing all the pieces into the kitchen, putting them where they should go, and then making the trace marks from that point. This was our first chance to see how accurate our sink measurements were…
Pretty good!
Putting the countertops on the cabinets did help us catch one angle that would not have lined up correctly with the cabinet, so it was definitely worth the time and energy. We made the remaining cuts and then anxiously dry fit everything in the kitchen. To our great relief, everything turned out pretty accurate.
[Edit from Amy: The counter tops still need to be sanded and oiled. The color will eventually be much earthier and darker.]
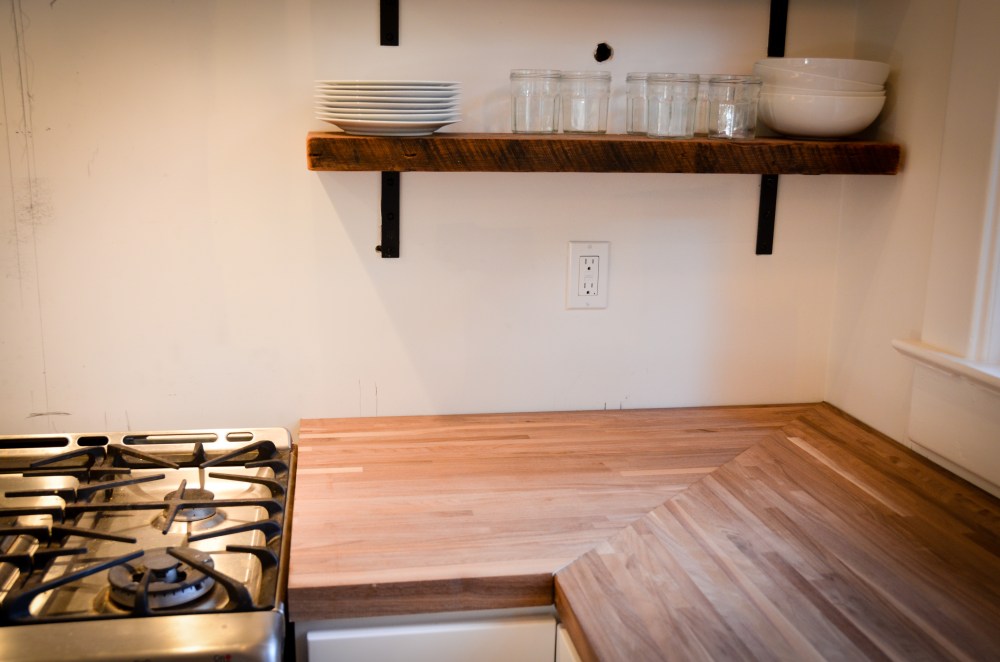
There was one big issue that became apparent right away. The countertops were all slightly bowed in the middle! Almost a 1/4″… enough to be noticeable and prevent the countertops from lying flat on the cabinets or for the angle cuts to line up properly.
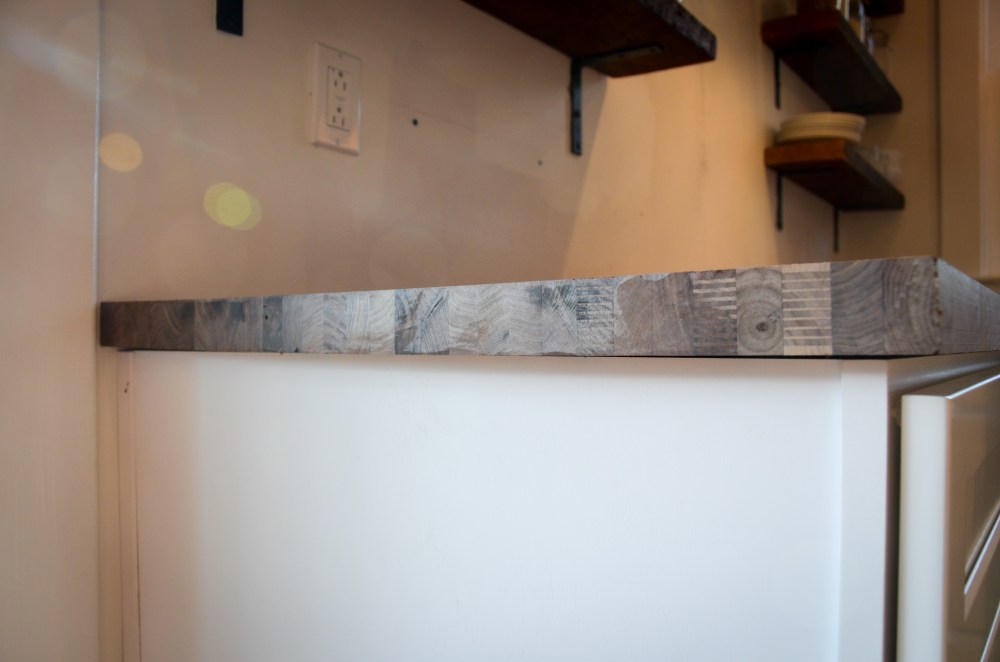
My best guess is that the extreme humidity of the past week and the fact that we stored the countertops stacked on top of each other (still wrapped in cardboard) for a week caused wood to absorb the moisture unevenly and cause the bowing. I immediately did some research and it seems that this a correctable problem. I’m going to start with just letting the wood get used to the lower humidity inside. It has just been 4 days and it seems to be getting better already (unless that is just wishful thinking). After a week I am going to go through the sanding process, seal the bottom of the countertops, then actually install them to cabinets, hoping to gradually tighten them down until the bowing levels out. I will add mineral oil to the tops and edges of the countertop until it has been fully absorbed by the wood. This means that this blog post won’t contain an exciting full countertop reveal, so stay tuned for Part 2.
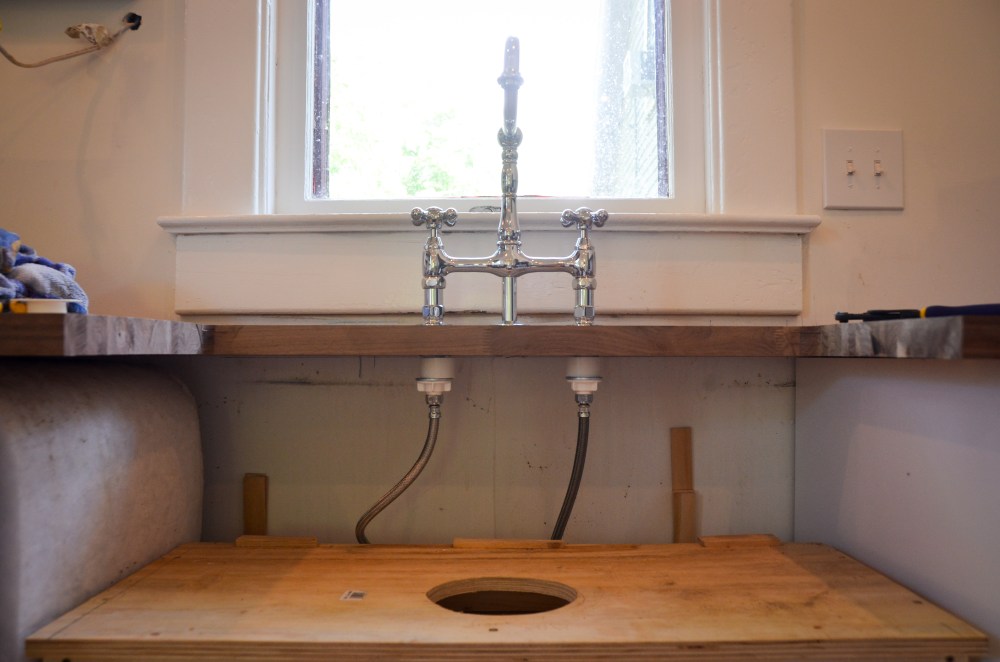
But there was still other work to be done. I mentioned in the last post that I had to create a structure that would be integrated into the cabinet to support the weight of the farmhouse sink. I ended up cutting holes in the top and bottom of the cabinet and attached 2x4s to the sides of the cabinet that then protruded through the bottom of the cabinet to the floor and through the top of the cabinet to a platform that holds the sink.
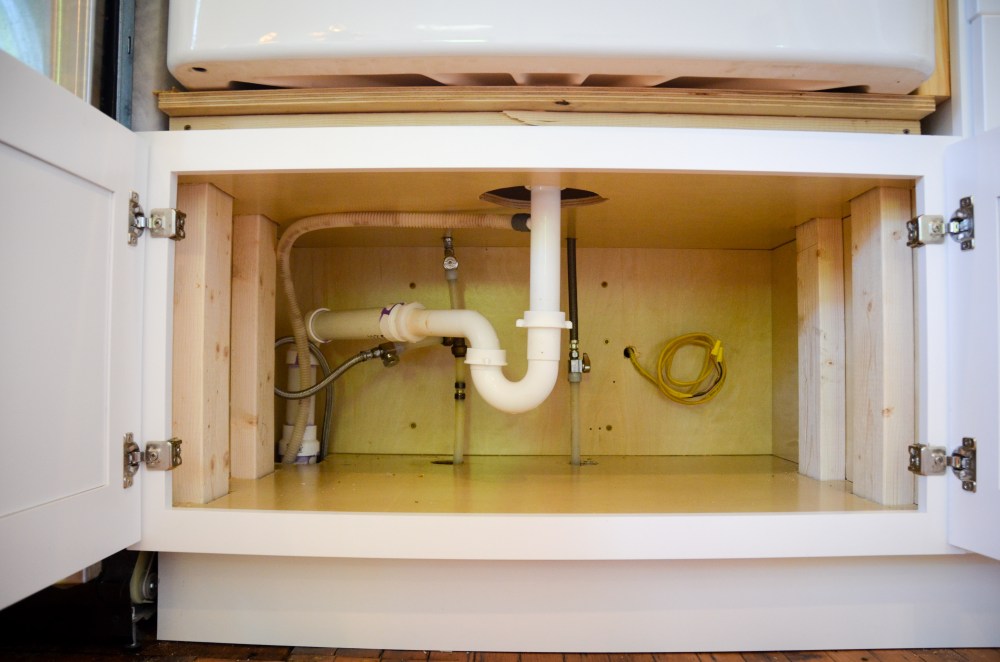
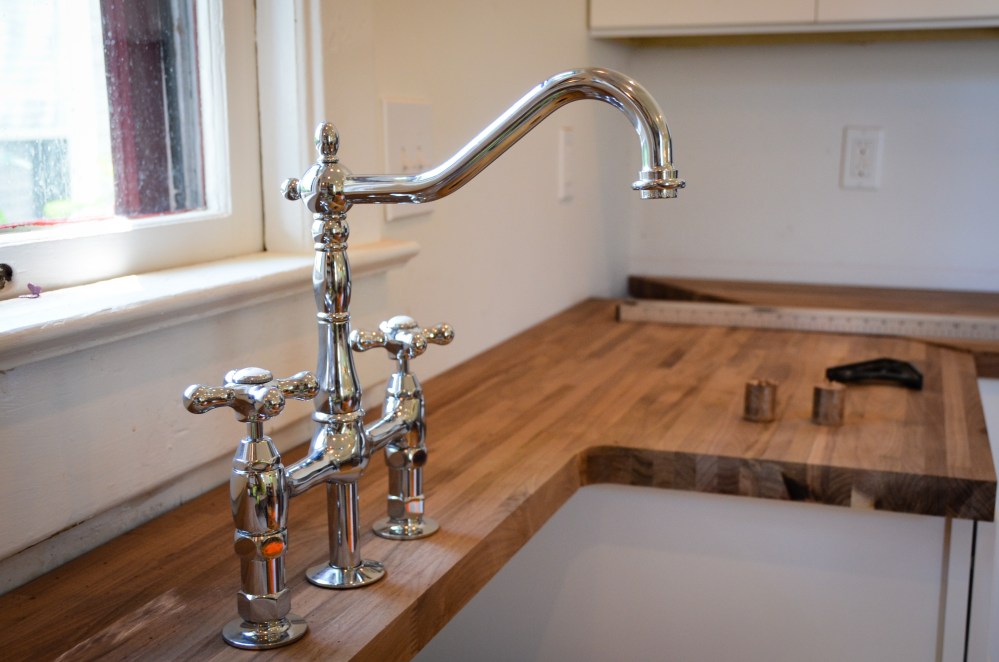
The plumbing needed to be modified slightly, which was surprisingly easy. Speaking of modify… The threaded pieces that are supposed to go through the countertop to the water supply lines were not long enough to allow them to be secured to the countertop. This meant that we had to get a coupler that would give us the length we needed. But it still didn’t solve the problem of securing the fixture to the countertop. I crafted a solution using PVC pipe and a large washer. This provided the extended reach needed to get to the bottom of the countertop and properly secure the fixture.
[Edit from Amy: They guys at the plumbing store told me twice on two separate trips that we wouldn’t be able to make this faucet work on this width of countertop. They apparently did not know who they were dealing with.]
We put the sink back in, attached the drain, and now have a functioning kitchen sink again! Good thing too. Remember that newly refurbished clawfoot tub? Well, it has been functioning more as a sink for the past week!
[Edit from Amy: Yes, we drink bathtub water with our dinner.]

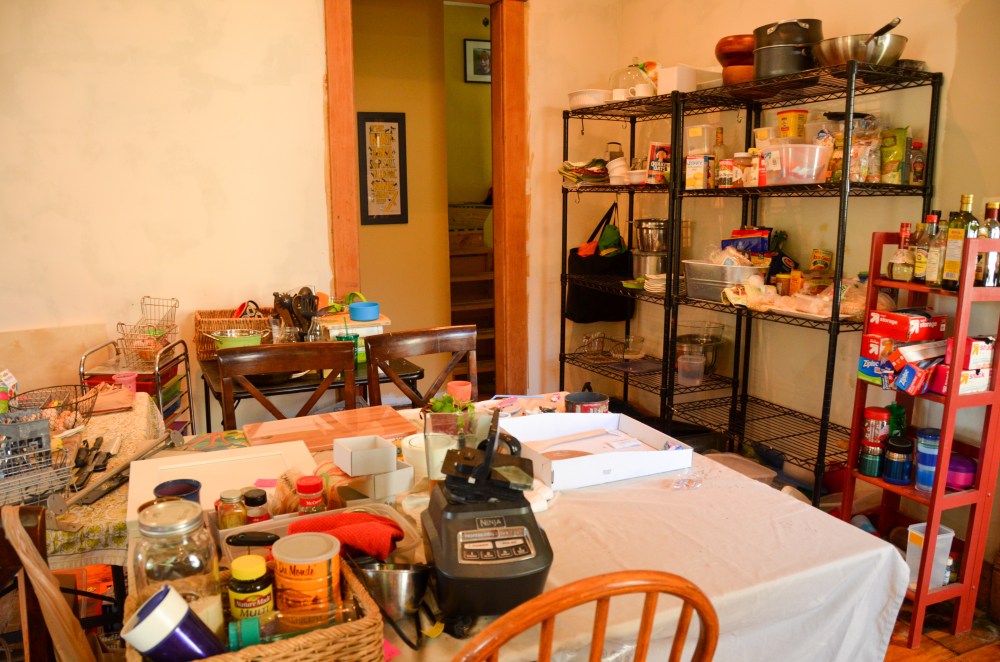
We haven’t had time to get everything organized in the kitchen, so this means our dining room still looks like this…
But we are one step closer. After getting the countertops sanded, sealed, and installed, we will start on the tile!
I am deliberately not posting any pictures of the kitchen with the countertops. I’ll post some final pictures of the countertop once it’s installed.

i went with soapstone, but I know originally there must have been wooden countertops in my home. I think the wooden countertops are lovely and make the kitchen so much warmer looking than soapstone. Don’t regret getting soapstone, the wooden countertops are period correct for your home. Beautiful job.
LikeLike
Thank you. If we hadn’t gone with butcher block we would have chosen soapstone. It has a more rustic feel for a stone.
LikeLike
Save some of your sawdust, mix it with wood glue, and create a perfect colour match wood filler!
LikeLike
That’s exactly what we ended up doing. It worked great.
LikeLike
Nice work! You clearly thought ahead by making templates and trial runs. Time-consuming, but as you learned, well worth it.
How did you join the sections at the corner miter cuts? Did you slot and bolt them, glue them, or otherwise? How did you decide them to the cabinets?
We were going to use soapstone in our last house, but ended up doing Corian in a similar color. The soapstone was going to be pricey to ship, and I found some slightly damaged Corian sheets for a great deal. It was easy enough to work with, but tedious (I glued up thicker edges, thickened it around the undermount sink, etc. We liked how it was to live with too, as it didn’t look as cold and out of place as polished granite. I sanded and polished it to a matte/semi-gloss sheen, so it hid scratches pretty well.
I’m looking forward to see your completed kitchen!
LikeLiked by 1 person
We were going to slot and bolt them, but we couldn’t get to the underside of one of the corners to tighten the bolts. I will show what we did in the next blog post, but basically we attached brackets to the cabinets underneath in strategic places and got them as close together as possible. Then we mixed wood glue with leftover sawdust and put that in the crack. After it was sanded down and then oiled it was pretty seamless. Turned out better than I thought it was going to.
LikeLike
Joe,
It appears that your early experience with G&W has served you well in this endeavor, but I am continually impressed with not only your workmanship, but You and Amy’s ability to undertake and accomplish such daunting tasks.
Obviously You and Amy make a great team. I am looking forward to seeing the finished product. Best Wishes
John G.
LikeLiked by 1 person
Thanks, John! I did learn so much at the shop. Some of it was about carpentry, but a lot of it was just about trying to do the job right and working hard. I wouldn’t have had the confidence to do this rehab without the experience you offered me. Thank you for that!
LikeLike
Your blog is so far best but it could be more better if you post some photos along with the description and still your work is praise worthy.
LikeLike