This view as we walked in the back door was our VERY first look inside the house.

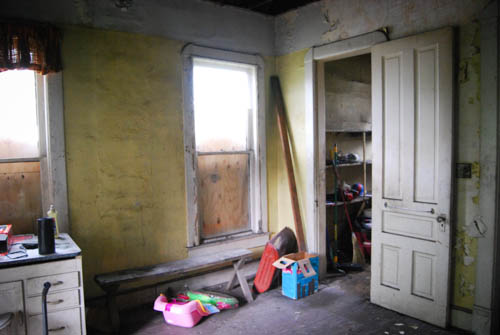
I’m not sure many people would recognize this as a kitchen. It had a sink. That was about the only clue. The kitchen is located at the back of the house with an entrance off the back porch. It was originally about 12’x13′ and included 2 windows and 5 doors, making it impossible to find enough wall space to function as a modern kitchen. The picture below shows the old sink, the door to the basement (on the left) and the doorway to the dining room and rest of the house.

We would have been okay with a small kitchen, but this one would have had no cabinets, no countertops, and just enough room for a freestanding oven and refrigerator.
There were two additional rooms inside what we now call the kitchen. One was a pantry…

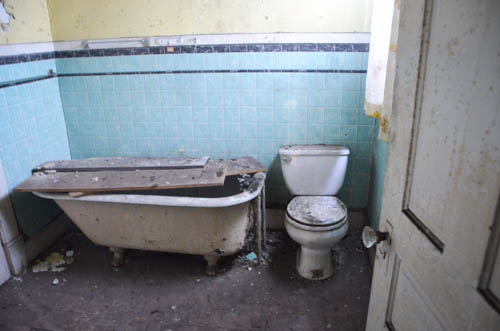
and one was a bathroom.
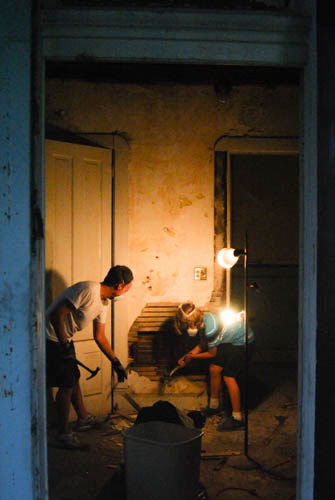
After pondering many possible layouts, we eventually decided we would need to get rid of the pantry and relocate the bathroom somewhere else so that we could have a reasonably-sized kitchen. The demo of these two small rooms was our very first project inside the house and we were excited to get going!
First we removed the trim, plaster, and lath on the two walls that were going to be removed.

Then we removed the remaining studs for those walls. This gave us a good feel for the size of the new kitchen space.

The plaster in the bathroom and pantry were in rough shape, so we removed it before it came crumbing down.

Then, after more thought, we just went ahead and removed ALL the kitchen plaster and lath. All the future electrical work, cabinets, and shelving that would have been very difficult to install if we had to work with the existing condition of the walls.
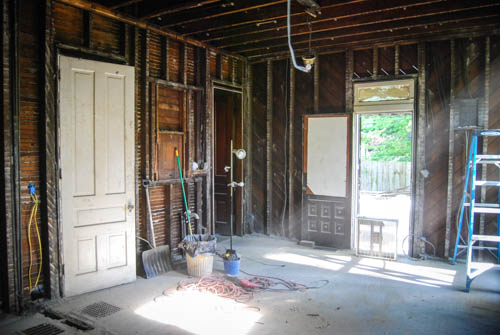

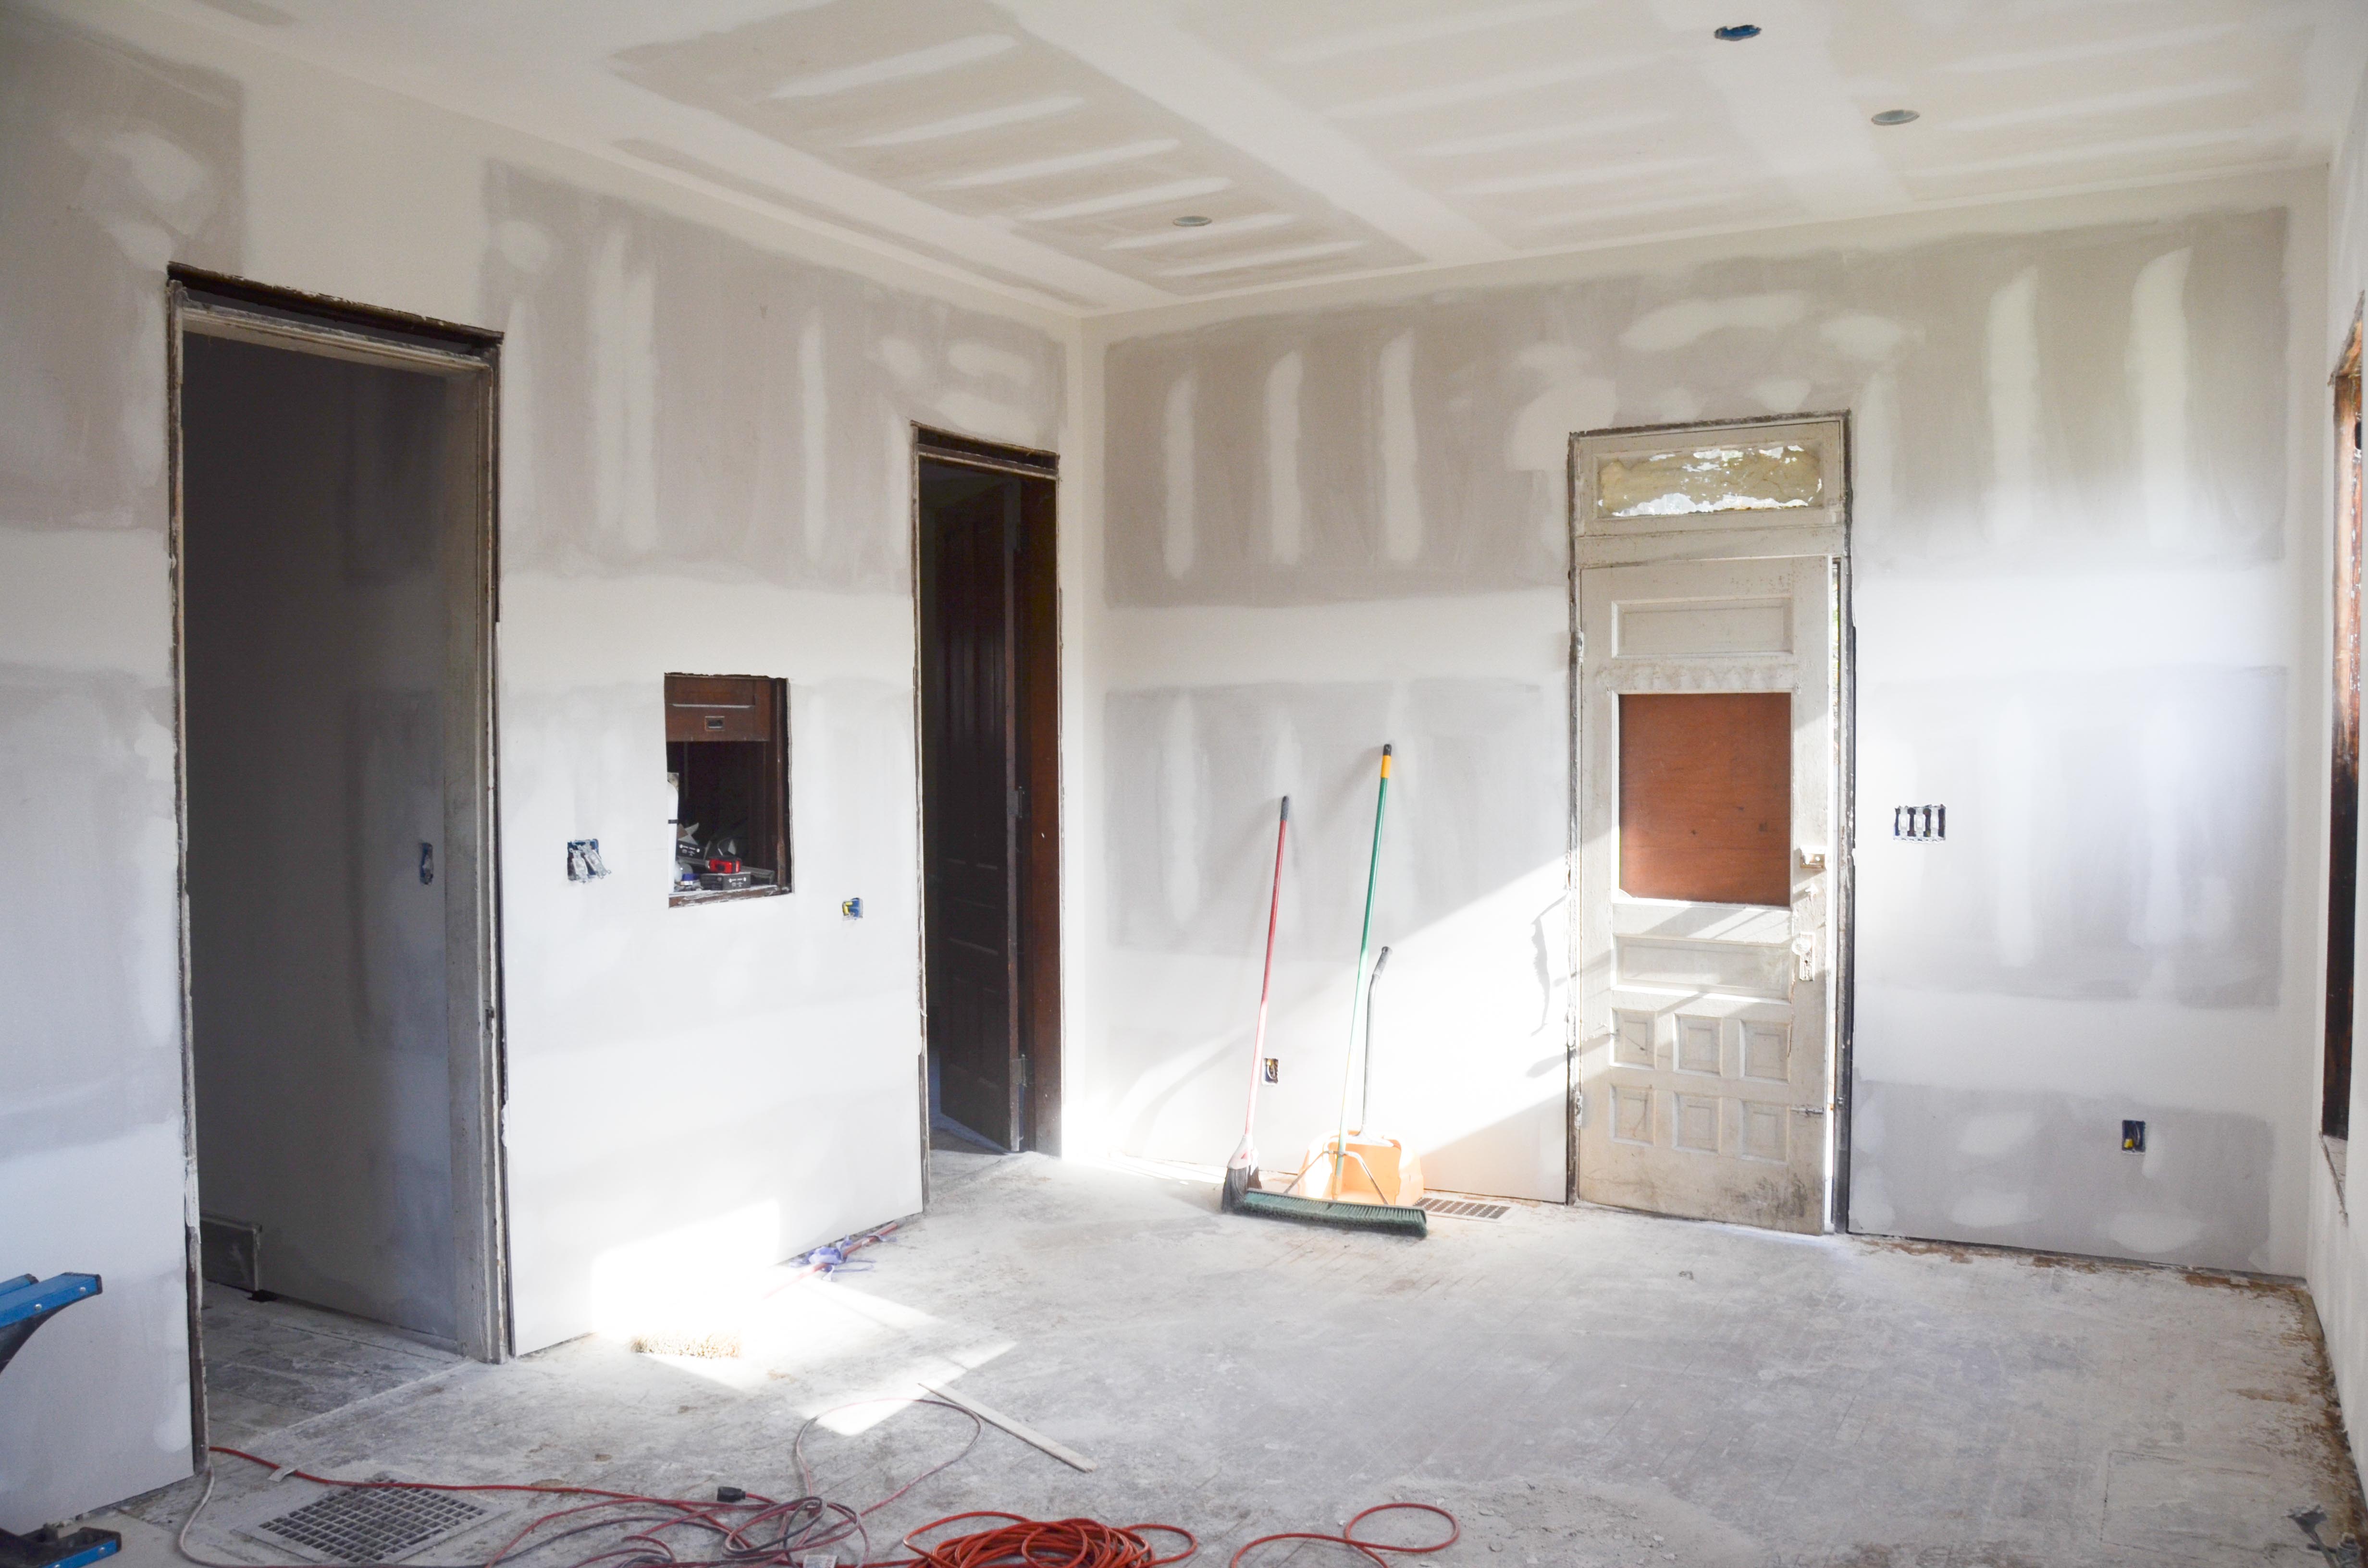
We did have to make a couple additional changes. The small door (in the picture below) led to the old stair case that we eventually removed. This meant that we could remove the door frame and fill in that portion of the wall, allowing us to use that corner space in our cabinet layout.

We cut a hole in the wall opposite of that big door (in the picture above) to create a space for a new door to the basement (that staircase would later be removed).

BUT, once we saw what it looked and felt like with a new hallway directly into the kitchen we decided we wanted to keep this area open. Of course this one decision also meant raising that floor (notice it is a step down) to the same level as the kitchen, building new stairs to the basement, removing the portion of the old staircase to the 2nd floor (which would have been exposed instead of hidden behind a wall) and a whole bunch of other jobs. BUT, it was one of the best changes we made to our original design… and it happened completely by accident.
The walls from the original footprint of the old pantry and bathroom left us with some holes in the floor.
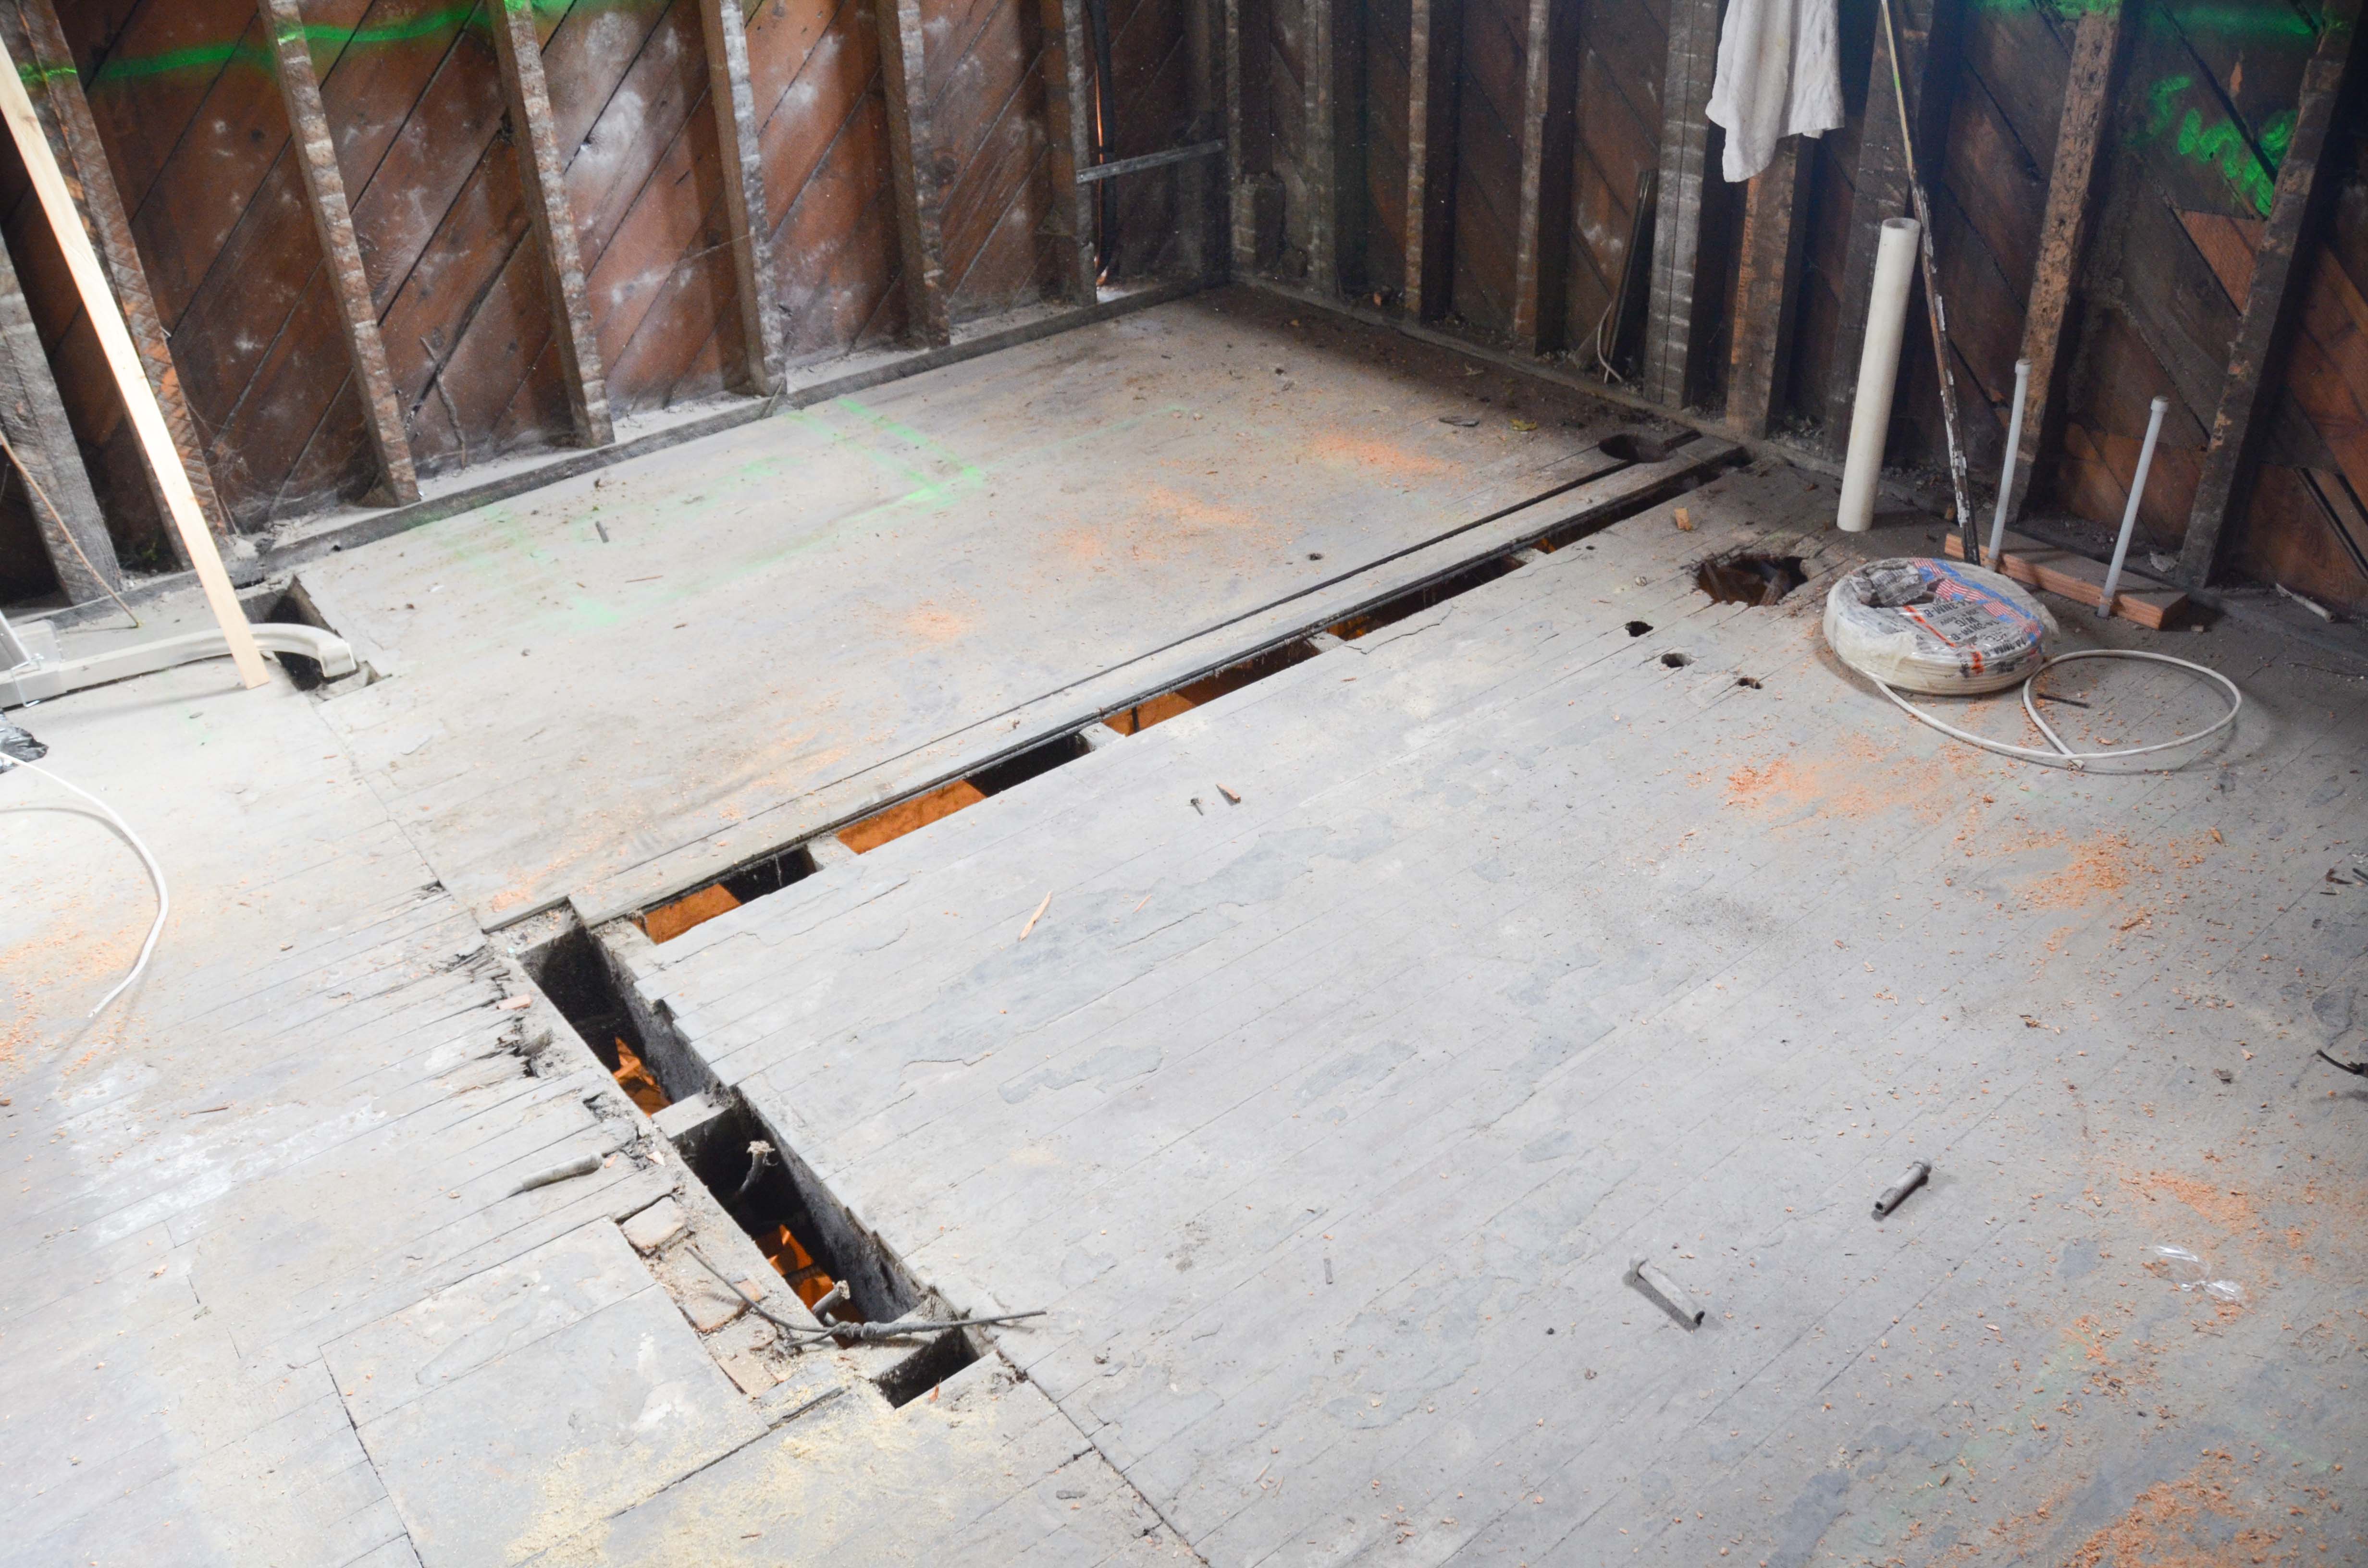 Our solution was to pull up flooring from other areas of the kitchen that we knew would eventually be covered by lower cabinets and use that flooring to fill in the holes.

It’s not perfect. It is still obvious that there used to be a different floor plan, but we like that the floor retains clues to the history of the house.

Another big part of the kitchen renovation (actually, EVERY room of the house) was the removal and complete renovation of all the original windows – including removing every sash, removing the old glazing, scraping paint, sanding, re-glazing, priming, and then repainting. The kitchen involved 8 window sashes, 4 additional large storm windows, and 16 panes of glass.


We also refurbished the back door, which is located in the kitchen.


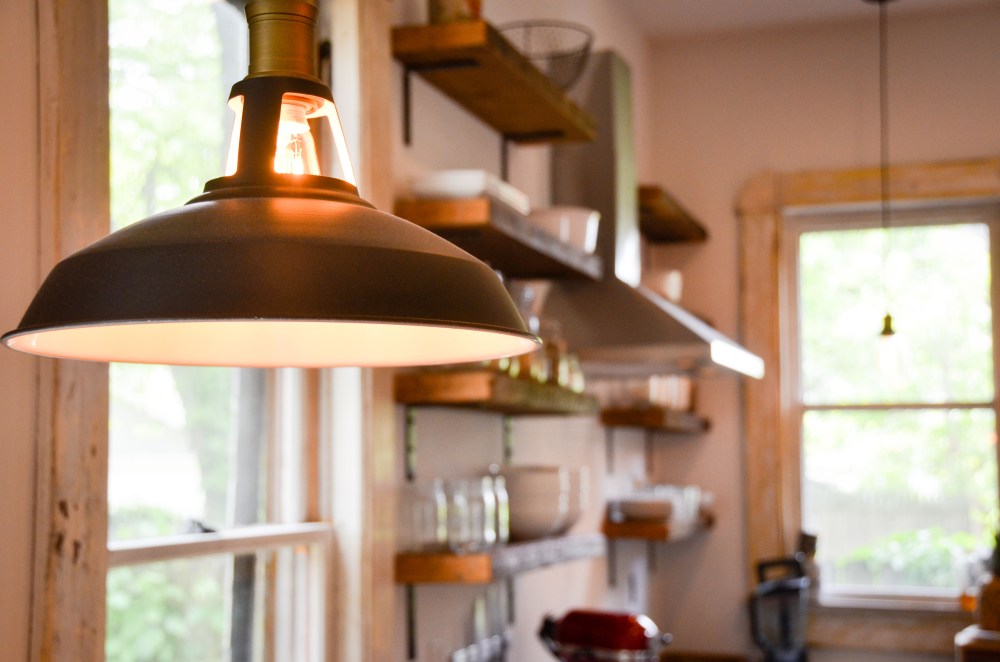
The electrical work for the kitchen took Amy a long time to complete. Besides the numerous outlets and power for appliances, we also included 6 recessed lights, 4 pendant lights, and under-cabinet lighting (which we eventually removed because we didn’t need it).


Before drywall could be installed, we needed to cut and install furring strips that would bring the wall depth back to where it was with the original lath. If we didn’t do this there would have been a substantial gap between the original window/door trim and the new drywall.

The previously uninsulated walls were now insulated with a skim coat of closed-cell spray foam. Fiberglass insulation was then added on top of that. The roof deck was sprayed with open-cell foam.


Finally, the big event we had been waiting for… drywall!
Once the drywall was complete we could finally re-install the kitchen windows. These were the very first windows to be re-installed and the only windows that had the original casing removed. Before re-installing the newly refurbished window I also installed new spring bronze weather stripping…

and new sash cord for the weights.

With the windows and trim re-installed the kitchen was finally beginning to feel…. real!


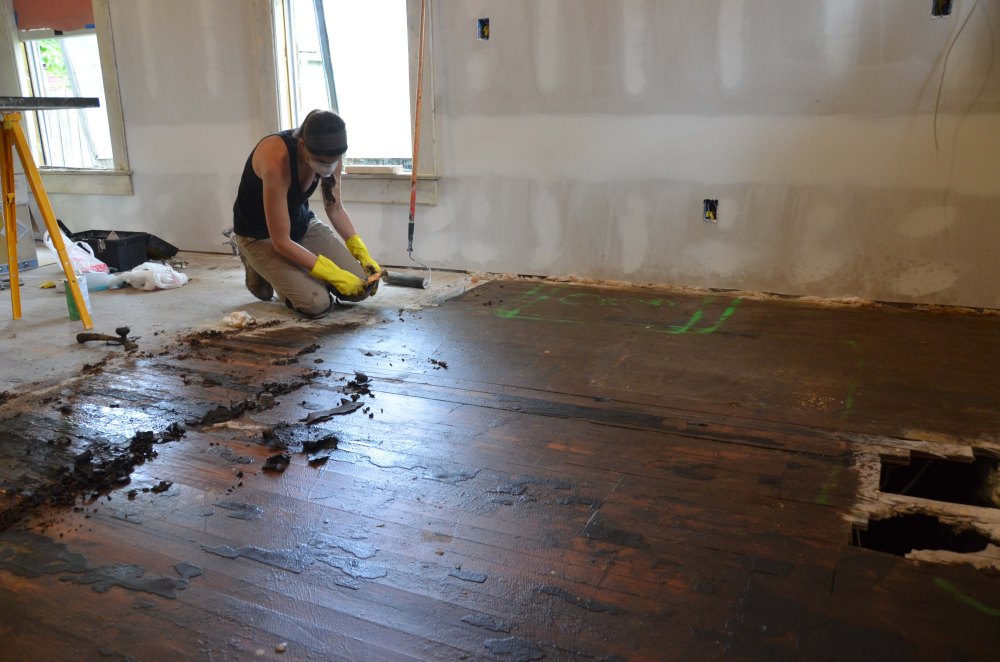
We had to remove linoleum flooring in the old bathroom and pantry as well as around the entire perimeter of the room. In the 20’s and 30’s people installed these kinds of floor treatments with mastic tar, which requires a lot of work to remove without damaging the floor itself. This needed to be done before any work to restore the original floors could begin. It was a painstakingly slow process that involved working inch by inch.
The walls were then primed and the floors were sanded.

and refinished…

The kitchen floor is definitely still a little rough. It contains a hodge-podge of wood, patches, and markings from the old oven, linoleum staples, and a century worth of abuse, but you can’t say it lacks character!
We moved in shortly after finishing the floors (a little less than three years ago) and tolerated a kitchen without countertops and cabinets for nearly two of years. It really wasn’t that bad. The open shelving had it’s perks and we used a small card table as an island to help with the lack of surface area.


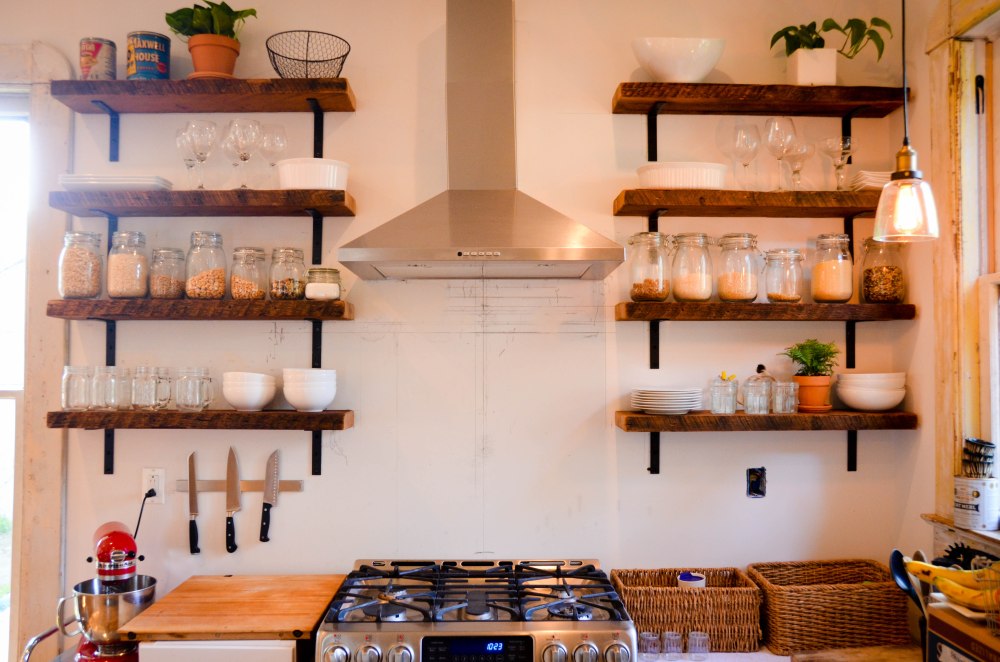
 Eight months later, as we prepared to have our house included on the neighborhood home tour, we added a vent hood, pendant lighting, and shelving that we constructed from our own floor joists that we removed when locating the new staircase.
A little more than one year later, we were finally ready to do the FUN stuff, beginning with installing our cabinets!


As you can see, it was a HUGE step forward.

The next big item was the cutting and installation of the butcher block countertops.

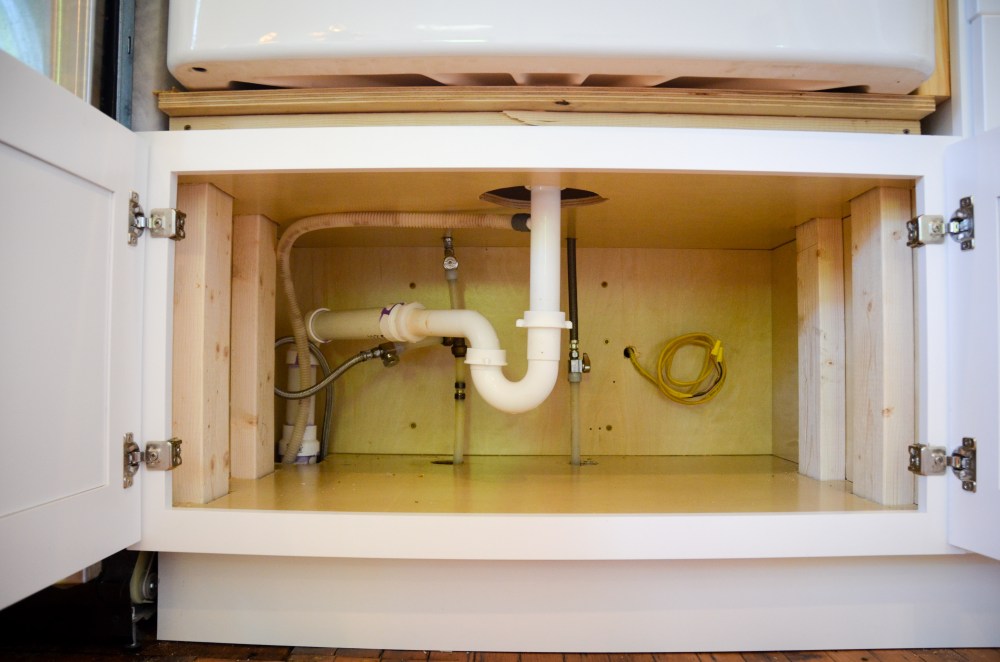
This also involved new plumbing and building a frame to support the weight of our new farmhouse sink.

Last on the “big item” list was the tile. We decided to do subway tile up to the ceiling!


The kitchen is an important room in any house. It is the nerve center, the gathering place, and where we spend most of our time. Because of this, we spent a crazy amount of time and energy planning the layout for this room. It was like a giant puzzle – trying to marry an efficient and logical workflow with our aesthetic preferences. It’s easy to walk into a space when it is complete and notice that something isn’t right. Maybe the sink is too far away from the oven or maybe the trash can, sink, and dishwasher are arranged in a way that makes washing dishes a real pain. What is much more difficult is to anticipate ALL of these things when the kitchen is just a sketch on paper. We did a LOT of standing and imagining… and even after all that time, I still wasn’t 100% positive we had it right before the time had come to finalize everything for the electrical work. But, after living with this kitchen for a while, I actually feel pretty good about the final result. That’s saying a lot coming from me, Mr. Overly Critical.
What most people notice right away when they walk in is that it’s a BIG kitchen with lots of open space – especially for an old house. Despite the available square footage, we eventually decided against adding a kitchen island. We already have plenty of counter top surface and it is nice having the middle of the floor open.
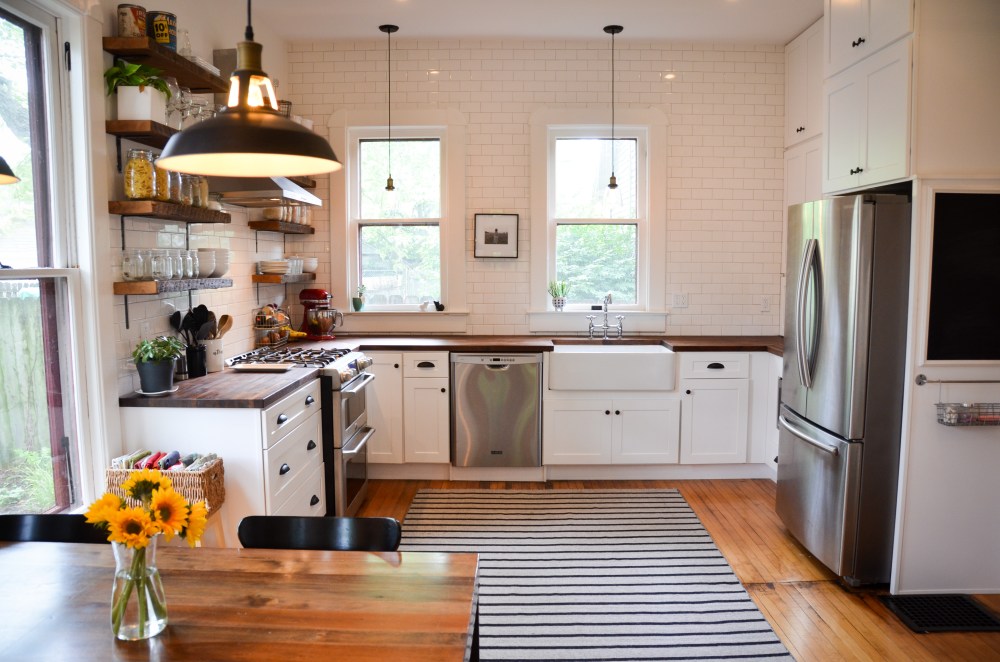
When we were designing the space we wanted to find a way to incorporat hints of the original historic aesthetic and age of the house while also keeping it new and fresh. We didn’t want a kitchen that stuck out as a modern space in an old house, but we also didn’t want to try to make it look old.


We tried not to choose finishes that were too trendy or would look dated in ten years. Of course we realize that farmhouse sinks, subway tile, and white cabinets are “in” right now, but we hope that these choices come across as logical for the vibe of our house. Actually, when our house was built, Victorian kitchens were often all white and subway tile was popular in kitchens and baths.

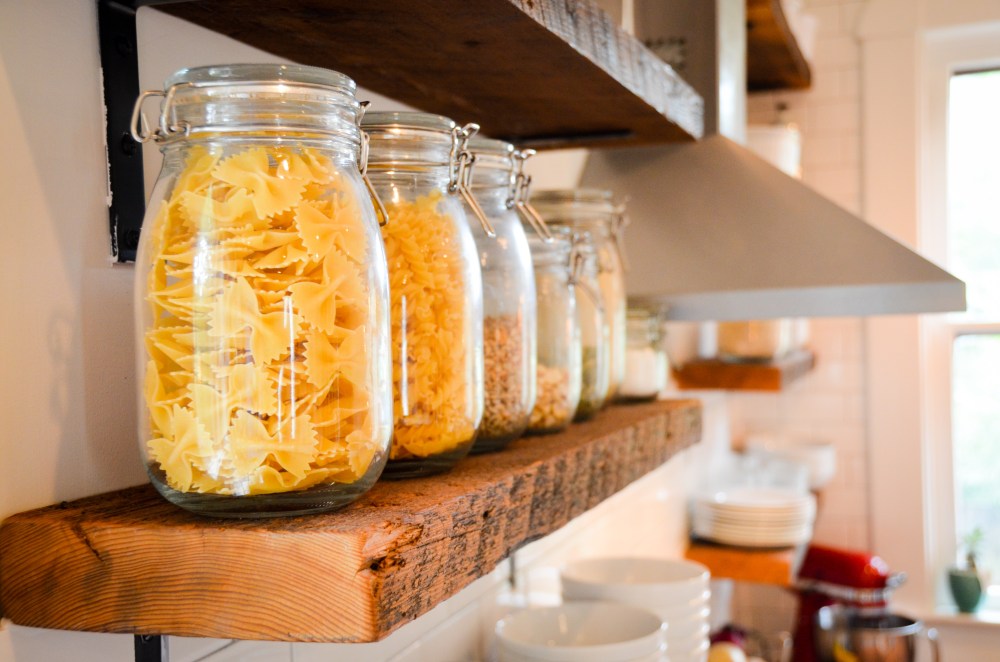
We kept some historical elements, such as the white cabinet on casters, the wooden pass through door, original flooring, original doors, windows, trim, and created open shelving made from our own floor joists.


I’m pretty sure Amy would agree with me when I say that, out of the whole house, the kitchen was the most consistent source of marital stress. Sooooo many decisions packed into one little space… lighting, plumbing, outlets, appliances, cabinets, counter tops, faucets, knobs, fixtures, and on and on and on. That is exactly why professionals get paid a lot of money to design kitchens and also why kitchens are so expensive. I don’t know exactly how much money we spent on the kitchen, but I know it is a lot less than the average. Of course most of that is because we did all the work ourselves, but also because we didn’t get carried away with the latest and greatest kitchen upgrades. We were able to keep costs low in most areas, which meant we could splurge in a few other areas – like the faucet and sink.


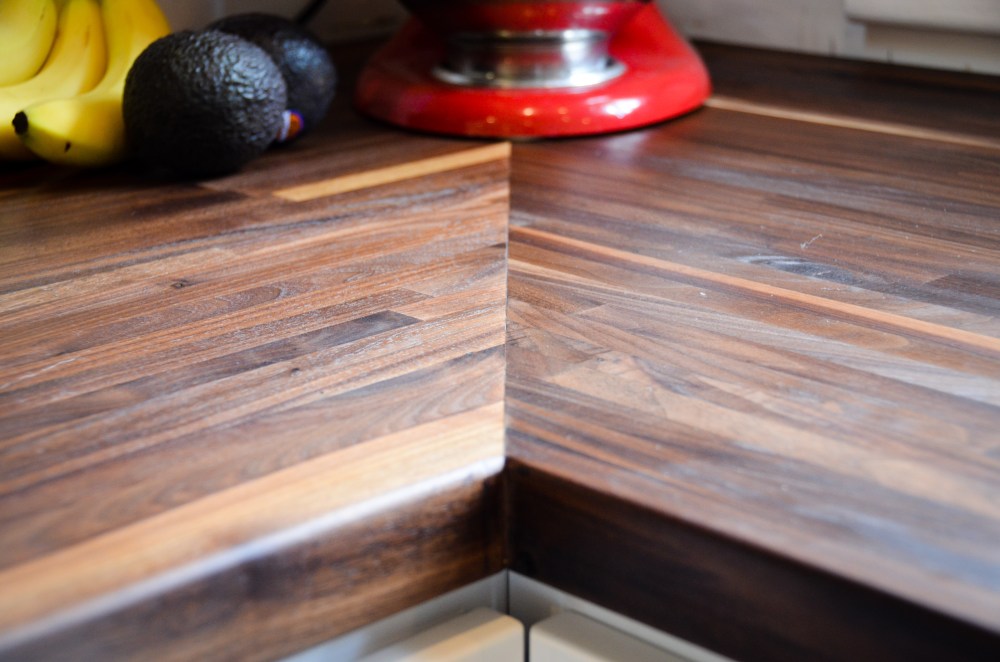
We only spent $800 on the countertops, including our own labor on fitting, installing, and finishing. Now that we have it, I can’t imagine any other type of counter top in this kitchen. We did briefly look into other surfaces, but they were so expensive and just didn’t seem to make sense with the more rustic nature of the space. The butcher block counter top is easily my favorite part of the whole kitchen. Speaking of countertops…
Last year, when we blogged about the counter tops, we mentioned that butcher block isn’t for you if you want perfection. I think we need to go back and clarify that statement. In reality, if you are willing to occasionally invest just a tiny amount of work (I really do mean tiny), you can keep your butcher block looking like NEW! We use a natural oil to treat the counter top (as opposed to sealing it with something) so it is easy to sand out any small imperfections and then re-treat it. For instance, these black circle marks were left by a wet cast-iron skillet that we must have forgotten about for too long. Now you would never know anything had happened. But really, besides this huge mark, which was easily removed, we have had little or no issues with water marks, stains, or scratches. It looks the same as it did a year ago.


The one original historic element of the room that we just could not figure out how to work into the new kitchen was the old sink. The high back made it impossible to fit under a window. Using any of the other wall space for the sink made the whole flow of the kitchen awkward…. trust me, we tried every possible scenario.

It still makes us sad that this sink is sitting in our garage right now instead of in our kitchen, but I think deep down inside we hold out hope that we will find a way to put it to good use someday.
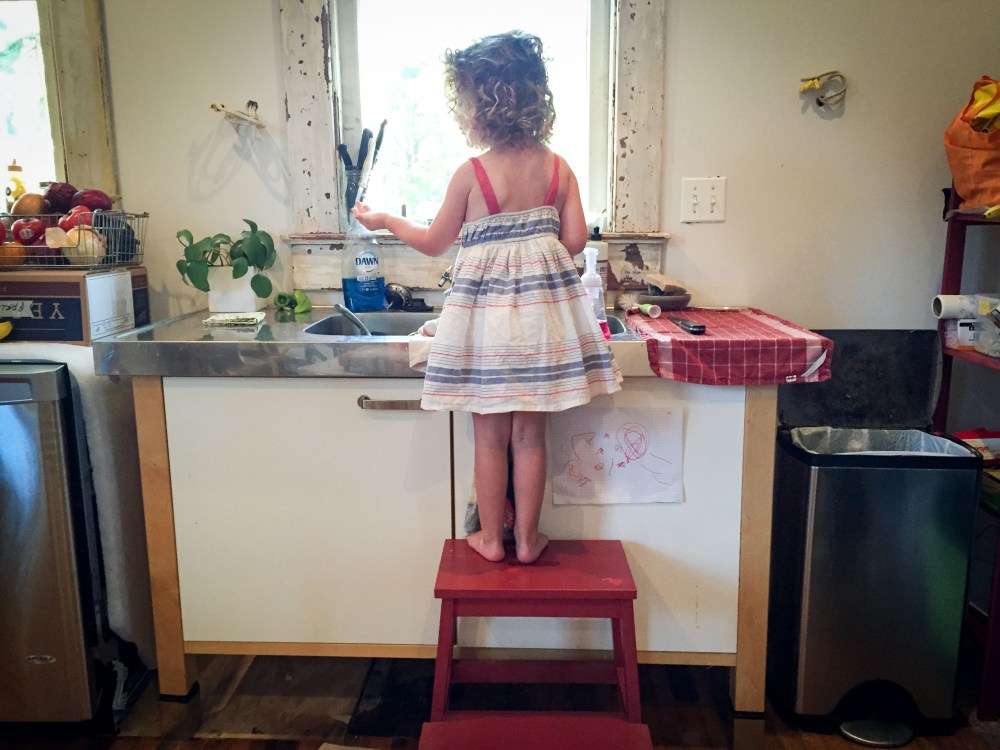
As we mentioned, we splurged on a large farmhouse sink. We weren’t sure that we would like having just one single large basin, but it does make it easier to clean large pots and pans. Plus, we just think it looks cool!

We drug our feet forever on buying cabinets until we got a recommendation for a cabinet company from a neighbor and then an extra nudge by a SALE. Prior to that we had looked into IKEA cabinets because they seemed good for the DIYer, but none of the cabinet styles or finishes seemed to work for us. We also considered trying to salvage old cabinets and repaint them, but we had a pretty specific cabinet layout in mind and we weren’t going to be able to recreate that with old cabinets.
Here is the drawing that we brought into the cabinet store.


Since we did the cabinet installation ourselves, we were able to customize a lot of detail elements, like the wall around the refrigerator, the toe kick in front of the dishwasher, several added trim pieces, and this modification for an under-counter microwave.

One silly reason it took us a long time to call the kitchen “done” is because we couldn’t decide what type of chairs we wanted. A couple weeks ago we saw these chairs in a store and knew they were IT!

Another thing that held up the kitchen renovation was the rehab work on this beauty.
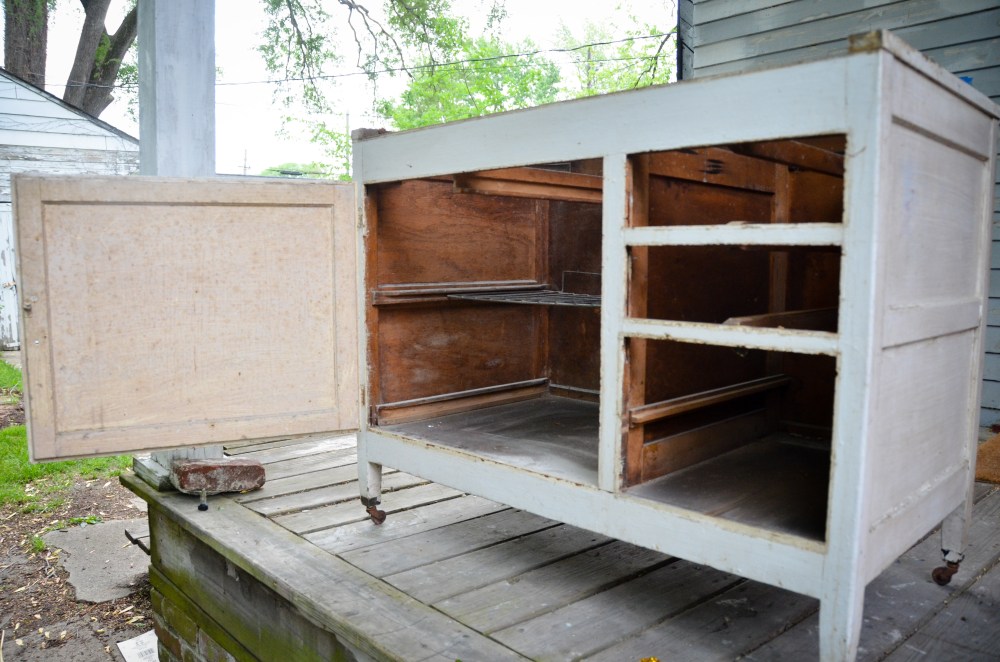 We haven’t previously blogged about it, but it was in the kitchen when we bought the house and has thus been a fixture in our house since day one. It wasn’t hard to clean up the hardware and repaint, but it just took us a ridiculously long time to get around to doing it. We don’t know what this furniture piece is officially called, so in our house it has always been called “the white kitchen thing.”
In the beginning it was a valuable storage place for tools and a rare table top surface for a wide variety of projects. Now it is the perfect place for lunch boxes, Lucy’s silverware, and other lunch packing supplies.


Every kitchen needs a place to put mail, keys, phones, and miscellaneous items you don’t want on the kitchen table. Well, this is our place for that stuff. As well as being convenient, it is the perfect furniture piece for that space! Another antique item that we discovered in the house was this milk crate.

It was found in the crawl space and now serves as a convenient storage spot for water bottles.
One of the great features of the kitchen is the light! Two giant east-facing windows bring in wonderful morning light while the two south facing windows keep it bright all afternoon.

I was initially concerned that the floor would not look good because of all the old staple holes, salvaged and mismatched wood, and other imperfections. But the worst of it is covered by the rug and the rest of it just helps to give the room an authentically old, warm and casual feel.

Remember that Joe and I are teachers and one goal with the entire house project was to stay within a budget that would allow us to have an extremely low house payment. We have stuck to that financial plan every step of the way, despite some laughter from sub-contractors way back when (whose laughing now?). Here are some things that we did during the kitchen renovation that kept our kitchen budget low.
- We installed the cabinets ourselves which saved a lot of money on labor. We also ordered basic cabinets and didn’t add any of the upgrades and frills like organizational systems or added trims. We also purchased the cabinets during a sale.
- We chose butcher block countertops instead of quartz or granite, which literally saved us thousands of $$$. We ordered 8′ untreated slabs of butcher block from Lumber Liquidators and then designed, cut, and installed the counter tops ourselves.
- We used basic hardware store subway tile and installed it ourselves.
- We restored and maintained many of the original elements such as the flooring, windows, trim, doors, shelves, and furniture, rather than replacing.
- We purchased some appliances from the “scratch and dent” section and waited for sales on others.
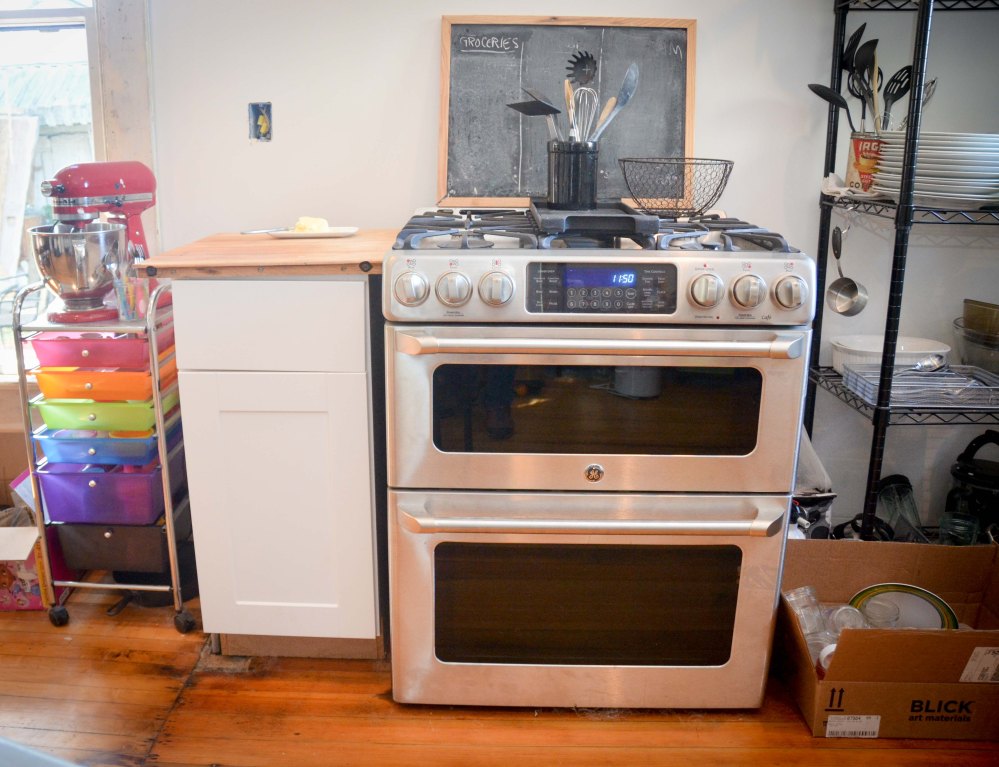
There are still a couple little things left to do… for instance, our oven doesn’t sit flat against the wall due to the location of the gas line coming through the floor. We also still don’t have our vent hood quite right. In addition, I’m sure we will also continue to tweak other aesthetics choices as we go.
When we bought the house, just living in it seemed like a distant and abstract idea. It wasn’t until we sanded the floors and we could sit down or walk around without our shoes on that it started to feel like a place where anyone might want to live. It was the first time it felt like this house was actually going to be our home.

The picture below was taken at our first official family dinner in the kitchen on the day we moved in. It was an amazing feeling just knowing we’d made it that far and for a long time we were content with a pieced together kitchen of free-standing appliances and garage storage shelves.

Three years later we finally have a finished kitchen. Doing all the planning, restoration and labor ourselves, combined with learning how to live without a fully functioning kitchen, makes us feel so extra grateful for the journey and also the modern luxuries we now have. You know – like running water, light, and a sturdy table!


Your kitchen is beautiful. Love the floors & all the light. FYI…the white kitchen thing is the bottom of a Hoosier-type cabinet. Almost identical to one my gram had years ago. I’ve been hunting for one like it for ages…at the price I’m willing to pay. (You know how that is!) I just found your blog & am excited to see all you’ve done to this sweet house.
LikeLike