Step 4 – Reglazing the window
I found it very beneficial to watch a lot of video tutorials on how to do this. It does take a little practice, but one big factor is probably in your selection of glazing putty. My research indicated that I should NOT use the DAP compound sold in most hardware stores. It is difficult to manipulate and will not last as long as the professional stuff. I used Sarco Dual Glaze Elastic Glazing Compound that I found online at Abatron. It seems to be well worth the extra expense because it handled very easily and made the process pretty simple.
The first step is to grab a fistful of the putty and squeeze it until it is warmed up and more flexible.
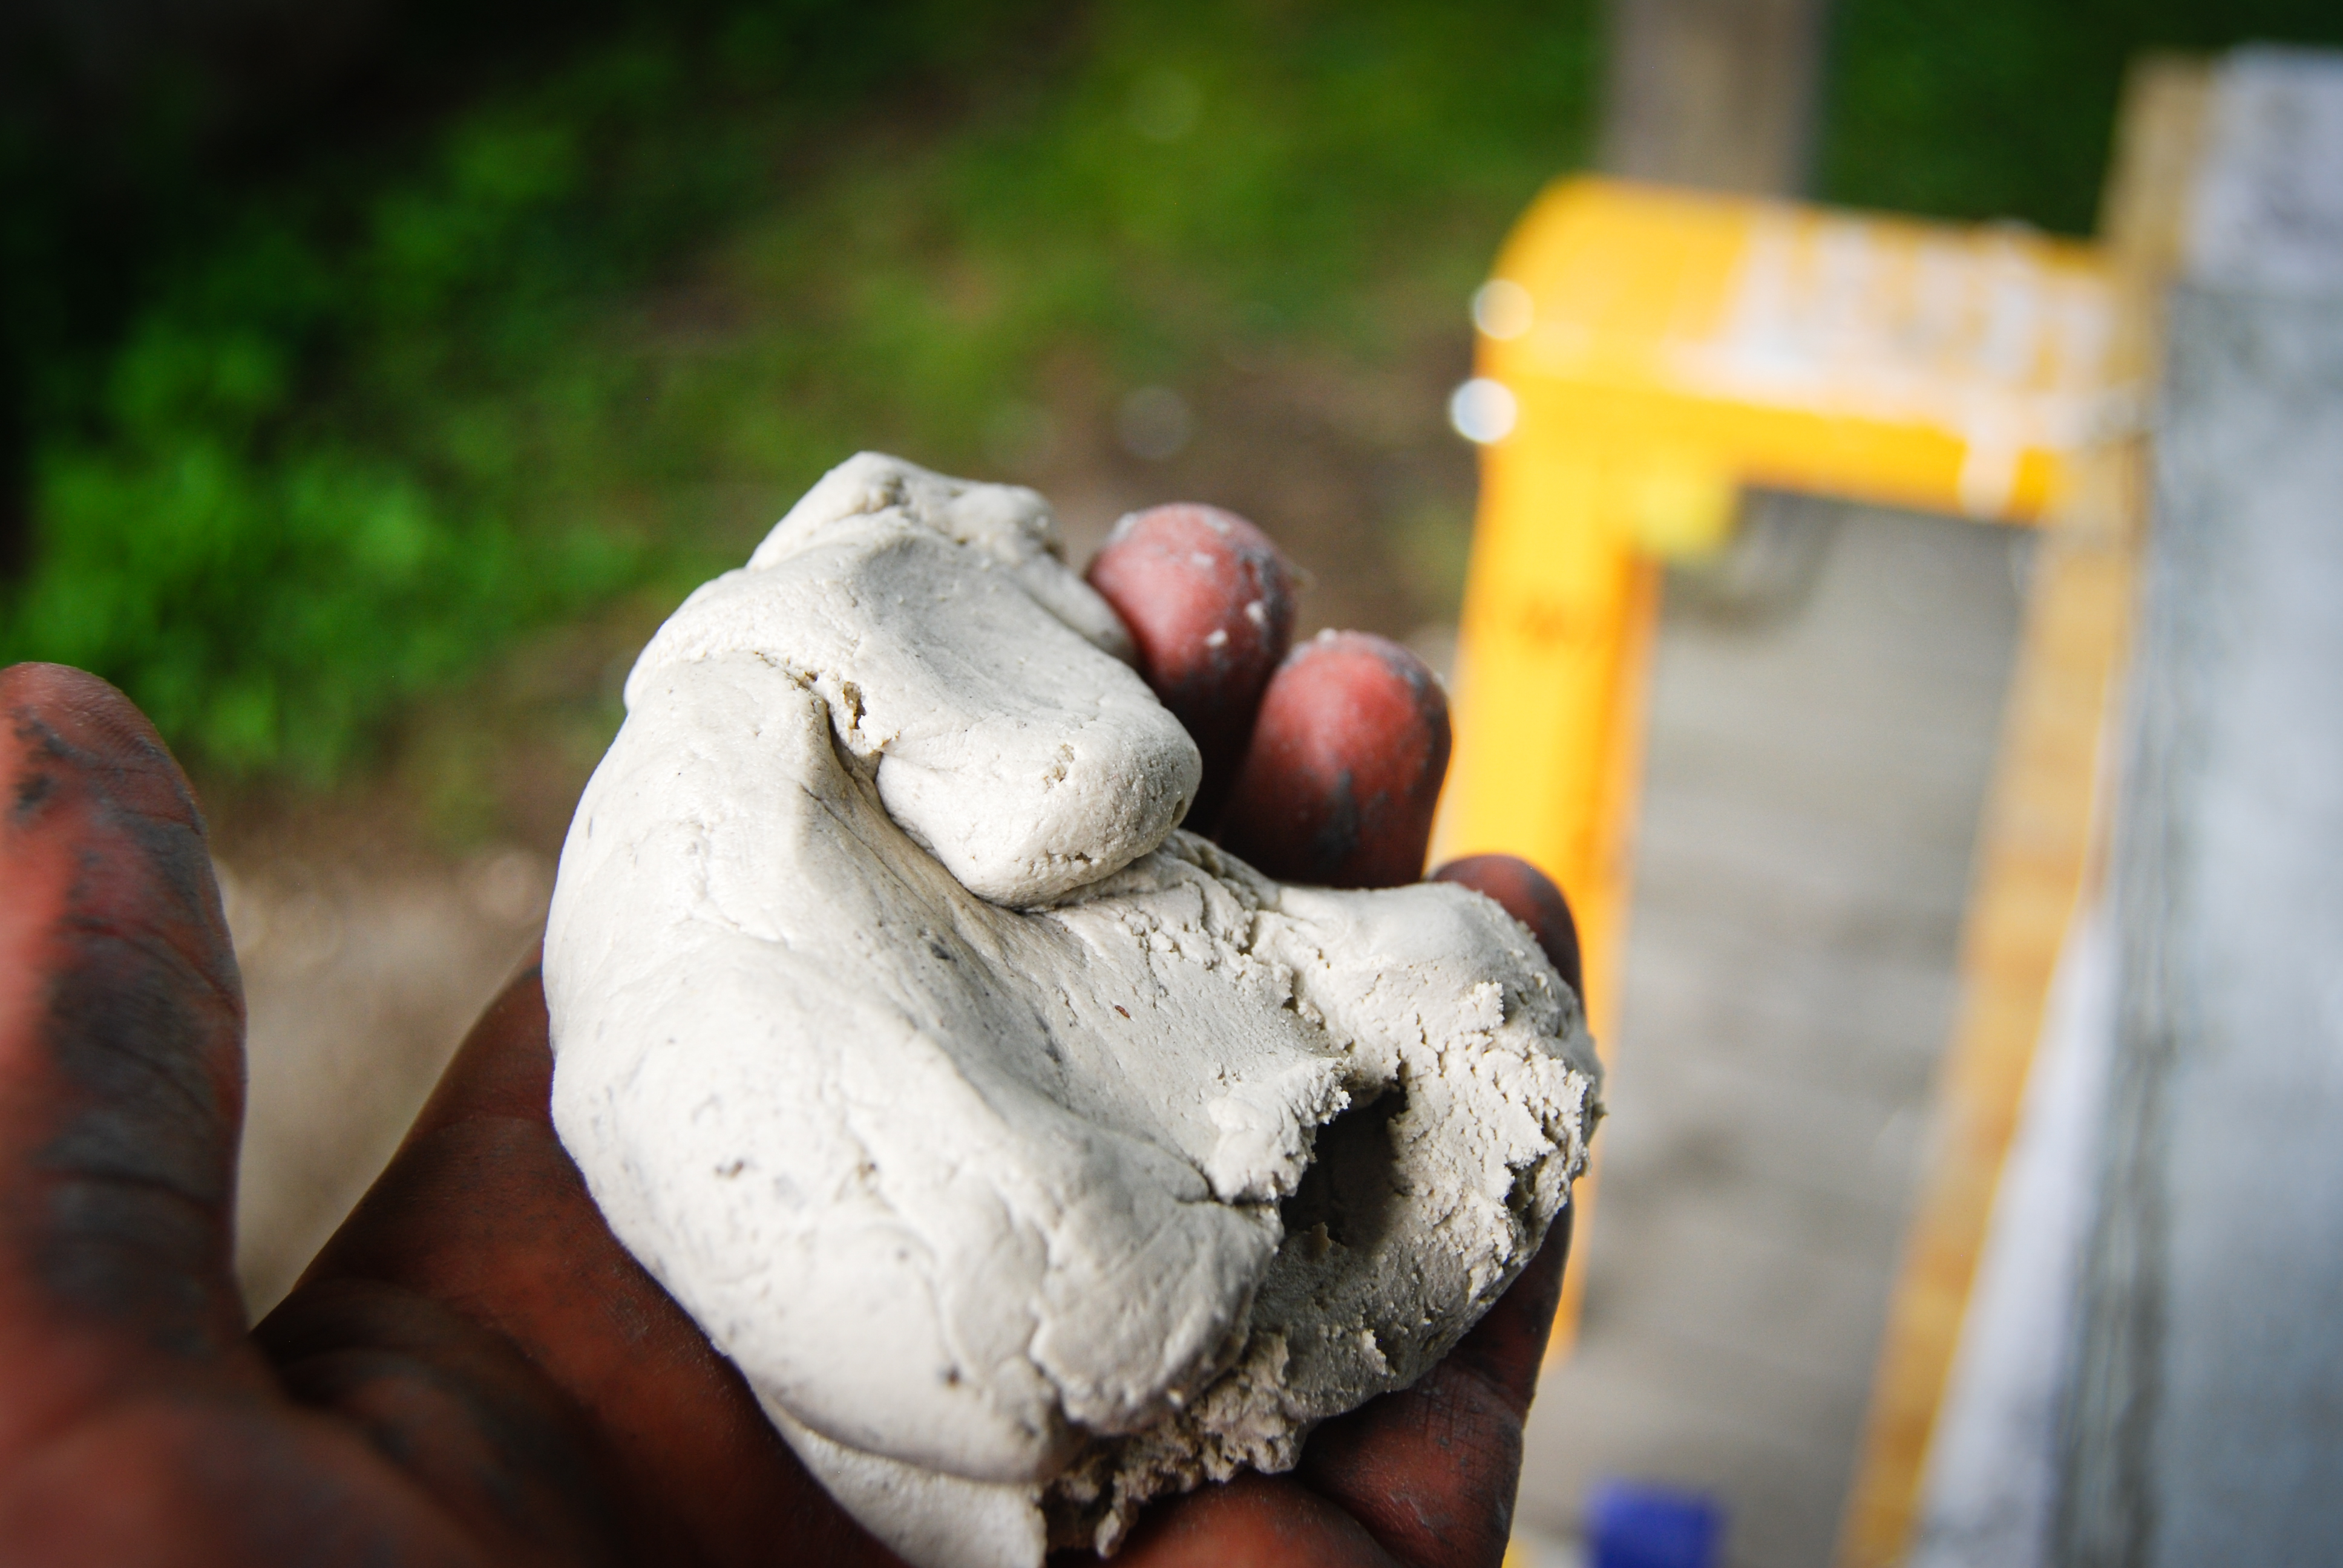
Next, apply putty to ledge on the interior of the sash. This doesn’t need to be pretty, but I make sure to not leave any gaps and make sure the putty is wedged down into the corner.

Carefully put the glass on top of the putty. Then gently push down on the edge and work your away around the entire window several times.
 Don’t try to do it all at once or the window will crack. Be especially careful of any obstructions that might catch on the edge of glass…

(If you are installing new glass, make sure to dry fit the glass first. You don’t want to wait until there’s glazing putty everywhere to find out it isn’t the right size)
Once you feel that the window is seated completely, push the glazing points into the wood. Make sure you are not pushing down on the glass. It helps to rock the glazing point back and forth as you push. You will need a glazing point about every 12 inches, that usually means 2 on the narrow side and 3 on the vertical side.
After the glazing points are secure, flip the sash over and scrape away the excess putty. Do this slowly and methodically so that the putty doesn’t pull up.

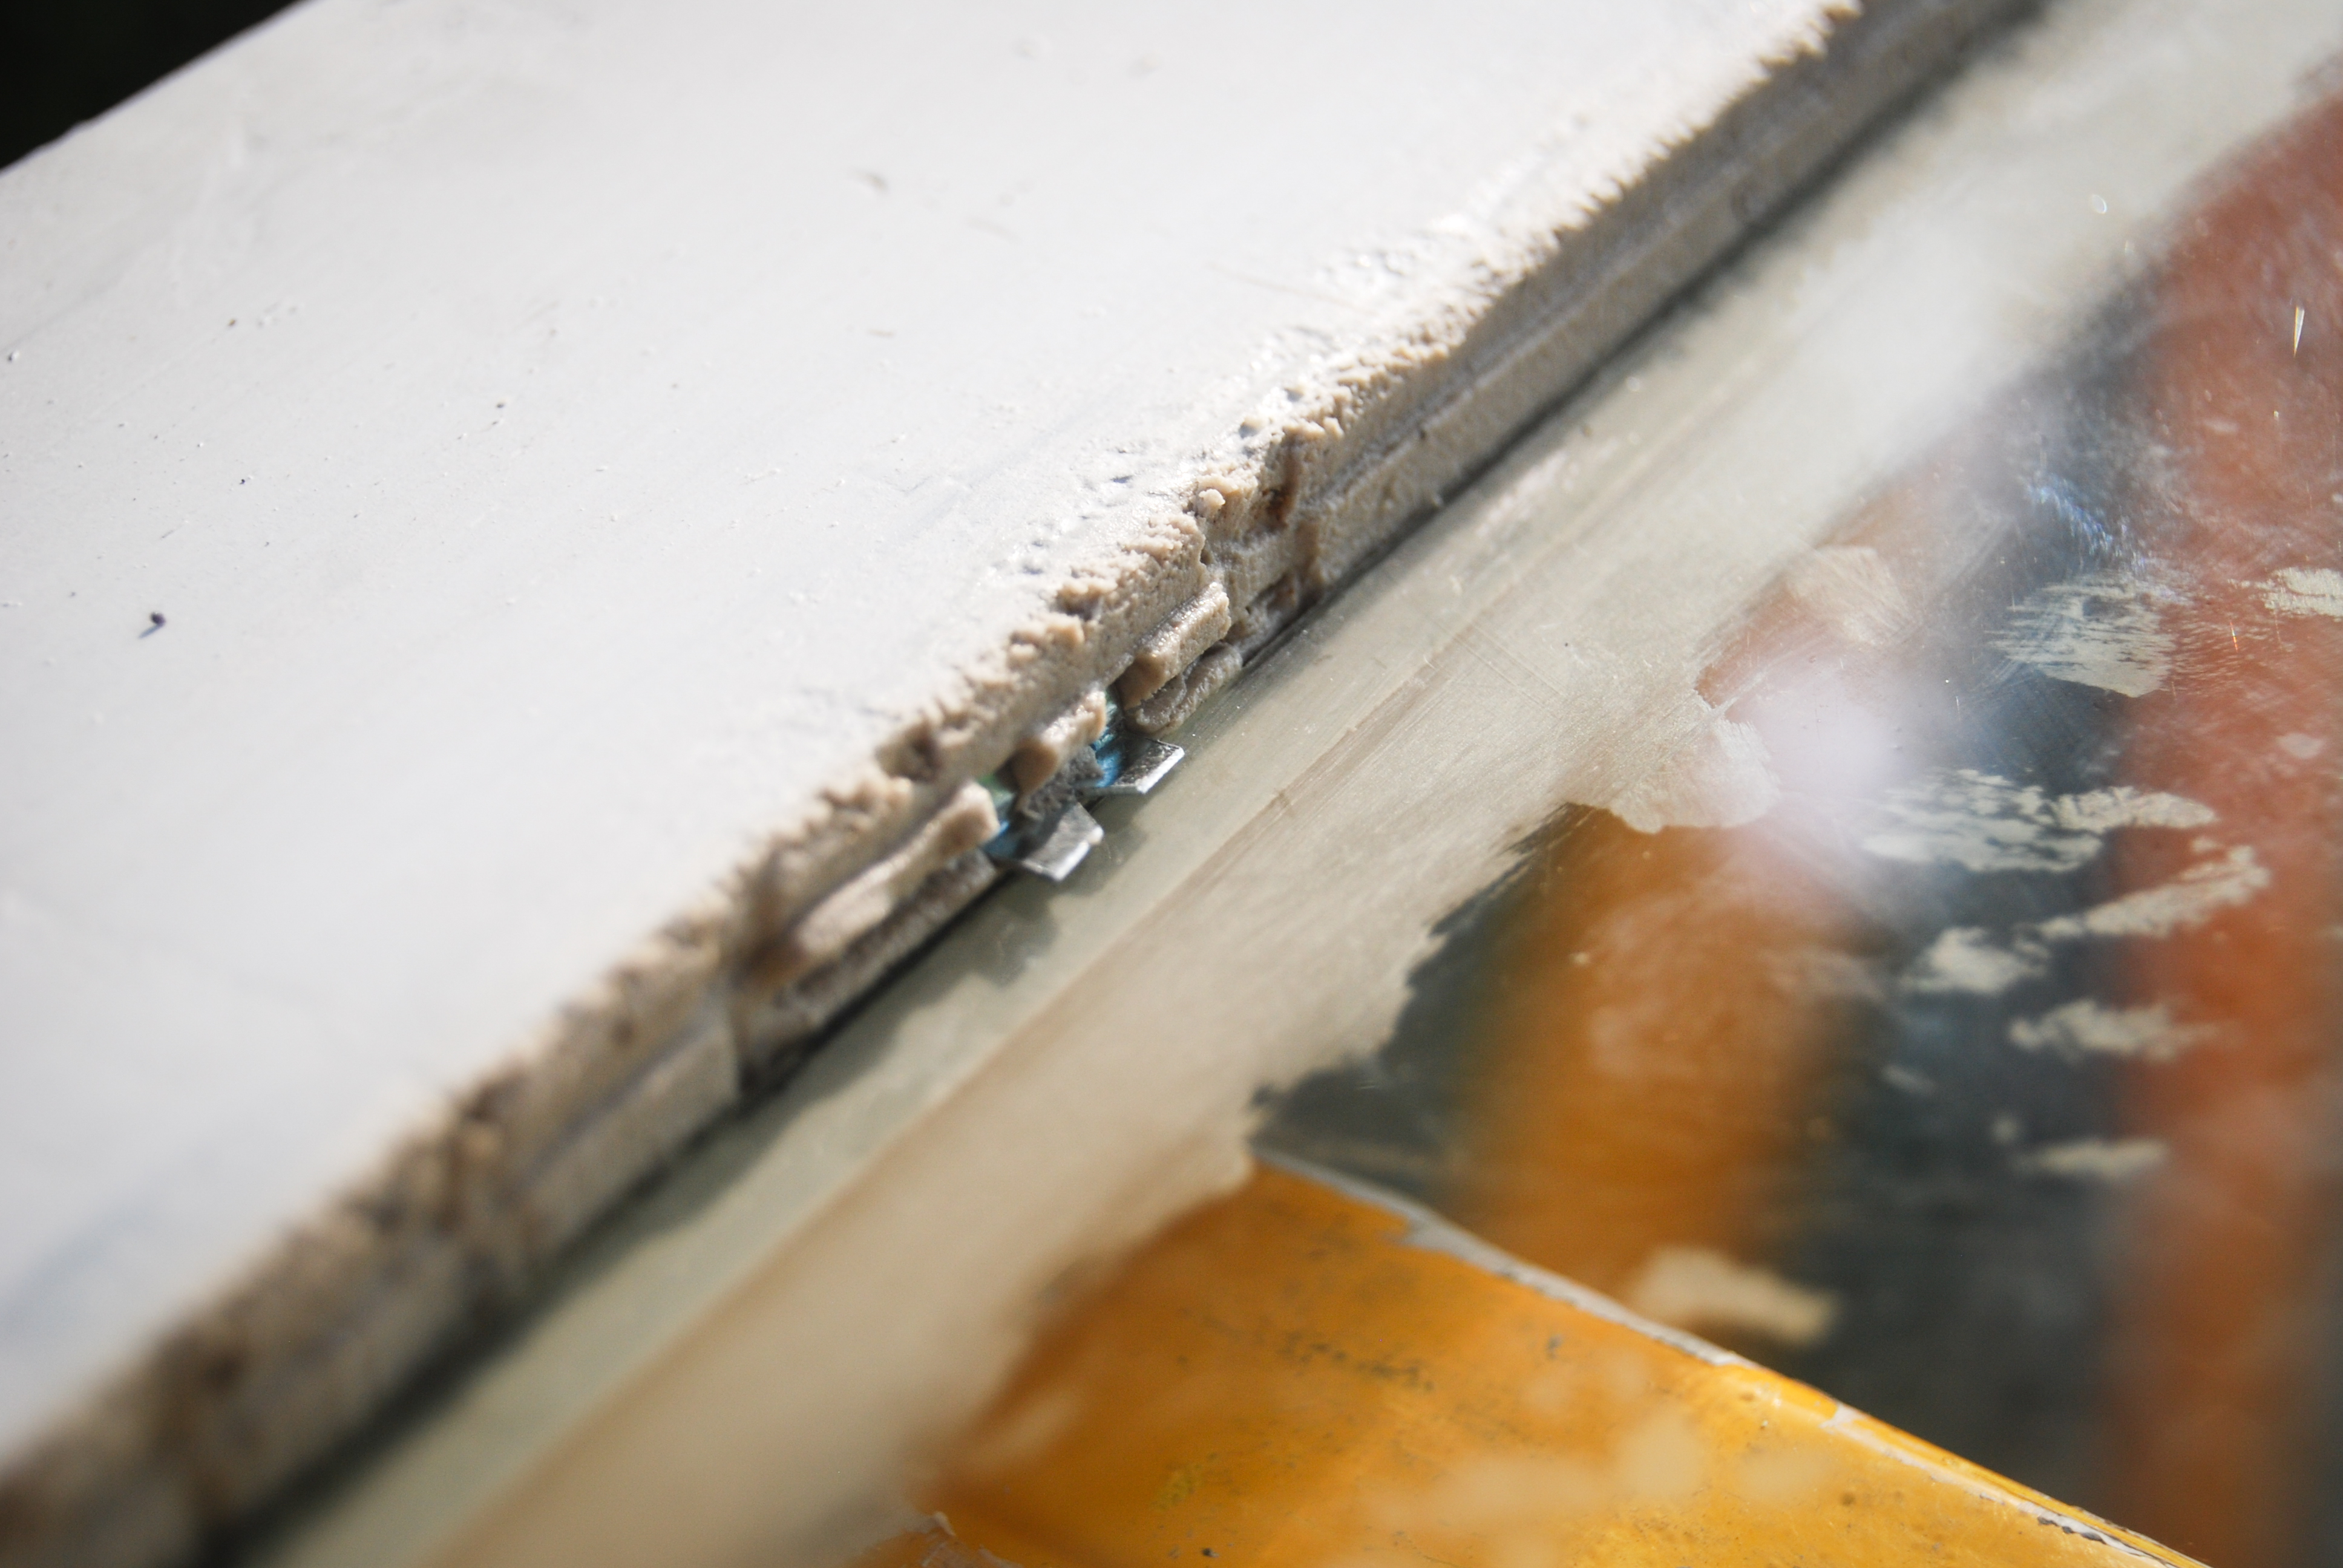
Then flip the sash back over and apply more putty to the exterior side of the sash. Once again, take your time and make sure there are no gaps.
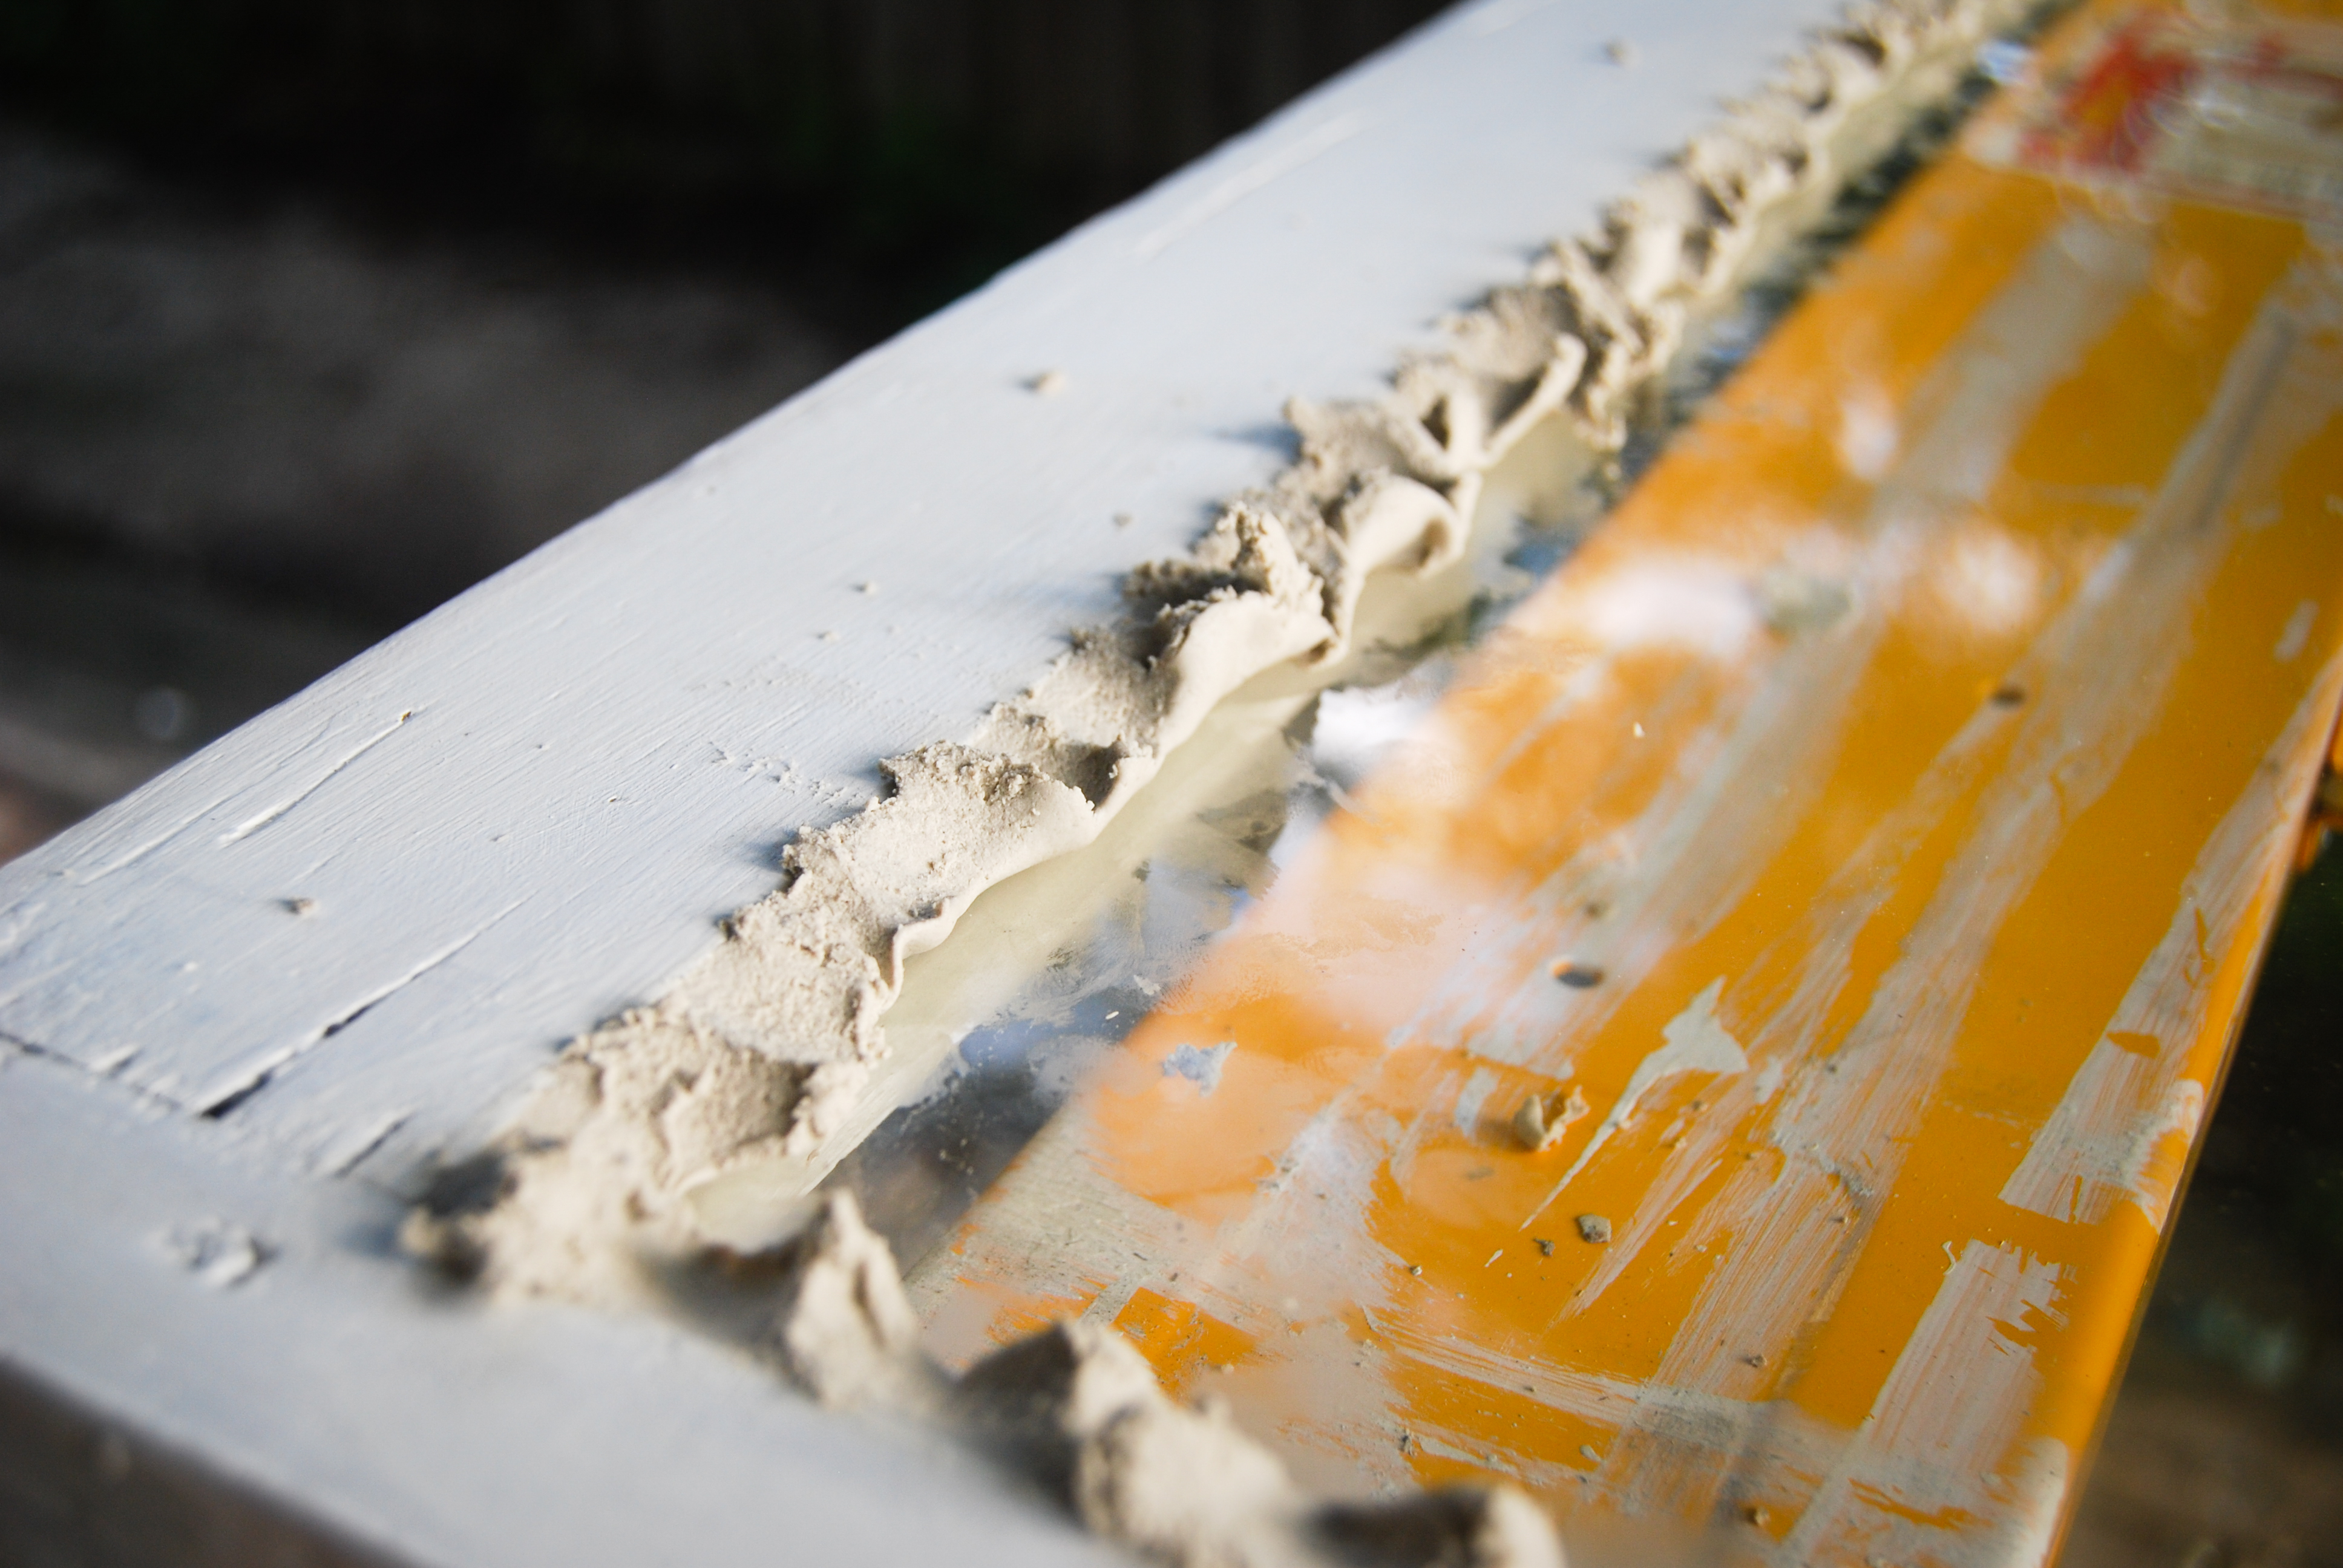
This is where experience counts. It’s time to form the angled edge all the way around the glass. Start in a corner and put the corner of the scraper on the line of putty visible from the other side of the glass while resting the middle of the blade on the edge of the wood. Pull the scraper along the sash to form an angle from the wood to the glass. Work to keep a steady hand and a steady pace. You want to try to at least go corner to corner without stopping. I have done enough of these that I can now go around the whole window without stopping (although my hand sometimes starts to cramp up). The corners are tricky. You want to try to create a nice angle in the corner by stopping, switching directions immediately, then continue on while maintaining the same angle to the glass. Once I have done the whole sash I go back over the putty in the opposite direction with my finger. This seems to smooth out the putty a little more.

On my windows I found that if the angle was 45 degrees it would be mean that a lot of the glazing putty is visible from the interior side of the glass. If I aimed to line it up with the ledge that the glass rests on it would mean that the angle is too steep and results in not enough putty. I ended up splitting the difference and just trying to get as little as possible to show from the other side while also making sure there was a good amount of putty to protect the window.
The good part about this stage is that you can always just redo it. It might take a little practice at first and if you mess it up just remove all the putty and try it again.
After you have admired your handiwork, turn the sash over again and remove any excess putty (again) that oozed it’s way out of the crack on the interior side. Then find a safe and secure place where you can lay the sash down with the exterior side up. Follow the instructions on the glazing putty for how long you need to wait before painting. The Sarco brand requires two weeks. After two weeks the surface will develop a “skin” that allows it to be painted.
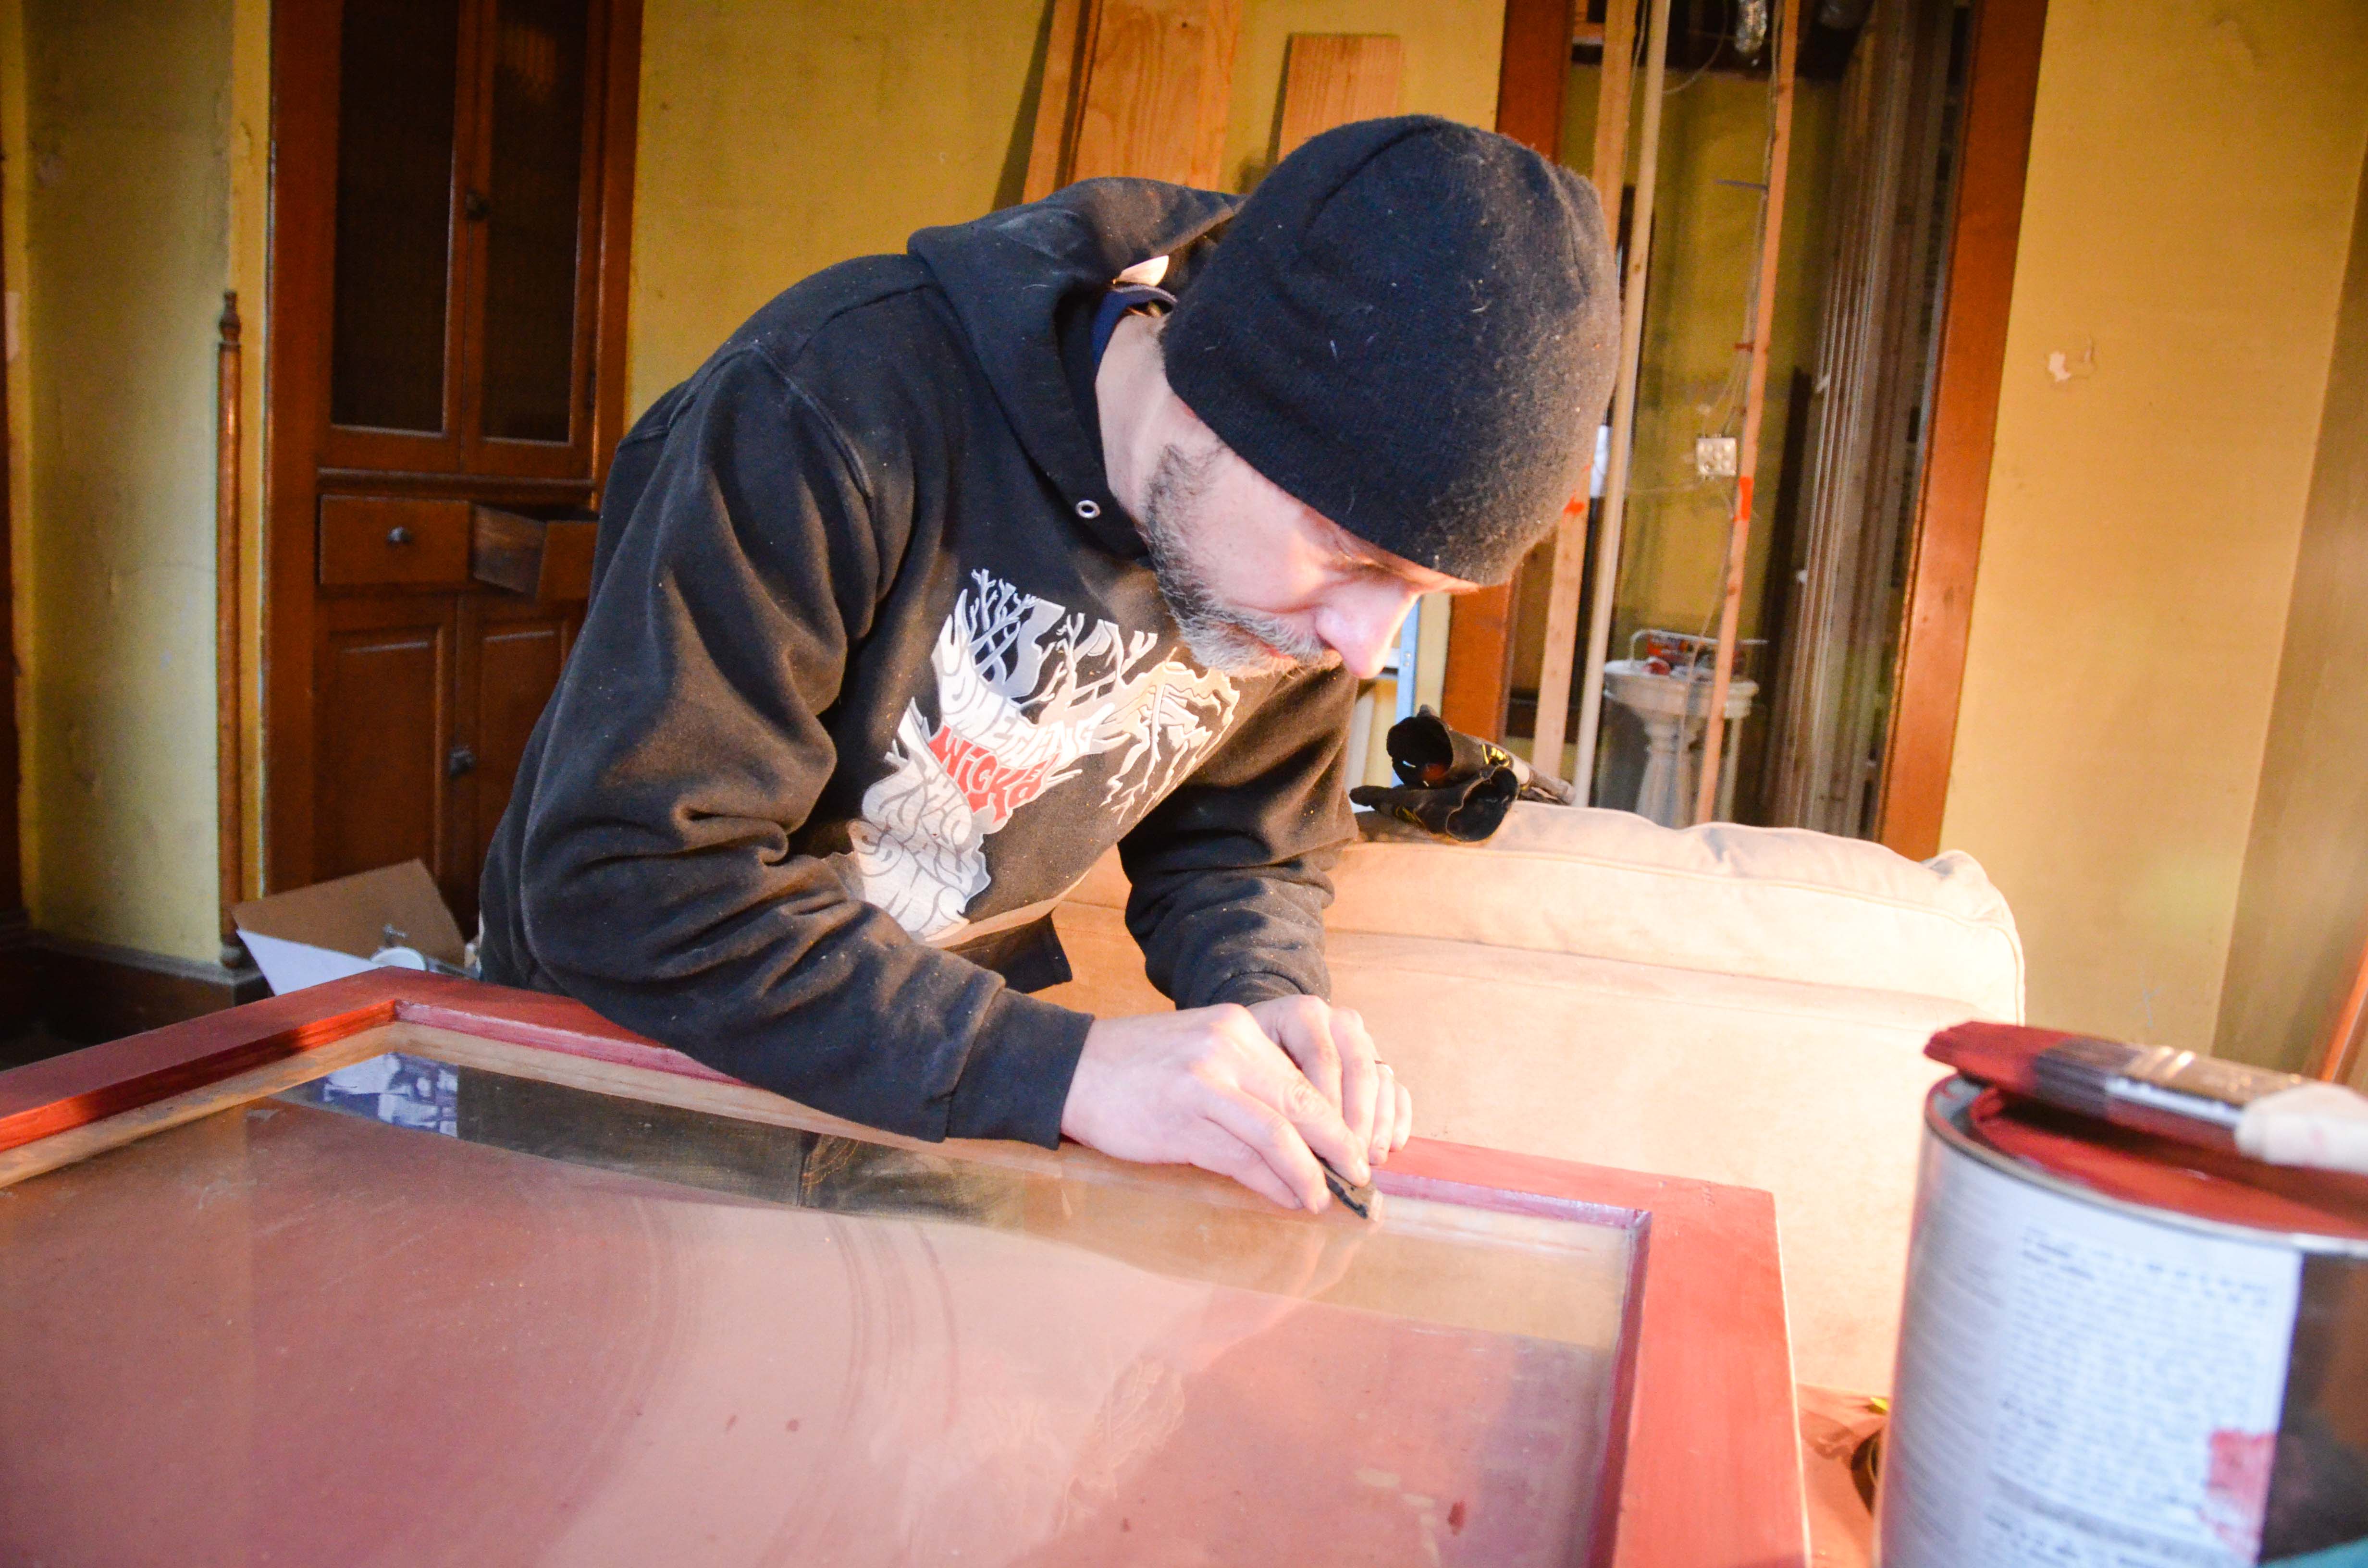
Painting the interior of the sash is pretty straight forward. On the interior side of the window, do what you would normally do… Tape the glass and then paint. The exterior is a little more critical. You need to paint at least 1/16″ onto the glass so that the putty is completely sealed in and water cannot creep in where the angled putty meets the glass. I got the best result by taping. Once the paint had tried a little, I used a knife to cut on the edge of the tape so that the paint on the putty didn’t pull up with the tape. Finally, go back with a razor blade to remove any paint that got through the tape.
Your sash is now mostly complete.
Next up… Installing weather stripping!
