Step 5 – Installing spring bronze weather stripping
For those of you that don’t know, old windows don’t slide up and down in an aluminum track or have much that keeps air from working it’s way around the parting bead or trim. This is why old windows are notoriously drafty. Most modifications that would help make the windows more energy efficient would also involve removing the old pulleys – and that was never an option for us. We wanted to maintain the original historic integrity of the windows, including all the hardware, rope, and pulleys. Personally, I enjoy the look of the pulleys and rope, the sound of the weights rattling around, and the feel of lifting a double hung window. The weather stripping option that seemed to be the most appropriate for my project was spring bronze. This is a strip of metal that already has a slight crease in it to create tension between the window frame and sash to reduce air flow around the sash. The spring bronze is installed in the track where each sash remains when closed. This means you don’t even see it unless the window is open, which is important because we don’t want to take away from the vintage aesthetic of our windows.
I found the materials I would need for this project online at Kilian hardware.
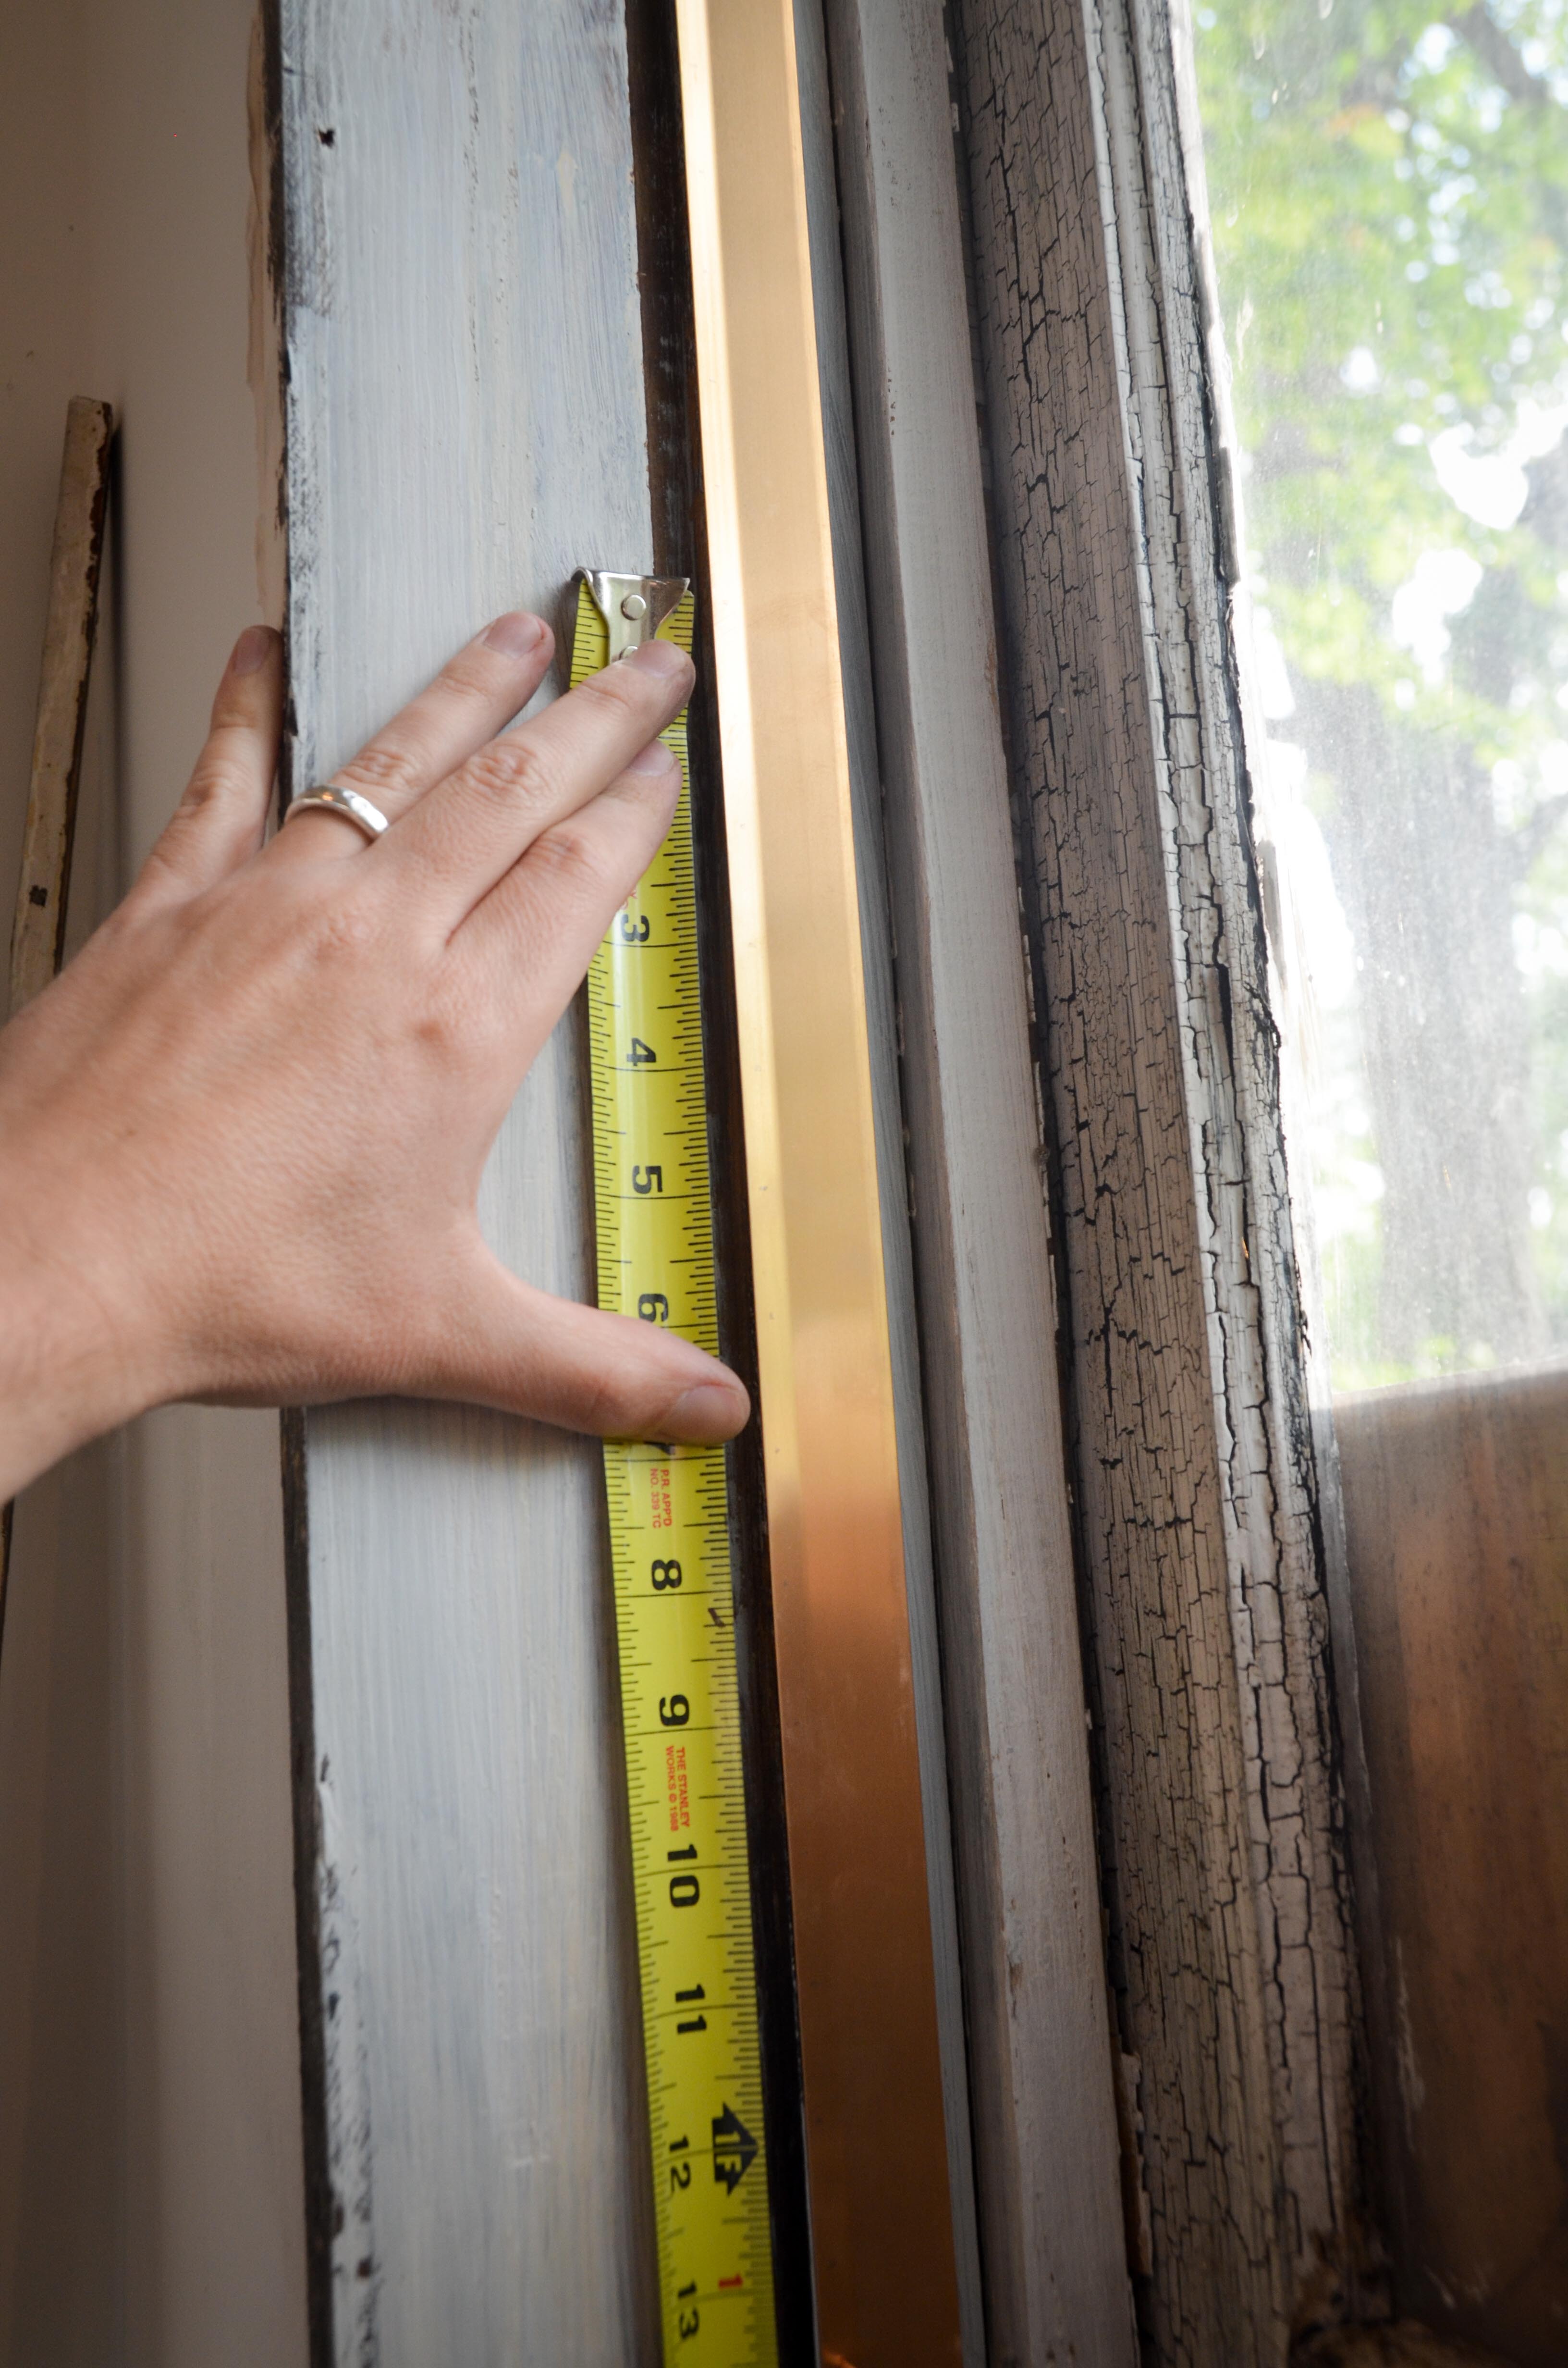
The first step was to mark the sash heights and take any necessary measurements. I did this by measuring the sash height and marking that height on the frame. The spring bronze needs to go 1/2 – 1″ past that line. You will have several measurements to take. For the top sash you will have two pieces on each side – measure the distance from the top of the frame to the top of the pulley. The distance from the bottom of the pulley to the line you drew (actually, a little past that). For the bottom sash you will have three measurements. From the line to the top of the weight pocket cover, the length of the weight pocket cover (add an inch to this measurement – I’ll explain why), and from the bottom of the weight pocket cover to the bottom of the window frame.
After cutting the bronze strips, I made a mark every inch for the nails. (edit: Since writing this blog entry I found out I only need to do every 1 1/2 inches. That will help speed up the process a little)
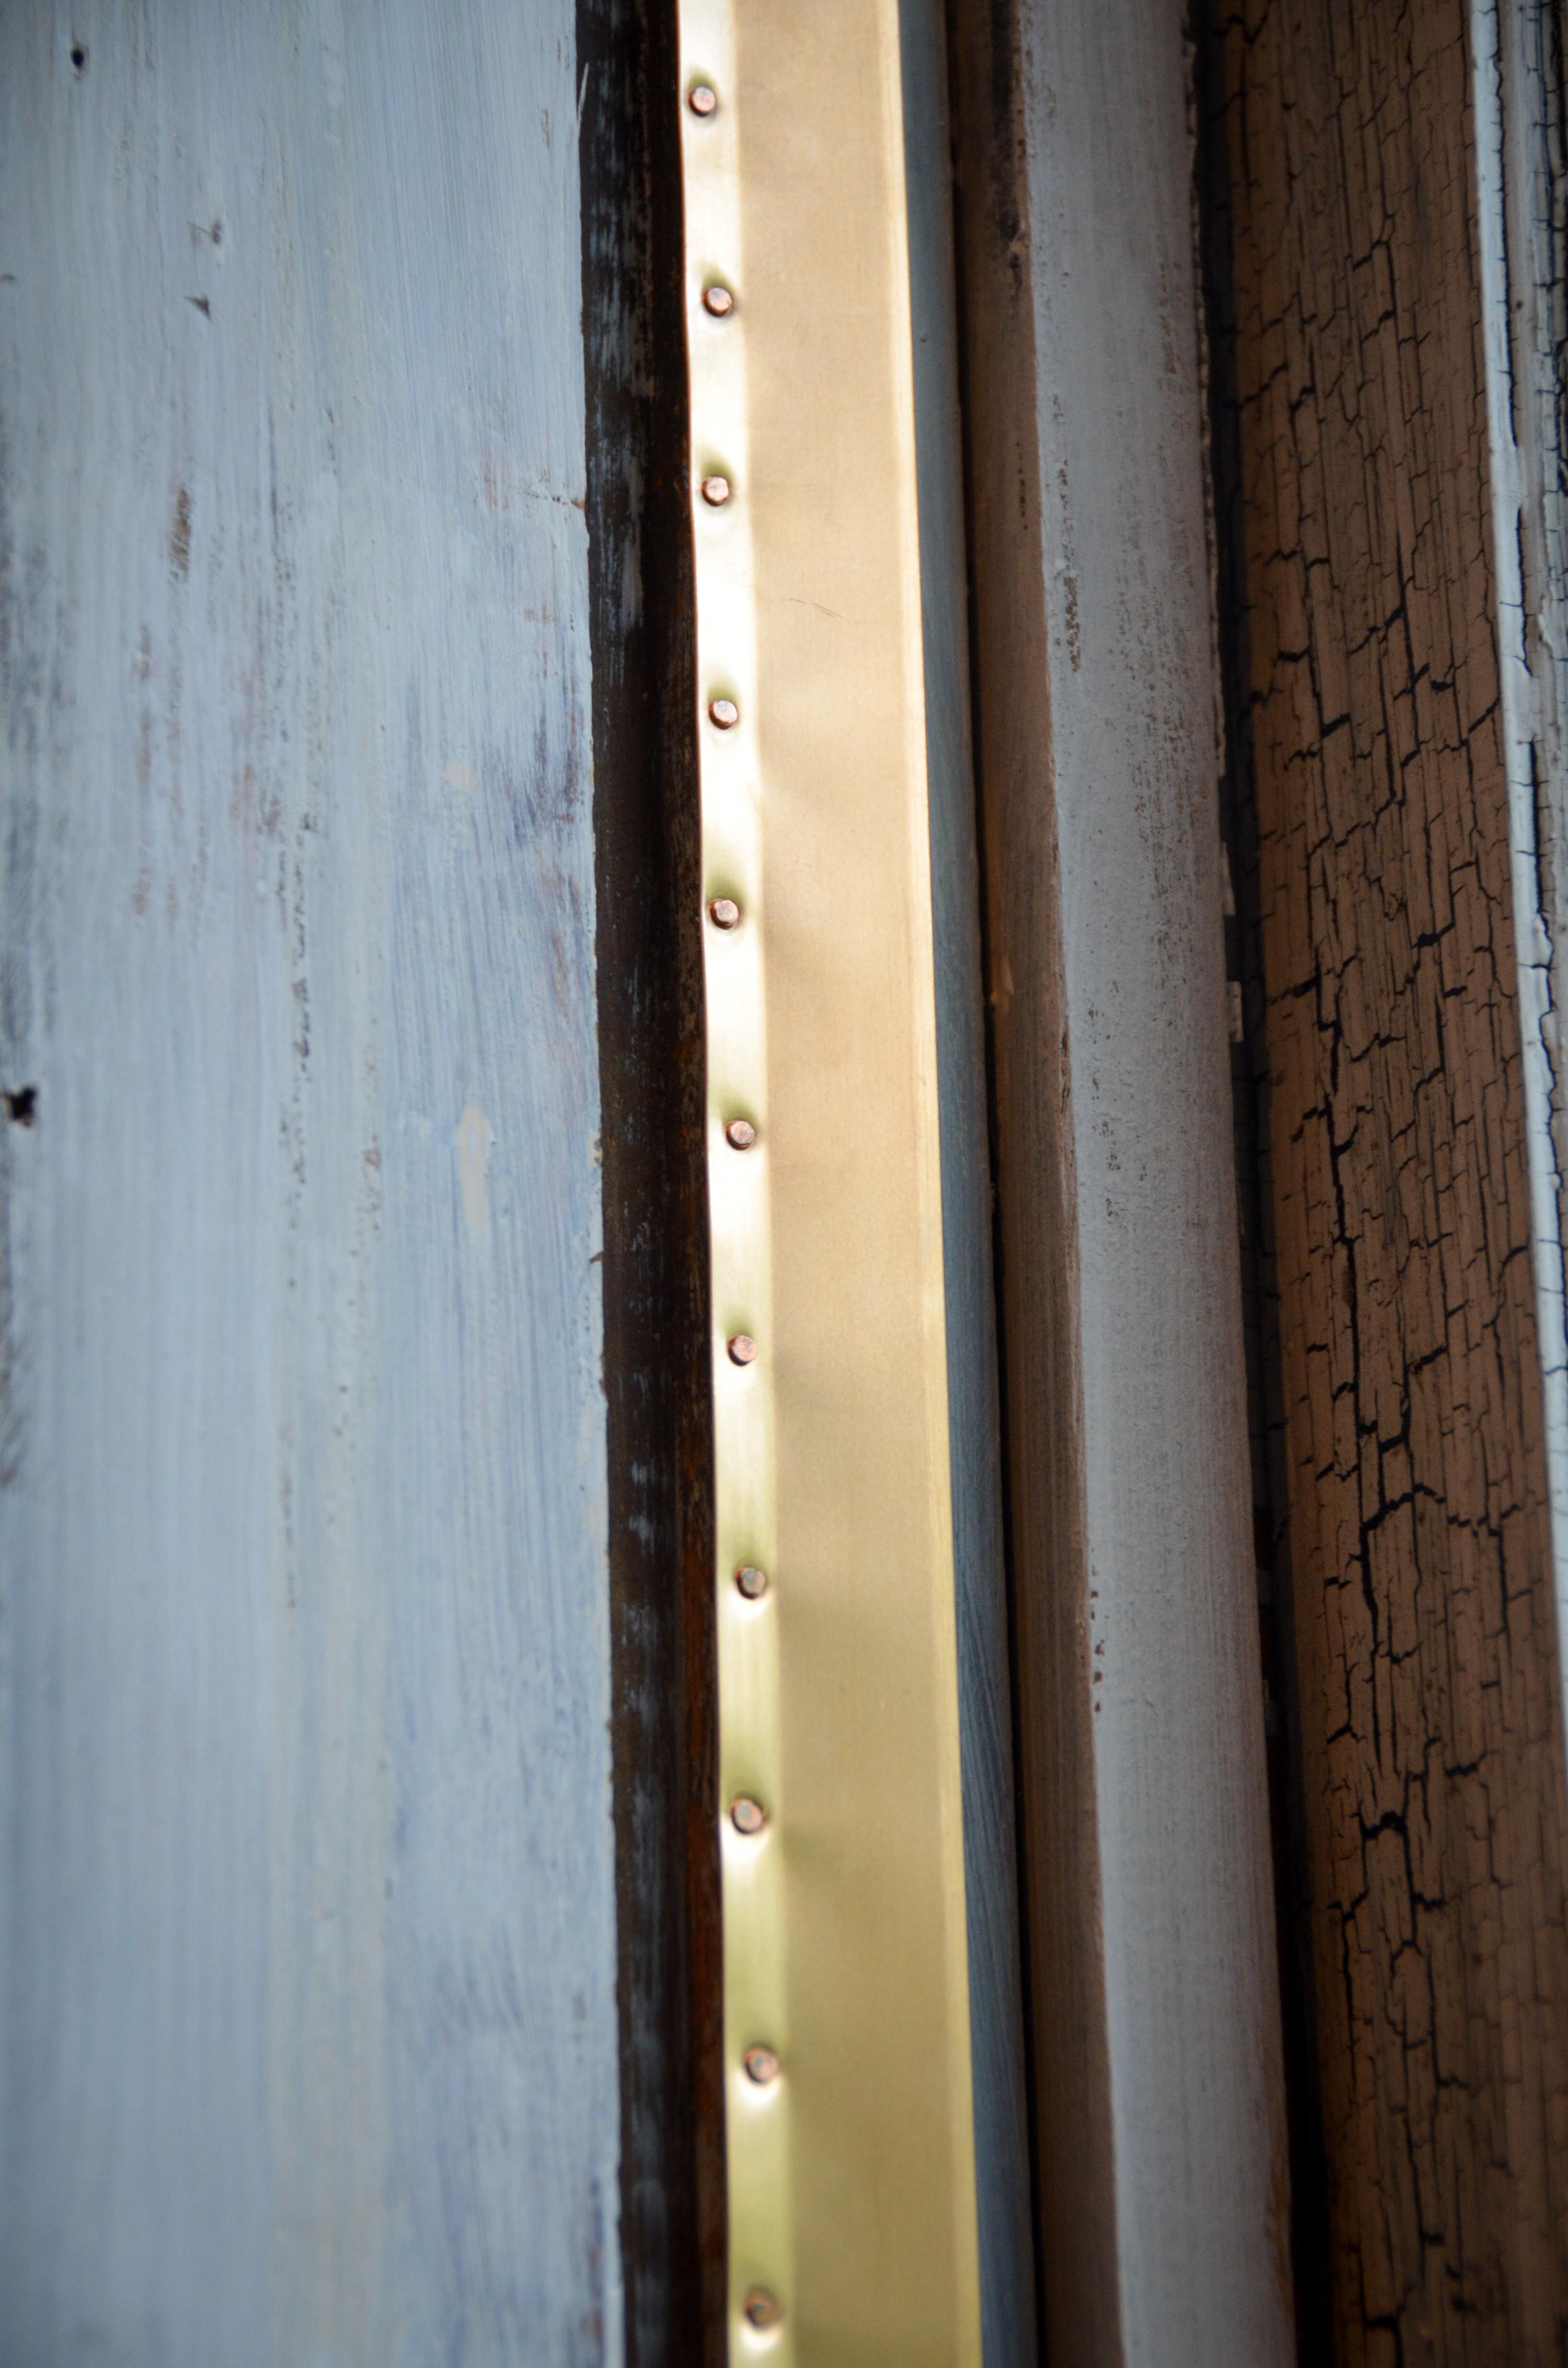
It is a little more difficult than you might imagine to keep the spring bronze straight over a long distance while you are hammering in the nails. Start with a nail at the top, then another one a few inches down. Check to make sure that the strip is still straight. I quickly learned to NOT hammer the nails completely in until each strip was done, because once they are in they are in it is incredibly difficult to remove. When each strip is done, this is what it looks like…
The strips need to fit around the pulleys on the upper sash. On the first one I just cut out a notch (like below), but that was difficult and made it much harder to keep the strip straight. I ended up just stopping the bronze at the pulley and starting it again underneath the pulley.

On the lower sash I found a nice tip online on how to do the pocket cover for the weights. That extra inch for the weight pocket cover should be on the top end. It will slip under the strip above it and will help keep the bronze from catching on the window sash.
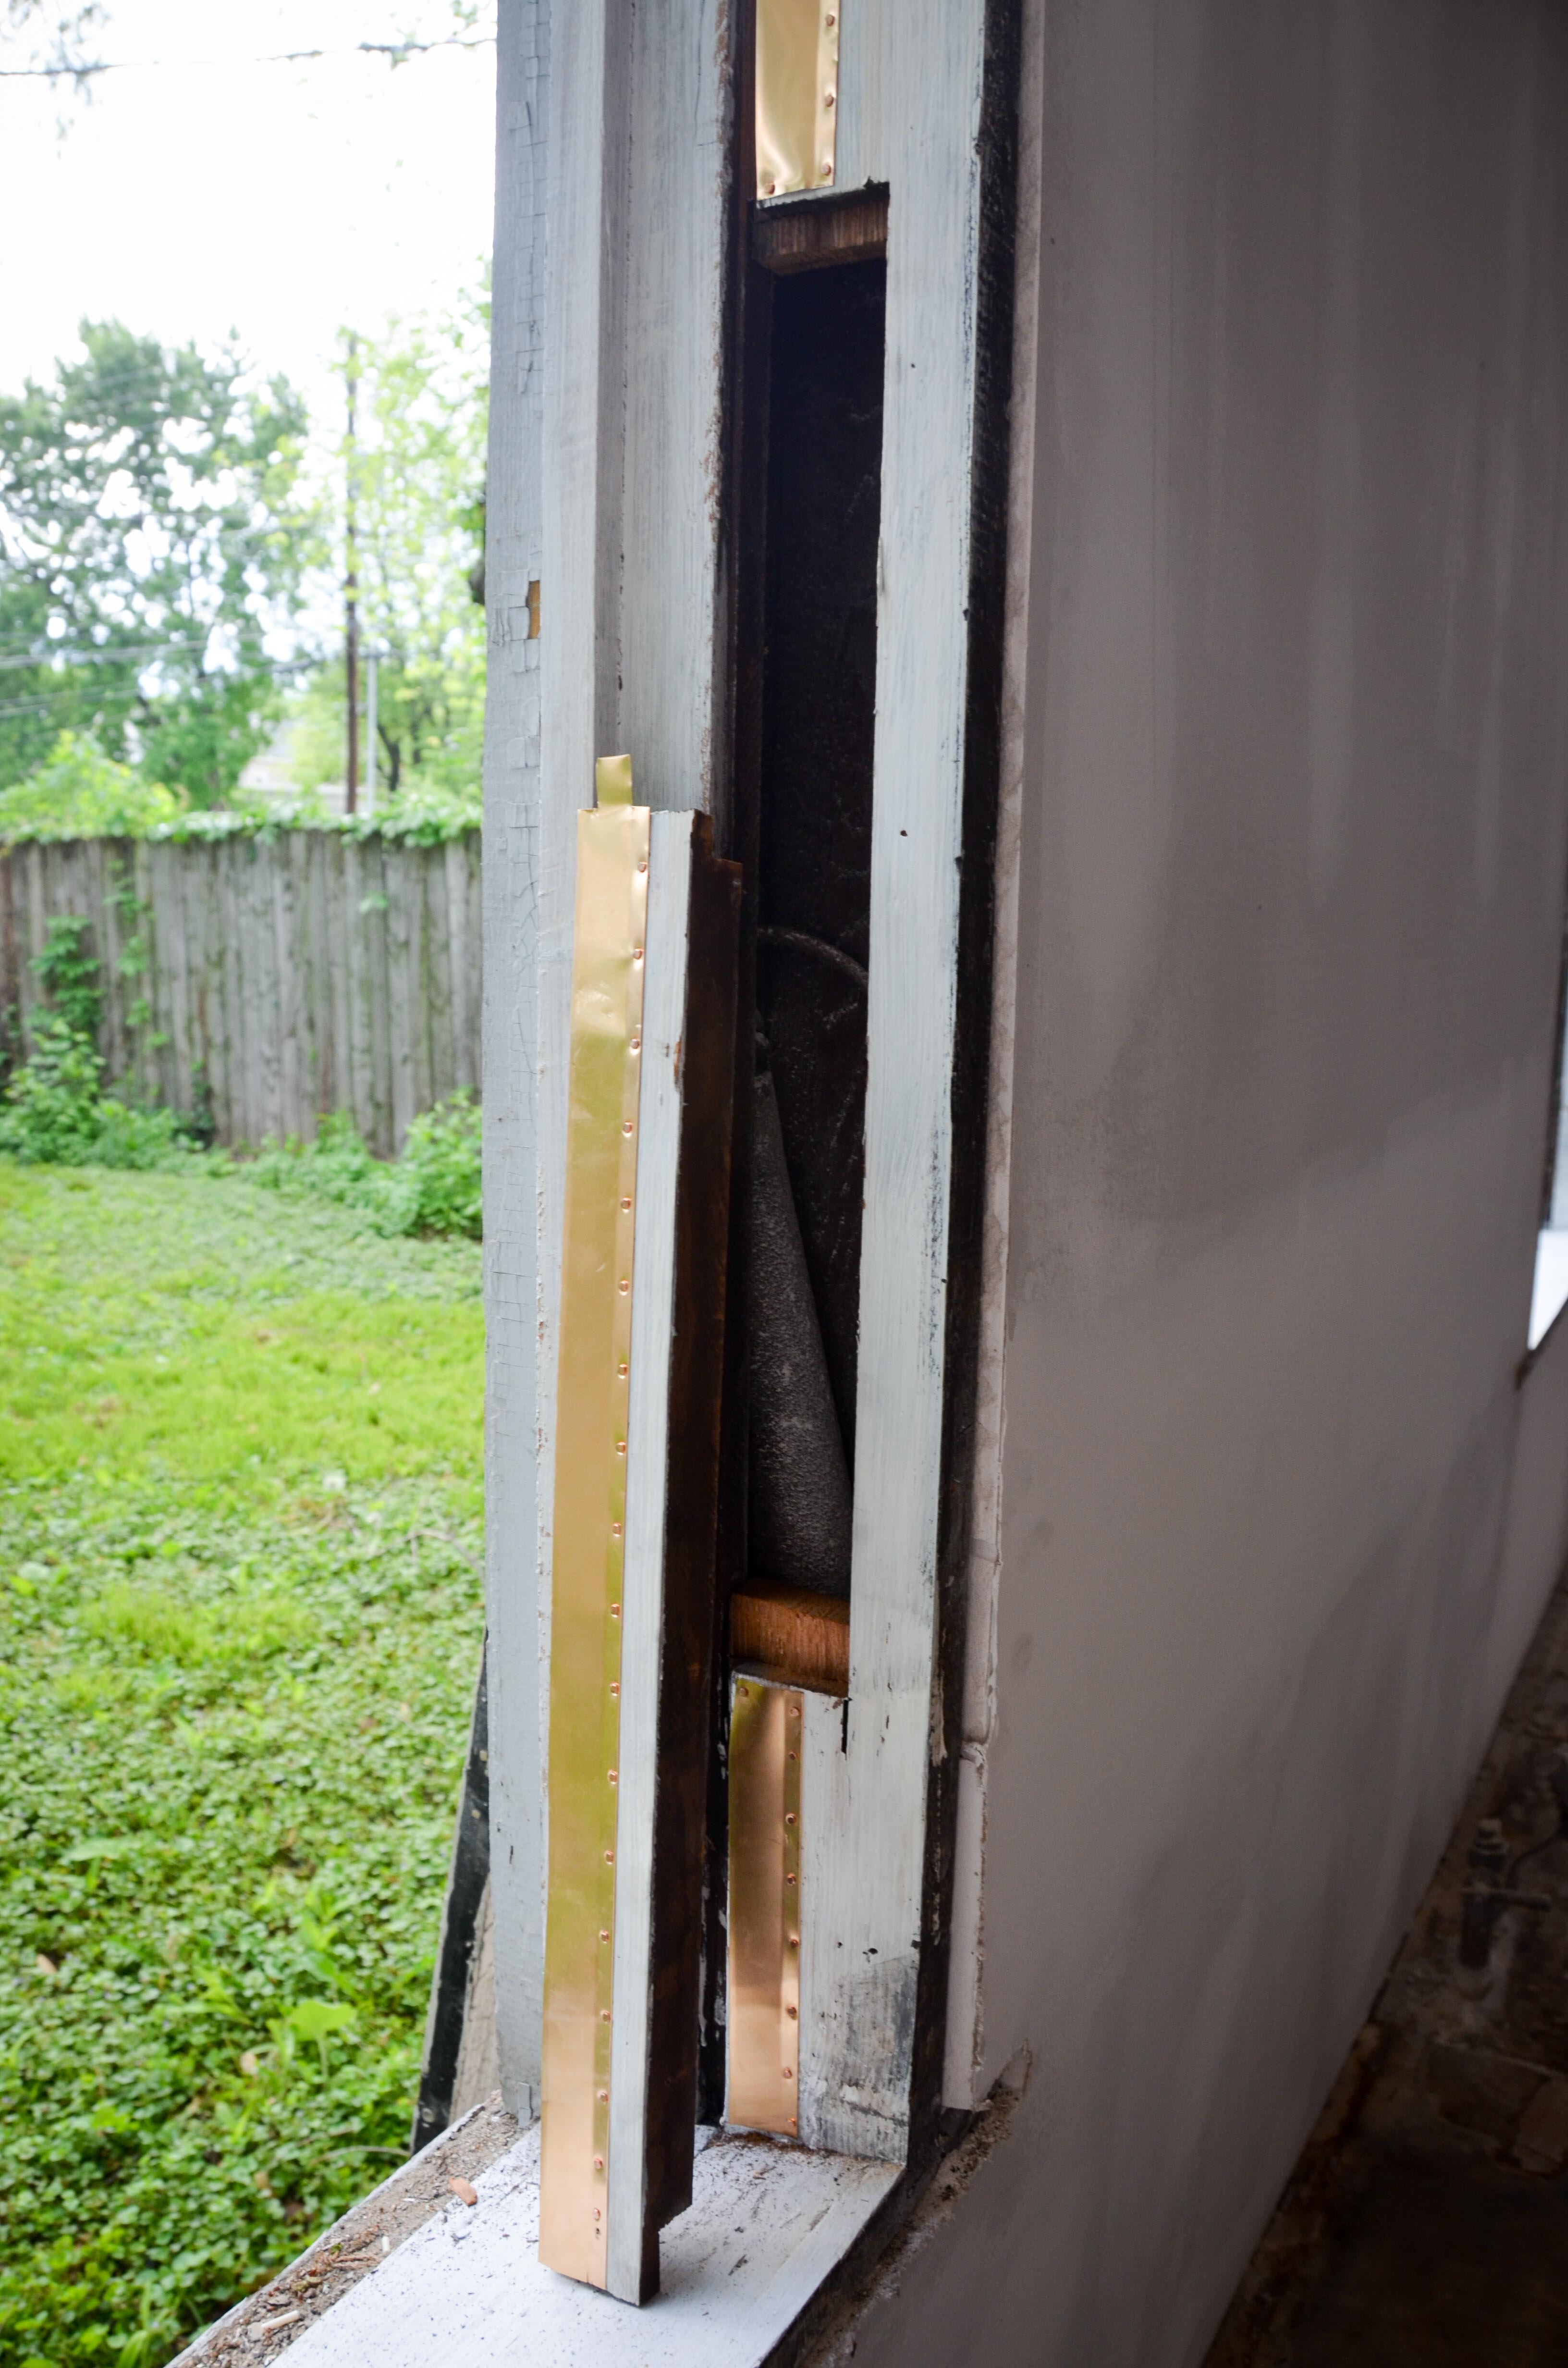
You could always choose to just nail the bronze strip over the cover, but then you won’t be able to access the weights.

One last tip. Notice in the picture above that there are two nails at the bottom of the top strip of bronze. This is necessary otherwise it will snag on the sash. Also, when I hammer in that last nail I wedge in a screw or drill bit and then remove it to create a little wrinkle. This wrinkle will help maintain the tension of the bronze. I made sure that all the bronze strips had these wrinkles on at least one end – the end that needs to be attached anyway to avoid snagging.
Installing the spring bronze is not rocket science, but it is EXTREMELY tedious. It took about 150 of these small nails to do just one window.
One last step to hang the sashes…

Hi Joe and Amy: I am an editor for Old House Journal, working on a story about window restoration. Wish I’d found your blog sooner than today, because you all take EXCELLENT pictures. I would like to use one of your pix of spring bronze weatherstripping as an example in a sidebar on increasing energy efficiency. To do that, I need the photographer’s FULL name, and would also like to have your mailing address to send you a copy of the (June 2016) issue, where it will appear. Could you let me know ASAP? Thanks!
Mary Ellen Polson, Senior Editor, Old House Journal, oldhouseonline.com
LikeLike
Hi thanks for some great info about weatherstripping old windows!
I am in the process of doing the same for my windows and have a question…
How did you weatherstrip the meeting rails?
LikeLike
I too would like to know how to handle the meeting rail. That info seems to be left out of all postings I’ve seen so far.
LikeLike
I didn’t do any weather stripping on the meeting rail. At least for my windows, when I lock them, they pull together pretty tight.
LikeLike