Step 1 – Removing the sash
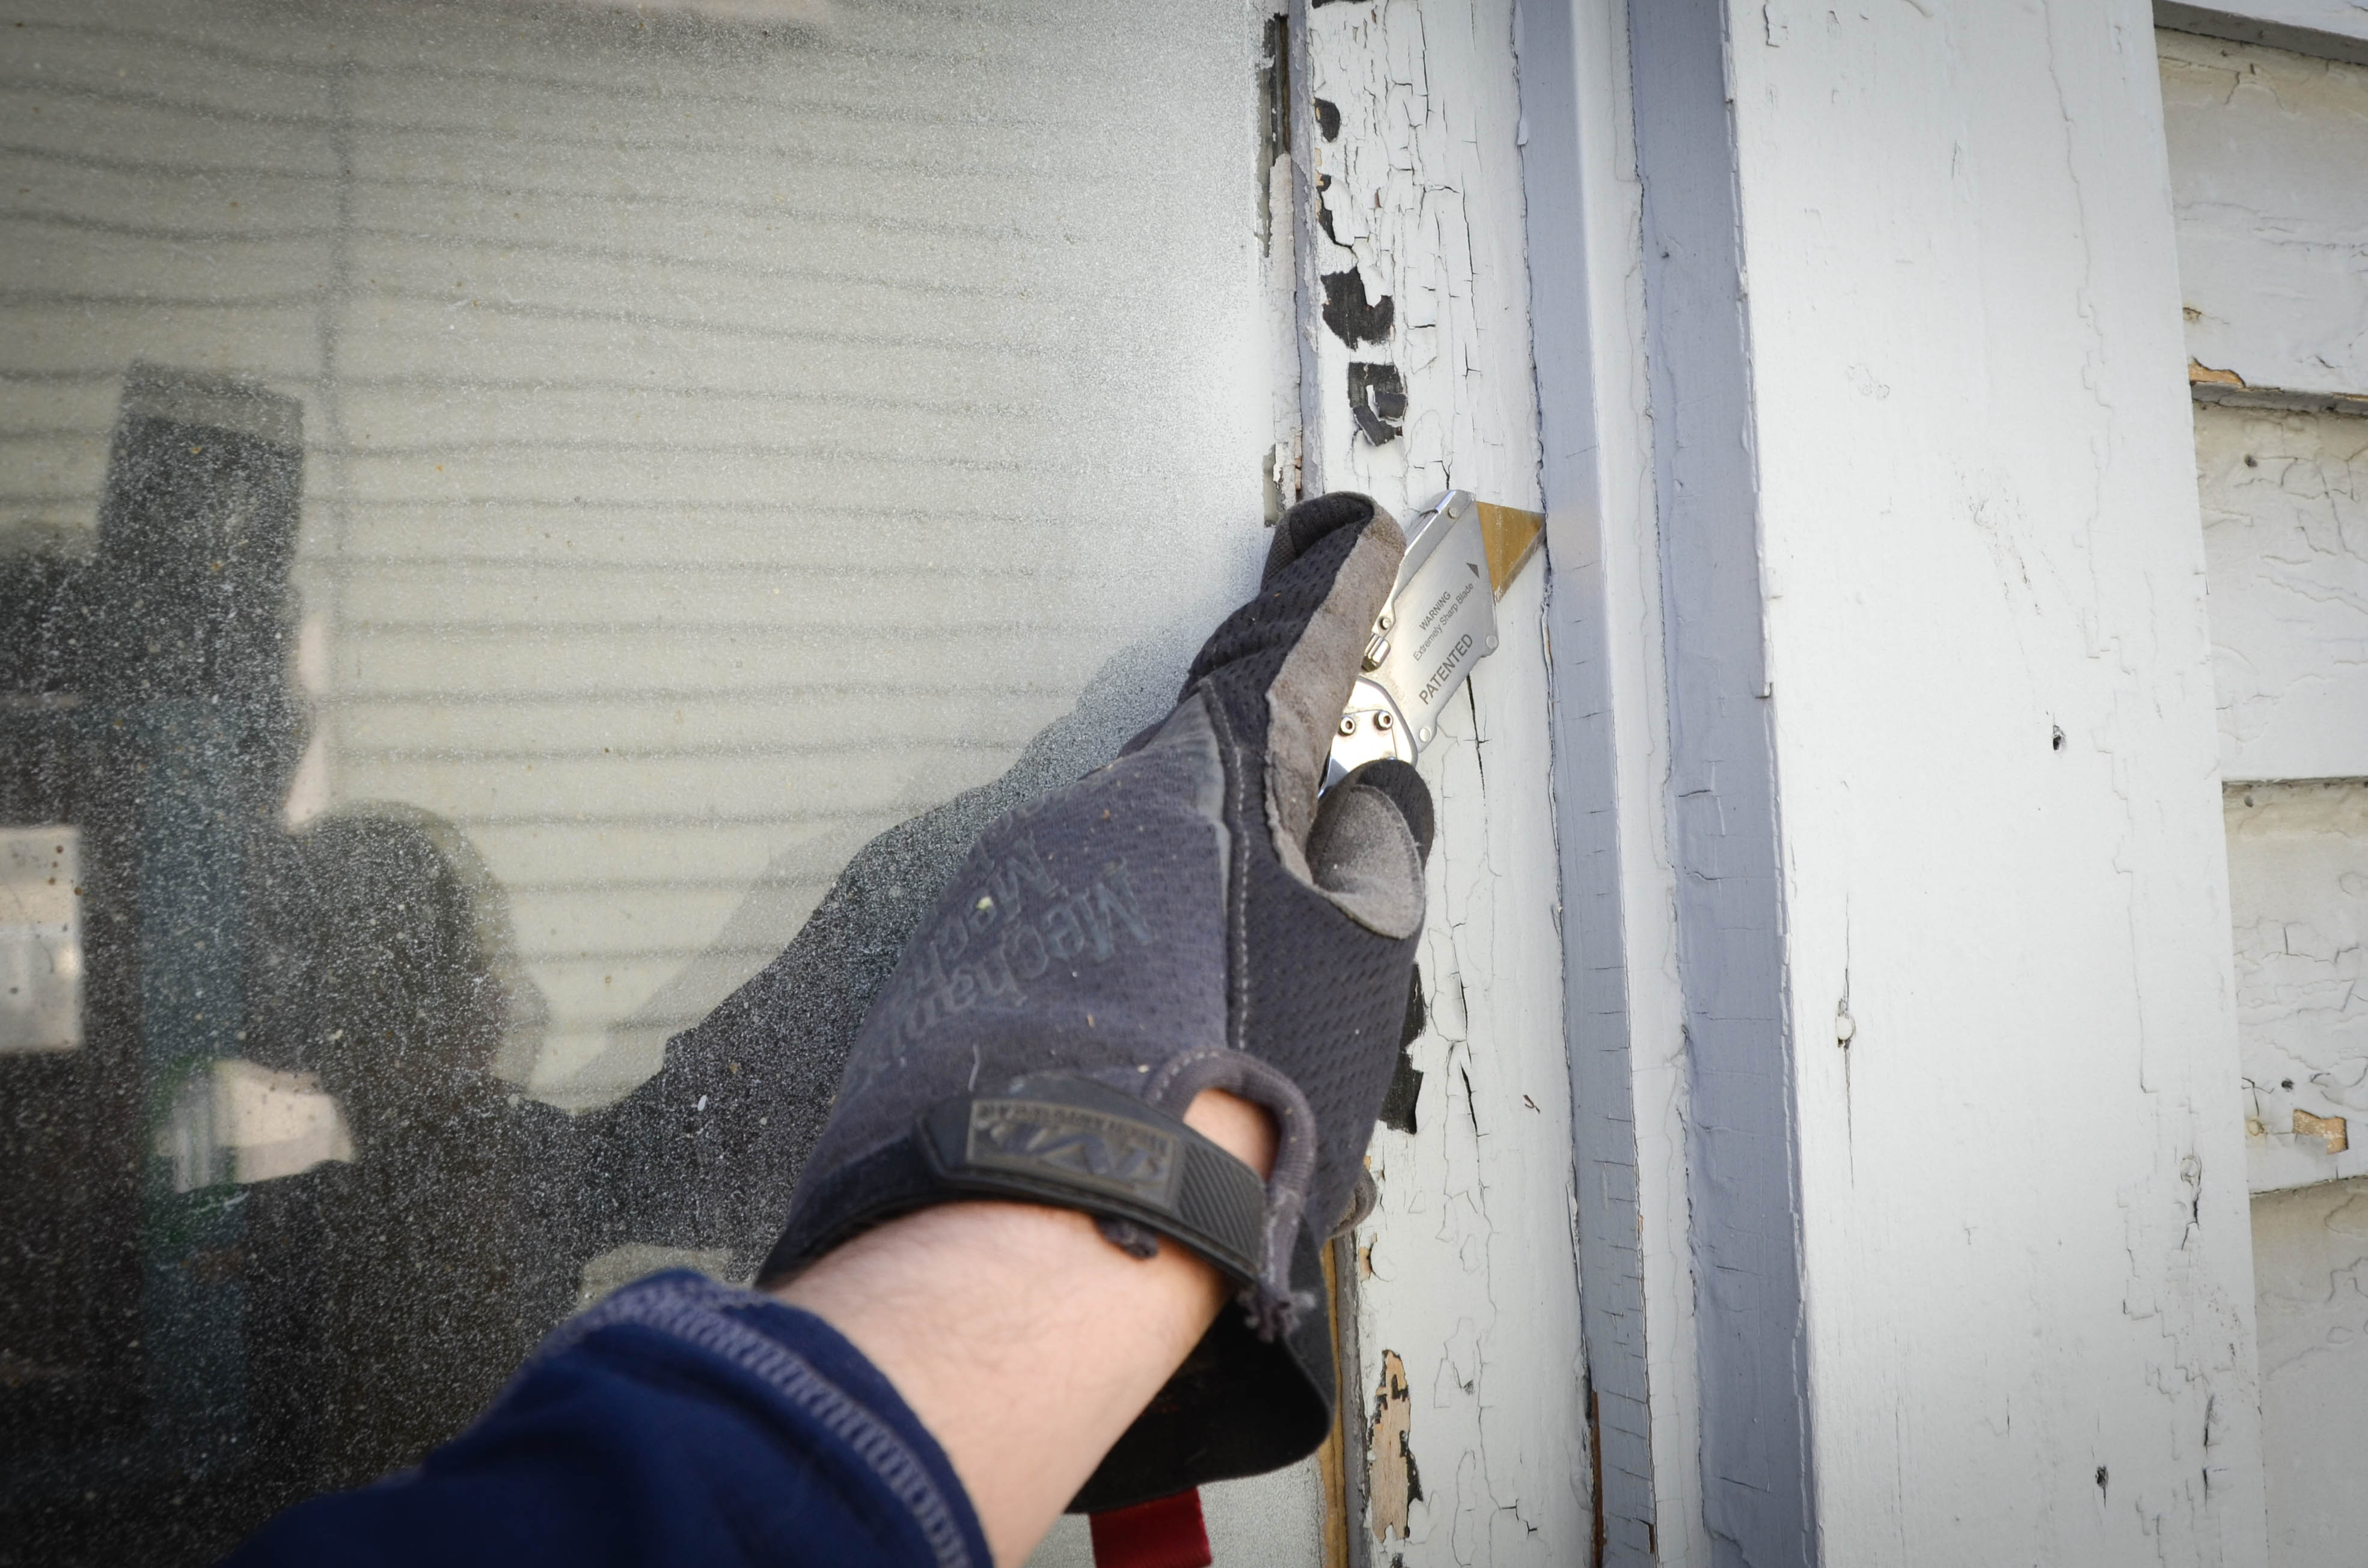
This can be very easy or very frustrating. Our kitchen windows were painted and were much more difficult to remove compared to the unpainted windows in the rest of the house. First, remove the trim piece that holds the lower sash in place. Use a thin blade and gently work your way up until the trim easily pulls lose. For painted windows the whole removal process is obviously the same, but you will need to use a blade to cut through the paint first. Don’t rush this process. Take your time and work gradually.

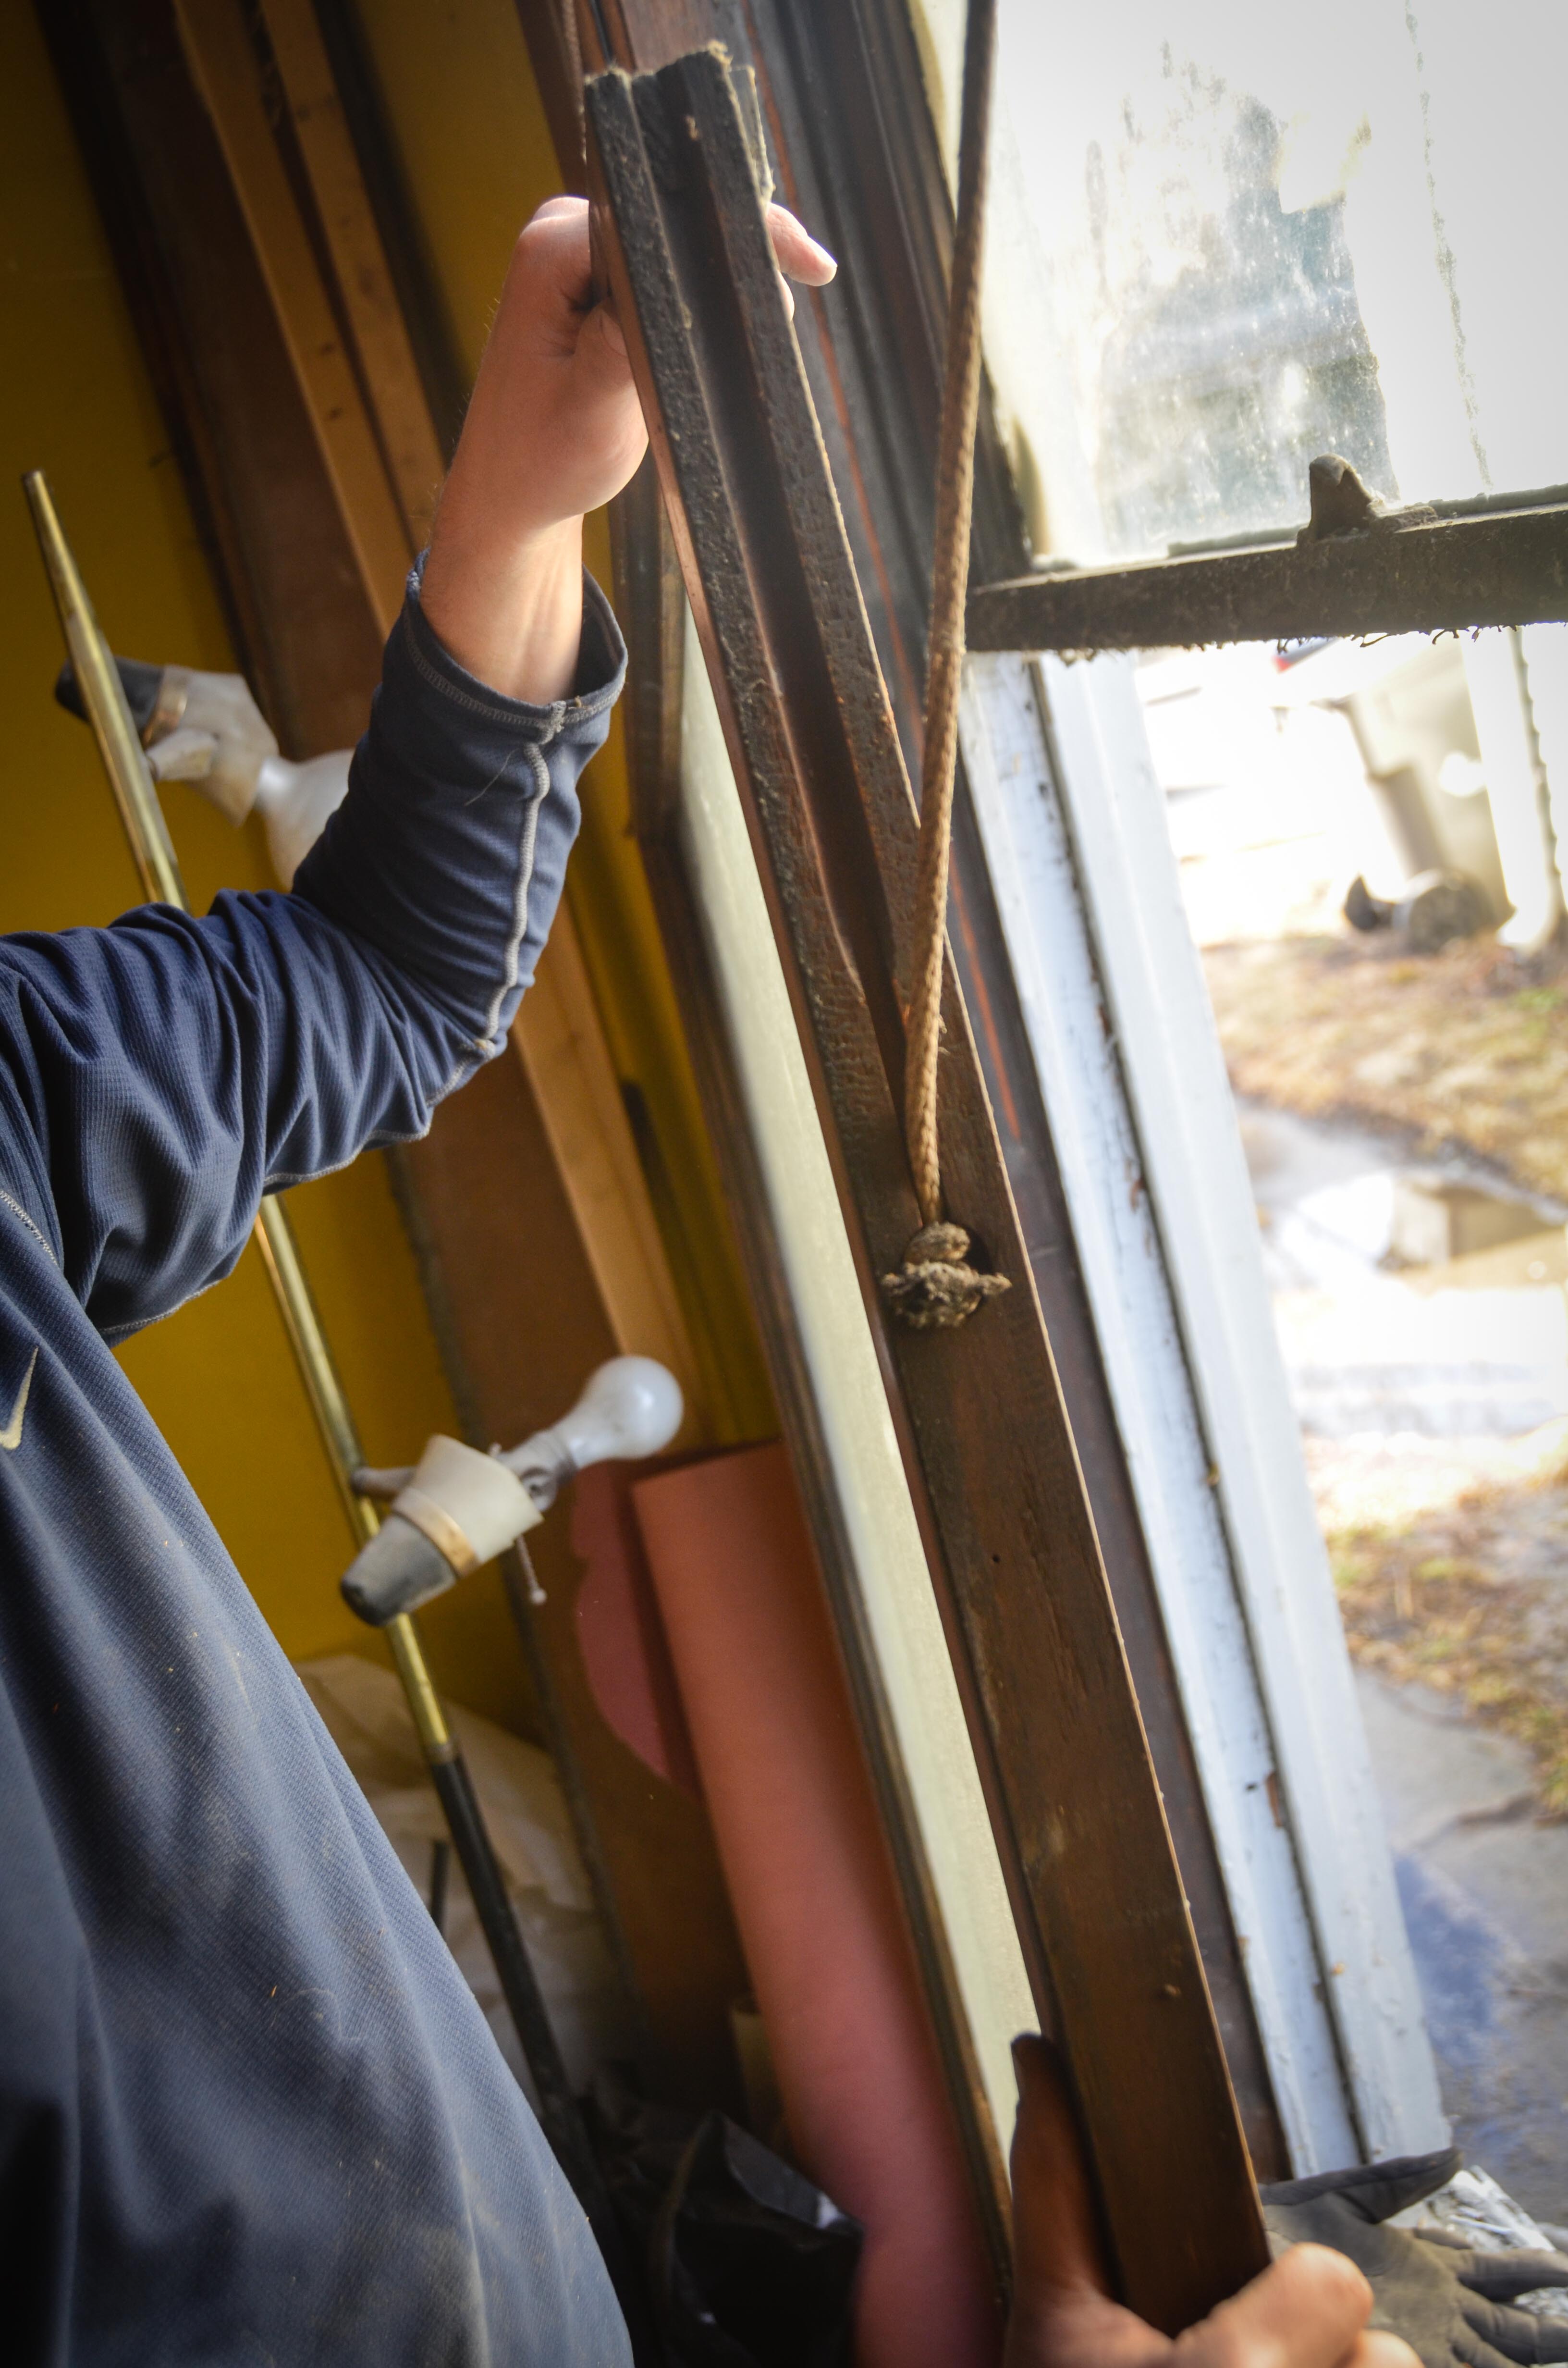
If you aren’t planning on replacing the sash cord ,you really only need to remove one side, because once that piece is removed the lower sash can be pulled sideways and removed from the window frame. At this point you can remove the sash cord from the sash, but be careful! I broke a pane of 100 year-old glass by letting go of the sash cord too early. The weight came crashing down, bounced out of the cavity in the wall (the plaster had been removed), and right through the glass.
The upper sash is a little more difficult to remove. This is because of the parting stop – the thin piece of wood that separates the lower sash from the upper sash. It will be painted and also nailed. In addition, the upper sash itself is most likely painted shut from the inside and outside and it must be freed before doing anything else. Nothing fancy here, just use a blade to cut through the paint.
Removing the parting stop can be the most difficult part of this stage. You might consider just ripping it out (still, not easy) and replacing it. Lumber companies sell these and they are cheap. If yours is finished/stained wood and you want to try to salvage it, this next part is for you. Once the upper sash is free, test it by moving it up and down. Keep it all the way up and begin removing the parting stop from the bottom. The technique that worked best for me was to pry up the bottom of the parting stop with a screw driver, then get underneath it and gently work up until I got to the upper sash. Sometimes I had to use a pair of pliers to help dislodge the parting stop enough to get under it with the screw driver.

The lower horizontal piece (the rail) of the upper sash has a section that overlaps the parting stop. That makes it more difficult to remove.

Once you have loosened the lower end of the parting stop, lower the sash about halfway down, and start removing the parting stop from the top. Eventually you should be able to wiggle the parting stop out and around the sash. If you can do that, you are home free!
Another approach that worked for me sometimes was to not even bother trying to get the top sash loose until I was able to remove the parting stop. It might be possible for you to work the parting stop out of it’s track be pulling it towards you and pushing the sash away from you. It just needs enough room to wiggle out from the rail. If you can remove the parting stop in this manner, that means that you can push one side of the top sash towards the inside of the house and break the seal of paint. This makes it much easier to scoot down and remove.
Once again, you only need to remove one side. If the parting stop snaps, don’t panic. As I said before, they are easily replaced. Once the parting stop is removed, just pull the sash out sideways, then pull down enough to be able to reach the sash cords.

Take off the sash cords (once again, be careful) and gently let the rope and weight slide down.
You’re done!
Now, on to the delicate part… Removing the old glazing.

What kind of parting stop wood should I get
LikeLike