The holiday break gave us time to make good progress with unpacking, organizing, and wrapping up some new projects. One big project that has been in the works for a long time was creating storage spaces in Lucy’s bedroom. We have known for more than a year exactly how we were going to create storage that fit the character of the room and wouldn’t take up too much valuable floor space in this awkwardly shaped room.

We wanted to create built-in shelving, drawers, and cabinets to utilize otherwise impractical space under the low points of the angled ceiling. Since our goal is to DIY as much as possible in this house, we were certainly not going spend big money to have someone else build custom cabinets. It was time for an “IKEA hack.” I imagine most people know what this is, but for those of you who don’t, an IKEA hack is when you take an existing IKEA product and modify it for a different use or look. Amy and I are fans of IKEA, but we live in an old house and most IKEA products would look pretty out of place. However, the kids’ rooms are new and a perfect place to tweak these affordable, yet stylish furnishings. The best part for me is that some of their furniture is solid wood, unfinished, and relatively inexpensive. This means we can easily modify it. Our plan was to find some dressers or cabinets that we liked and modify them in a way that made them look like they were built-ins.
After a couple trips to IKEA, we finally decided on using the Hemnes sideboard. The great thing about the Hemnes series is that it is solid pine instead of a synthetic material or laminate. There was a lot of prep work to be done and some obstacles to overcome. First up – sanding the surfaces would need to be painted.
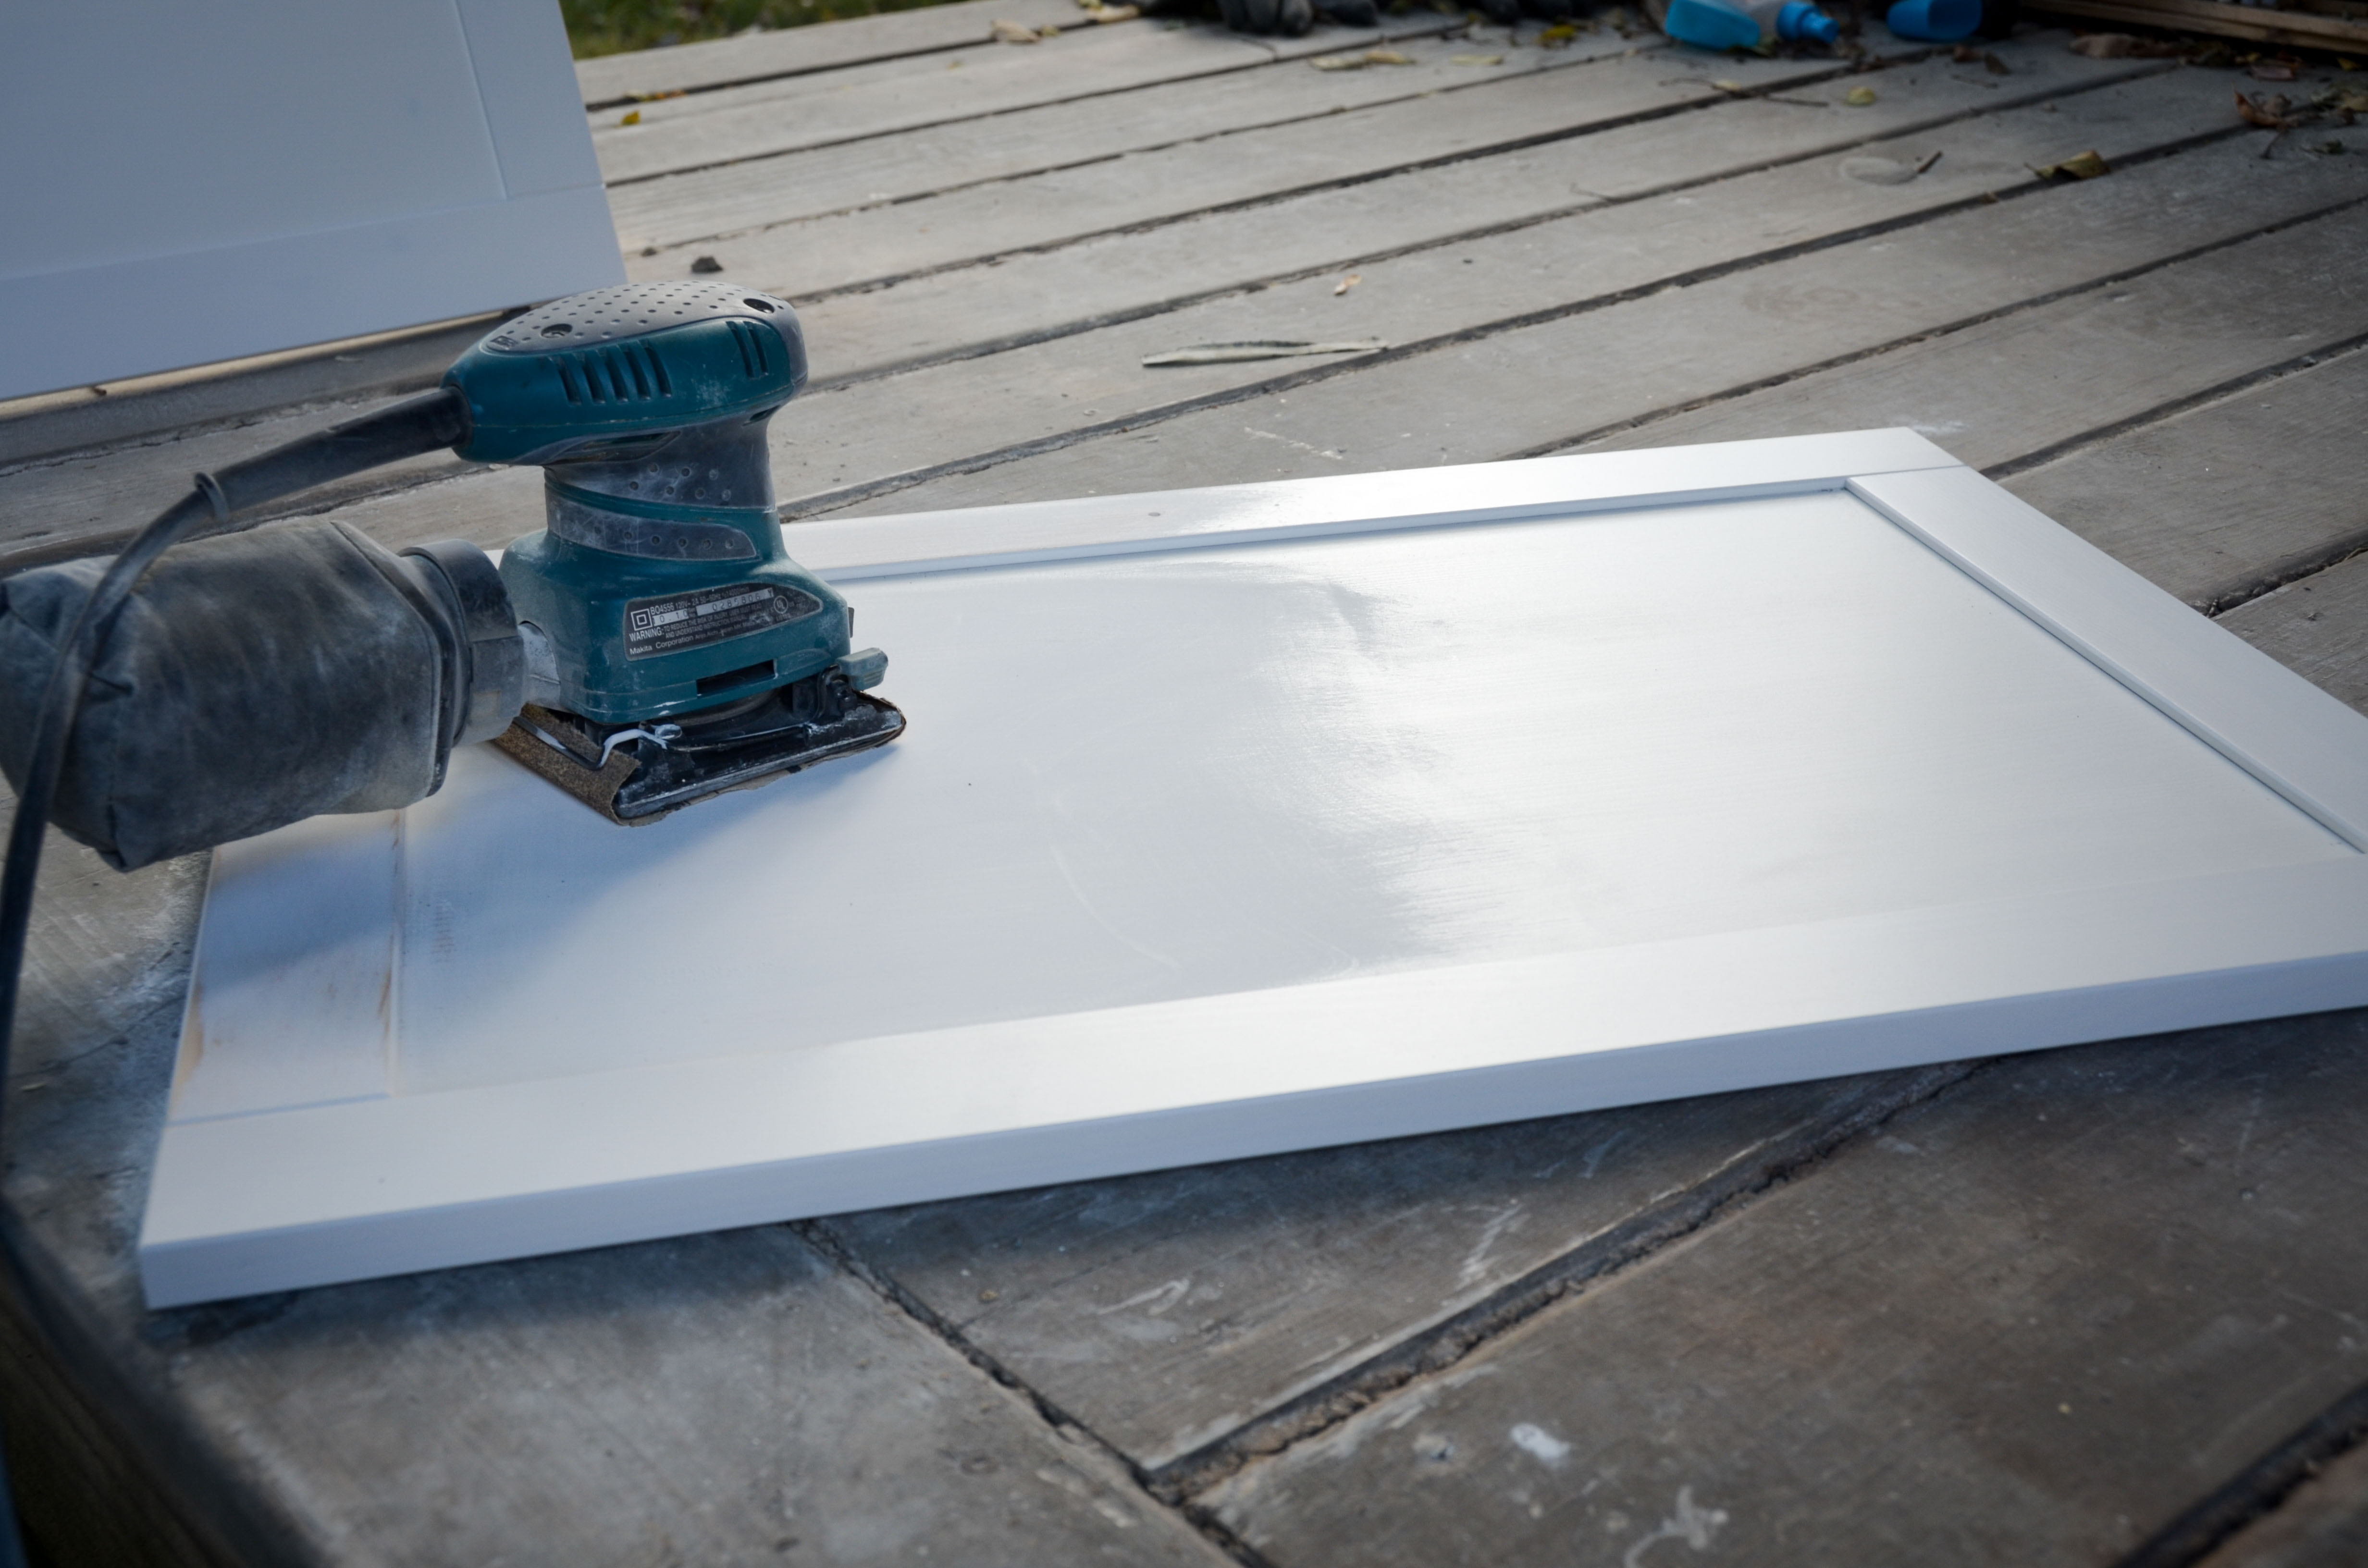
It wasn’t difficult, but it was tedious to sand SO many pieces! After the sanding had been completed, Amy got busy assembling the furniture.
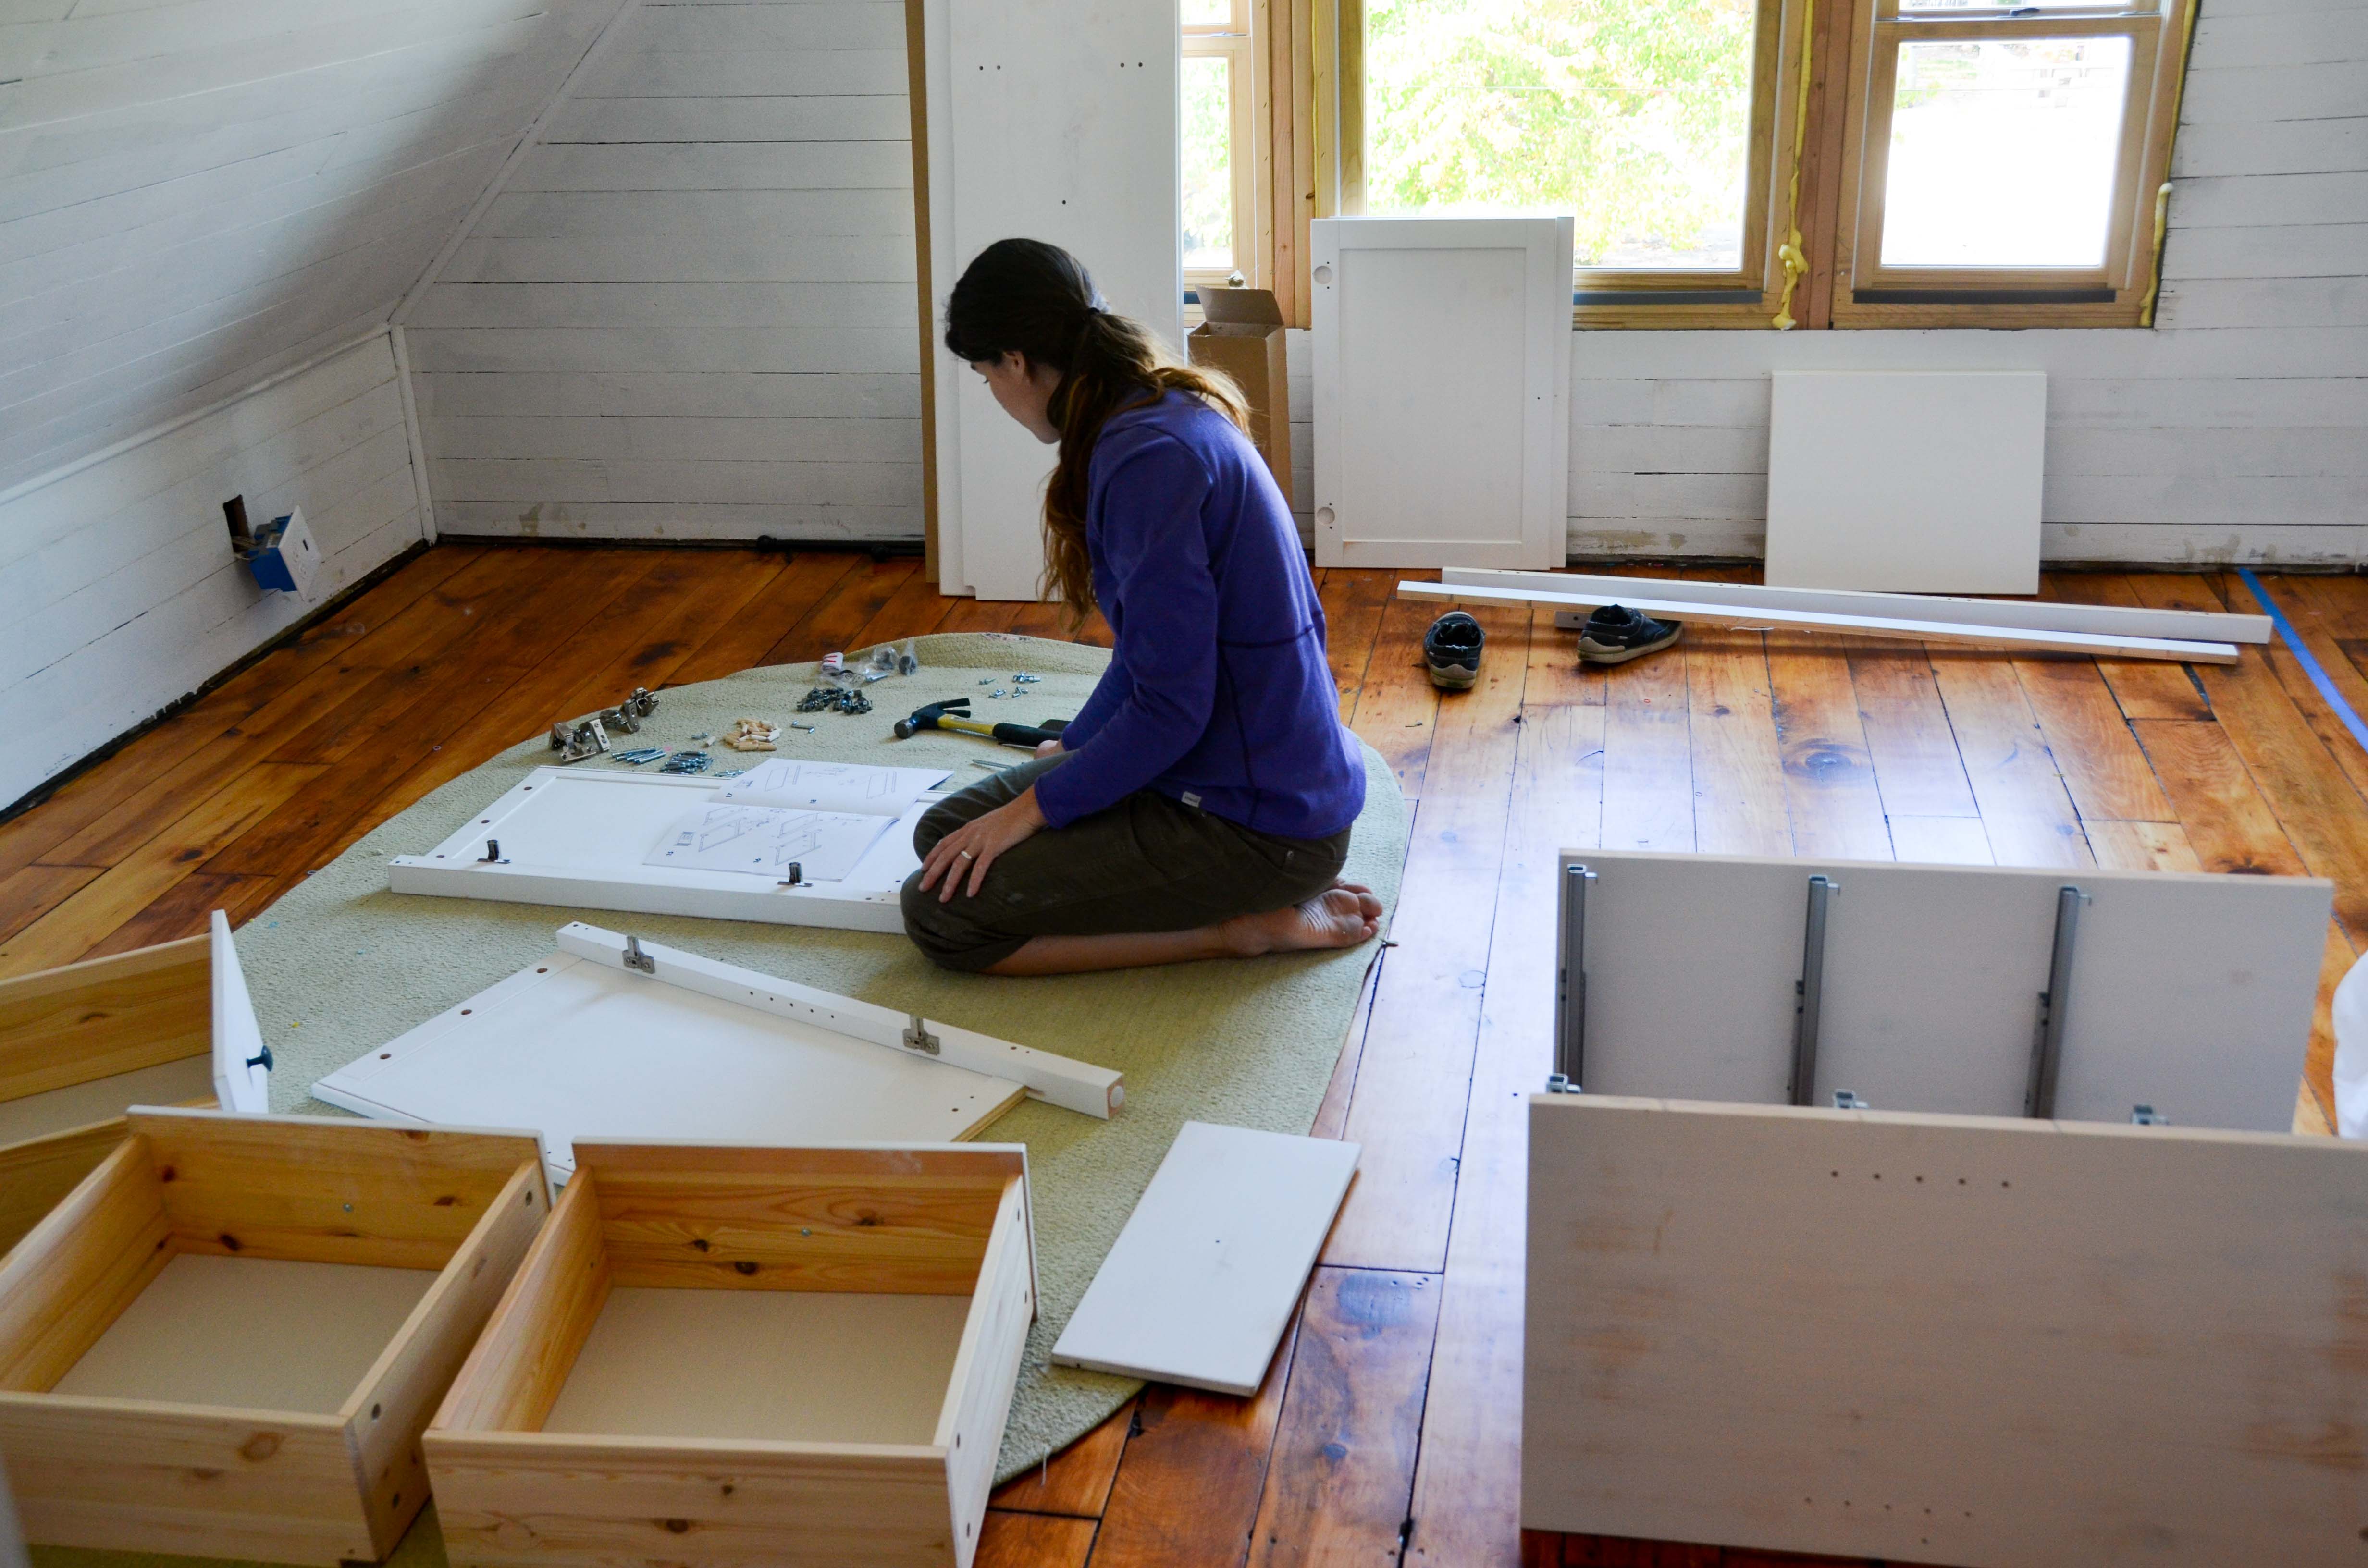
Let me take this moment to say that I really enjoy IKEA’s directions. Seriously. No words to read… just very obvious signs, images, cartoon characters, and exclamation points.
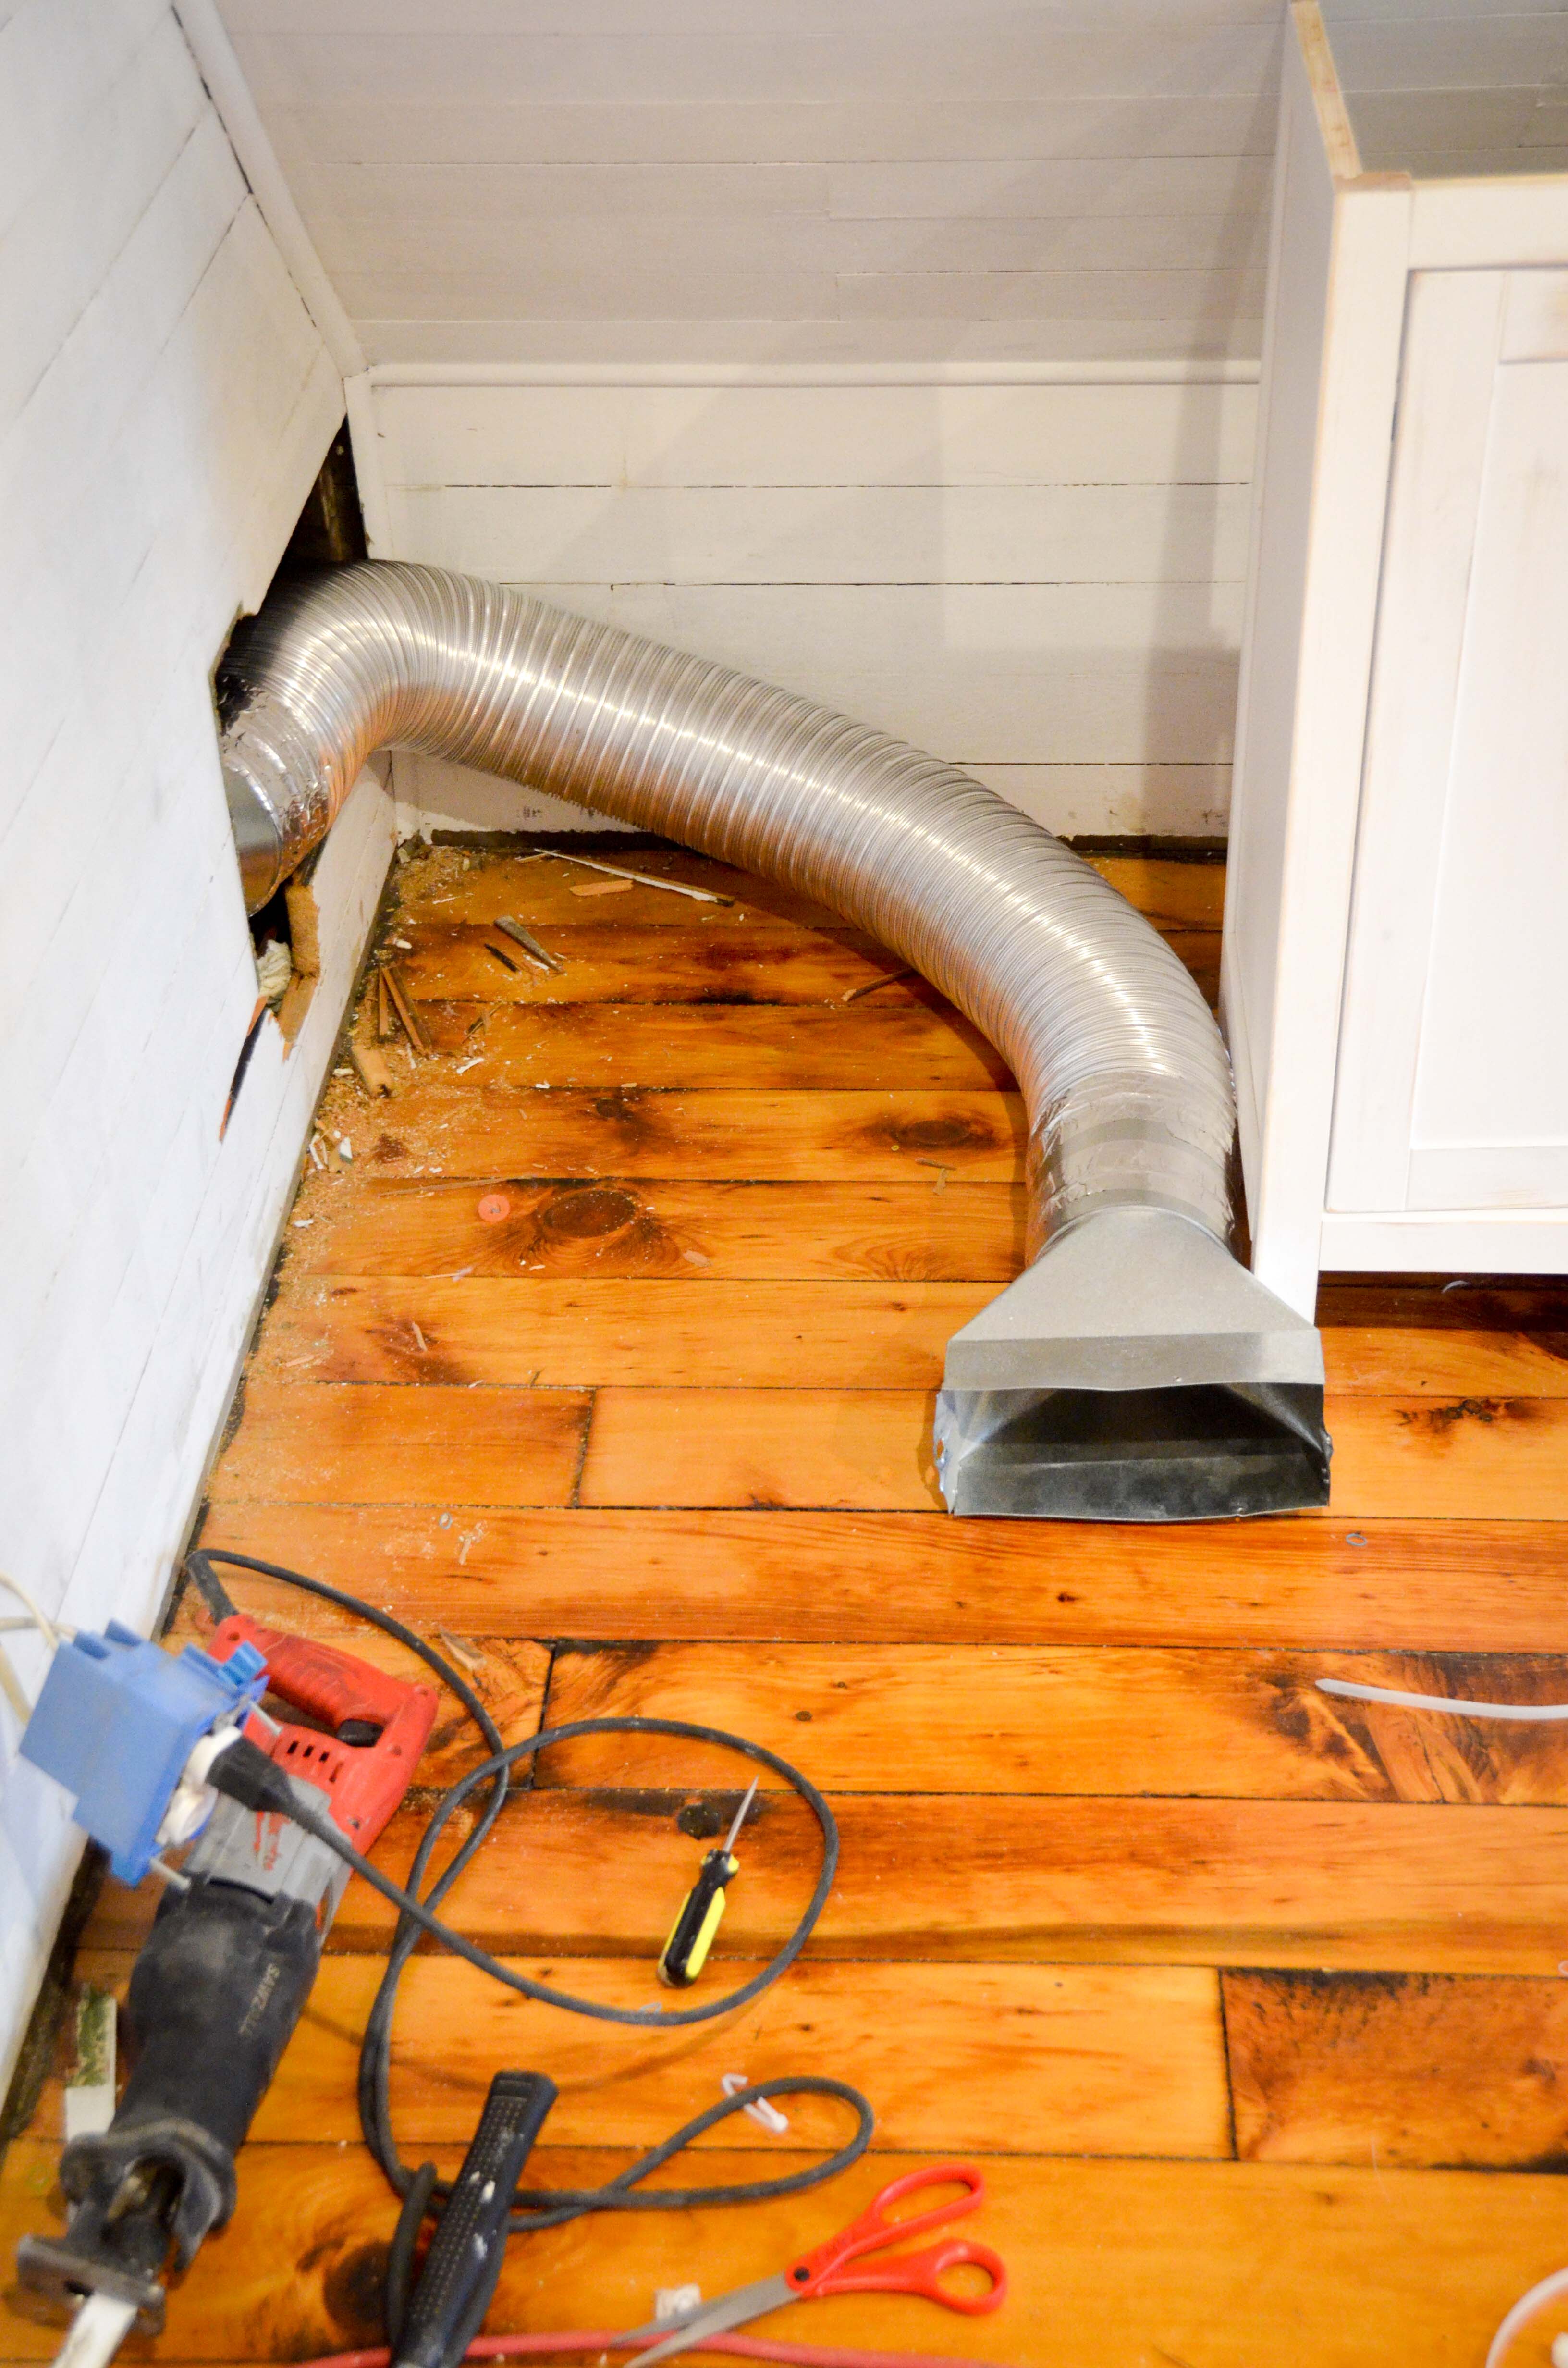
Sanding and building the furniture was the easy part. Now it was time to customize, modify, and create! But first, I had to deal with the fact that the heating/AC vent was inconveniently located. In it’s current position it would blow air directly behind the built-in.
I needed to find a way to add duct work and vent the air below the built-in through the new baseboard I was going to install. This proved a little trickier than I had anticipated. The first step was to remove some of the siding so that I could pull out the existing duct work.
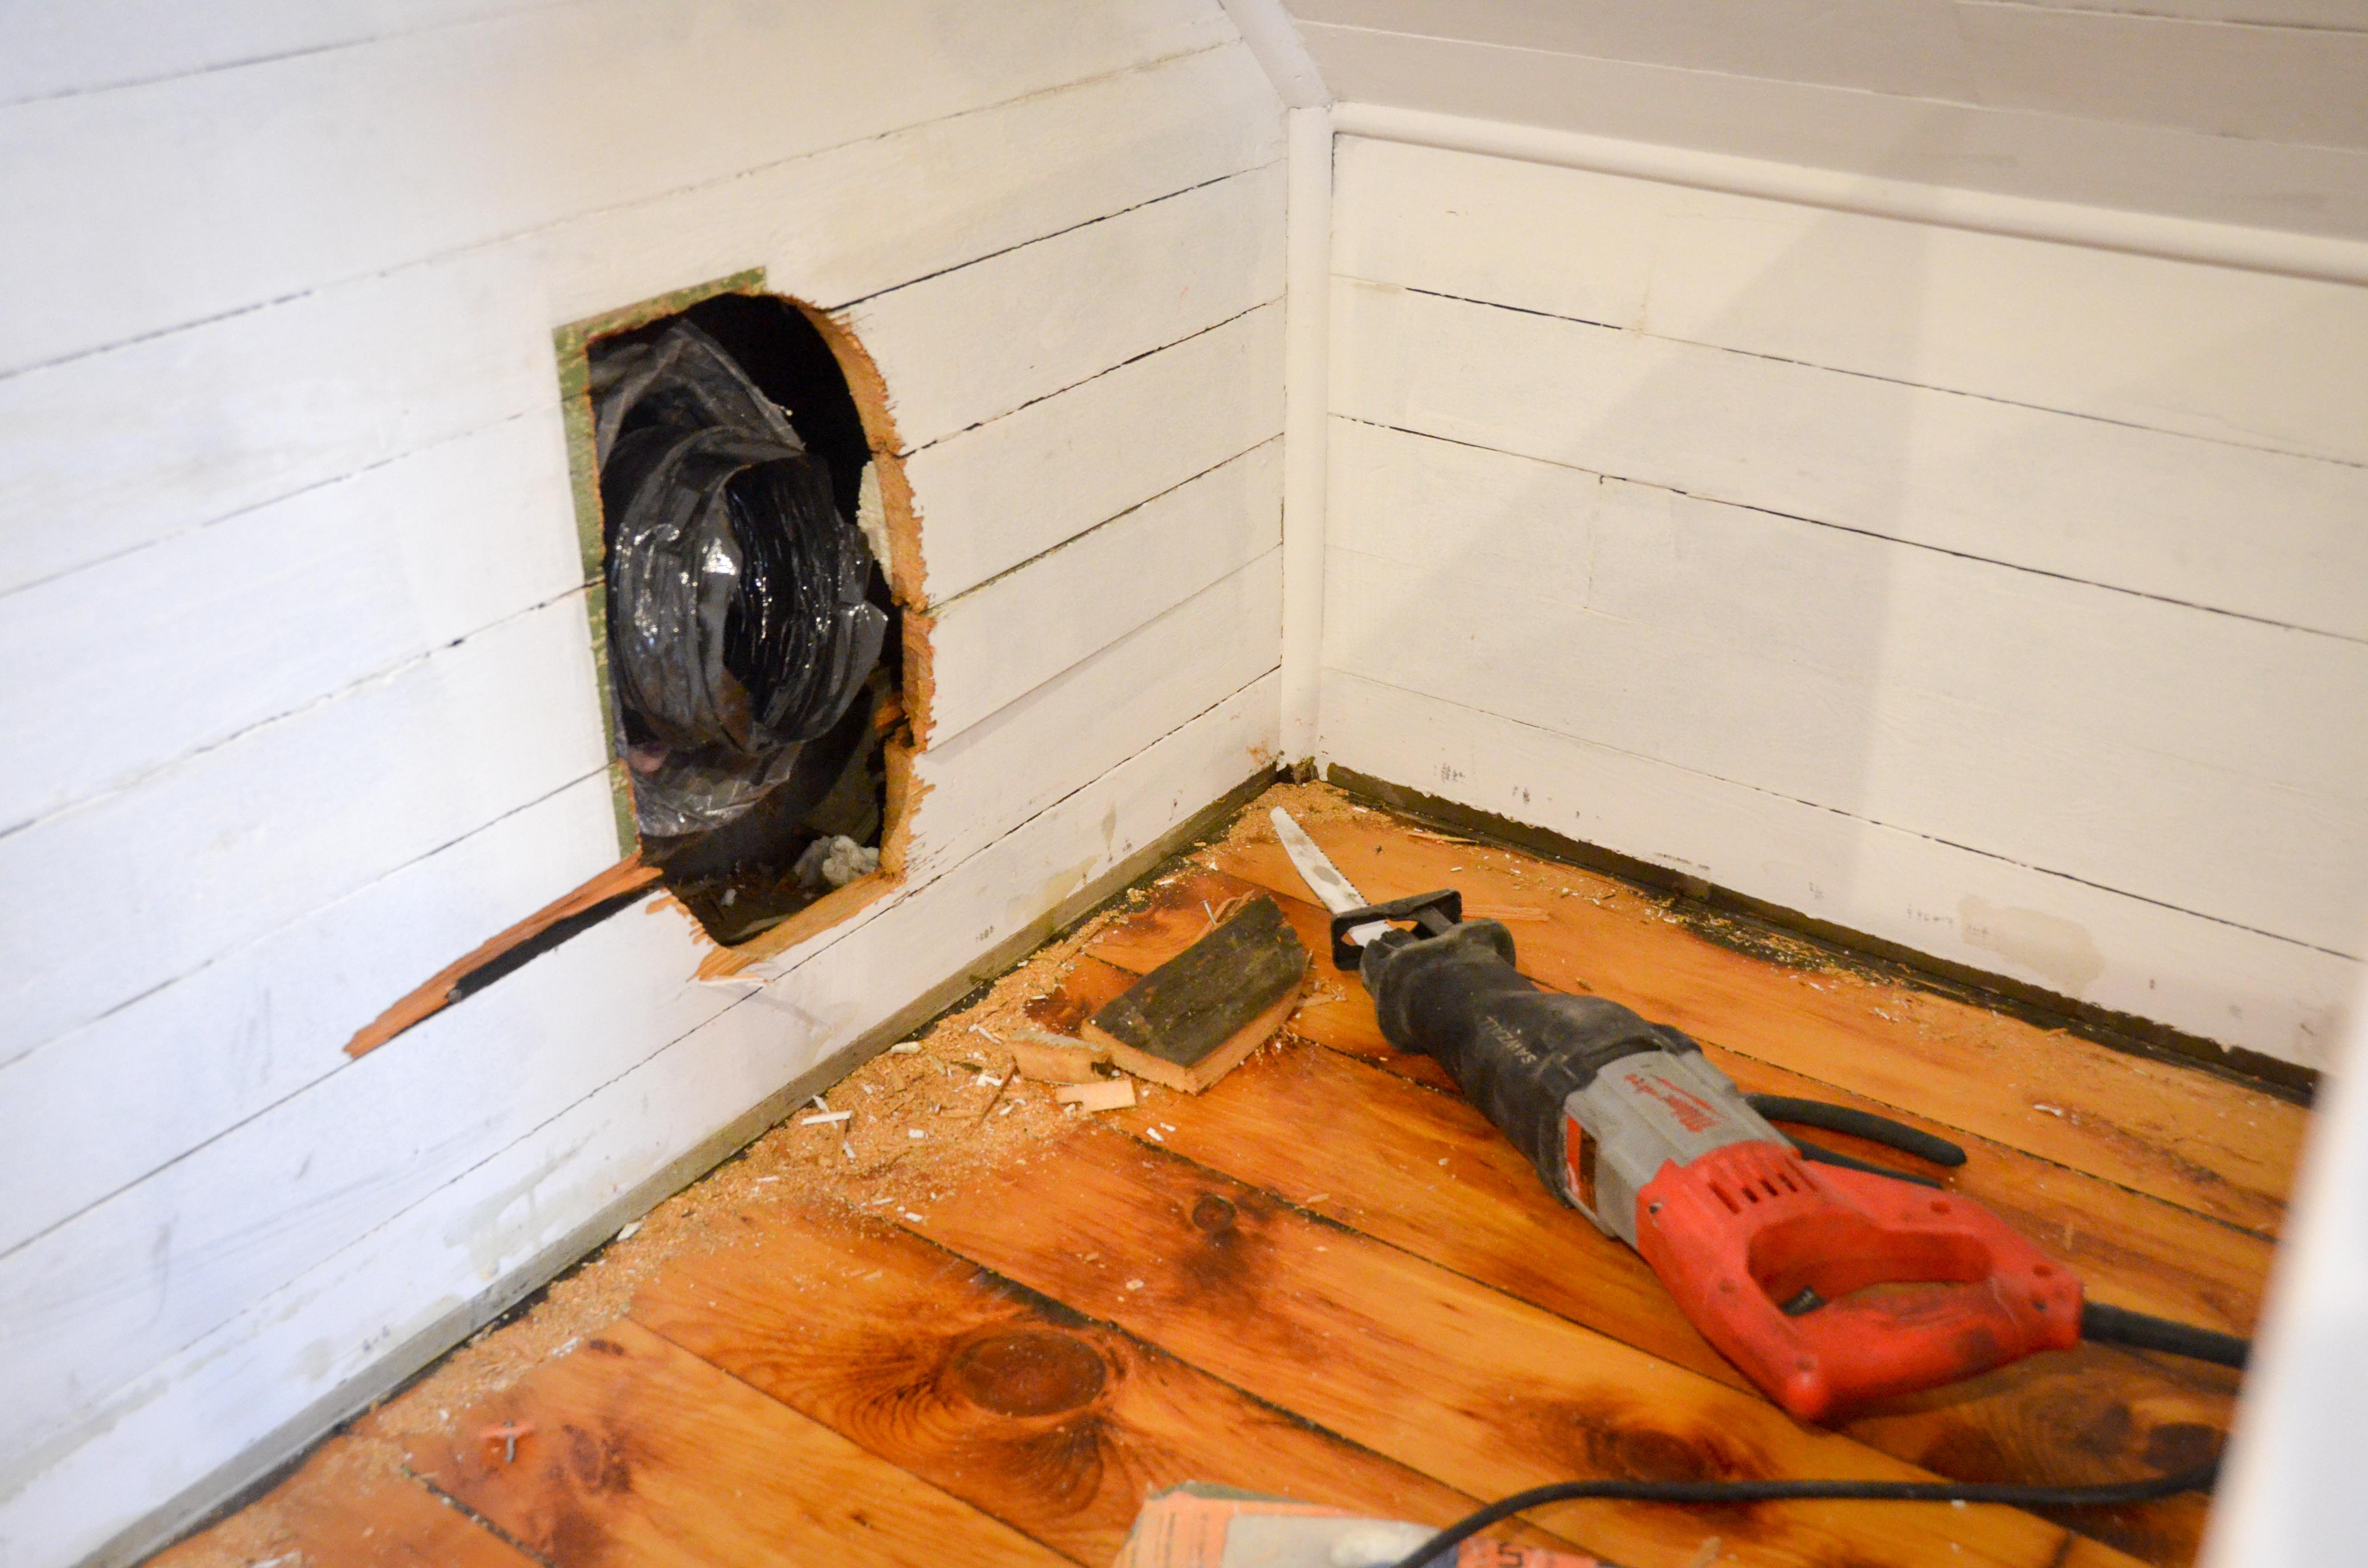
After removing even more of the siding, I was able to attach an elbow to the existing flexible duct and then add more flexible duct that could be compressed underneath the built-in. Maybe there was an easier or prettier way to do this, but no one will ever see this (except all of you) and the final result works well.
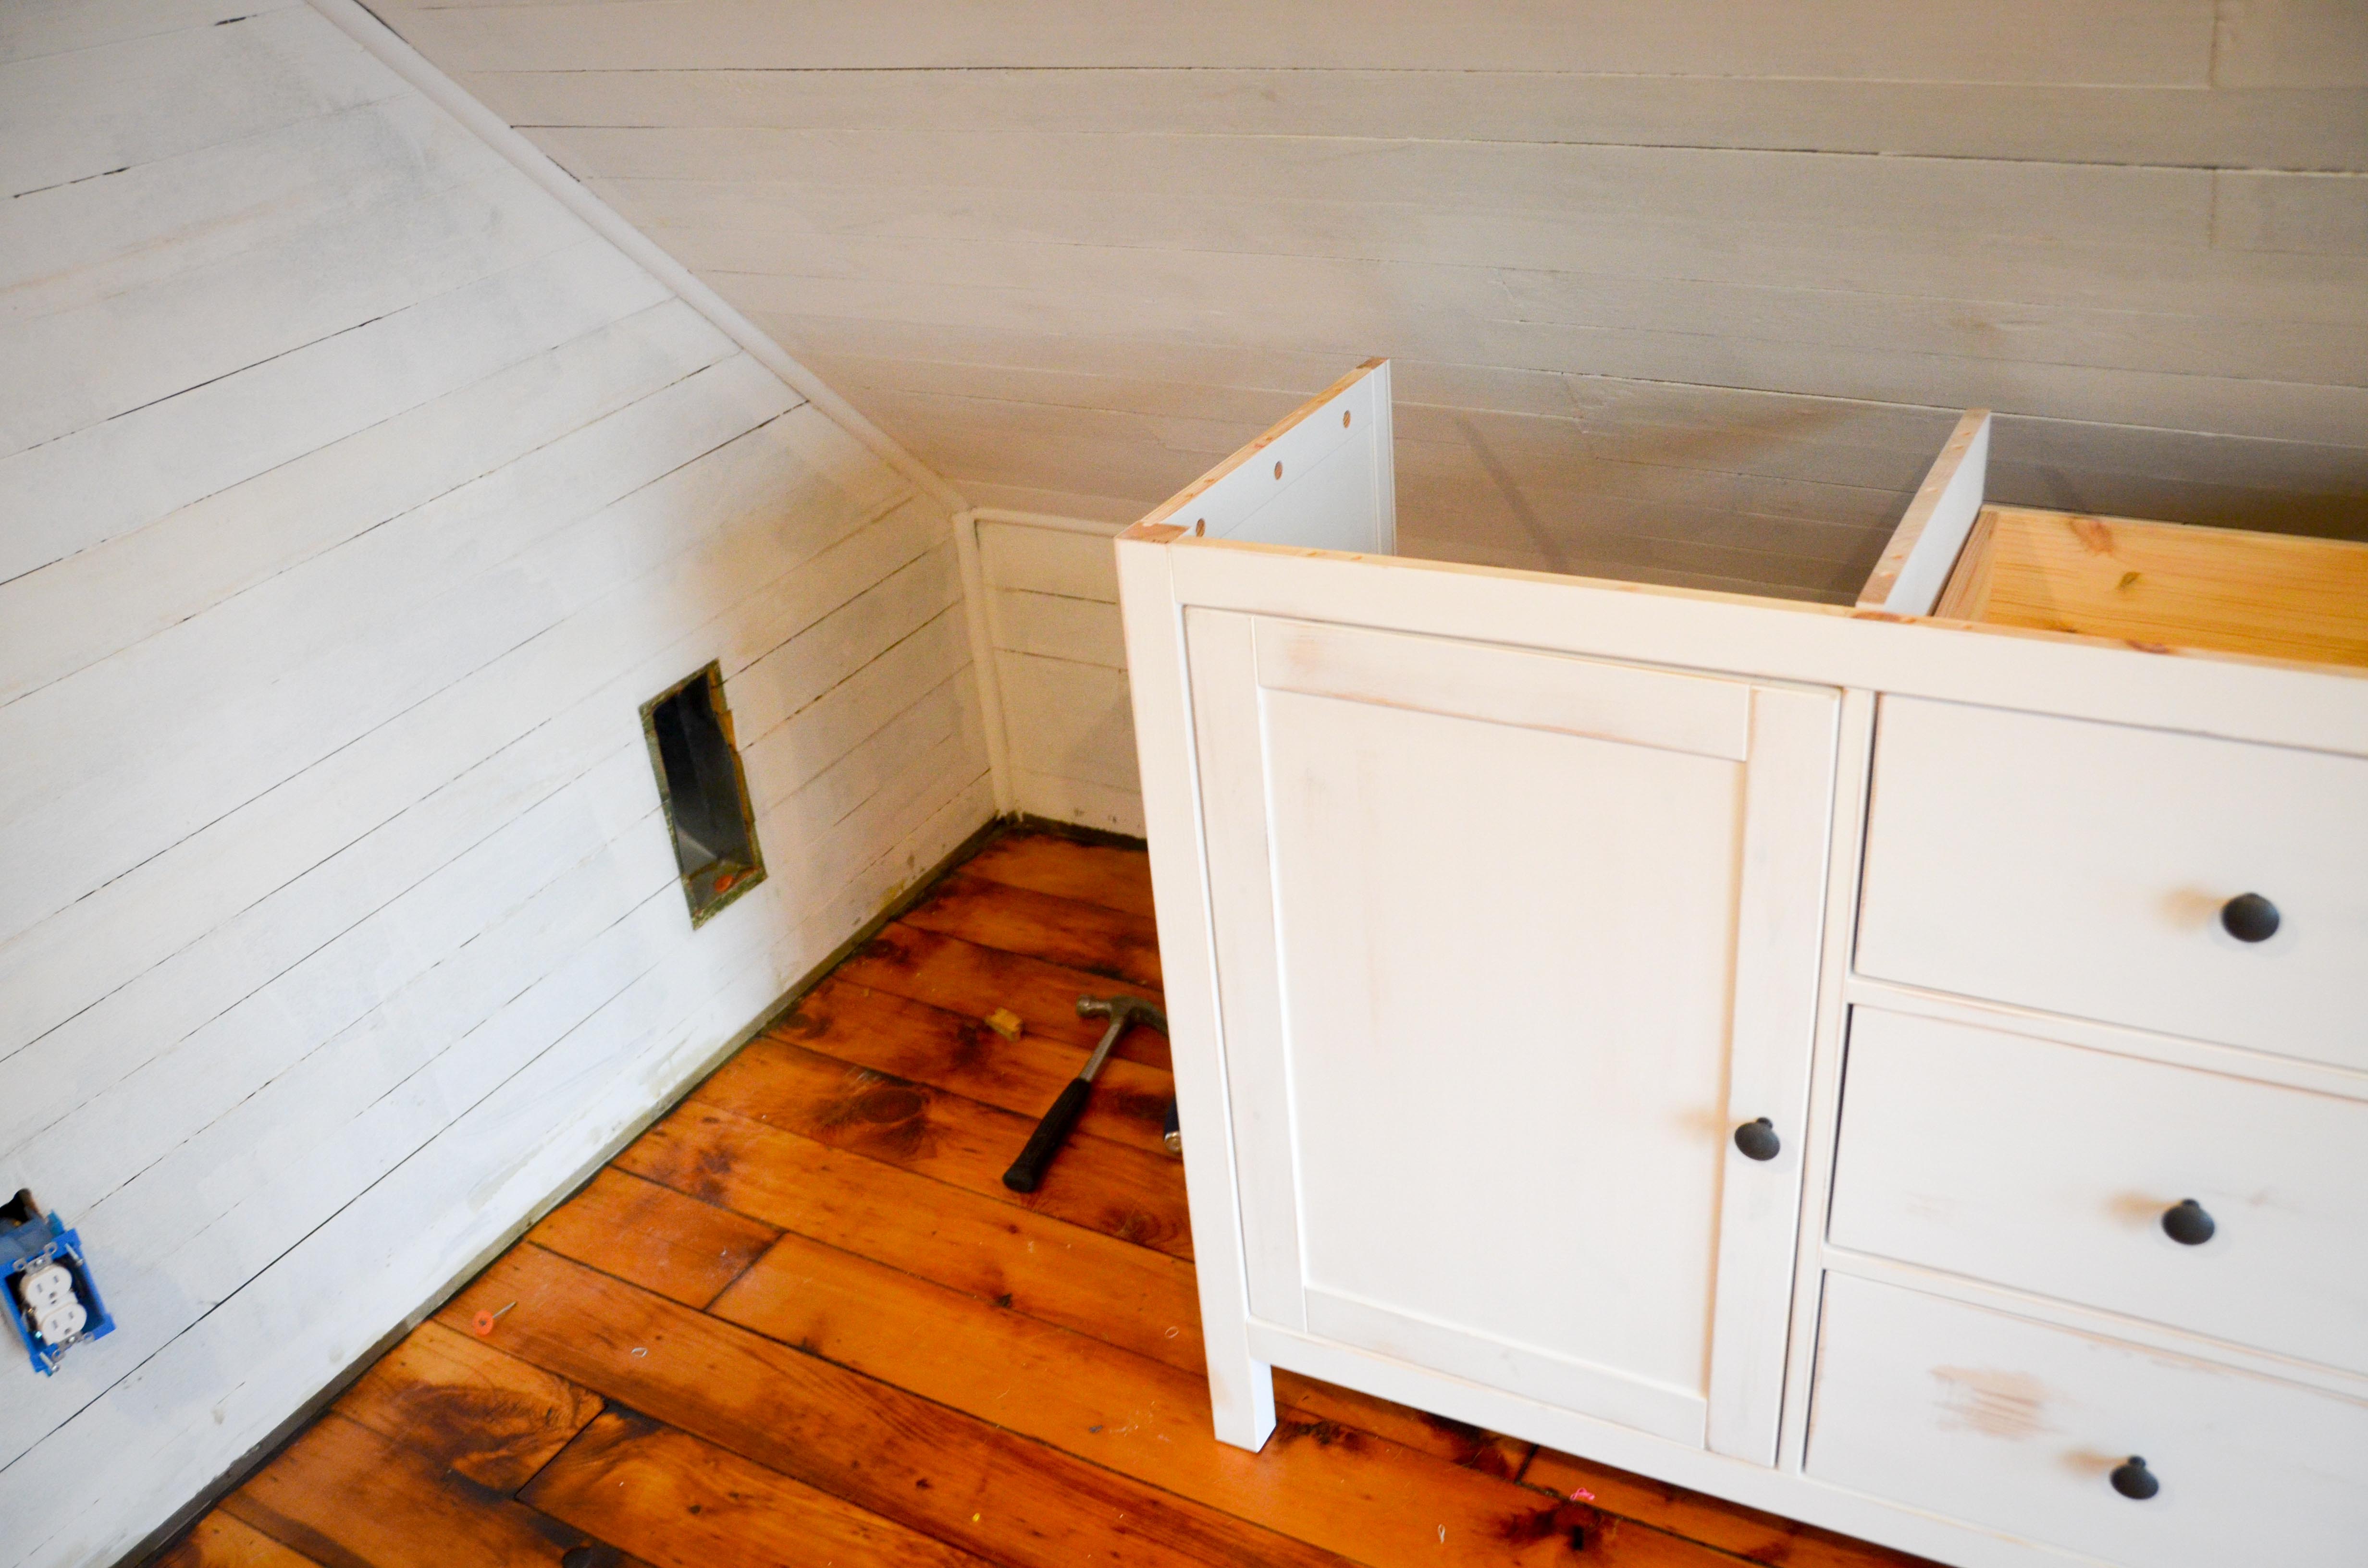
The next step was to move the dressers into place and begin thinking, and measuring, and thinking some more. I wanted them to look as built in as possible, so the first thing I needed to do was to trim off the overhang that would prevent the dressers from being flush to the wall. I also needed to trim the existing quarter round on the wall to allow the dresser top to fig snug in the corner

I also needed to trim off the opposite end of the dresser top so that I had room to insert another piece of wood and use the edge of the dresser for support. Once I was done with that, I moved the dressers into place and began to experiment with the height of the baseboard I was going to add.

After anchoring the dressers to the walls, I began the construction of the book shelf. My plan was to make the bookshelf look indistinguishable from the dressers. I wanted it to look like the bookshelf was included in the Hemnes series at IKEA.
I first added backing to the shelf opening and cut supports for the dresser top, shelves, and shelf faces.
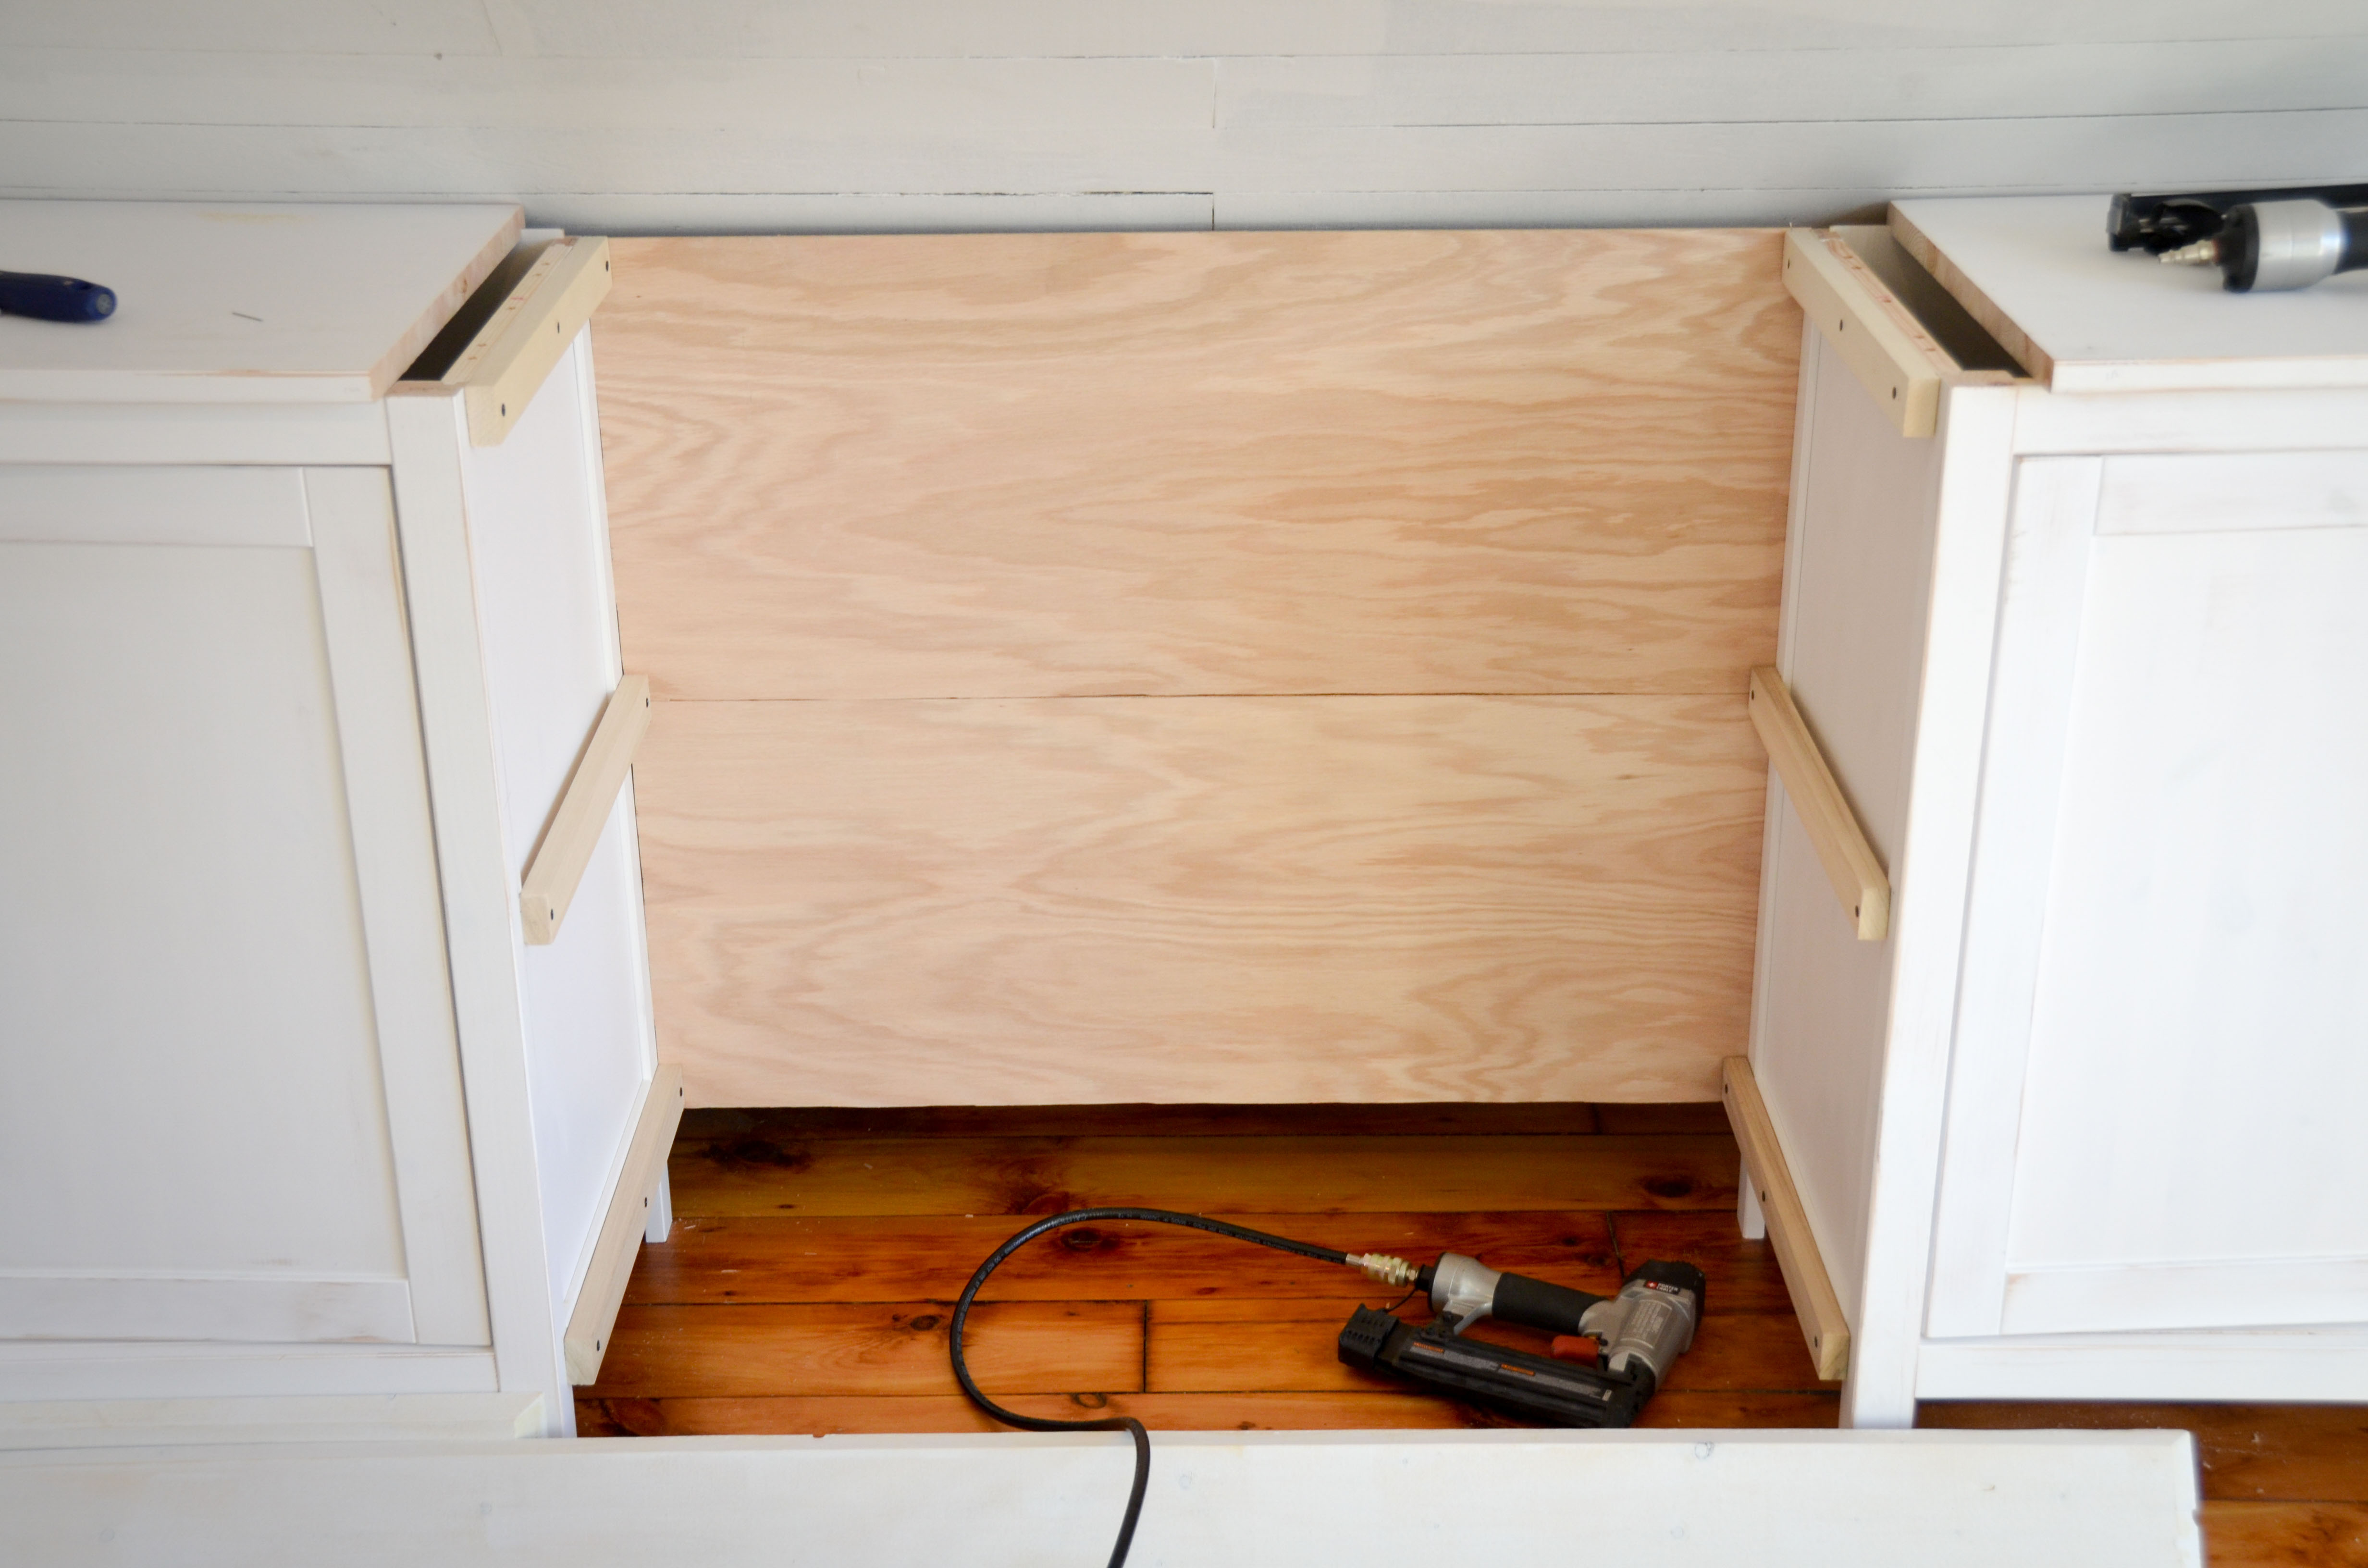
I cut the shelves and installed a lip on the front of each shelf to make it look like the exact same construction as the dressers.

Next, I added the dresser top and a final piece of trim just below it to mimic the Hemnes style. The final step of construction was to mill baseboards that would cover the legs of the dresser and help create that built-in look.
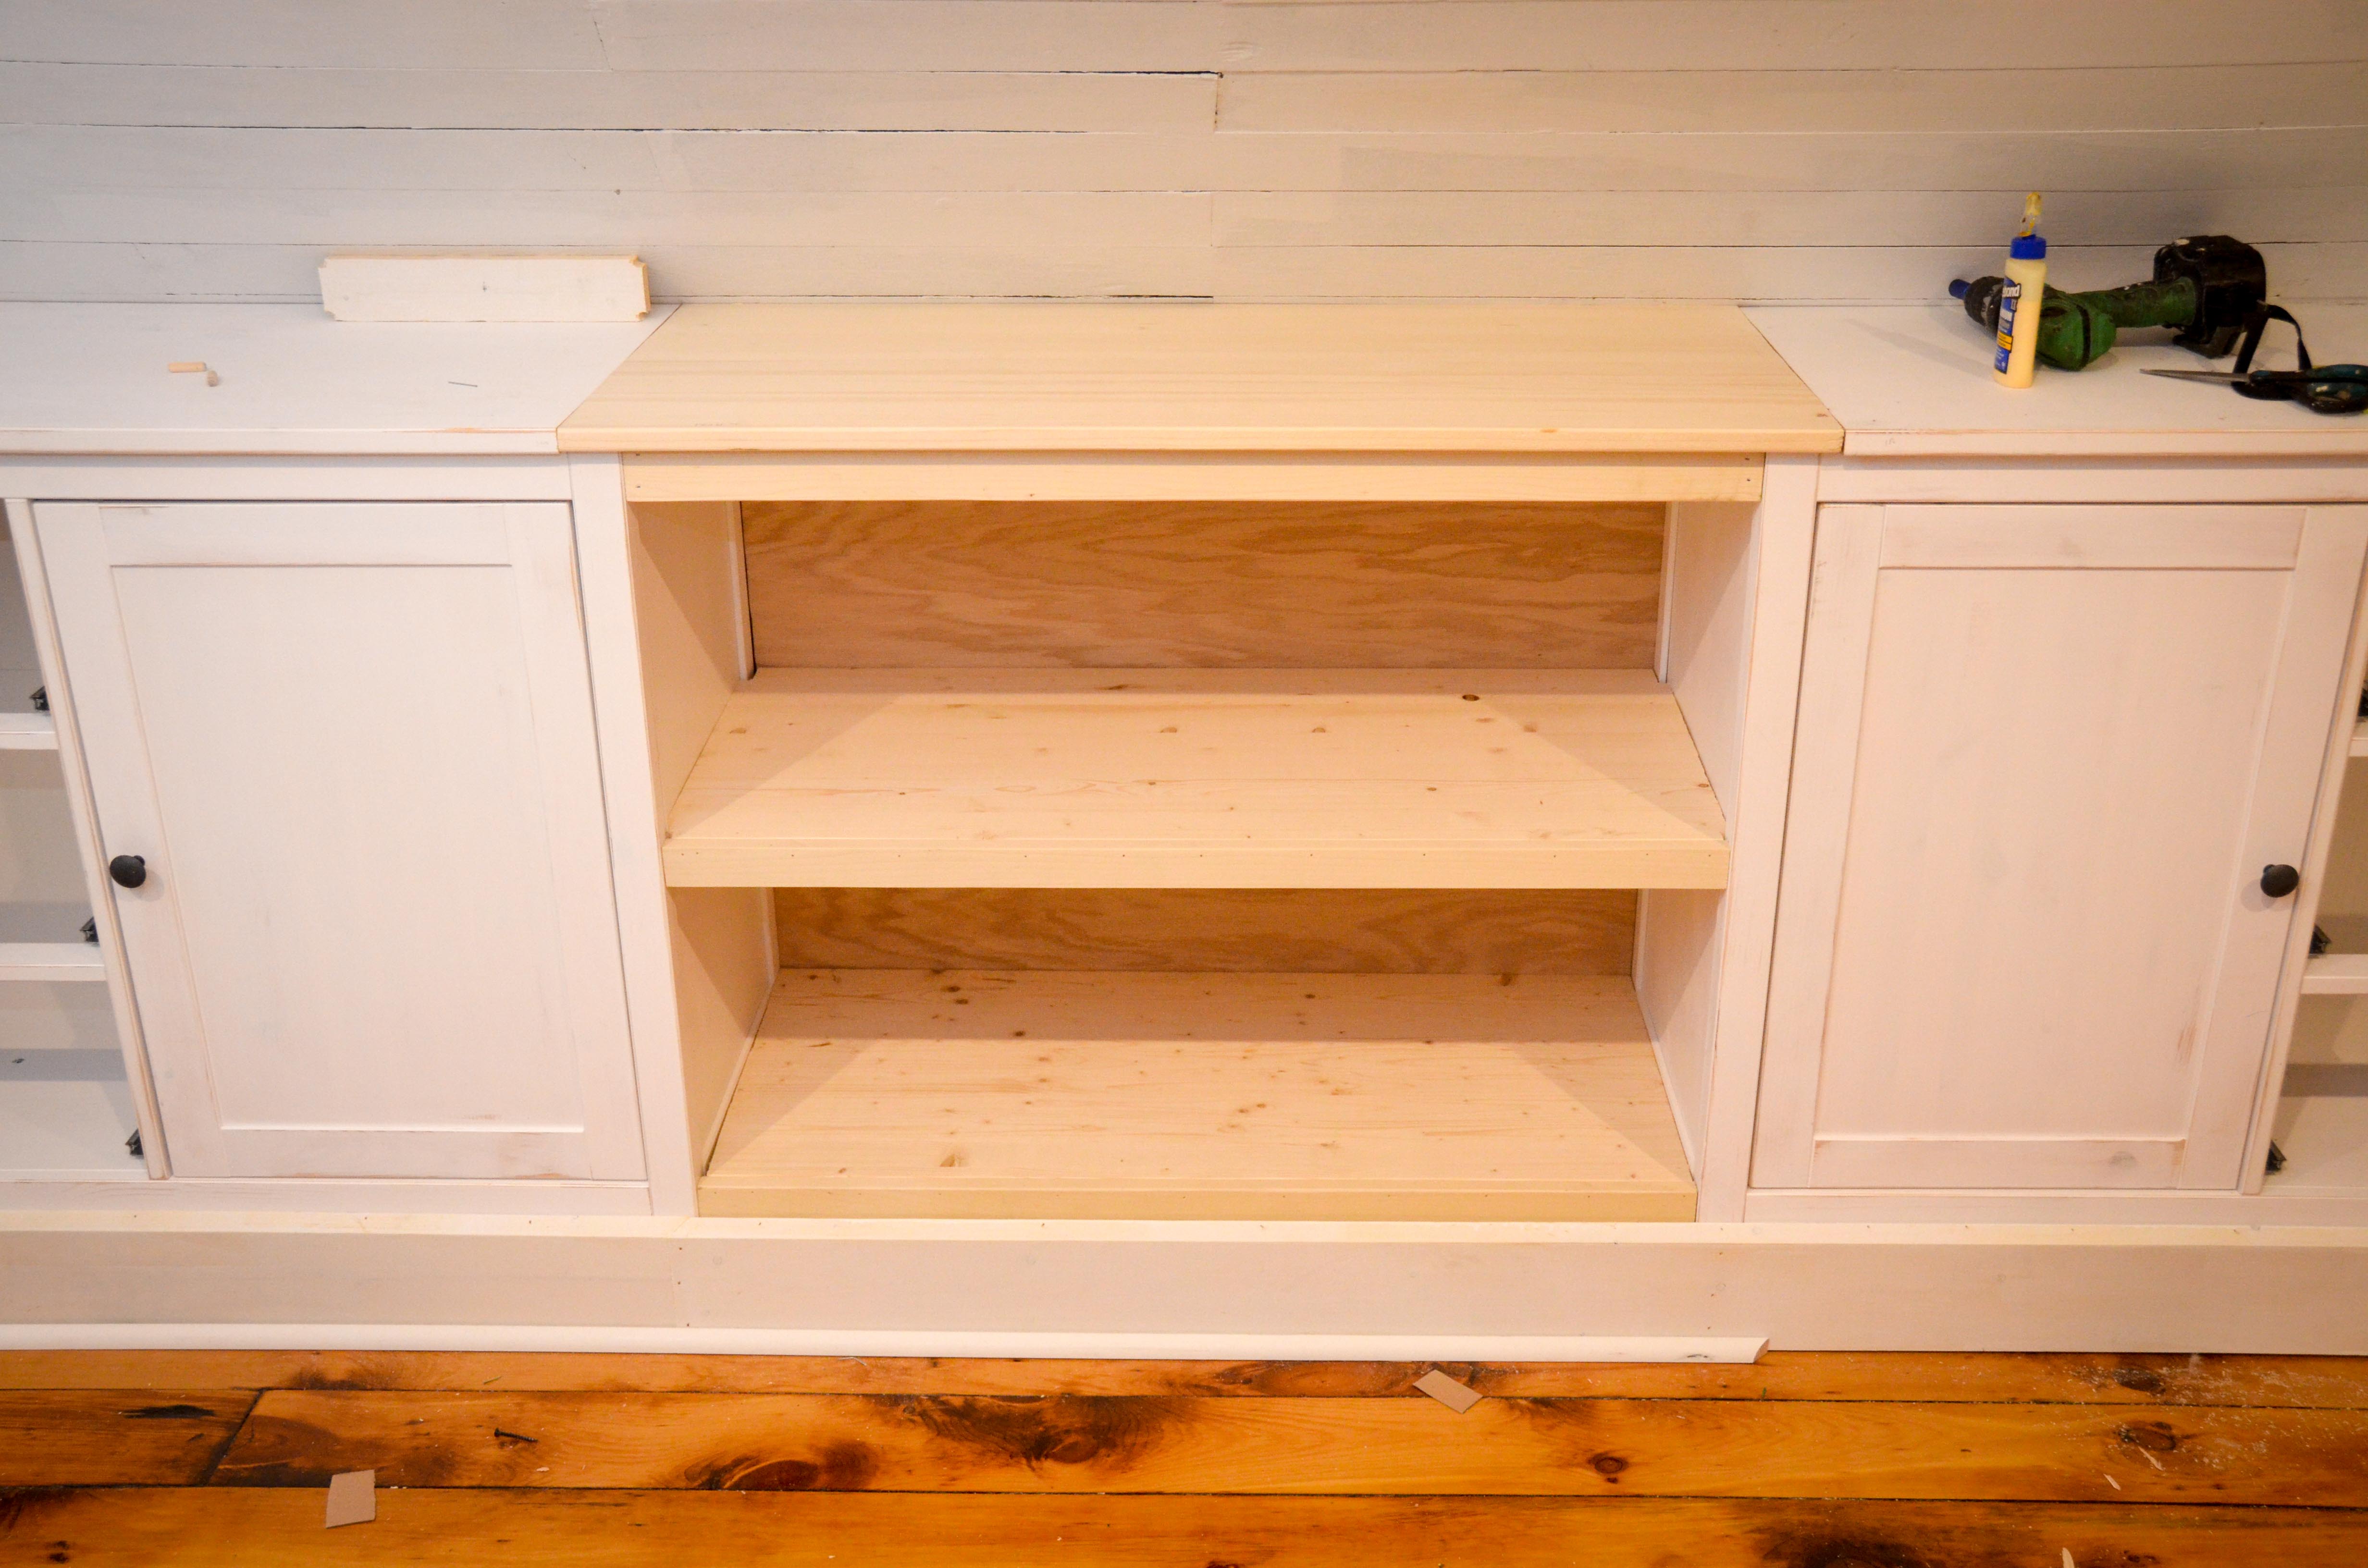
Before priming and painting, I needed to make the transition between the new dresser top piece and the original ones look more seamless. This was tricky because the original dresser tops were thicker. I chose to shim up the new counter top to match the existing height because the difference won’t be as noticeable underneath. Still, this process involved a lot of sanding and then experimenting with several layers of woodfiller to fill the gaps and also get rid of any perceived height differential.

Next up, lots and lots of priming and painting…
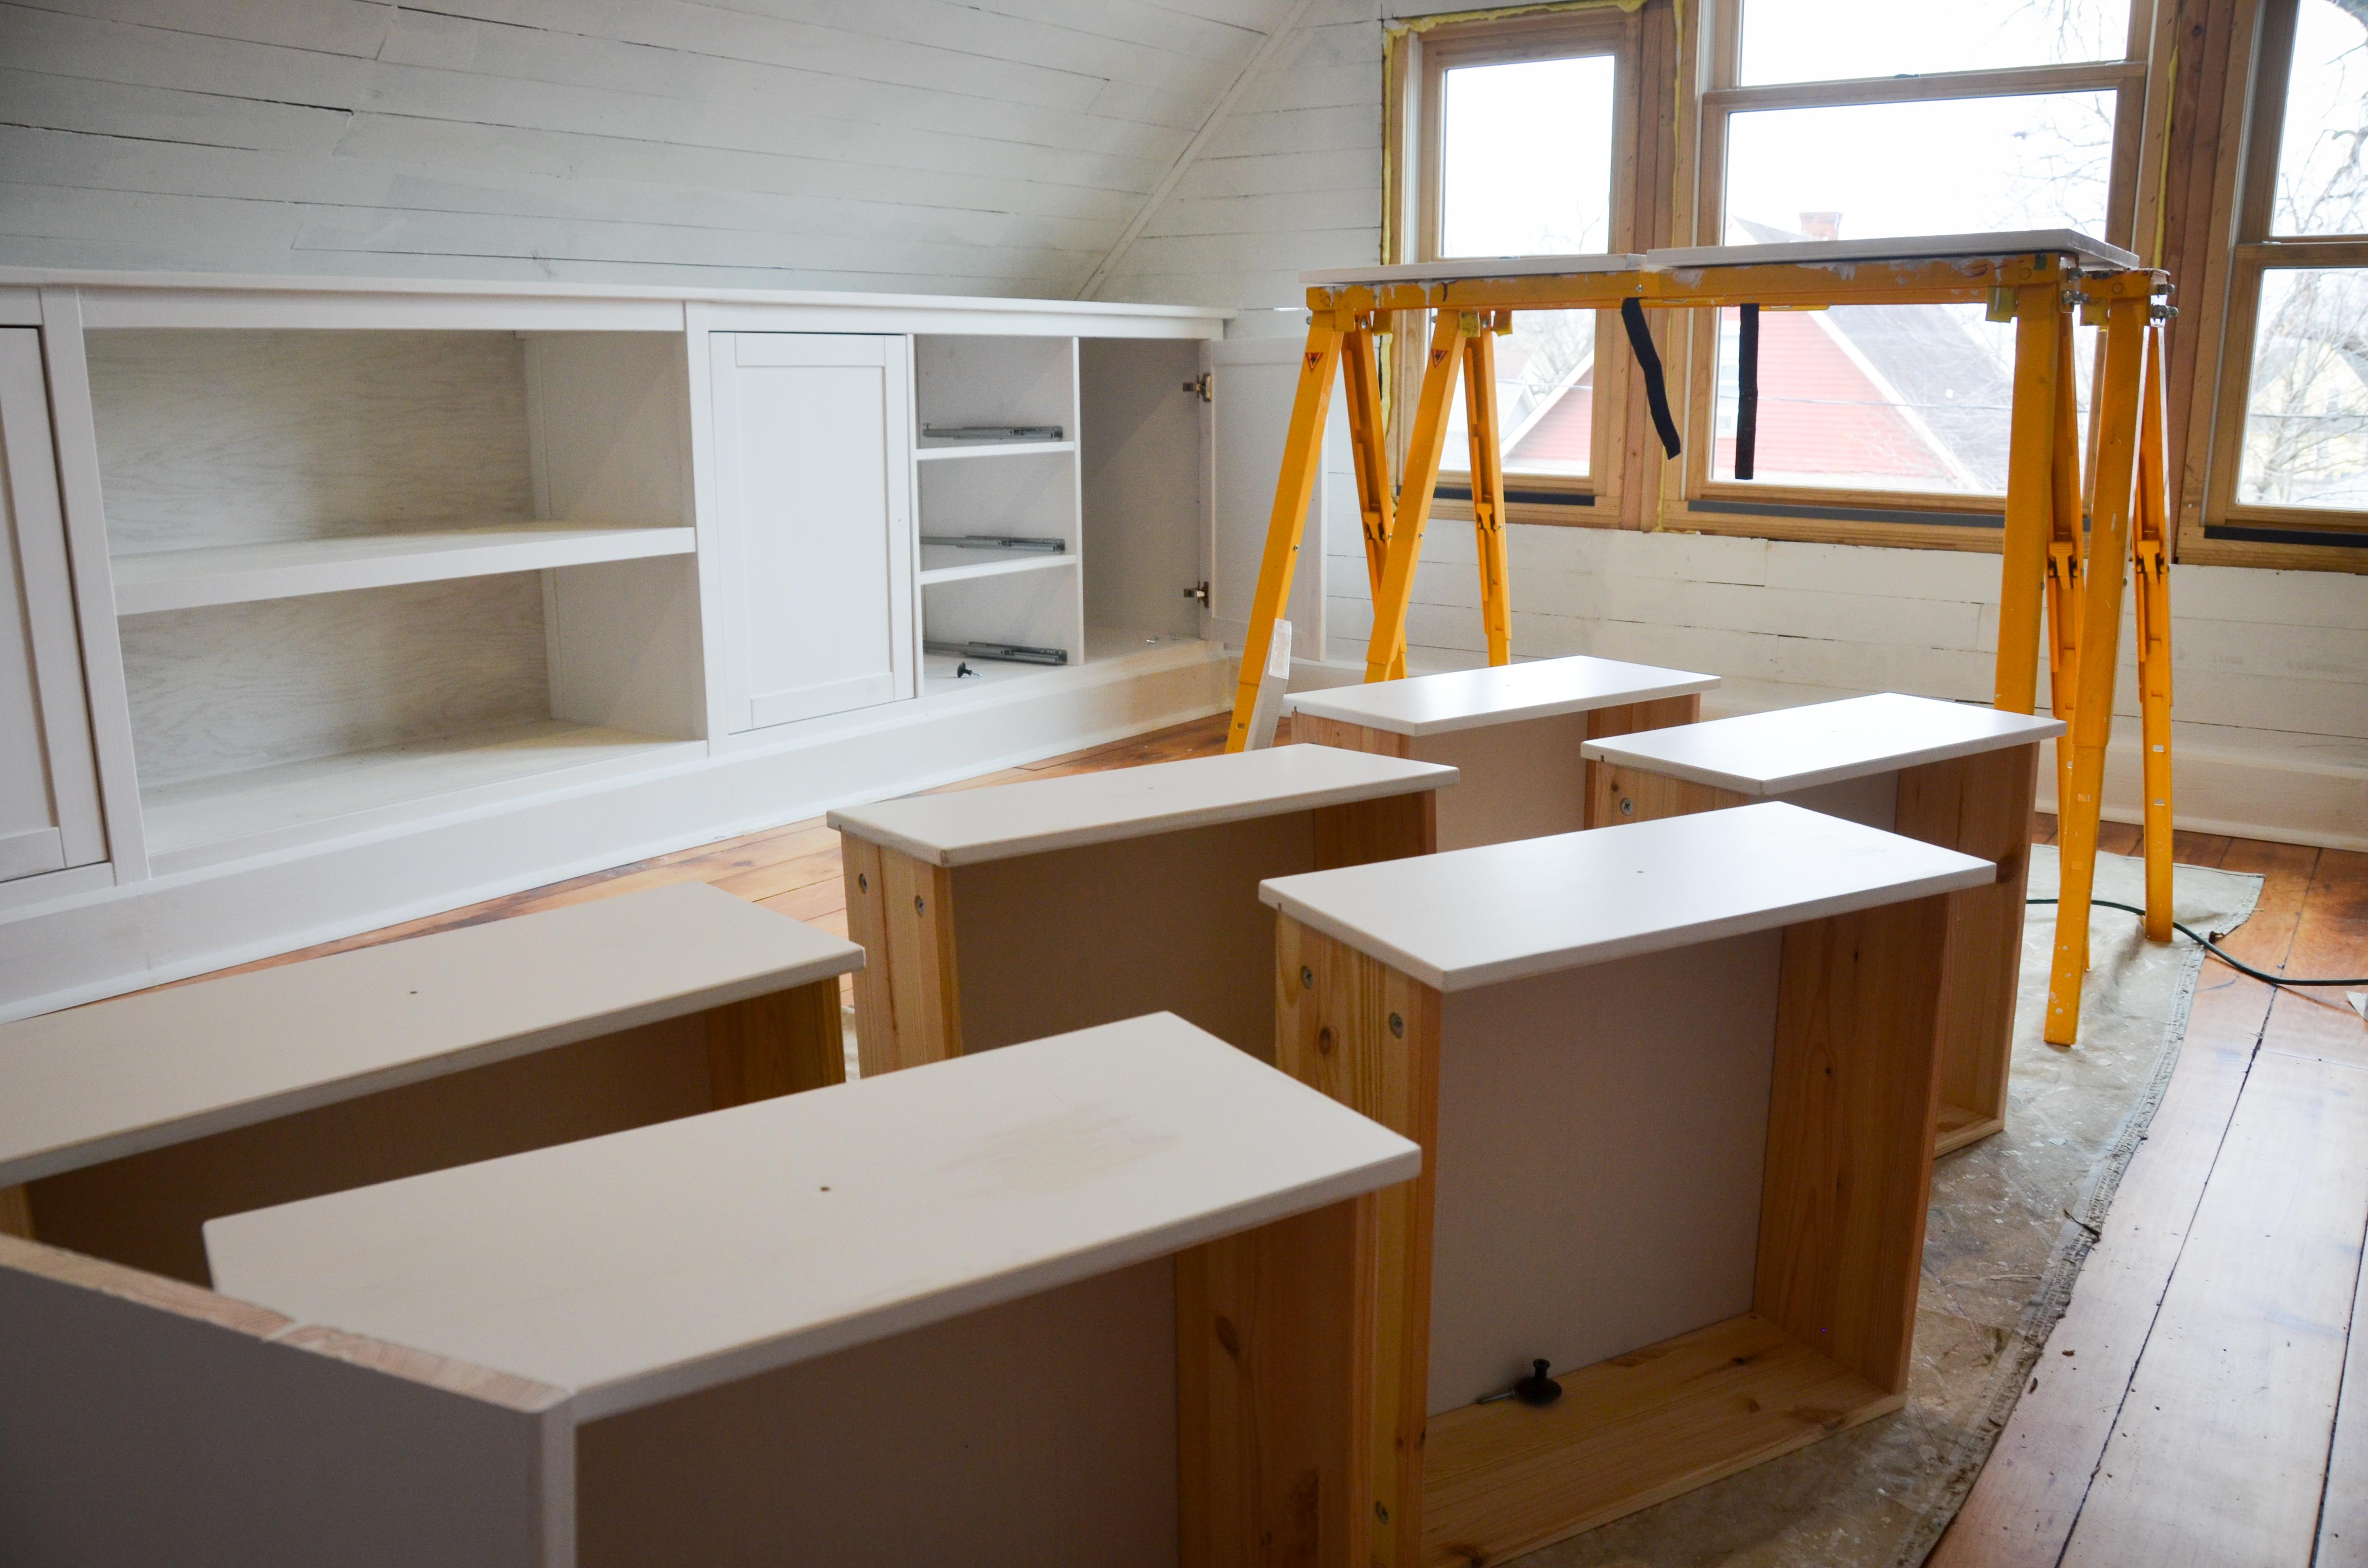
And now the big reveal!

The new shelves really blend right in with the original furniture.

Everything was sanded and painted to match the baseboards…

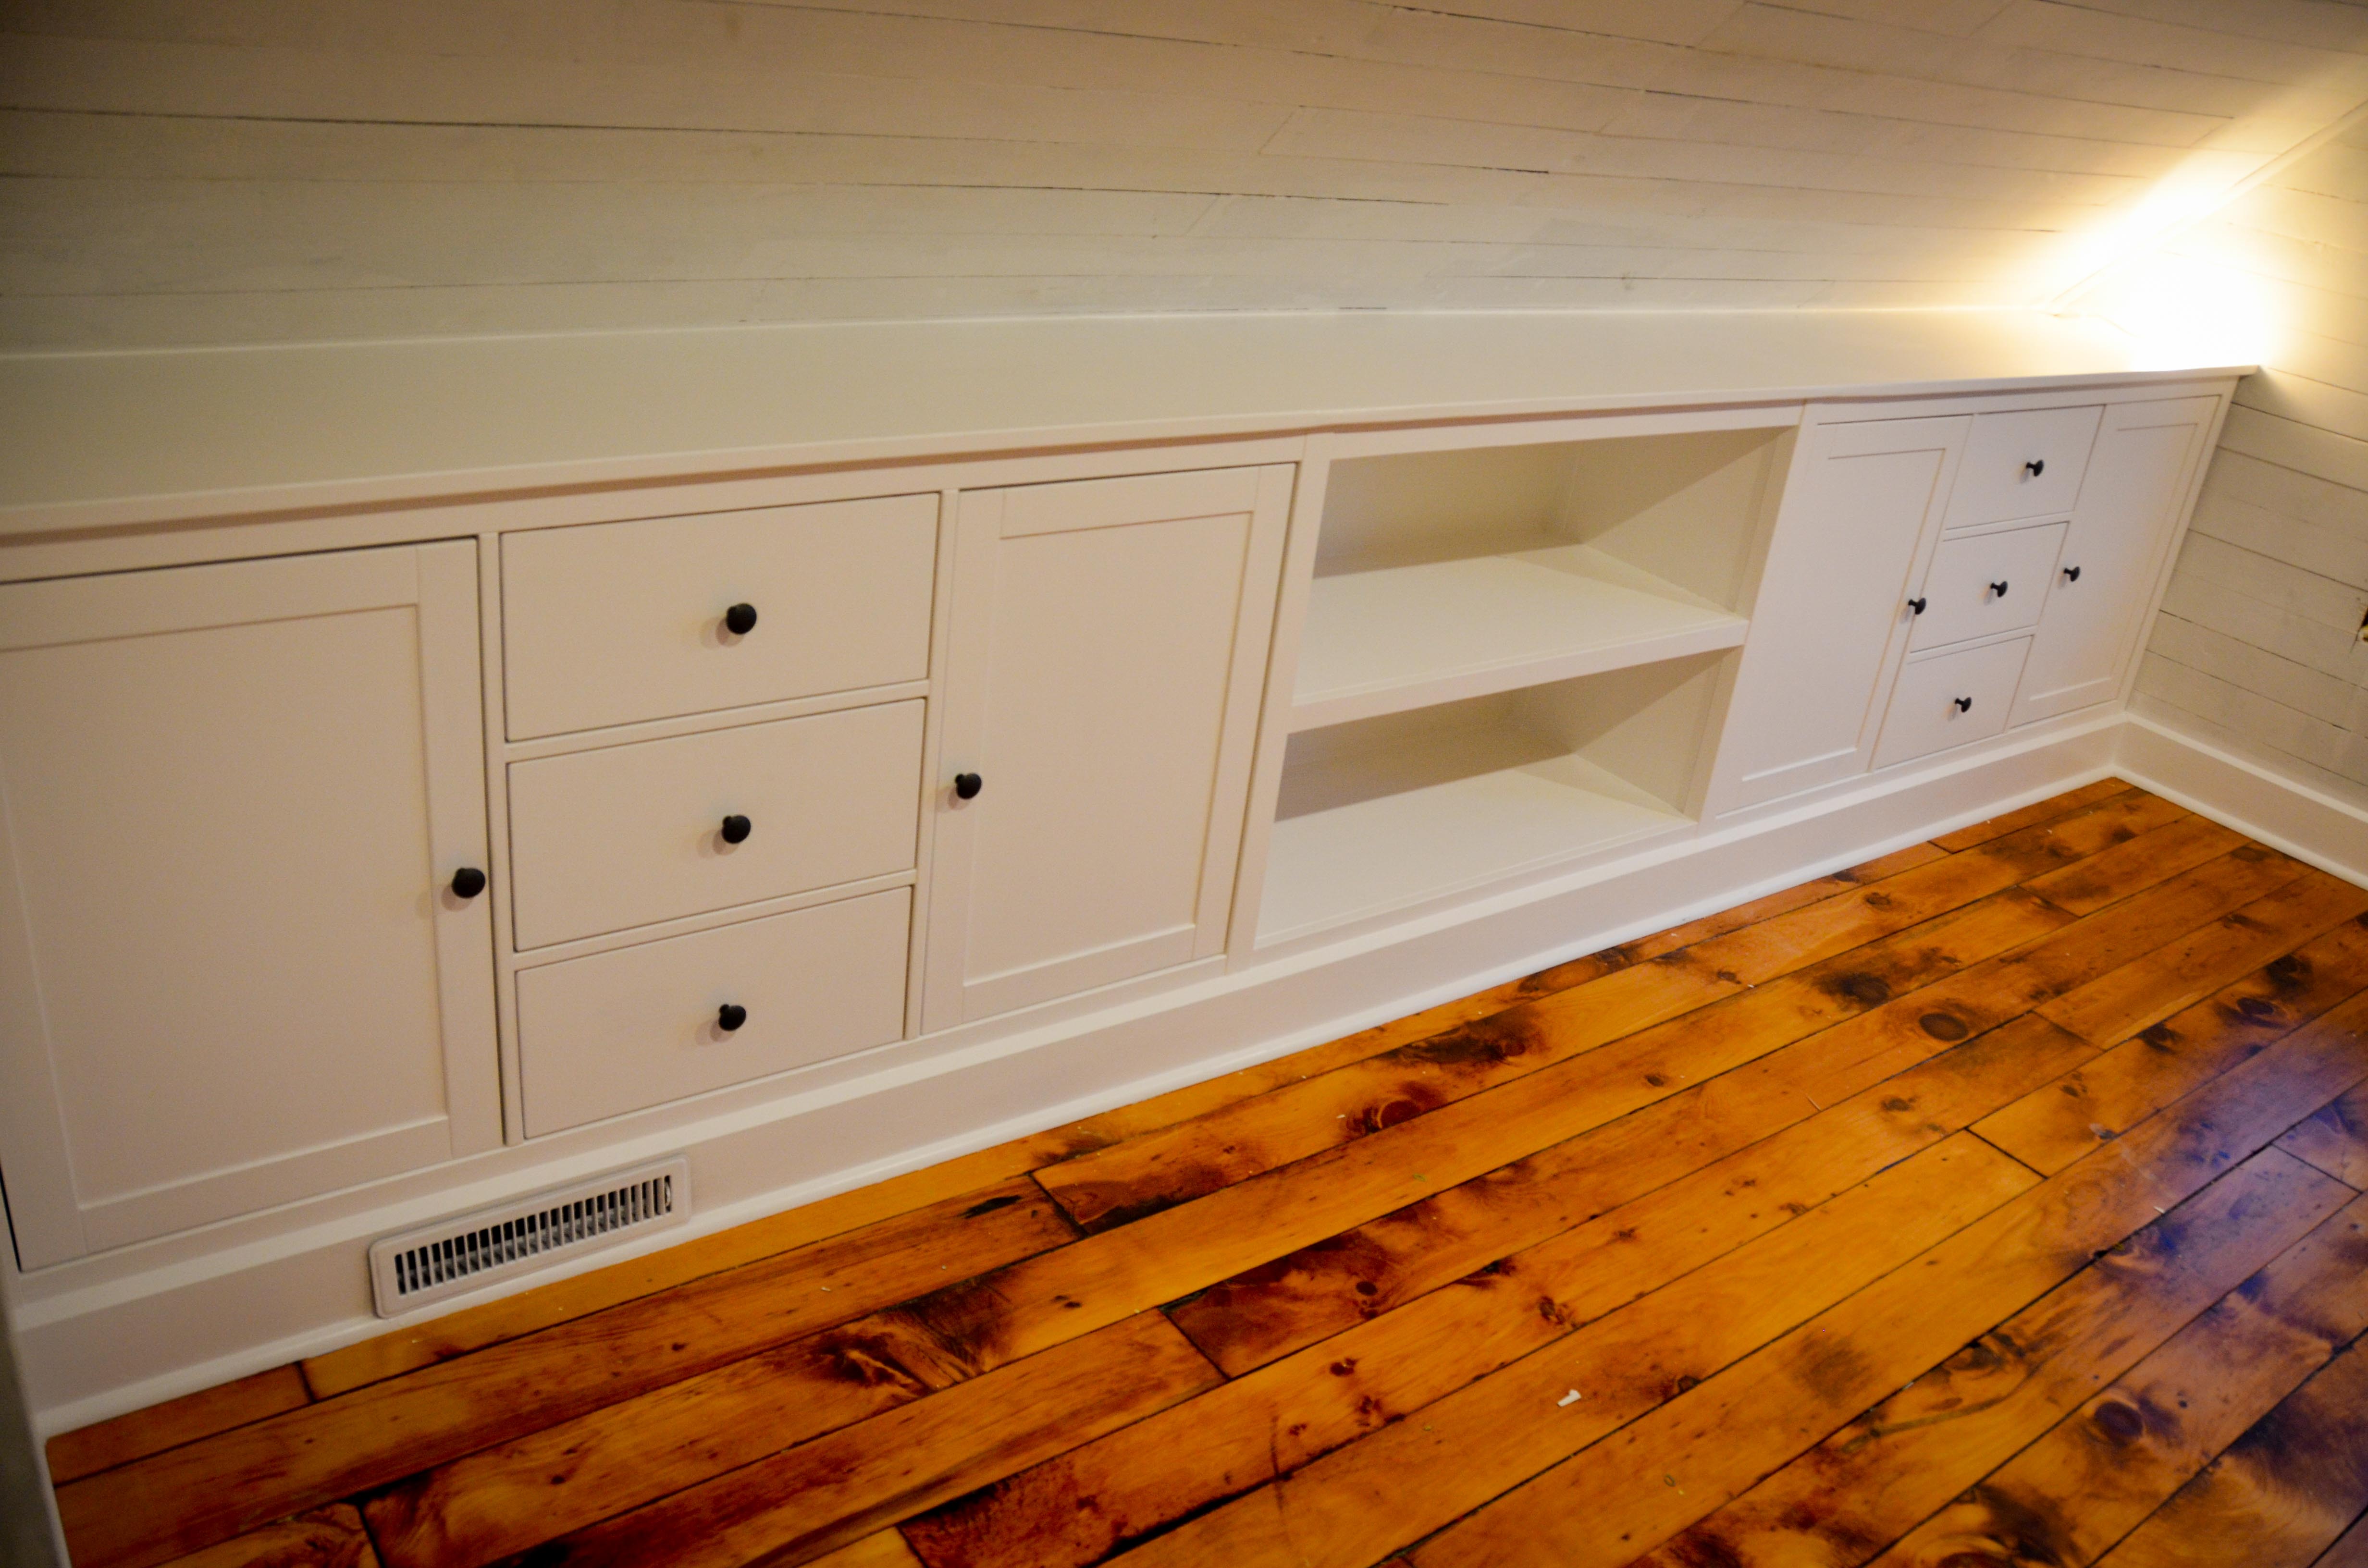
A few additional things to point out… First of all, notice the air vent in the picture above. It fits in pretty well! Also, notice the lighting in the corner? I cut a hole in the counter top so that we could easily access a new electrical outlet down below.
There is a lingering issue that you might have noticed in the pictures. The walls aren’t exactly flush with the sides of the cabinets. As you would expect in a house this old, the walls aren’t perfectly perpendicular to the floor. I toyed with the idea of adding a trim piece to hide the small gap, but for now I’m just leaving it alone. Adding something might call even more attention to it.
One late addition… I removed a portion of the back panel in one corner so that we could get behind the built-in just in case we ever needed to gain access to the electrical or duct work. An added benefit? This also creates a fun place for Lucy to hide.


Here is one last picture of Lucy showing off her new storage…

I don’t claim to be a carpenter, but it’s nice to use all the tools and knowledge I have gained over the past couple years to occasionally pretend that I am one. This was one of the more satisfying projects I have done on this house. I can sort of claim to have constructed this built-in, even if IKEA is responsible for 90% of it.

Oh, my word. This is perfect. Absolutely fantastic! What a fantastic job, you guys!
LikeLike
Good work Joe.
LikeLike
Hi, This looks amazing! I was wondering what tool did you use to cut the hemnes dresser top? I want to do something similar but I’m afraid it will look choppy. Did it cut pretty easily? Did you do anything to make the cut smoother? I’m also interested in cutting off the legs. Thanks so much!
LikeLike
Sorry it has taken so long to respond.
I’m pretty sure I just used a jig saw. I knew I was going to have to caulk and paint it anyway. I did cut easily, not choppy at all. A circular saw could certainly work too as long as you didn’t need to make many small adjustments. After cutting it I just sanded it.
Good luck!
LikeLike