So much has happened since our last post that I had to go back and reread it just to figure out where I left off. On the 5th day of sanding we were finally done with the drum sander and edger, finishing up with the 80 grit. On day 6, the Saturday of my last day of summer break, I rented an orbital sander to do the final “buffing” pass. The orbital sander is supposed to provide one consistent look and, since it can get much closer to the wall, get rid of any remaining lines from the edger. This type of sander is the one that is recommended (instead of the drum sander) by a lot of websites for DIYers because it is much less aggressive and much less likely to damage the floor. Of course, this also means it doesn’t actually do much. This sander would have run screaming just at the sight of our floors in their original condition. The orbital sander has hundreds of little rubber stubs on the bottom of it that help hold a thick pad and then a 12×18″ sheet of sandpaper.

Before picking up the sander I had pleasant images of myself effortlessly gliding the sander on the surface of our fresh, clean floors and erasing any little mistakes I might have created. My pleasant thoughts evaporated as soon as I tried to lift this beast out of the trunk of my Honda Civic. It must have weighed 125 pounds, even heavier than the drum sander. I barely managed to get it up the stairs, but eventually got everything situated and fired it up. Much to my surprise it pulled immediately to the left, and then kept pulling to the left until I found myself going in a complete circle. There was nothing effortless about this at all. After 5 or 10 minutes of this I started to have another problem – sometimes the sander wouldn’t move. It was almost like the sandpaper just stuck to the floor. I could give it a good shove, but then it would happen again a minute later. I tried flipping the pad over, but that only helped for another minute… then it would get stuck again. I was given three pads for the whole house, so I didn’t think I would need to change it after just one room, but I tried a new pad and it was immediately better. Until that one had the same issue. I went through the 3rd pad and I was only done with three rooms.
Frustrated, I went back to the rental place, showed them one of the pads, and said I needed more. They suggested that the black rubber spikes on the bottom of my sander might be worn down and therefore not holding the pad tight enough, so I drove back to the house, picked up the sander, drove back to the rental place, loaded another sander into the car, drove back to the house, unloaded the 125 pound beast again, and got back to work on the first floor. It worked much better this time and I was able to do the first floor pretty quickly.
Instead of being excited that I was done with sanding, I was actually a little concerned. Before using the orbital sander the floors looked crisp, the grain of the wood was clear, and the details really popped. Afterwards, everything looked a little blurry. Like looking at a regular TV after an HD TV. I brought this up at the rental place and they seemed surprised, but did concede that maybe the old pine is soft enough that the orbital might create that fuzzy effect that was not present after the passes with the drum sander. After more talk, one guy did recommend using a sanding screen over the bare wood. I briefly considered taking the sander back and doing everything again with the 120 grit sanding screen, but I was just too tired at that point.
On Day 7 we had originally planned to start applying the polyurethane, but I decided I DID want to go back over the floors with the sanding screen and we also still needed to stain the new pine that we used as repair boards in Aiden’s room and the master bedroom. We also briefly considered staining the kitchen floor, because it just doesn’t look good right now and it will not have the same big color change that the pine will after we add the poly. In the end, we decided not stain the kitchen because I’m not sure it would have looked any better afterwards and there is a distinct possibility it would have looked worse.
It is at this point where my memory becomes a little blurry and I really start to loose track of days. My job has started back up again at school and the 12 hour rehab days are now done. Also, my mind can’t just be on the house all day every day. This is scary because we still have so much more to do. Also, to make matters worse, we have had some major rain in Indiana this month and last week we had a big leak in our kitchen roof.
This is so frustrating because we have had absolutely zero leaks for the past year, and of course, now that we have drywall and a fresh coat of primer, we have a leak. Upon closer inspection of the rubber roof on top of the kitchen I found a sizable rip.

On the bright side, at least this didn’t happen when we had a fresh coat of polyurethane on the floor! We called our roofer and we are now in the process of getting this fixed.
On the 8th day of floor work I used the orbital sander again with the 120 grit screen. It did look a little better this time, or maybe I just came to terms with the fact that this was the best the floors were going to get. I had officially become neurotic about the floors. This was bound to happen – I had been doing nothing but stare at them everyday for a week. It was time to move on and let it go.

On to the next phase…
Except, before really moving on we had to thoroughly vacuum the whole house and THEN get on our hands and knees and wipe down every square inch of the floors with mineral spirits to clean up all the fine dust.
Now, on to the next phase for real…
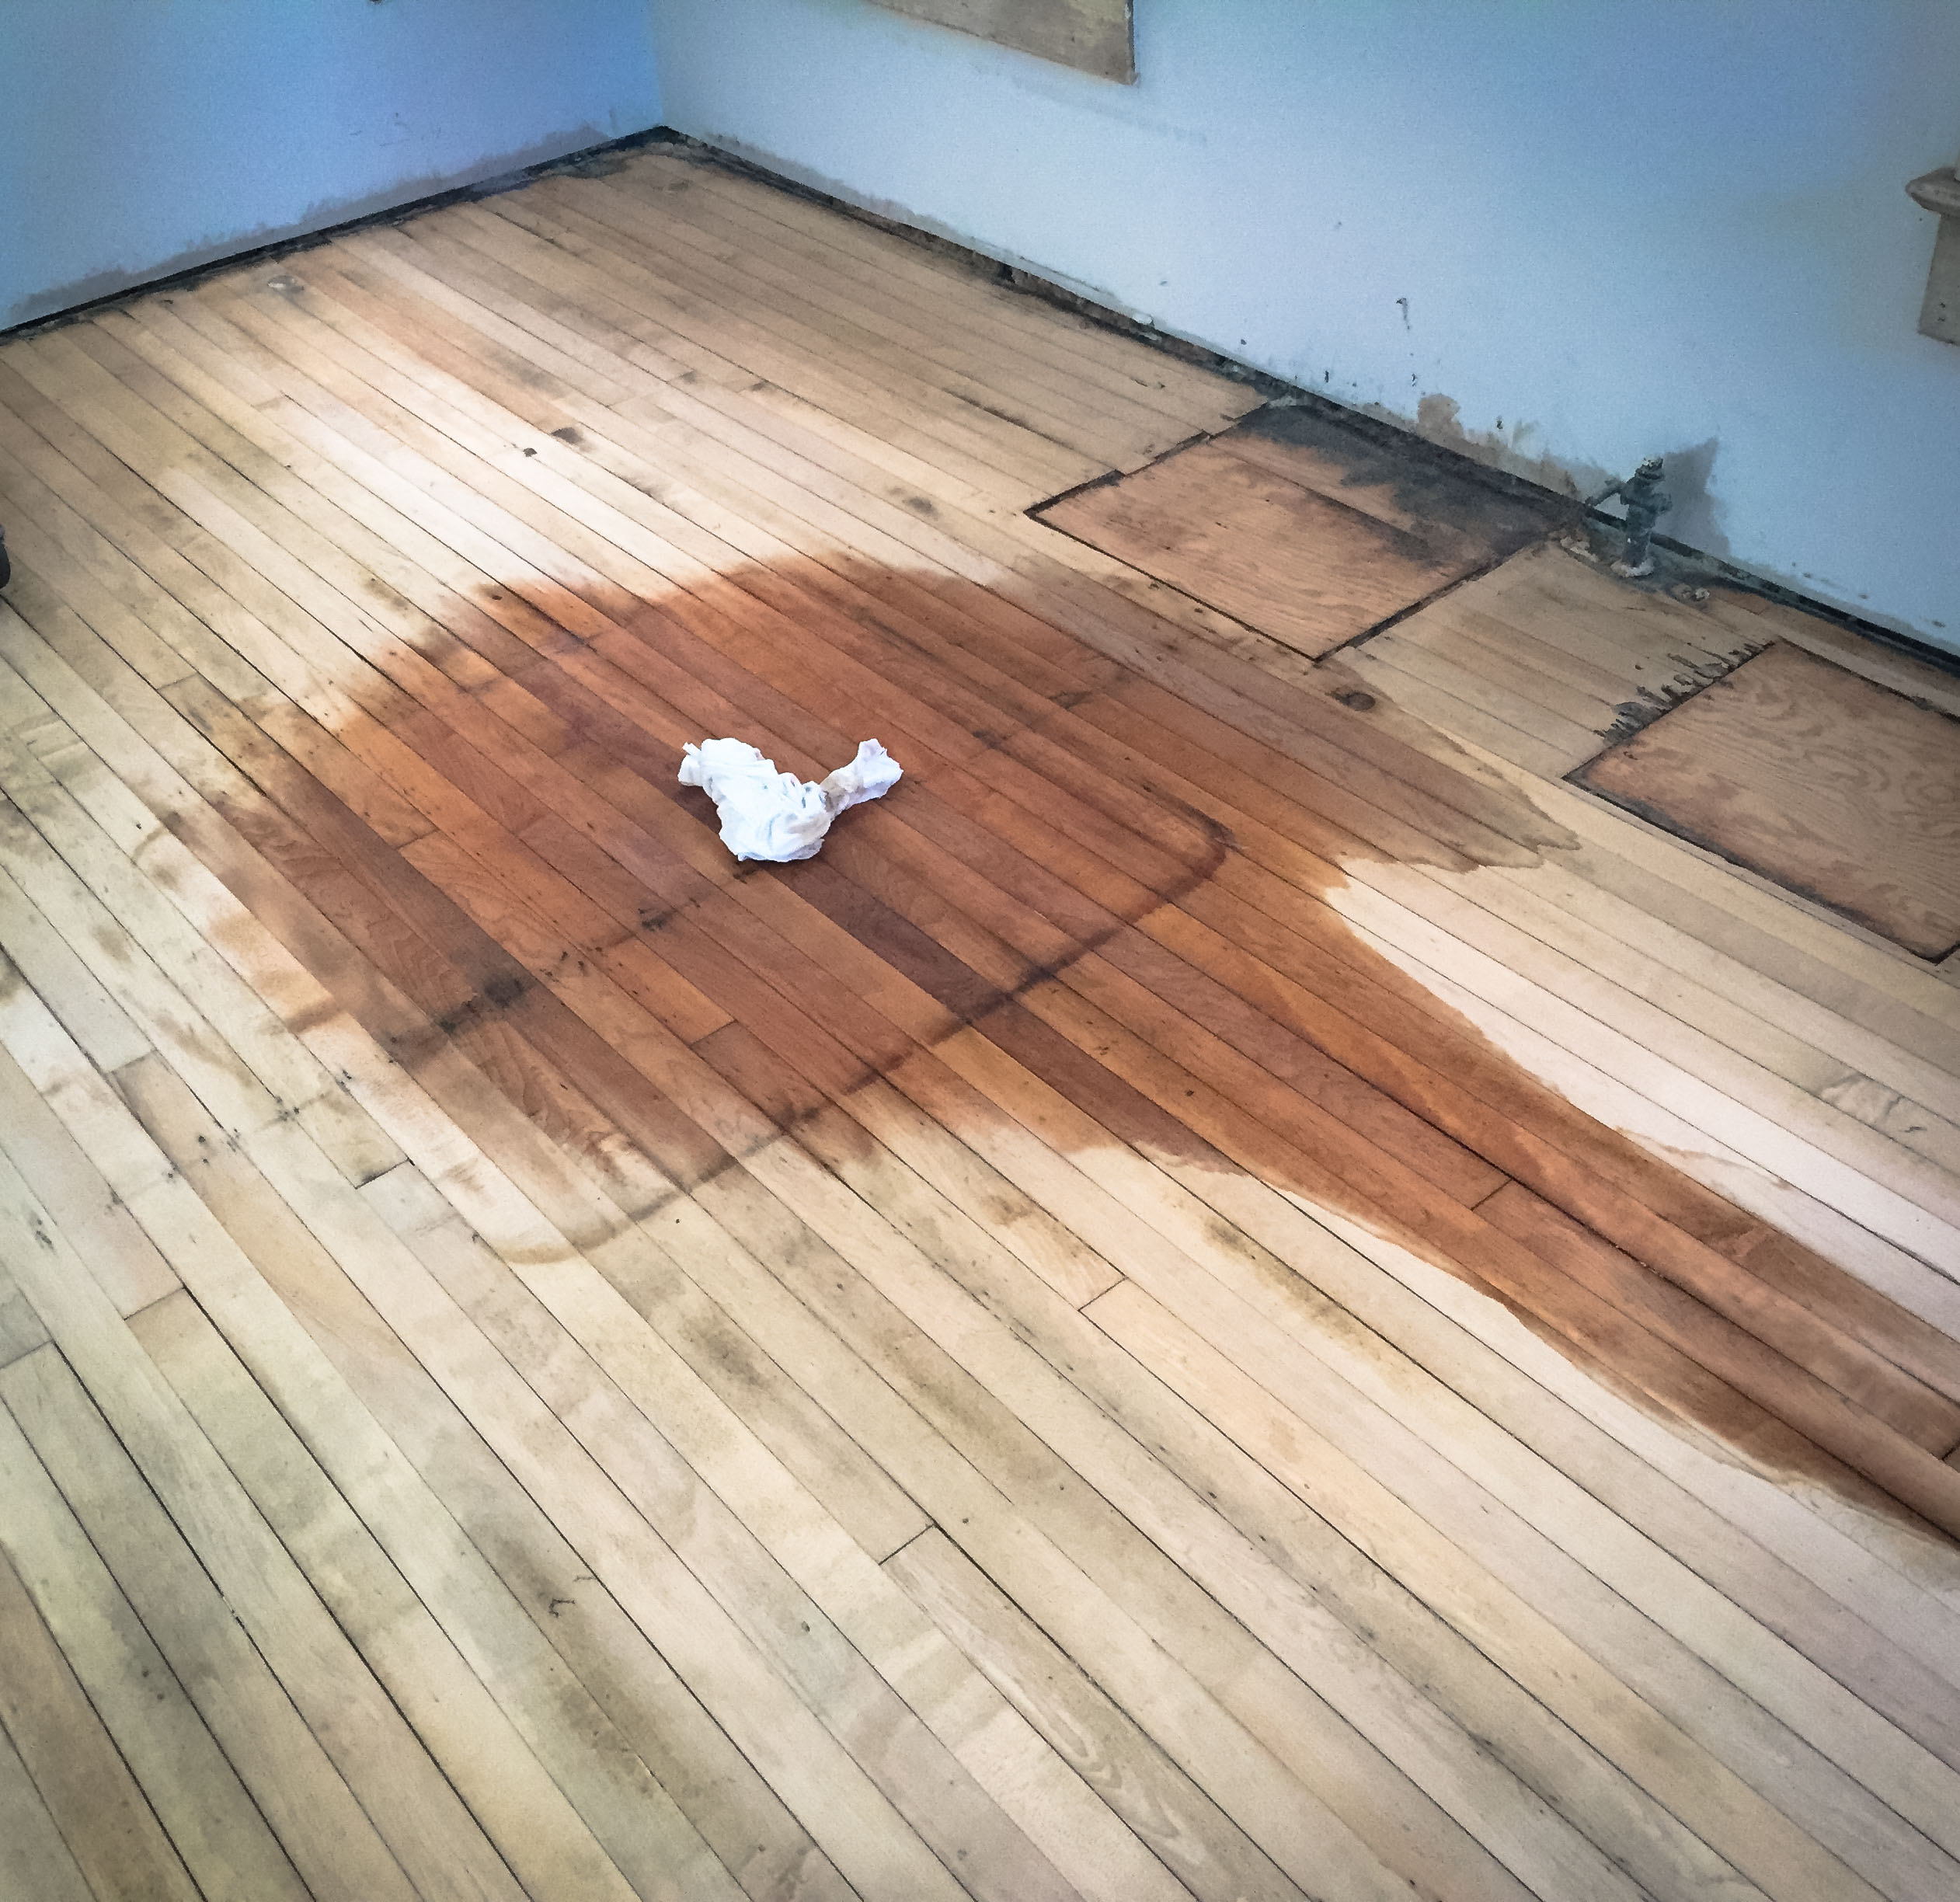
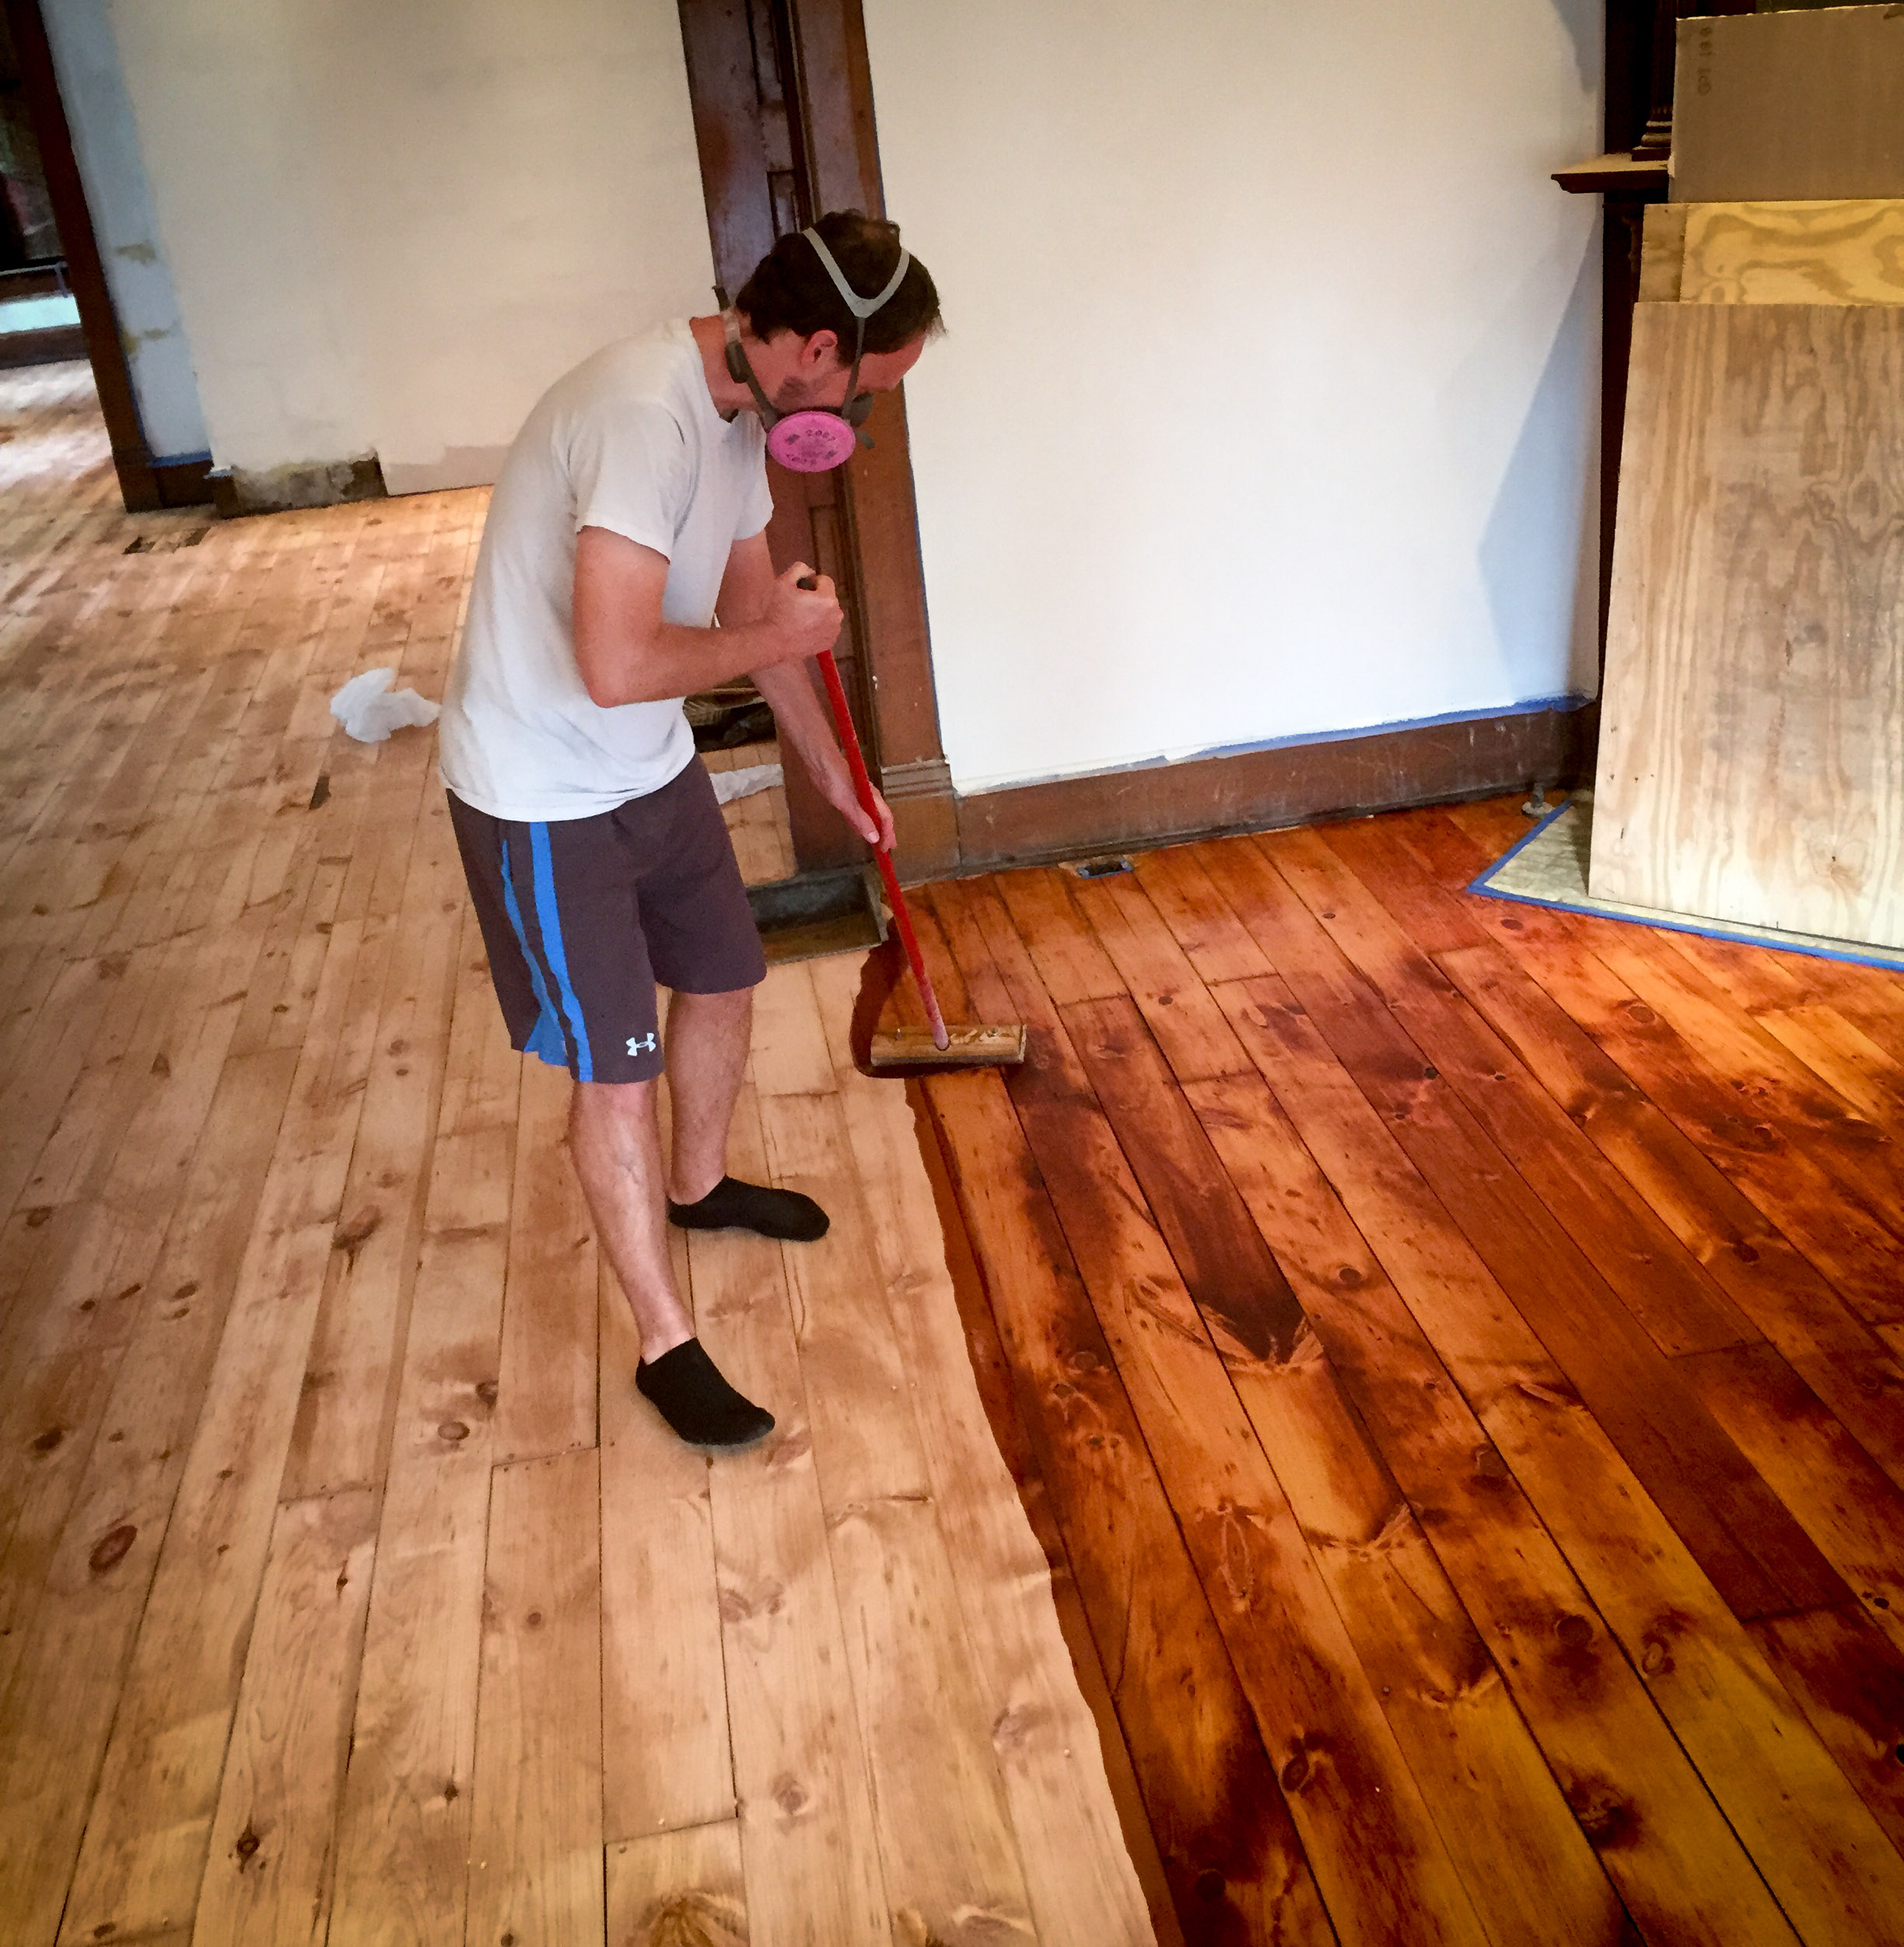
Like everything else I do, I researched how to apply polyurethane until my brain was completely saturated with information. I finally decided on the method I was going to use and began the application on the 9th day. This was the big moment, the moment when any flaws from sanding would suddenly show up. This was also the moment of no return. It’s one thing to re-sand a portion of the floor, it’s completely different to mess up the finish and have to live with it forever.
Applying the poly is immediately gratifying. The floors change colors right before your eyes and you can begin to see the hard work of sanding begin to pay off.
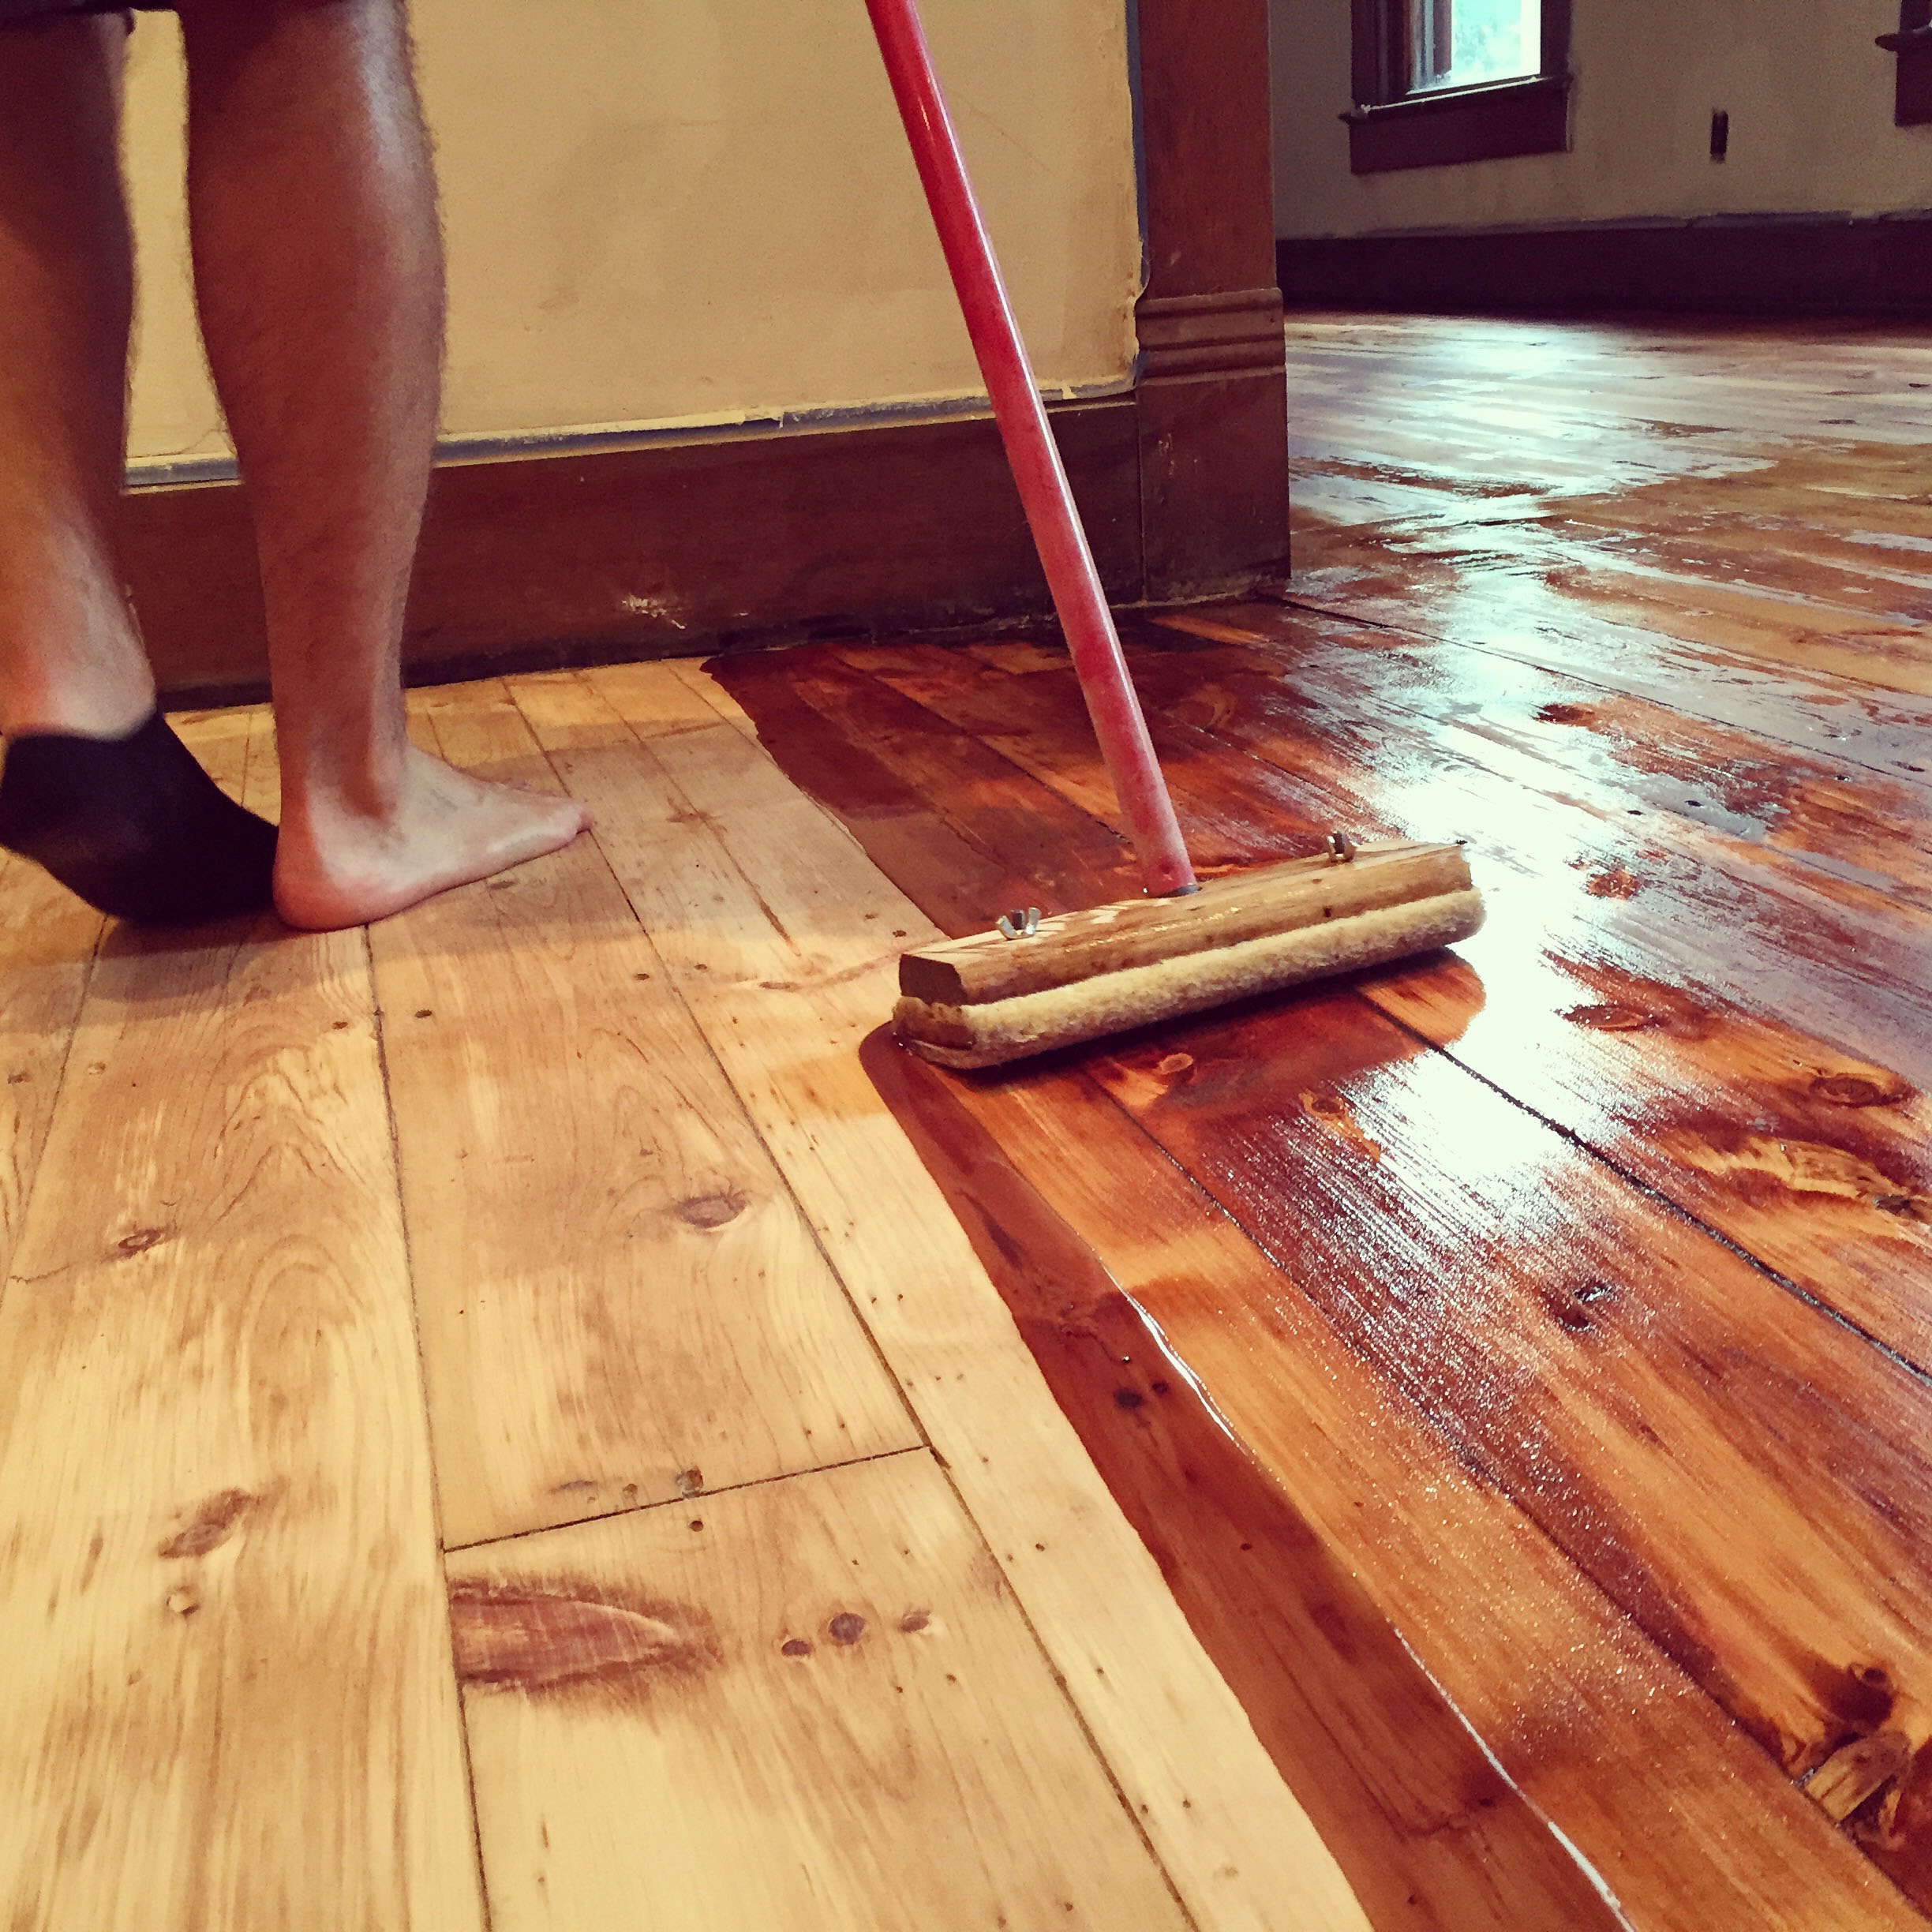
It didn’t take too long to get the technique down, although I am STILL not sure of the best way to work out of a room. It doesn’t seem like it would be that difficult (Amy did not believe me), but I can’t seem to do it without having to then remove small puddles of excess poly. I will find out soon enough if these sections level themselves out or if they do in fact leave a raised section of poly.
[ Edit from Amy: This is the first coat of poly out of three that we will be doing. Note that instead of doing one or two rooms, like most DIYers would do, we’re doing all 2,000 square feet at once- the whole house! Yikes! So every step is a 2,000 square foot mega step. Also, there is not really any mercy with refinishing a floor so we have to get it right the first time we’ve ever done it. ]
By looking at the pictures you might think we are applying a stain, but it’s not. Just a clear coat of polyurethane. The color you see is the natural color of the old pine.
On Day 10 I applied the poly to the first floor. The first floor was actually much easier because I didn’t have to deal with the angled ceilings and odd room dimensions of the 2nd floor. I was able to move faster and also use less poly because there are not nearly as many cracks and crevices to swallow it up.
After letting the floors dry for 24 hours…

[Edit from Amy: This picture is the view from eye level when walking by on the north side of the house. This helps illustrate how high our house sits.]
We then returned to pole sand all 2000 sq ft again with 220 grit and then wipe down the whole floor again with a microfiber cloth.
On Day 11 I applied the 2nd coat. This was a little more stressful because it was harder to see. The first coat of poly is essentially a sealer and gets absorbed into the wood. The 2nd coat sits on top of the wood and is difficult to see unless you look at it at an angle.

I felt even better about my technique this time around, although I have yet to find the perfect way to exit a room, especially when the boards run perpendicular to the doorway. But, the good news is that there is no early evidence of chatter marks, very few discrete edger lines to be seen anywhere, and no other big sanding mistakes have magically appeared.

[Edit from Amy: They won’t be this glossy when they dry.]

[Edit from Amy: And in case you’ve forgotten, here’s a look at those floors before we did any renovations. The room with the fan is now Lucy’s room with the big windows. Is that a gun rack?! ]

Most of the time the 2nd coat is the final coat, but pine is so soft that most people recommend 3 coats. I have to wait a lot longer before I can do the 3rd coat, but we will need to pole sand it again and wipe it all down. But then…. DONE!
So far, so good. I’m interested to see what the floors look like once they have dried.
Three weeks until we are supposed to move in…

They look so good!
LikeLiked by 1 person