Over the last 100 years the waves of what’s hot and what’s not in home decor usually leaves many layers of work to be subsequently undone in future home renovations. Each decade brings a new layer (literally) to the story with floors and walls acting like layers of sediment that reveal the past. We are extremely lucky that our house has seen very little alterations. No awkward additions to the house, not much wallpaper to remove, original hardware remains, no one removed the original windows for cheap replacements, the walls were all still plaster, the original woodwork is in good shape and was never even painted. It’s truly shocking that this house has remained so untouched for so many years. It makes us feel guilty for making any alterations at all, but we have worked hard to leave as much intact as possible by going through great pains to restore the walls, windows, floors, and retain the original floor plan as much as feasibly possible in a modern world.
In the last post, we discussed the layers of wallpaper and paint that were scraped off of the walls, bringing fresh air to our raw plaster. Next up, the floors. We are essentially pressing the rewind button…. if only it were as easy as it sounds.
When our house was new, sometime around 1910 the current fashion looked a lot like this:

Okay, actually the Titanic sunk in 1912. But that’s close enough. Some other good examples to give you a visual idea:


While we aren’t planning on making a historical museum out of our home we do plan on mimicking what was originally there with the more permanent features, such as the floors. We are certainly not experts on historic houses, but we can make some educated guesses about the floors of our house…
Our house was built in the late Victorian or early craftsman era (around 1910) when it was common to have large oriental rugs covering basic wood floors. I assume that wall to wall carpet would have been reserved for the wealthy and oriental rugs for the middle class. Then, possibly in the 20’s or 30’s, linoleum flooring began to make it’s way into our home. In all the rooms except the kitchen, these layers were laid down around the perimeter of the room leaving an empty square of wood floor in the center, presumably to be covered by a rug. Curiously enough, during the next several decades the owners of our home decided to cover the perimeter of our once beautiful hard wood floors with FAUX WOOD GRAIN linoleum…..WHY? During the installation of these linoleum floors, a water soluble glue made from horse hoofs was adhered directly to the original hardwoods. Have you ever heard of horses being sent to the glue factory? That’s really a thing. A layer of what is called mastic tar was applied above the horse hoof glue as a way to further adhere the linoleum to the wood floor. This mastic tar was not really designed with a rewind button in mind.
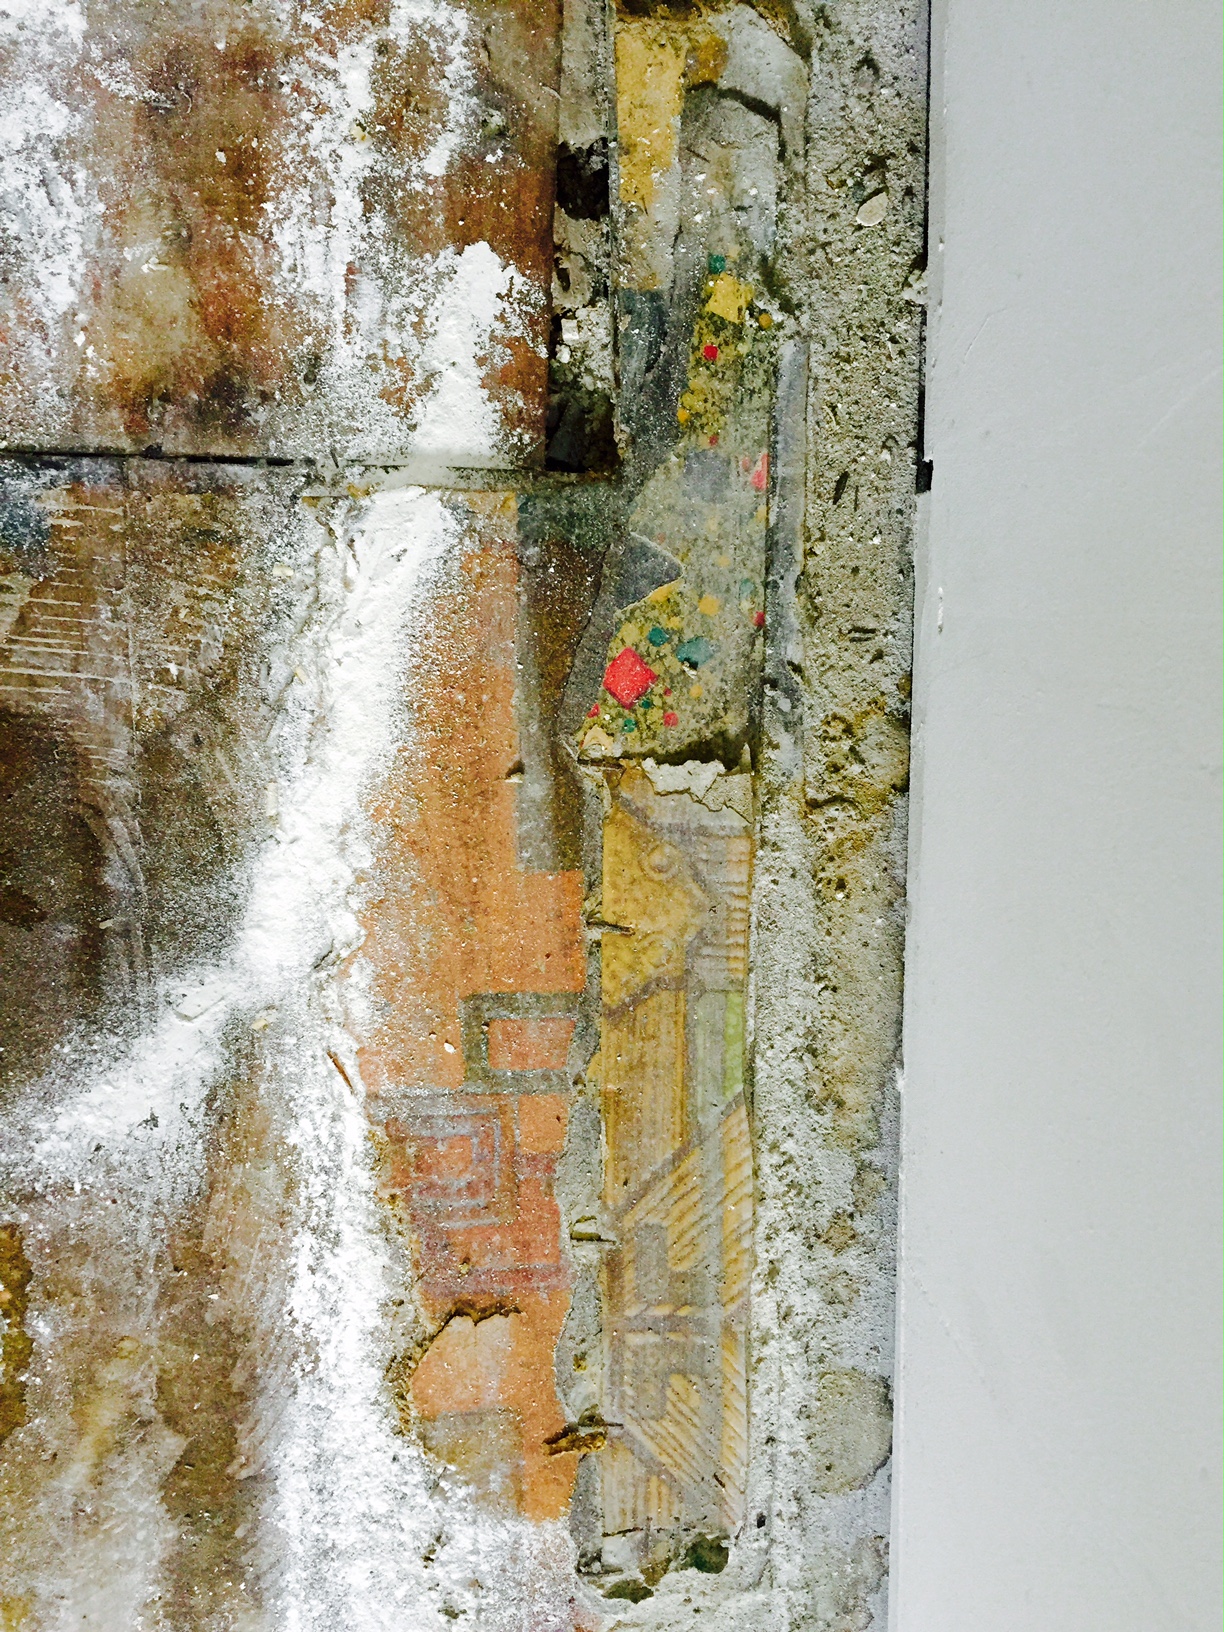
While most areas are a single layer of linoleum, it appears as though a few areas have two layers of flooring. This is actually very little in comparison to other horror stories we’ve heard. The kitchen has had more than two layers of linoleum over the floors. Judging by the pictured below – possibly 4 layers. Luckily, these layers were removed before we purchased the house. However, there are still large swaths of mastic tar ripe for removal. Joy.

In addition to these layers of floor we’ve seen evidence of a rust colored shag carpeting that inhabited our once inhabitable home. Luckily for us we did not have the pleasure of feasting our eyes on that sight. Some threads and small patches were left behind when they were removed sometime in the past decade. Thank God.
Most people in civilized society (whatever that is, I’m not sure) take off their shoes before walking across their precious wood floors, or freak out when a drop of water hits them (you know who you are…….mom). They are expensive, I get it. So, who in their right mind would GLUE something to the floor…WITH TAR. Ugh. So, I know what you must be wondering. How does one remove linoleum, tar, and glue from wood floors without damaging the planks beyond repair? The main ingredient is patience, followed closely by time. You have to, as my mom would say, “use some elbow grease.”
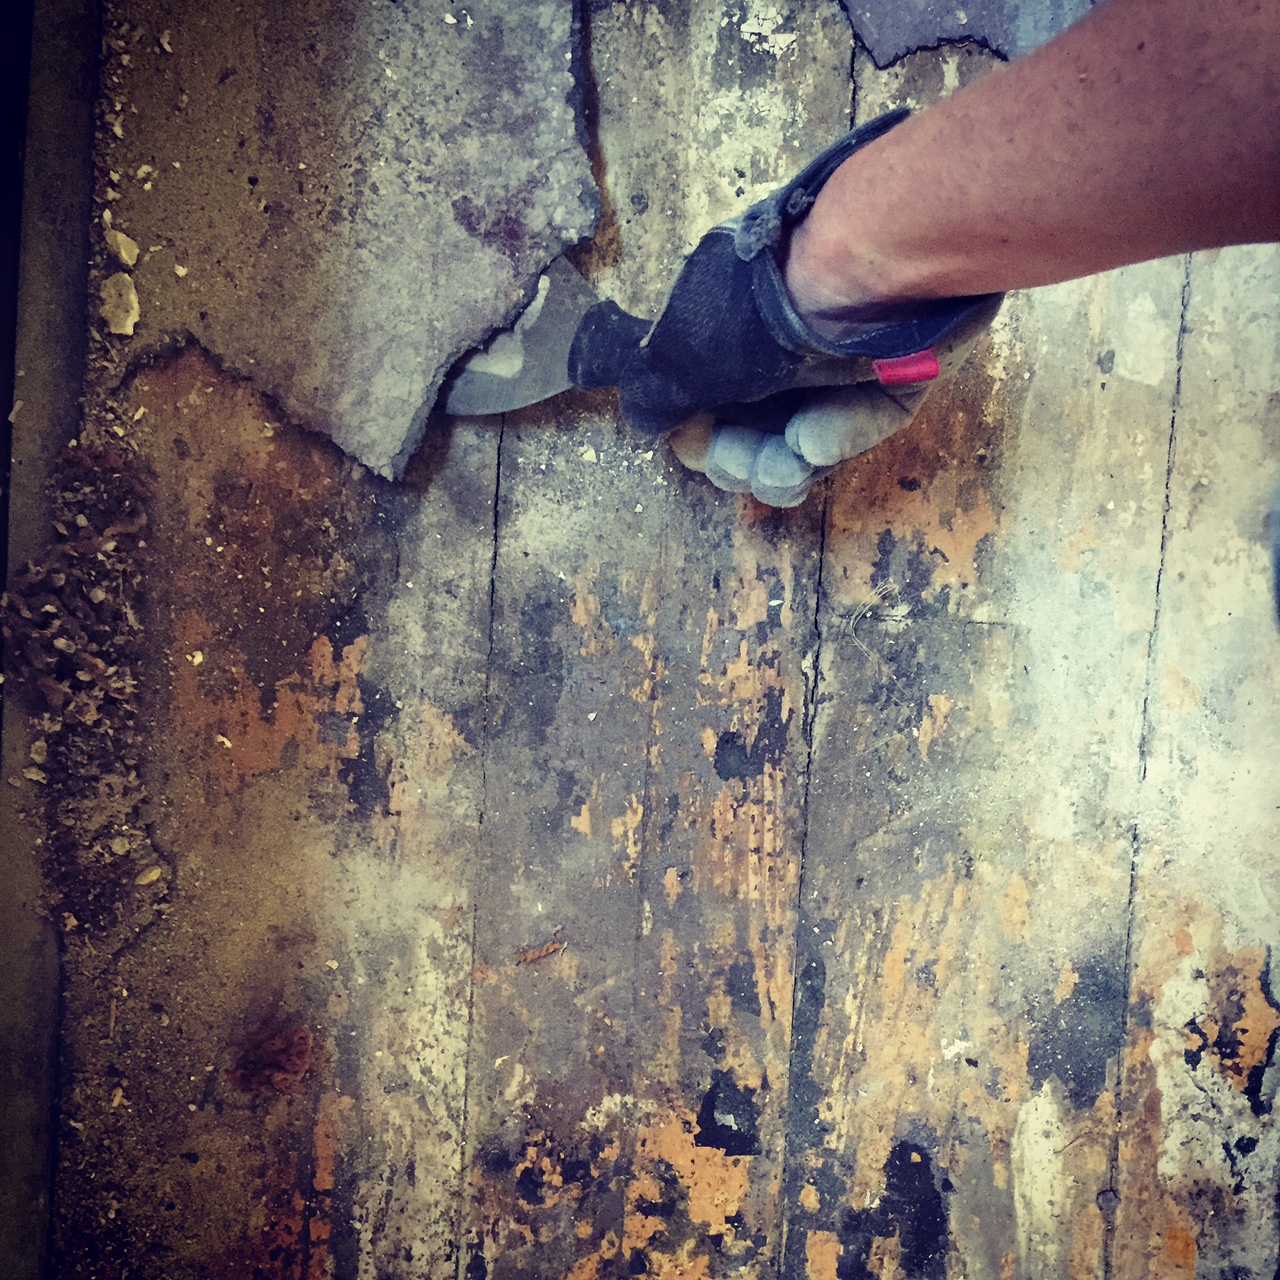
The first and obvious thing to do is to try to remove those layers of linoleum. We use a flat scraper to pry up the linoleum, leaving behind the tar and glue. Some areas came off effortlessly, others required jabbing repeatedly with the scraper, and some areas required a steamer to heat up and loosen the effects off the tar.

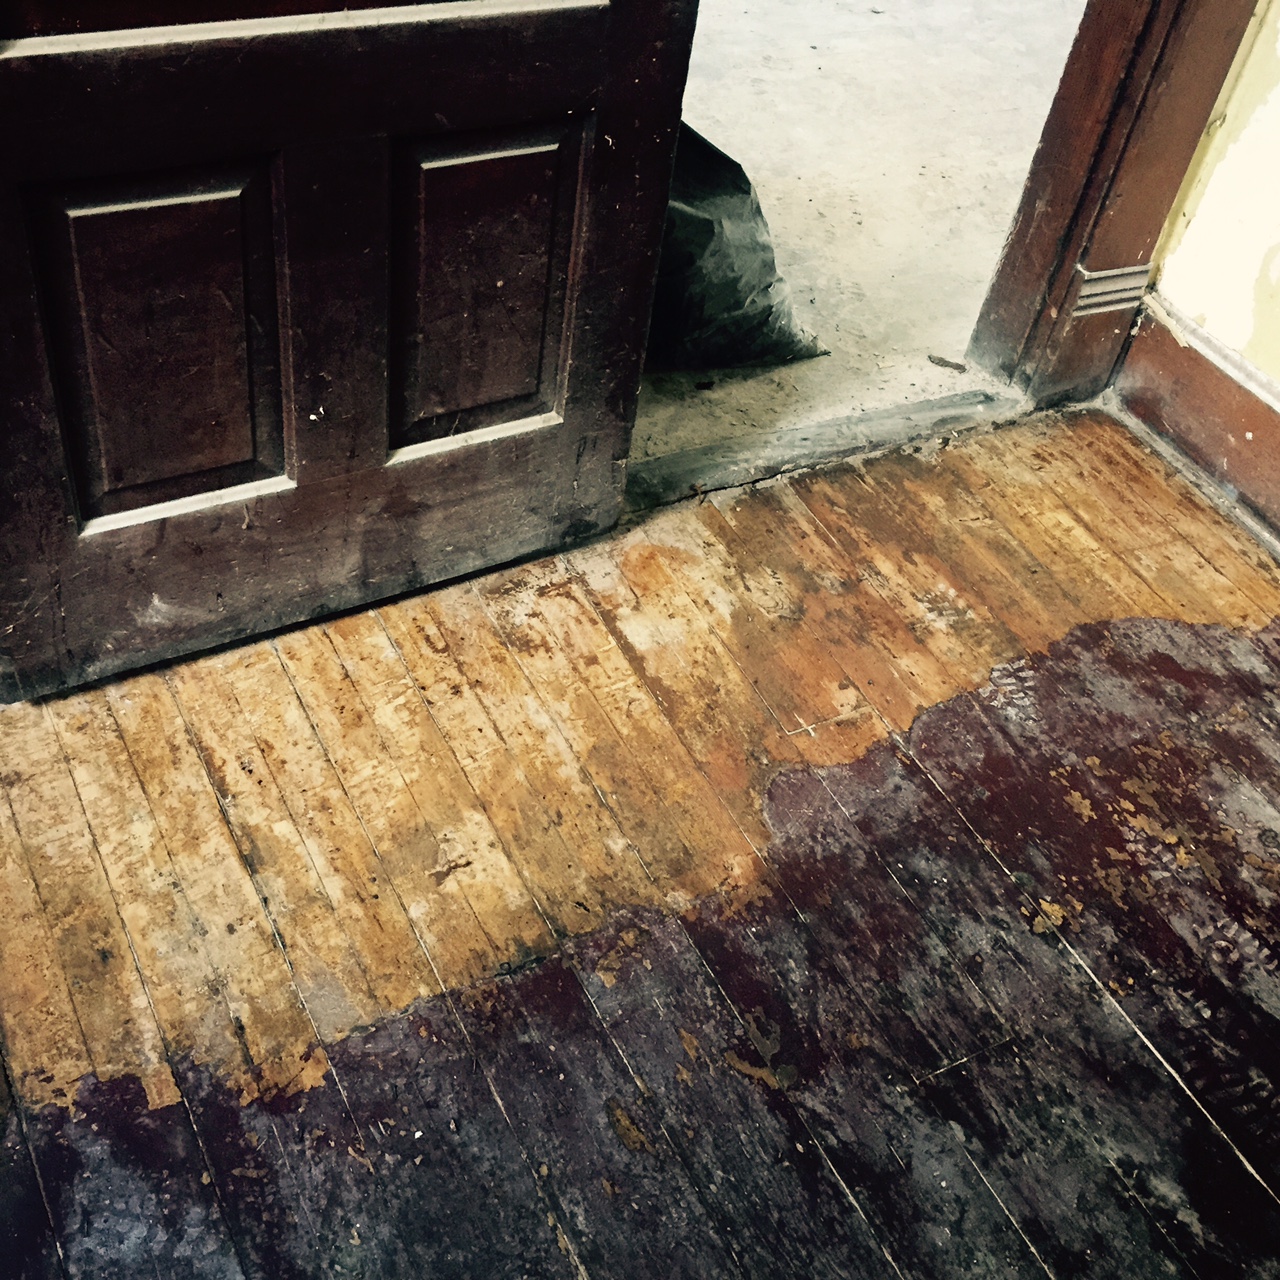
Almost all of our flooring is in good shape, but in the picture above you can see a large area of linoleum that was removed and exposed one of the roughest sections. It appears as if something really nasty and juicy happened here a long time ago. Most likely water damage, but it looks so strange it makes you wonder if a small animal possibly decayed right there. We are hoping it was nothing worse than that.
After removing what we could of the loosened linoleum we moved in with the steamer and painstakingly pried off what we could of the rest. The tar residue required a repeated mixture of scoring, steaming, scraping, and wiping. Little by little the floors are being revealed to us. Of course, they still have a LONG way to go. At this point we are about half way done with this process. Some areas are much quicker and some are crazy tedious, but it averages out to be about 45 minutes to an hour per square foot.
This has been our view as we work through this tedious project:


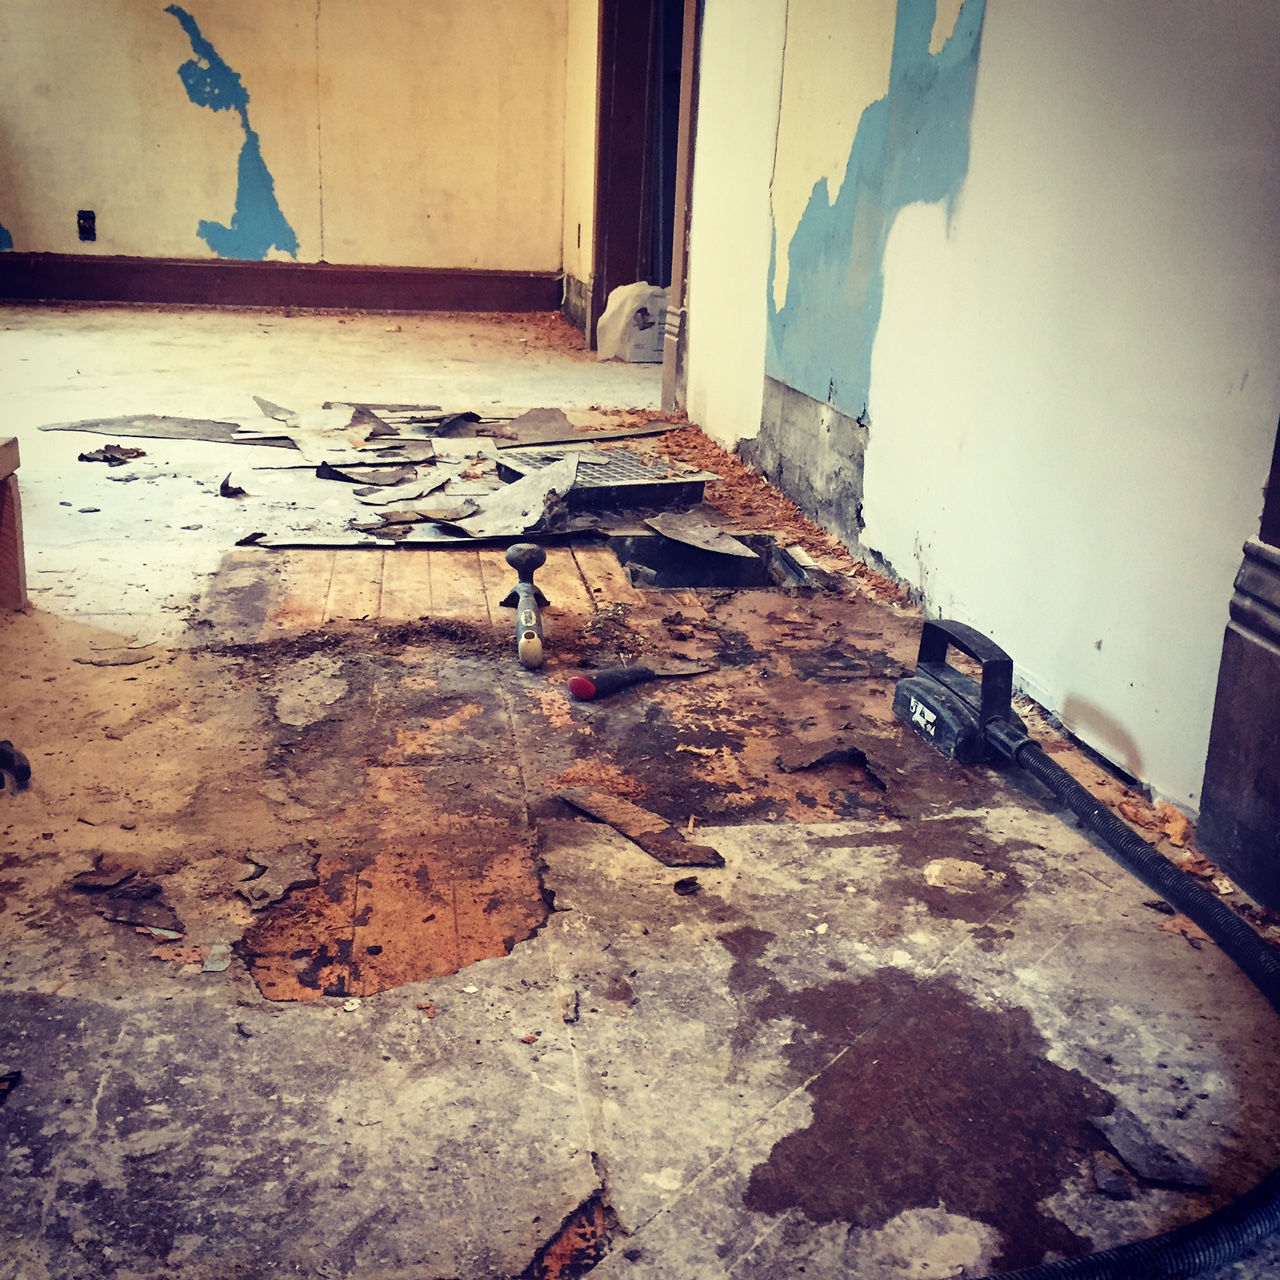

It’s interesting to see the visual record of history that this process unveils. The picture below shows a variety of flooring conditions including painted floors, raw wood and area’s of chipping polyethylene. The yellow orange area on the right is what the floors look like after the steaming and scraping process.
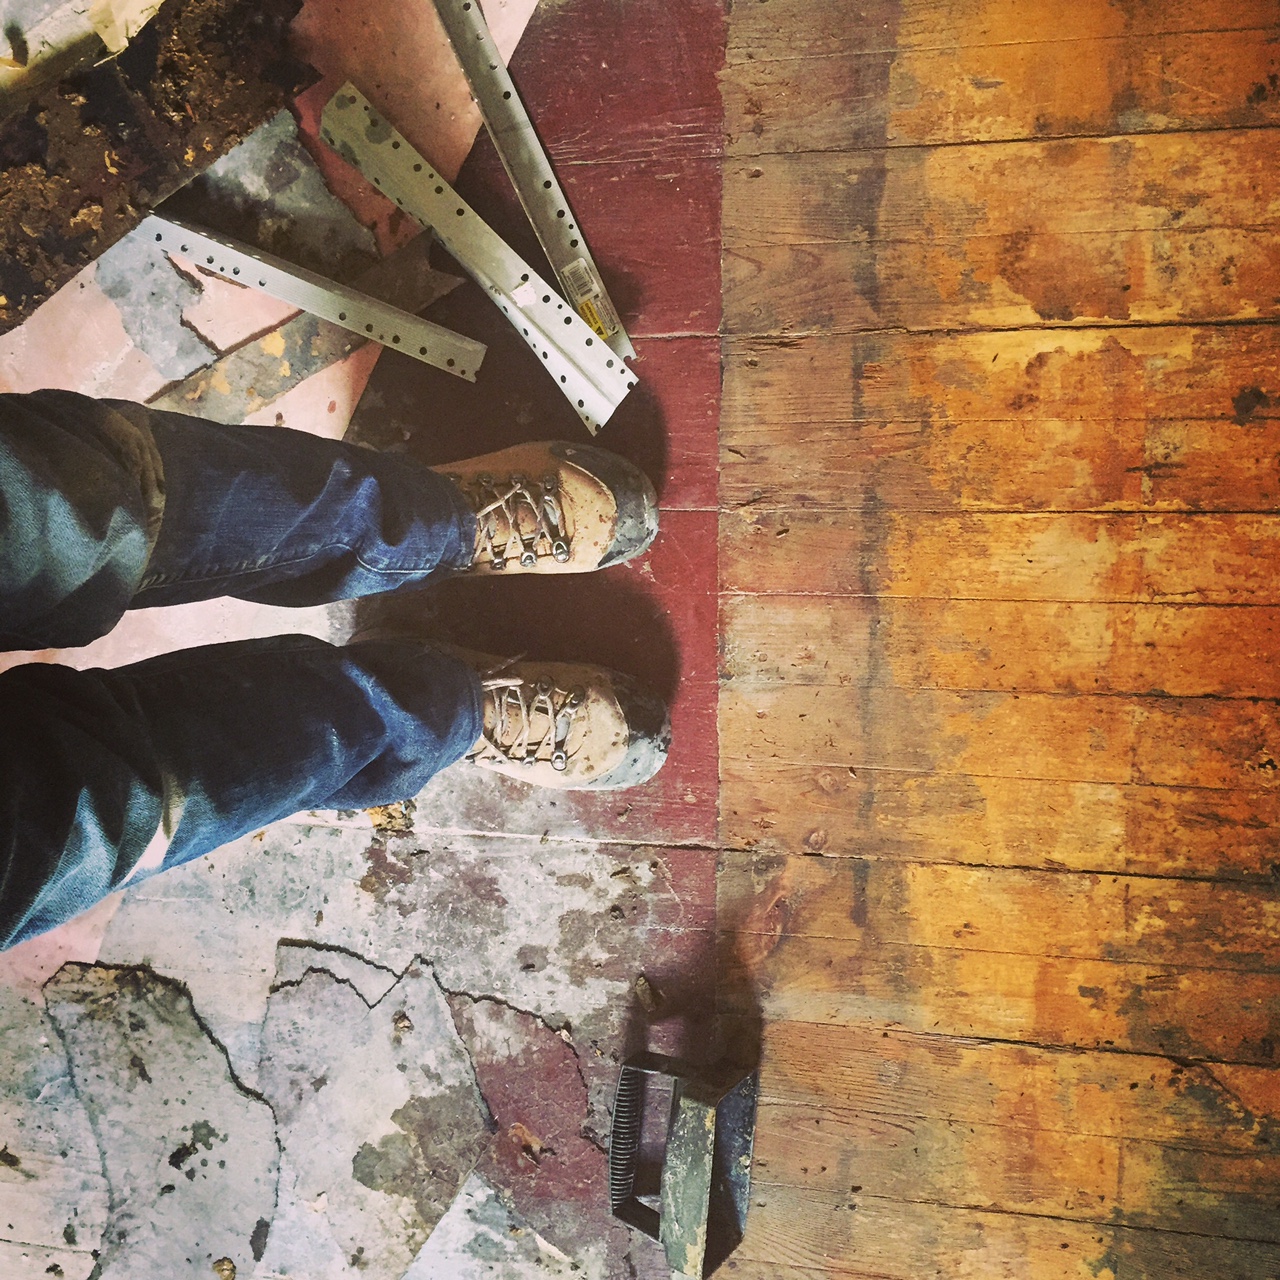
The picture below is from the dining room. Notice the condition of the floors underneath the linoleum and also the red painted floors.
Here is an exciting look at the dining room floor at the end of this process. Some people may look at this and think it looks awful but we’re thrilled to see uninterrupted planks of wood stretching from one side of the room to another. Also, based on our research, we are confident that these floors will clean up nicely.

After the sanding and finishing process these floors will still decidedly be quite rustic, but people pay good money for that you know. In this case, if time is money, we’re “paying” a lot for the real enchilada. What I appreciate most is what money can’t buy- the unique story that the floors will tell. These are not just our floors, their Claude’s floors, and all the other people who lived here before us. Each occupant adding to the story, including that dead animal that sunk it’s death juices into the floor.


2 Comments Add yours