The renovation of our beautiful 100 year old windows has been the most time consuming single project (by far) and the biggest money saving DIY project (by a mile) of our home renovation project. Those of you that have followed this blog from the beginning have read about these windows off and on for the past year.

They are always being worked on in the background, taking up the limited available space in our basement, and making progress when I have extra time. I was demoralized early on when I broke a few of the treasured old glass panes and then frustrated by the science fair of matching new pine to old pine. These early set backs have been more than offset by the pride I have developed in my accomplishments and the realization that we would have blown half our entire renovation budget if we had paid someone to do this… IF I could have even found anyone willing to rehab the windows with the same level of detail.
I still have a long way to go to actually complete the window project (some of them haven’t even been removed yet), but the first 12 sashes I removed last summer have been ready to go for months. Now that the drywall is complete I can finally begin this final stage of window rehab project… The re-installation! I have had the supplies for months. This includes sash cord to re-rope all the weights, spring bronze for weather stripping, and copper coated nails.
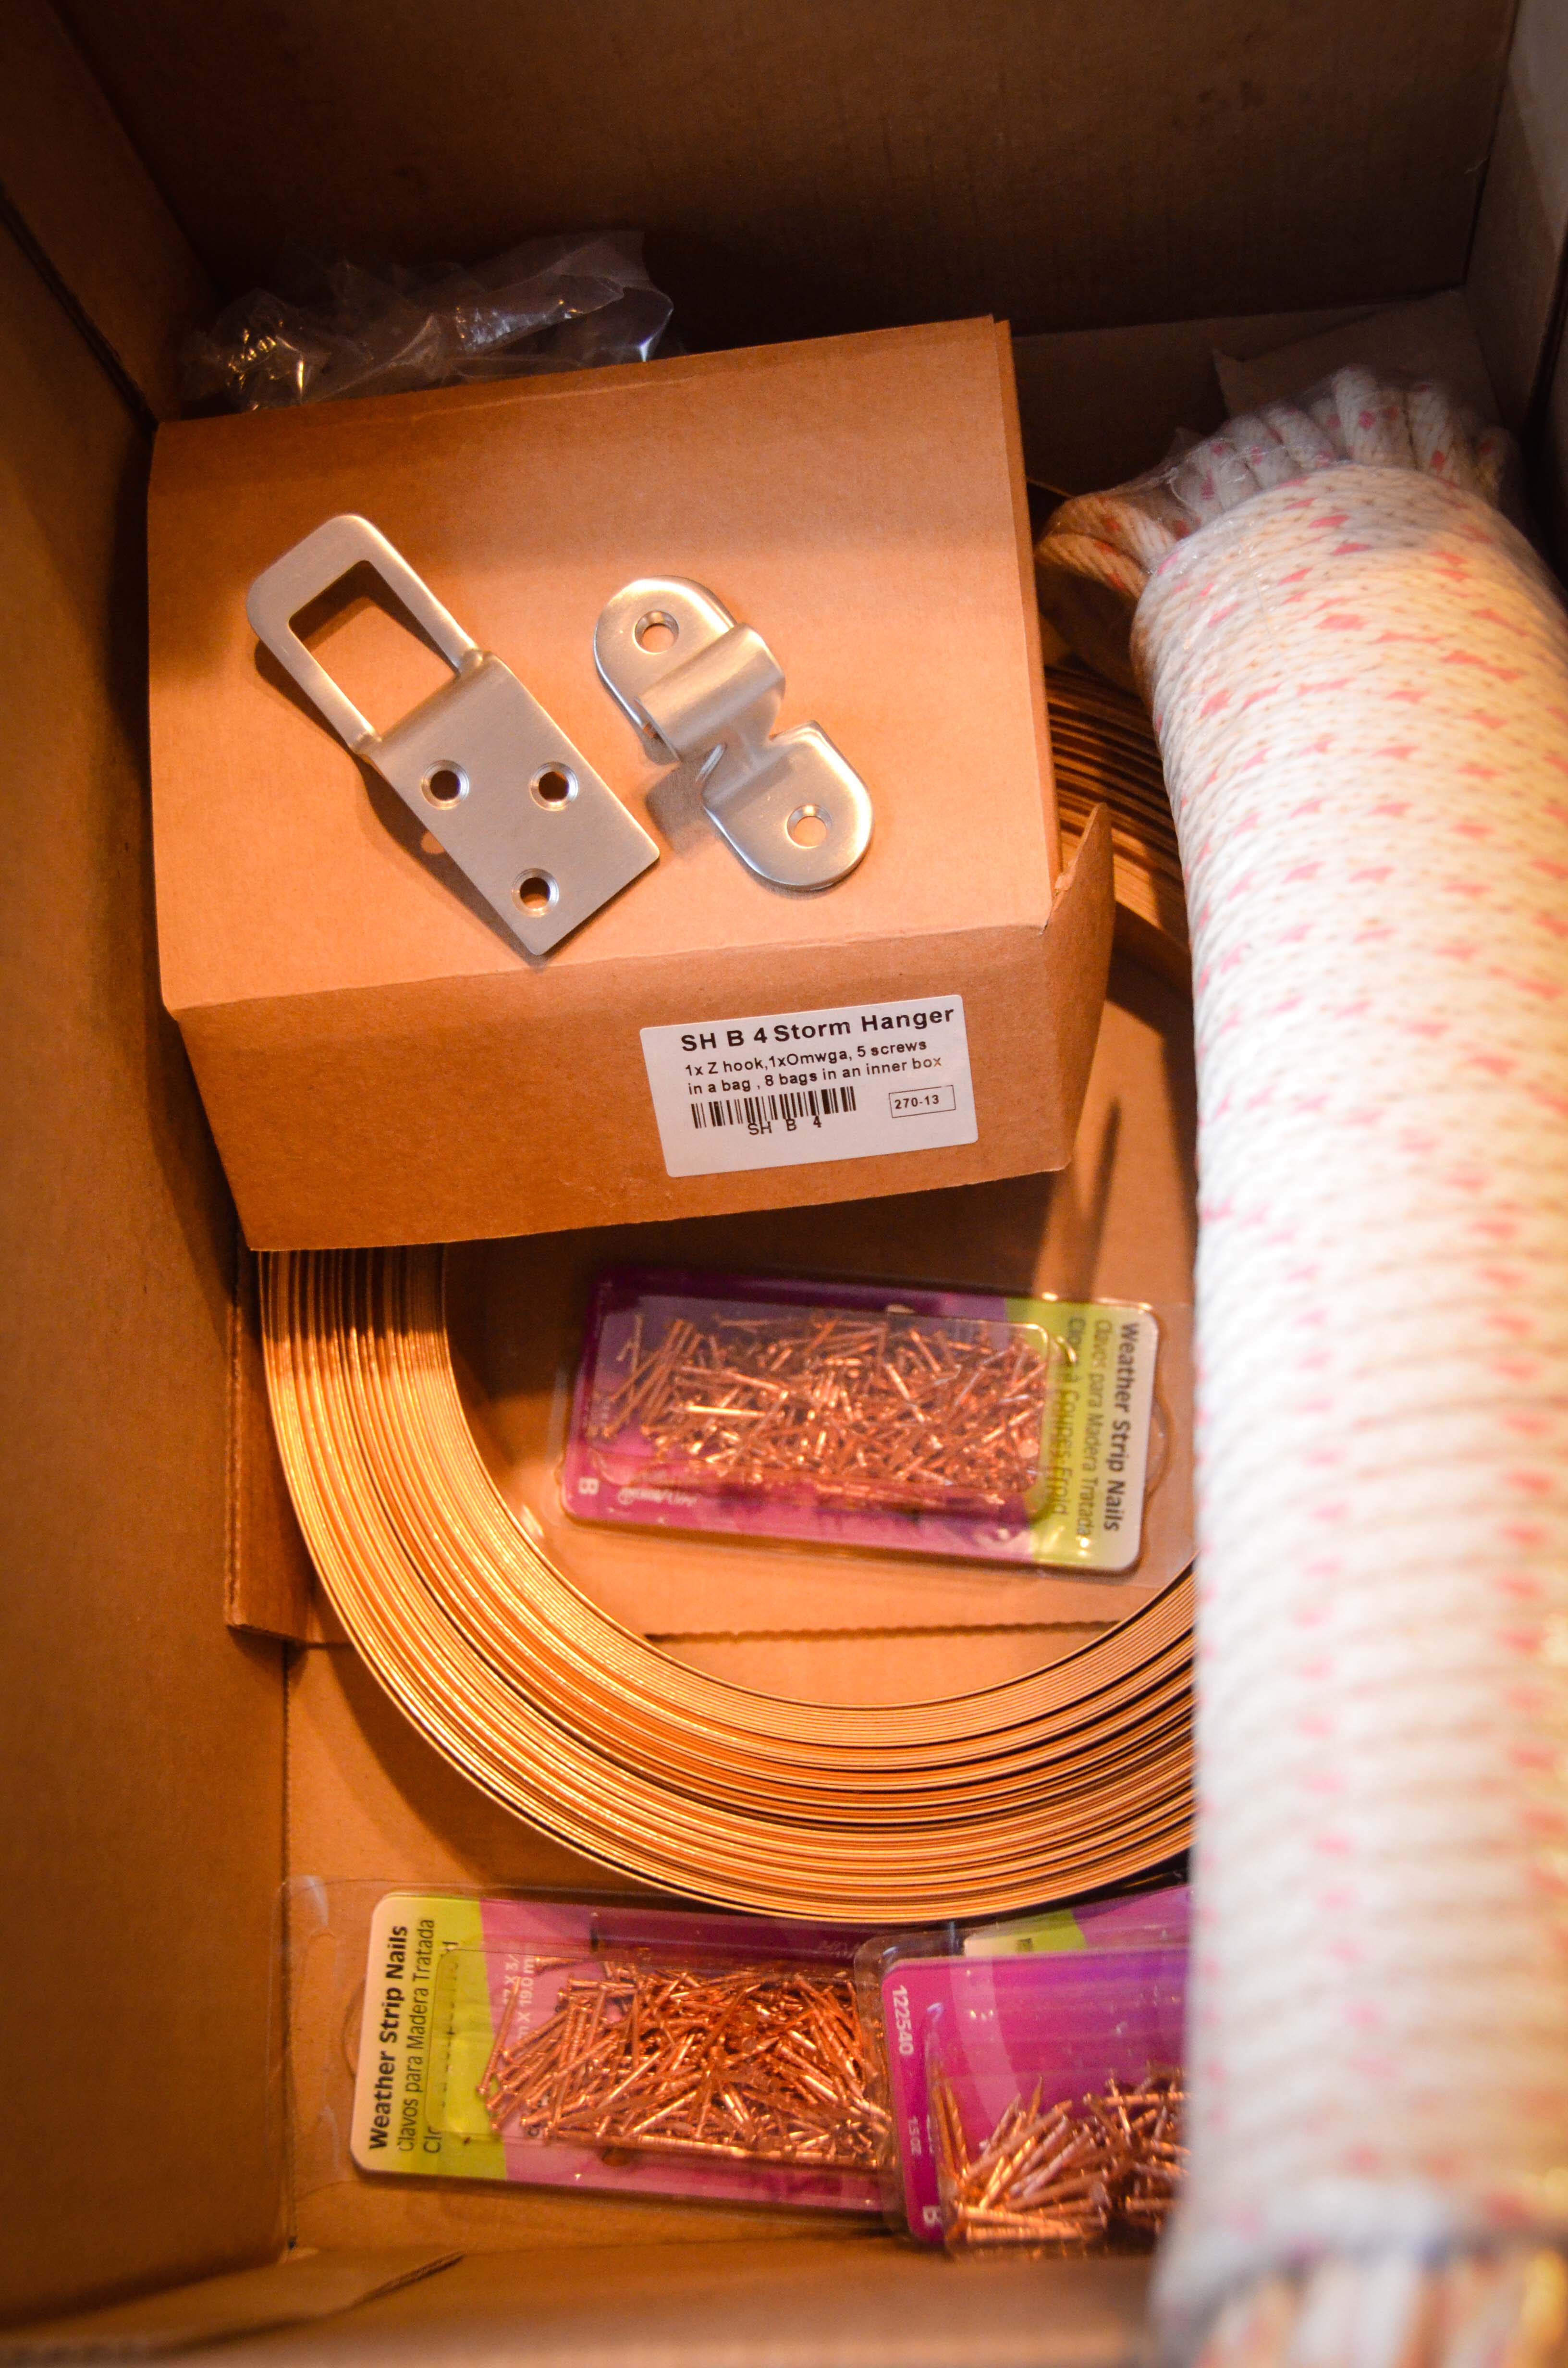
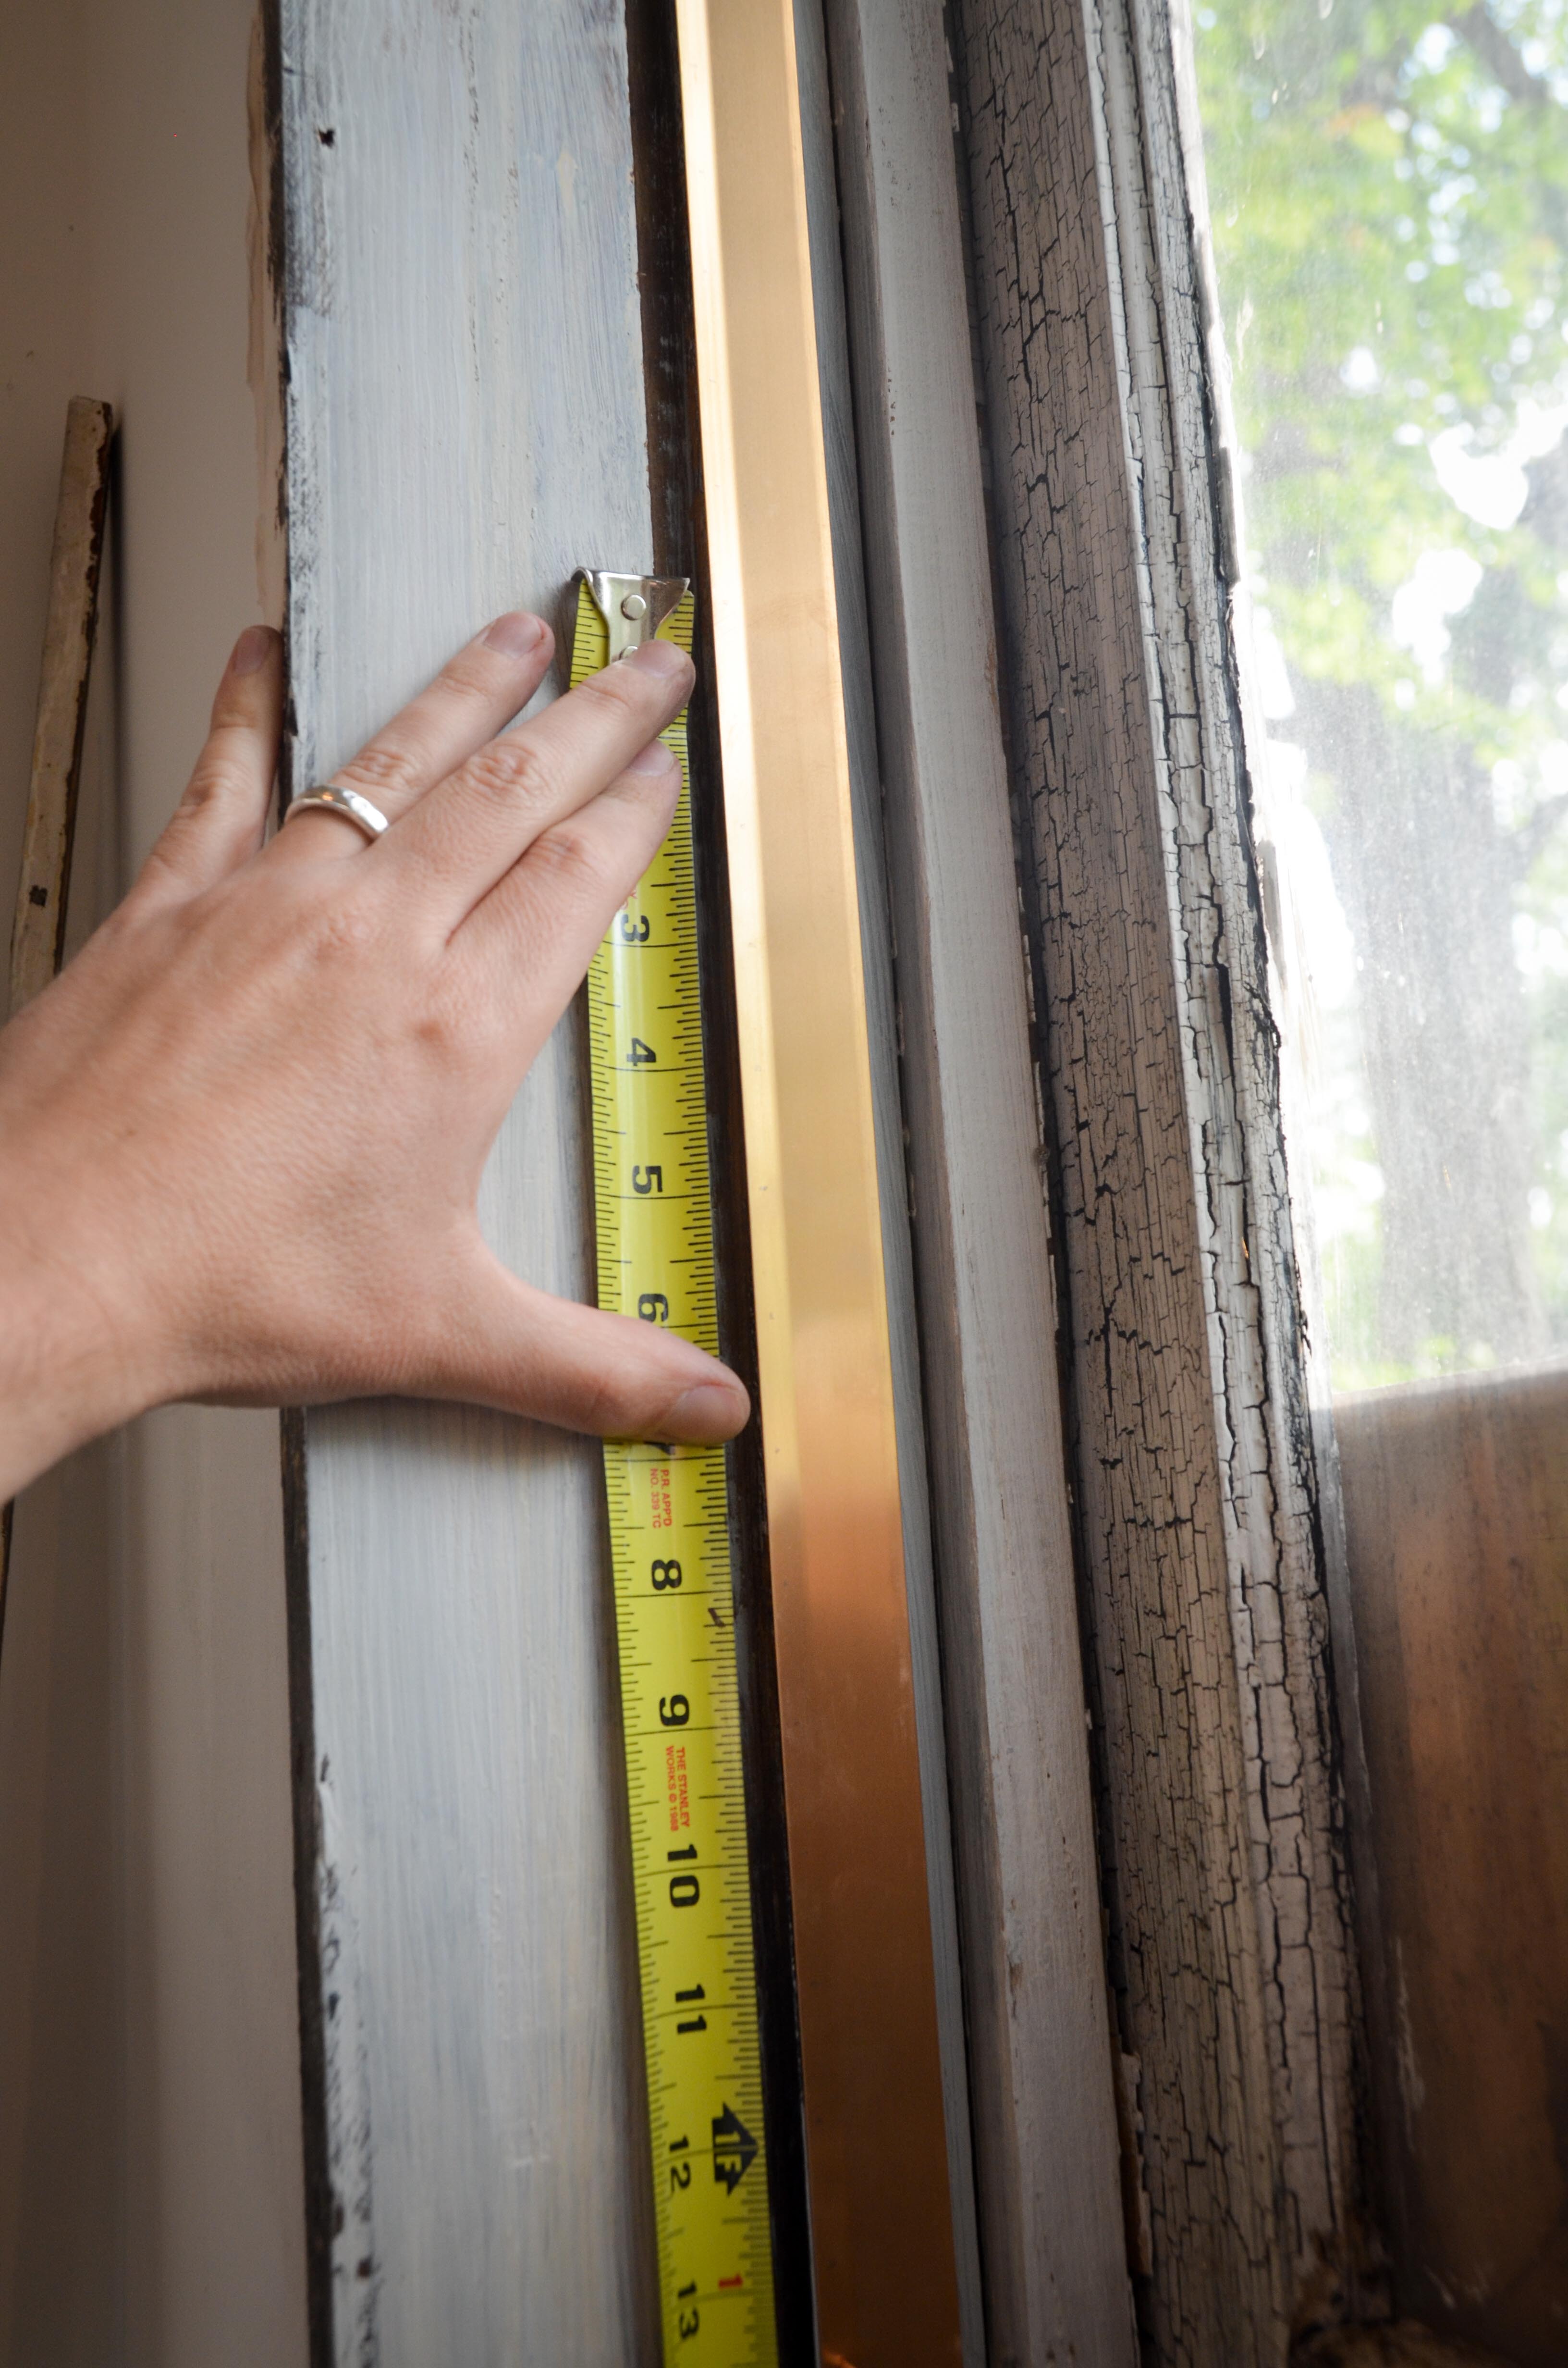
I had one more personal day available from work, so I took the day off on Friday and got to the house early that morning. The first step was to add the weather stripping. For those of you that don’t know, old windows don’t slide up and down in an aluminum track or have anything else that keeps air from working it’s way around the parting bead or trim. This is why old windows are notoriously drafty. Most modifications that would help make the windows more energy efficient would also involve removing the old pulleys – and that was never an option for us. We wanted to maintain the original historic integrity of the windows, including all the hardware, rope, and pulleys. Personally, I enjoy the look of the pulleys and rope, the sound of the weights rattling around, and the feel of lifting a double hung window. The weather stripping option that seemed to be the most appropriate for my project was spring bronze. This is a strip of metal that already has a slight crease in it to create tension between the window frame and sash to reduce air flow around the sash. The spring bronze is installed in the track where each sash remains when closed. This means you don’t even see it unless the window is open, which is important because we don’t want to take away from the vintage aesthetic of our windows.
The first step was to mark the sash heights and take any necessary measurements. After cutting the bronze strip, I made a mark every inch for the nails. (edit: Since writing this blog entry I found out I only need to do every 1 1/2 inches. That will help speed up the process a little)
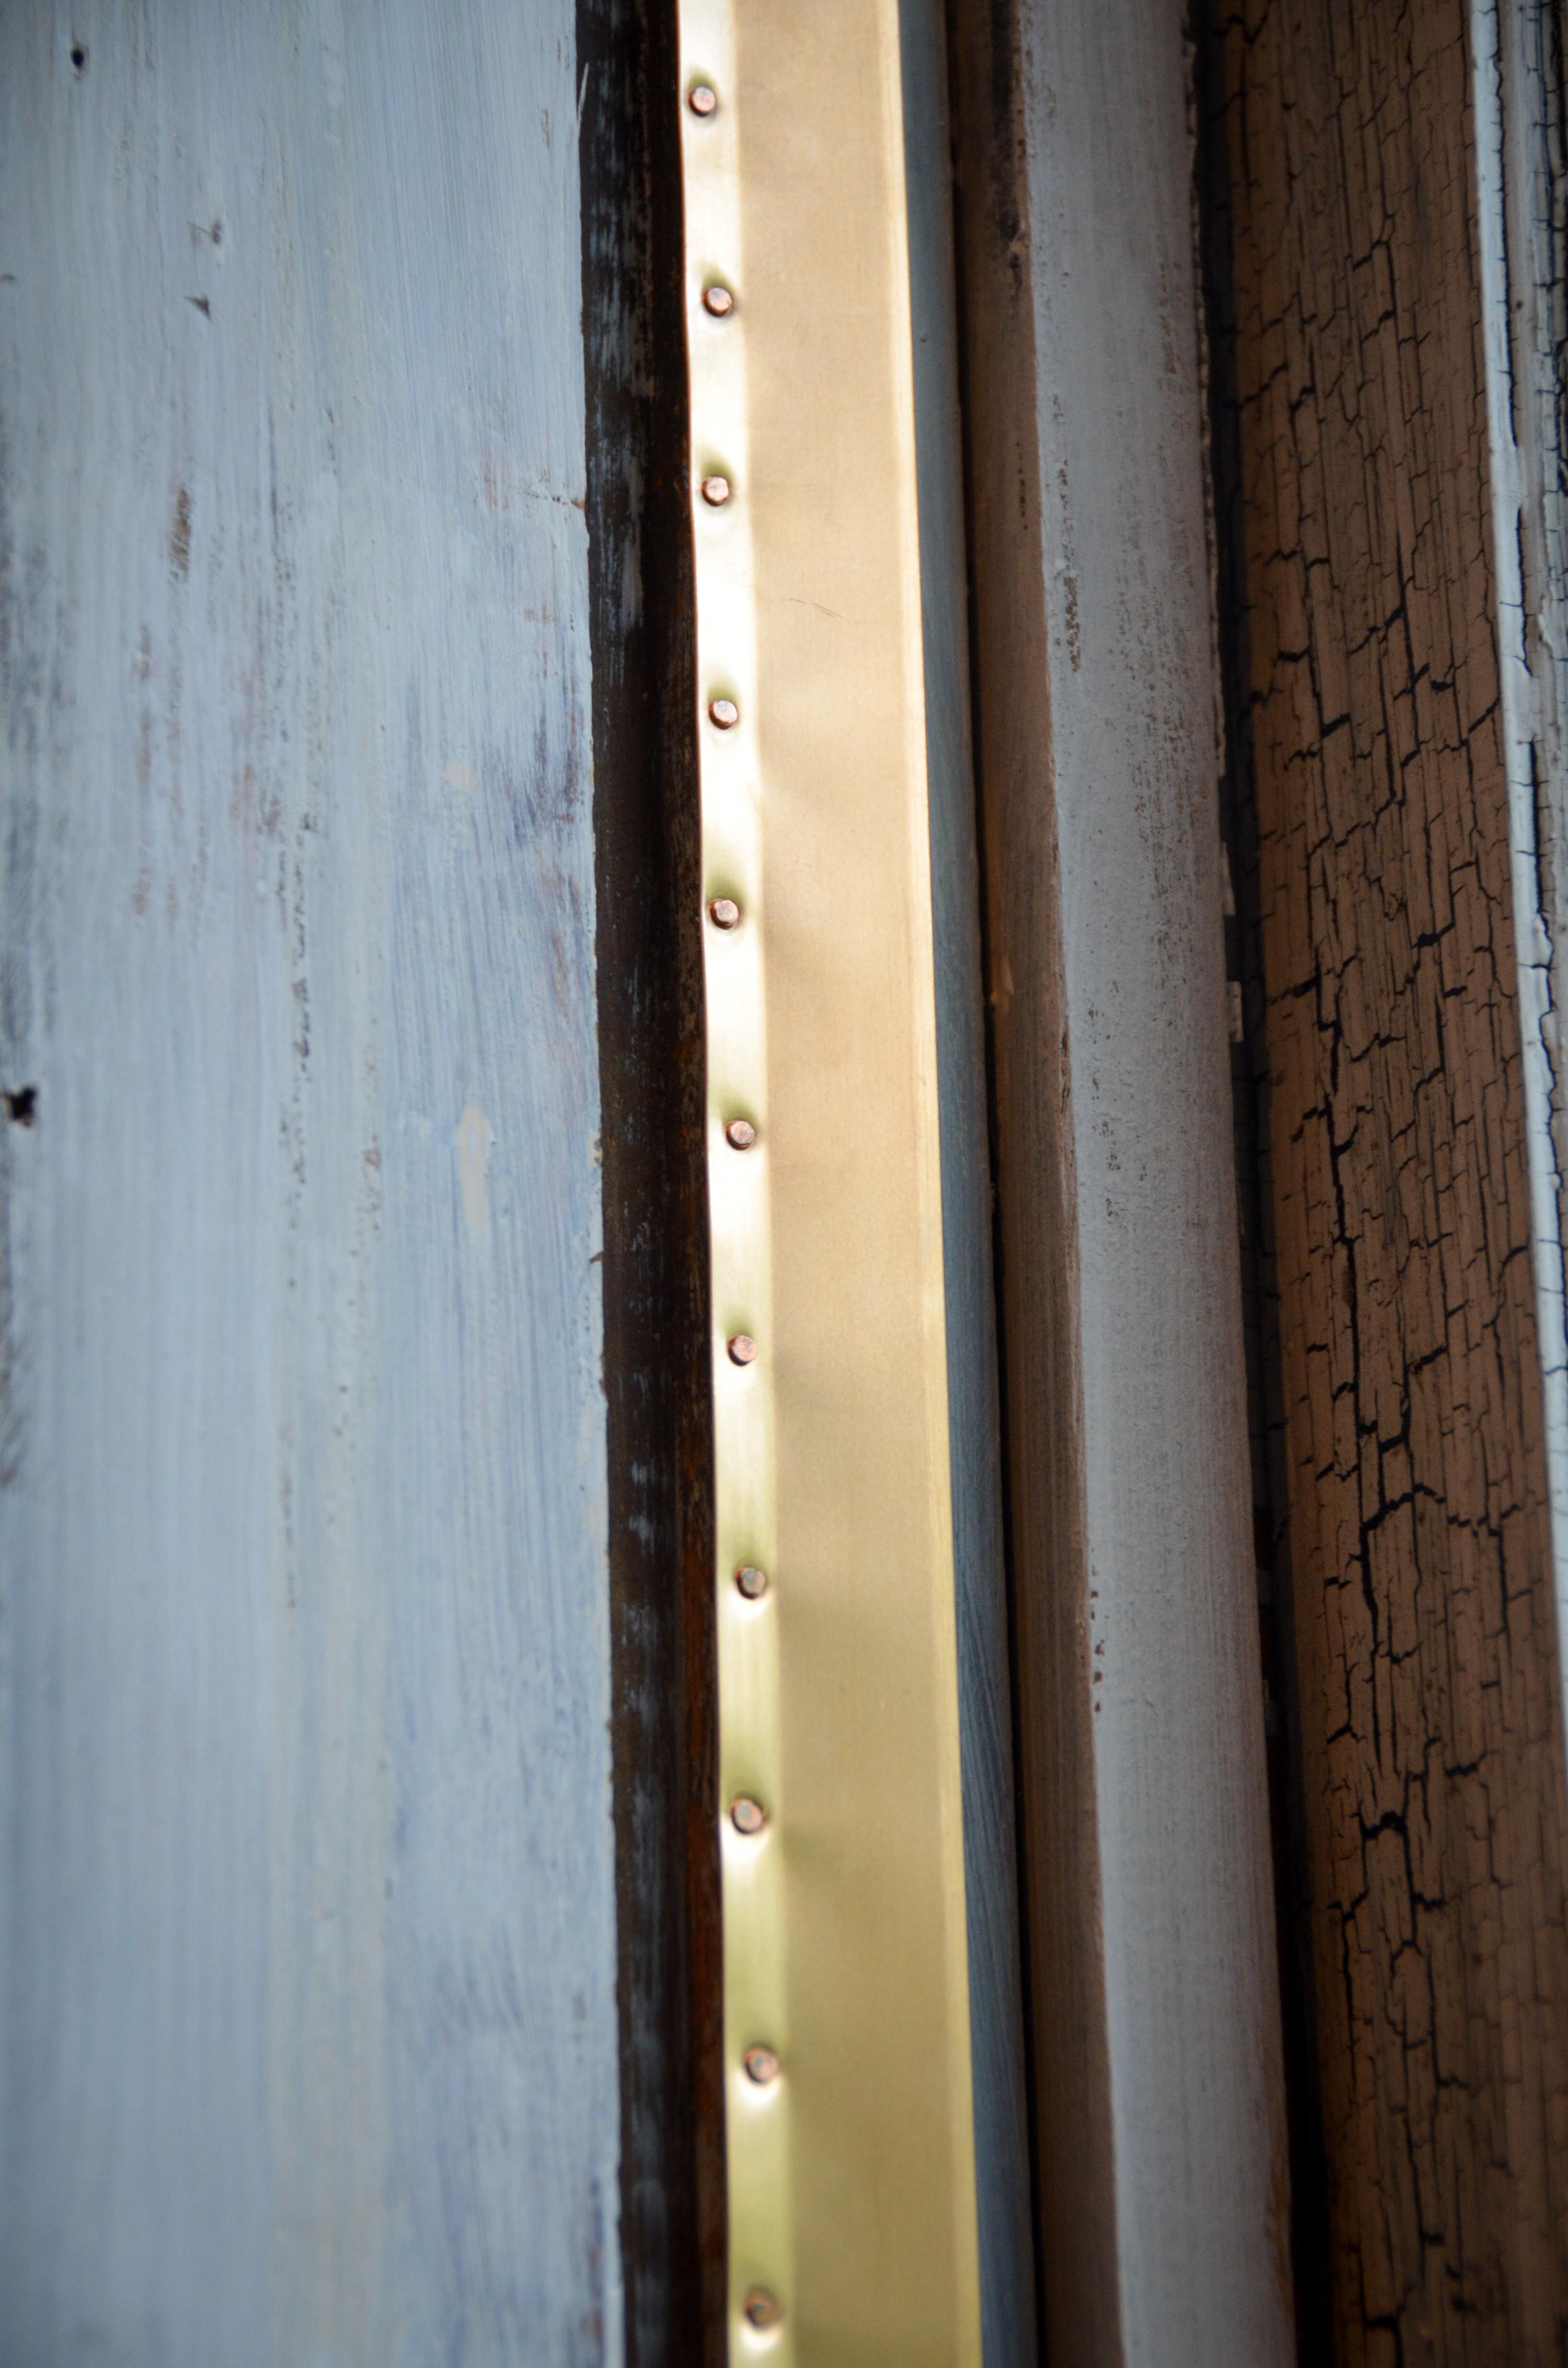
It is a little more difficult than you might imagine to keep the spring bronze straight over a long distance while you are hammering in the nails. I quickly learned to NOT hammer the nails completely in until each strip was done, because once they are in they are incredibly difficult to remove. When each strip is done, this is what it looks like…
The strips need to fit around the pulleys on the upper sash…

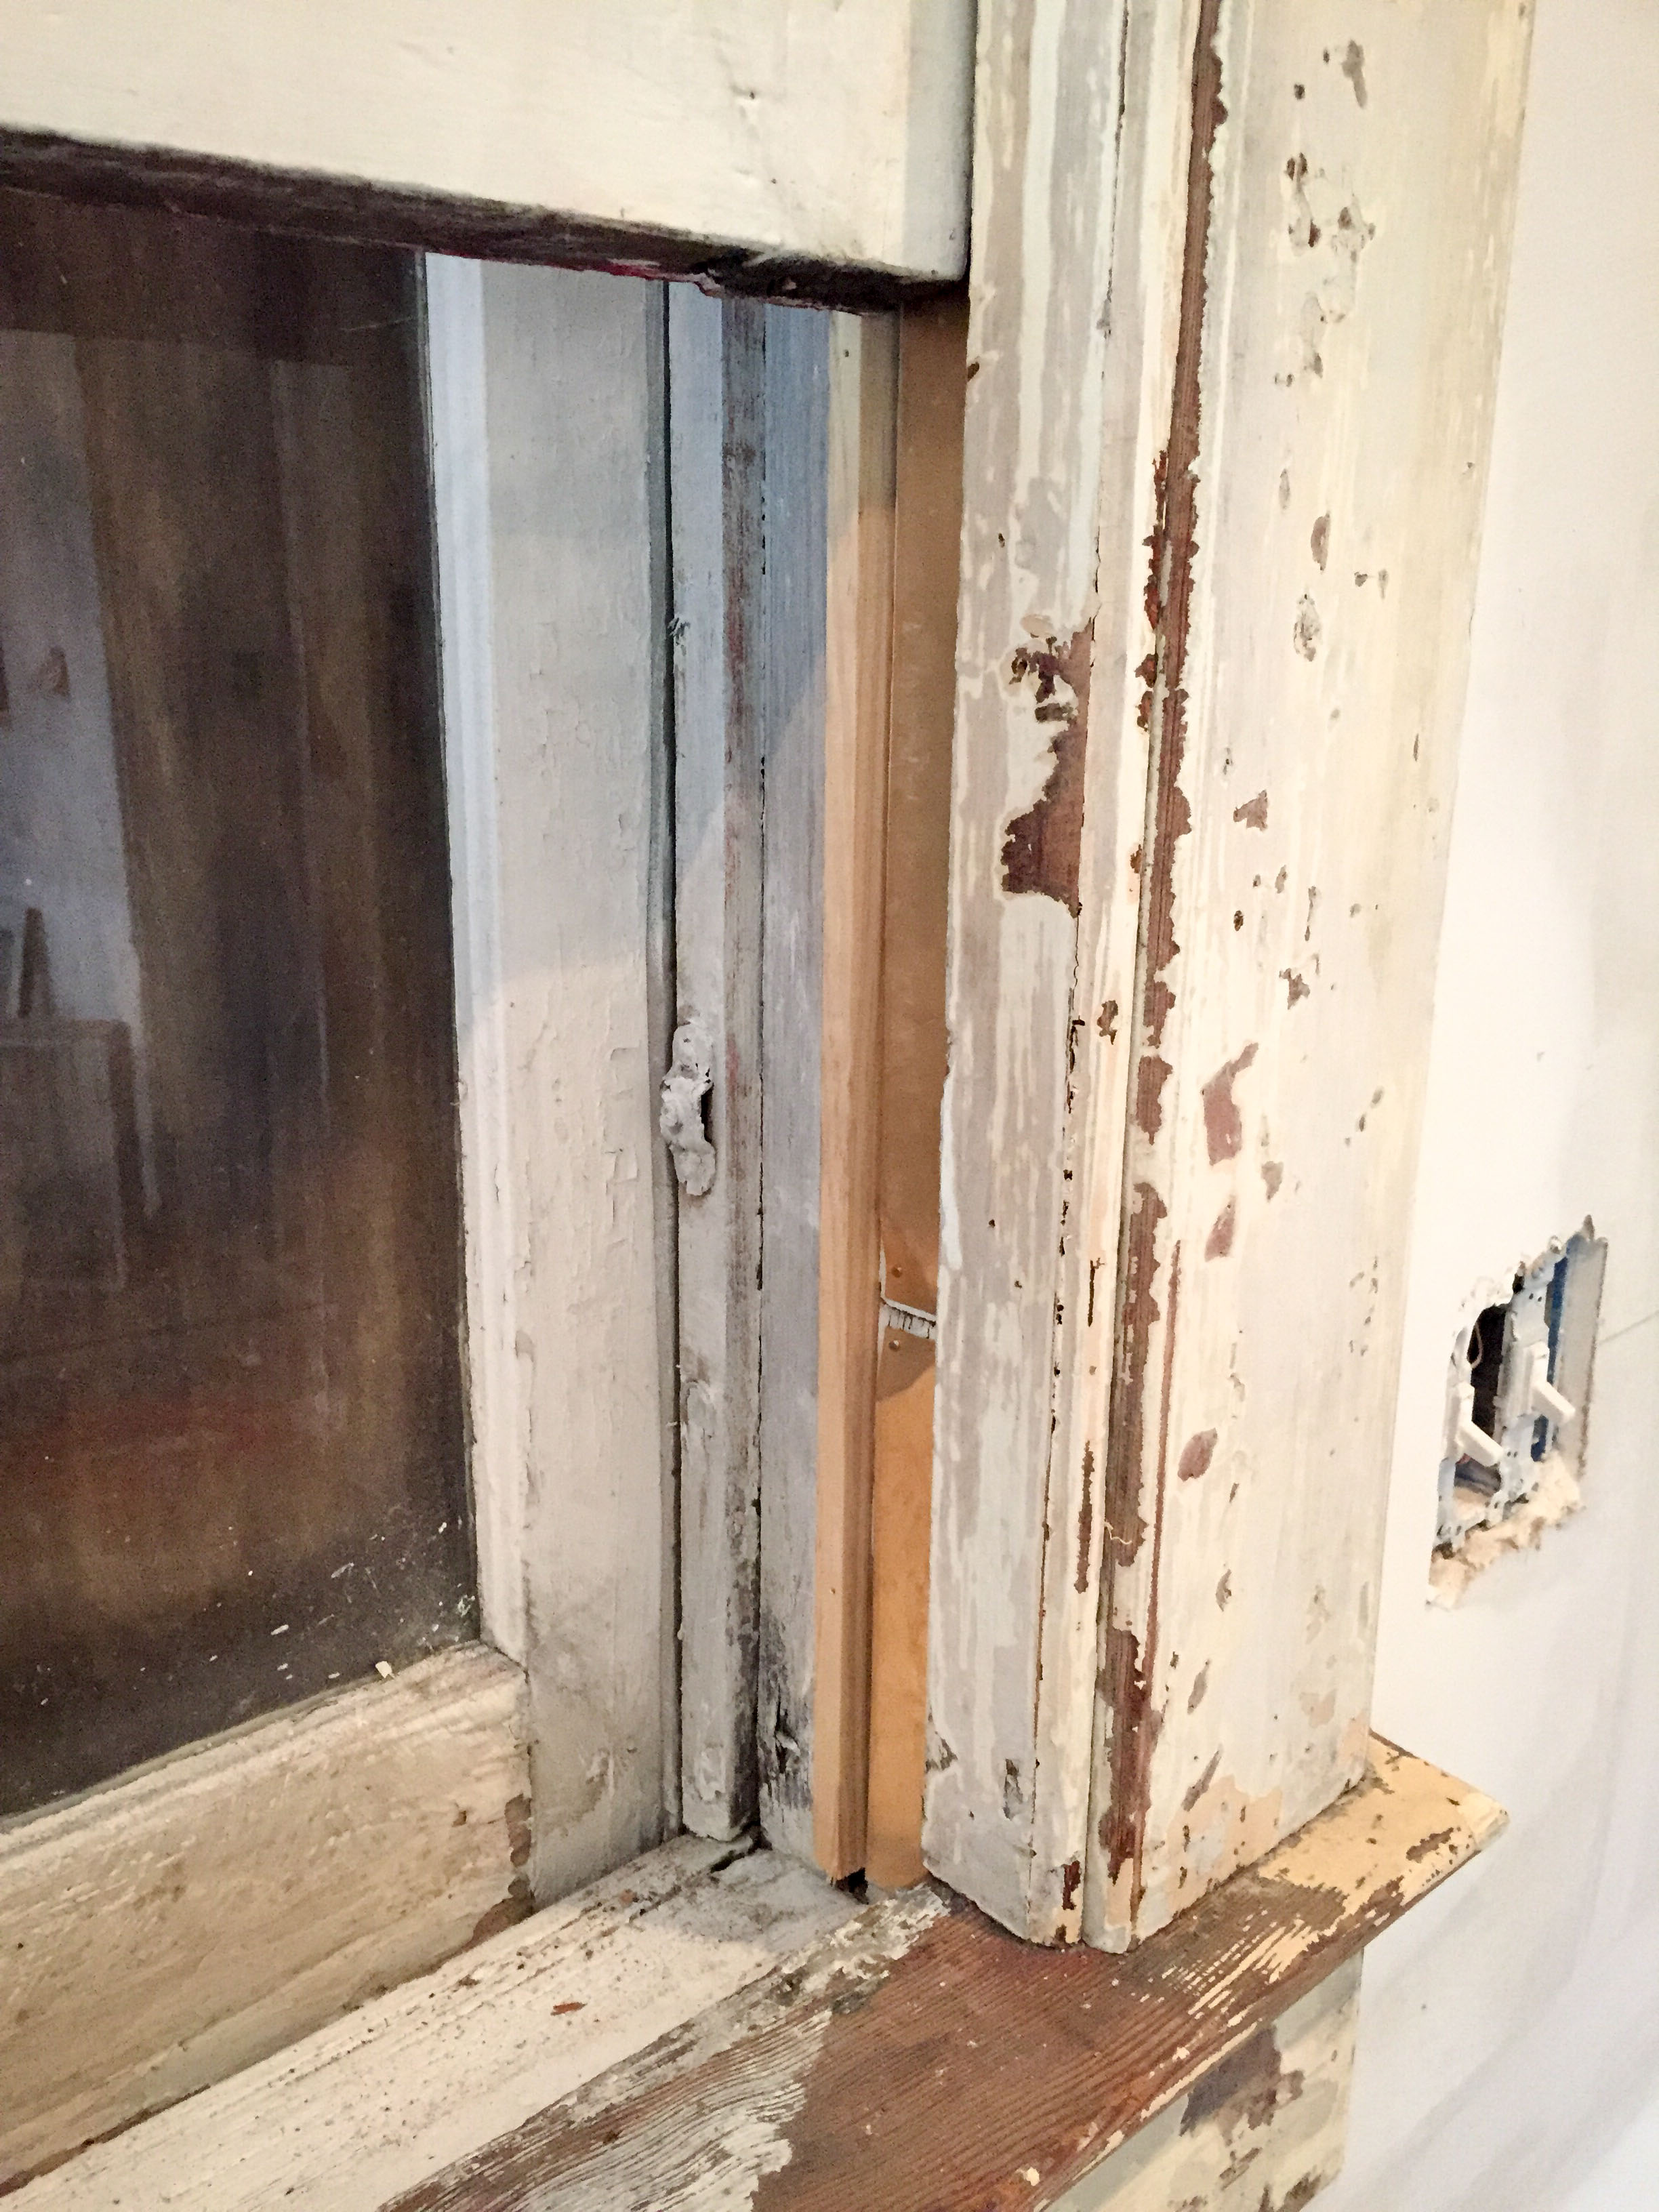
On the lower sash I found a nice tip online on how to do the pocket cover for the weights.
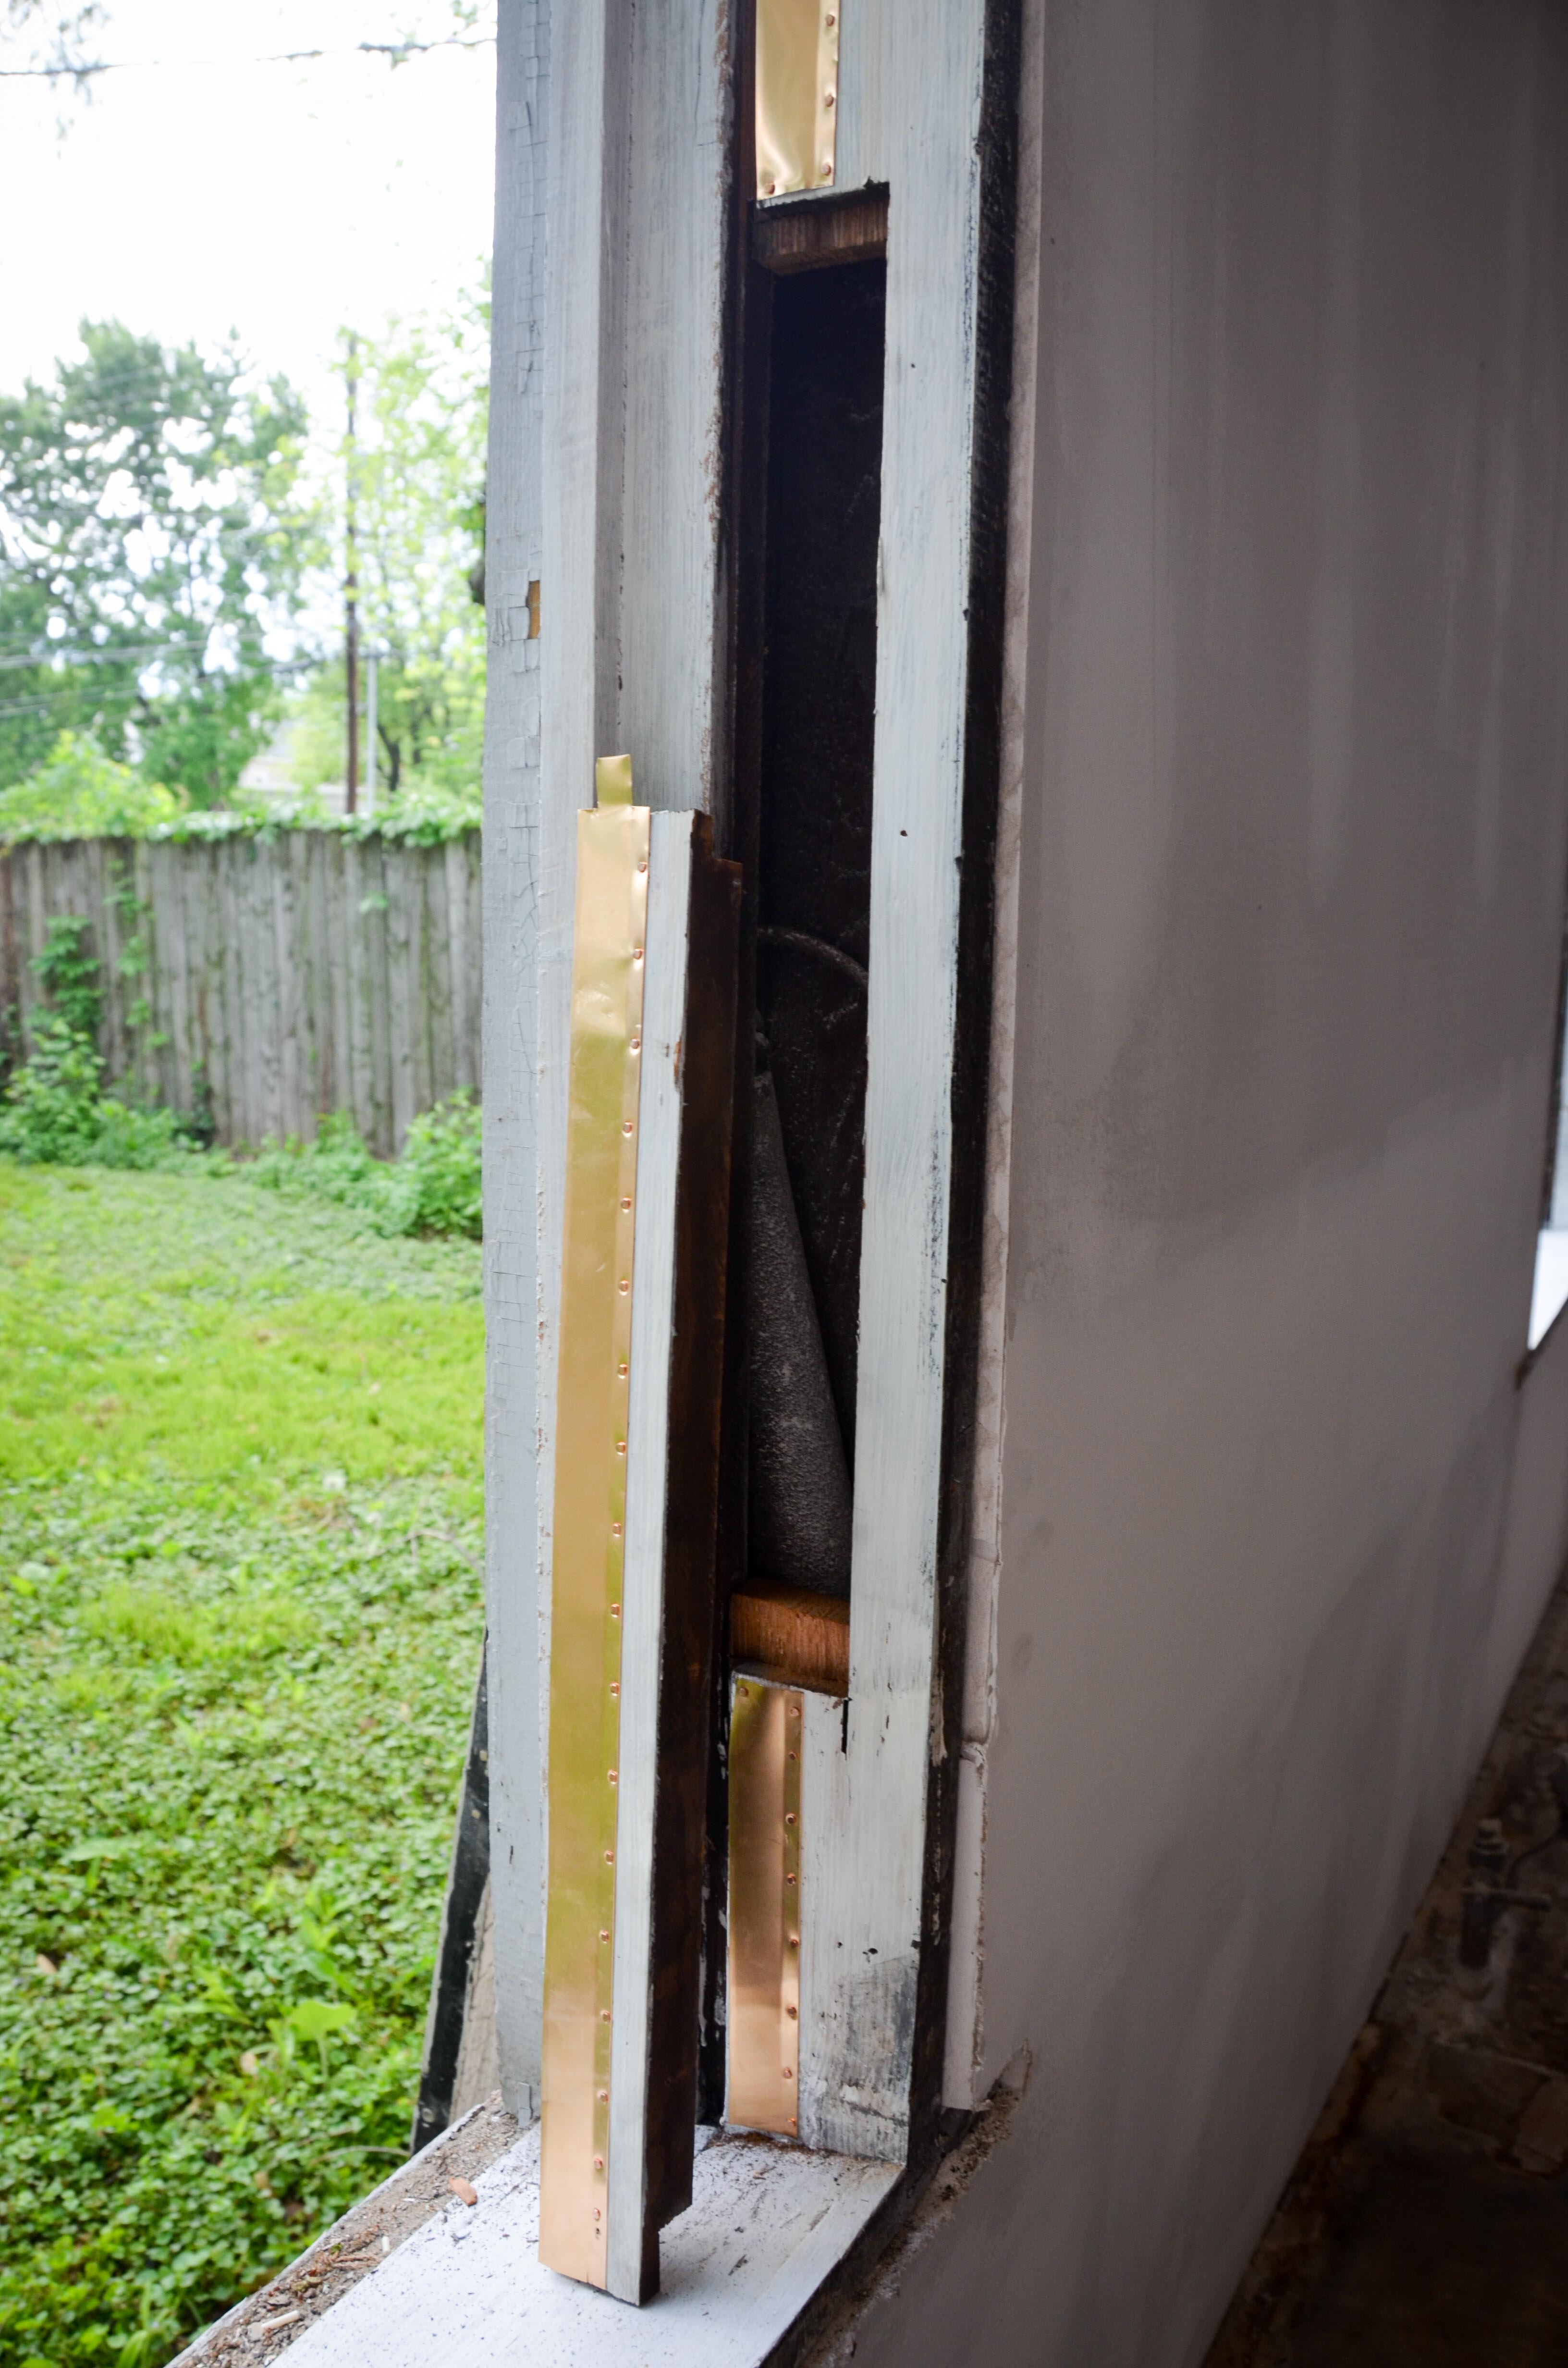
These covers need to be removable, but the spring bronze needs to be done in a way that doesn’t snag the sash when it is raised and lowered.

Installing the spring bronze is not rocket science, but it is EXTREMELY tedious. I hammered approximately 750 very small nails this weekend.
The next step was to re-rope the sash weights. Not all of the sash cords were broken, but now seemed like a good time to just replace them all. I found a company online that sells authentic sash cord. You should see the looks I got when I asked the Home Depot or Lowe’s staff if they had sash cord for double hung window weights. They inevitably would just lead me to the nylon rope section. Not going to work.
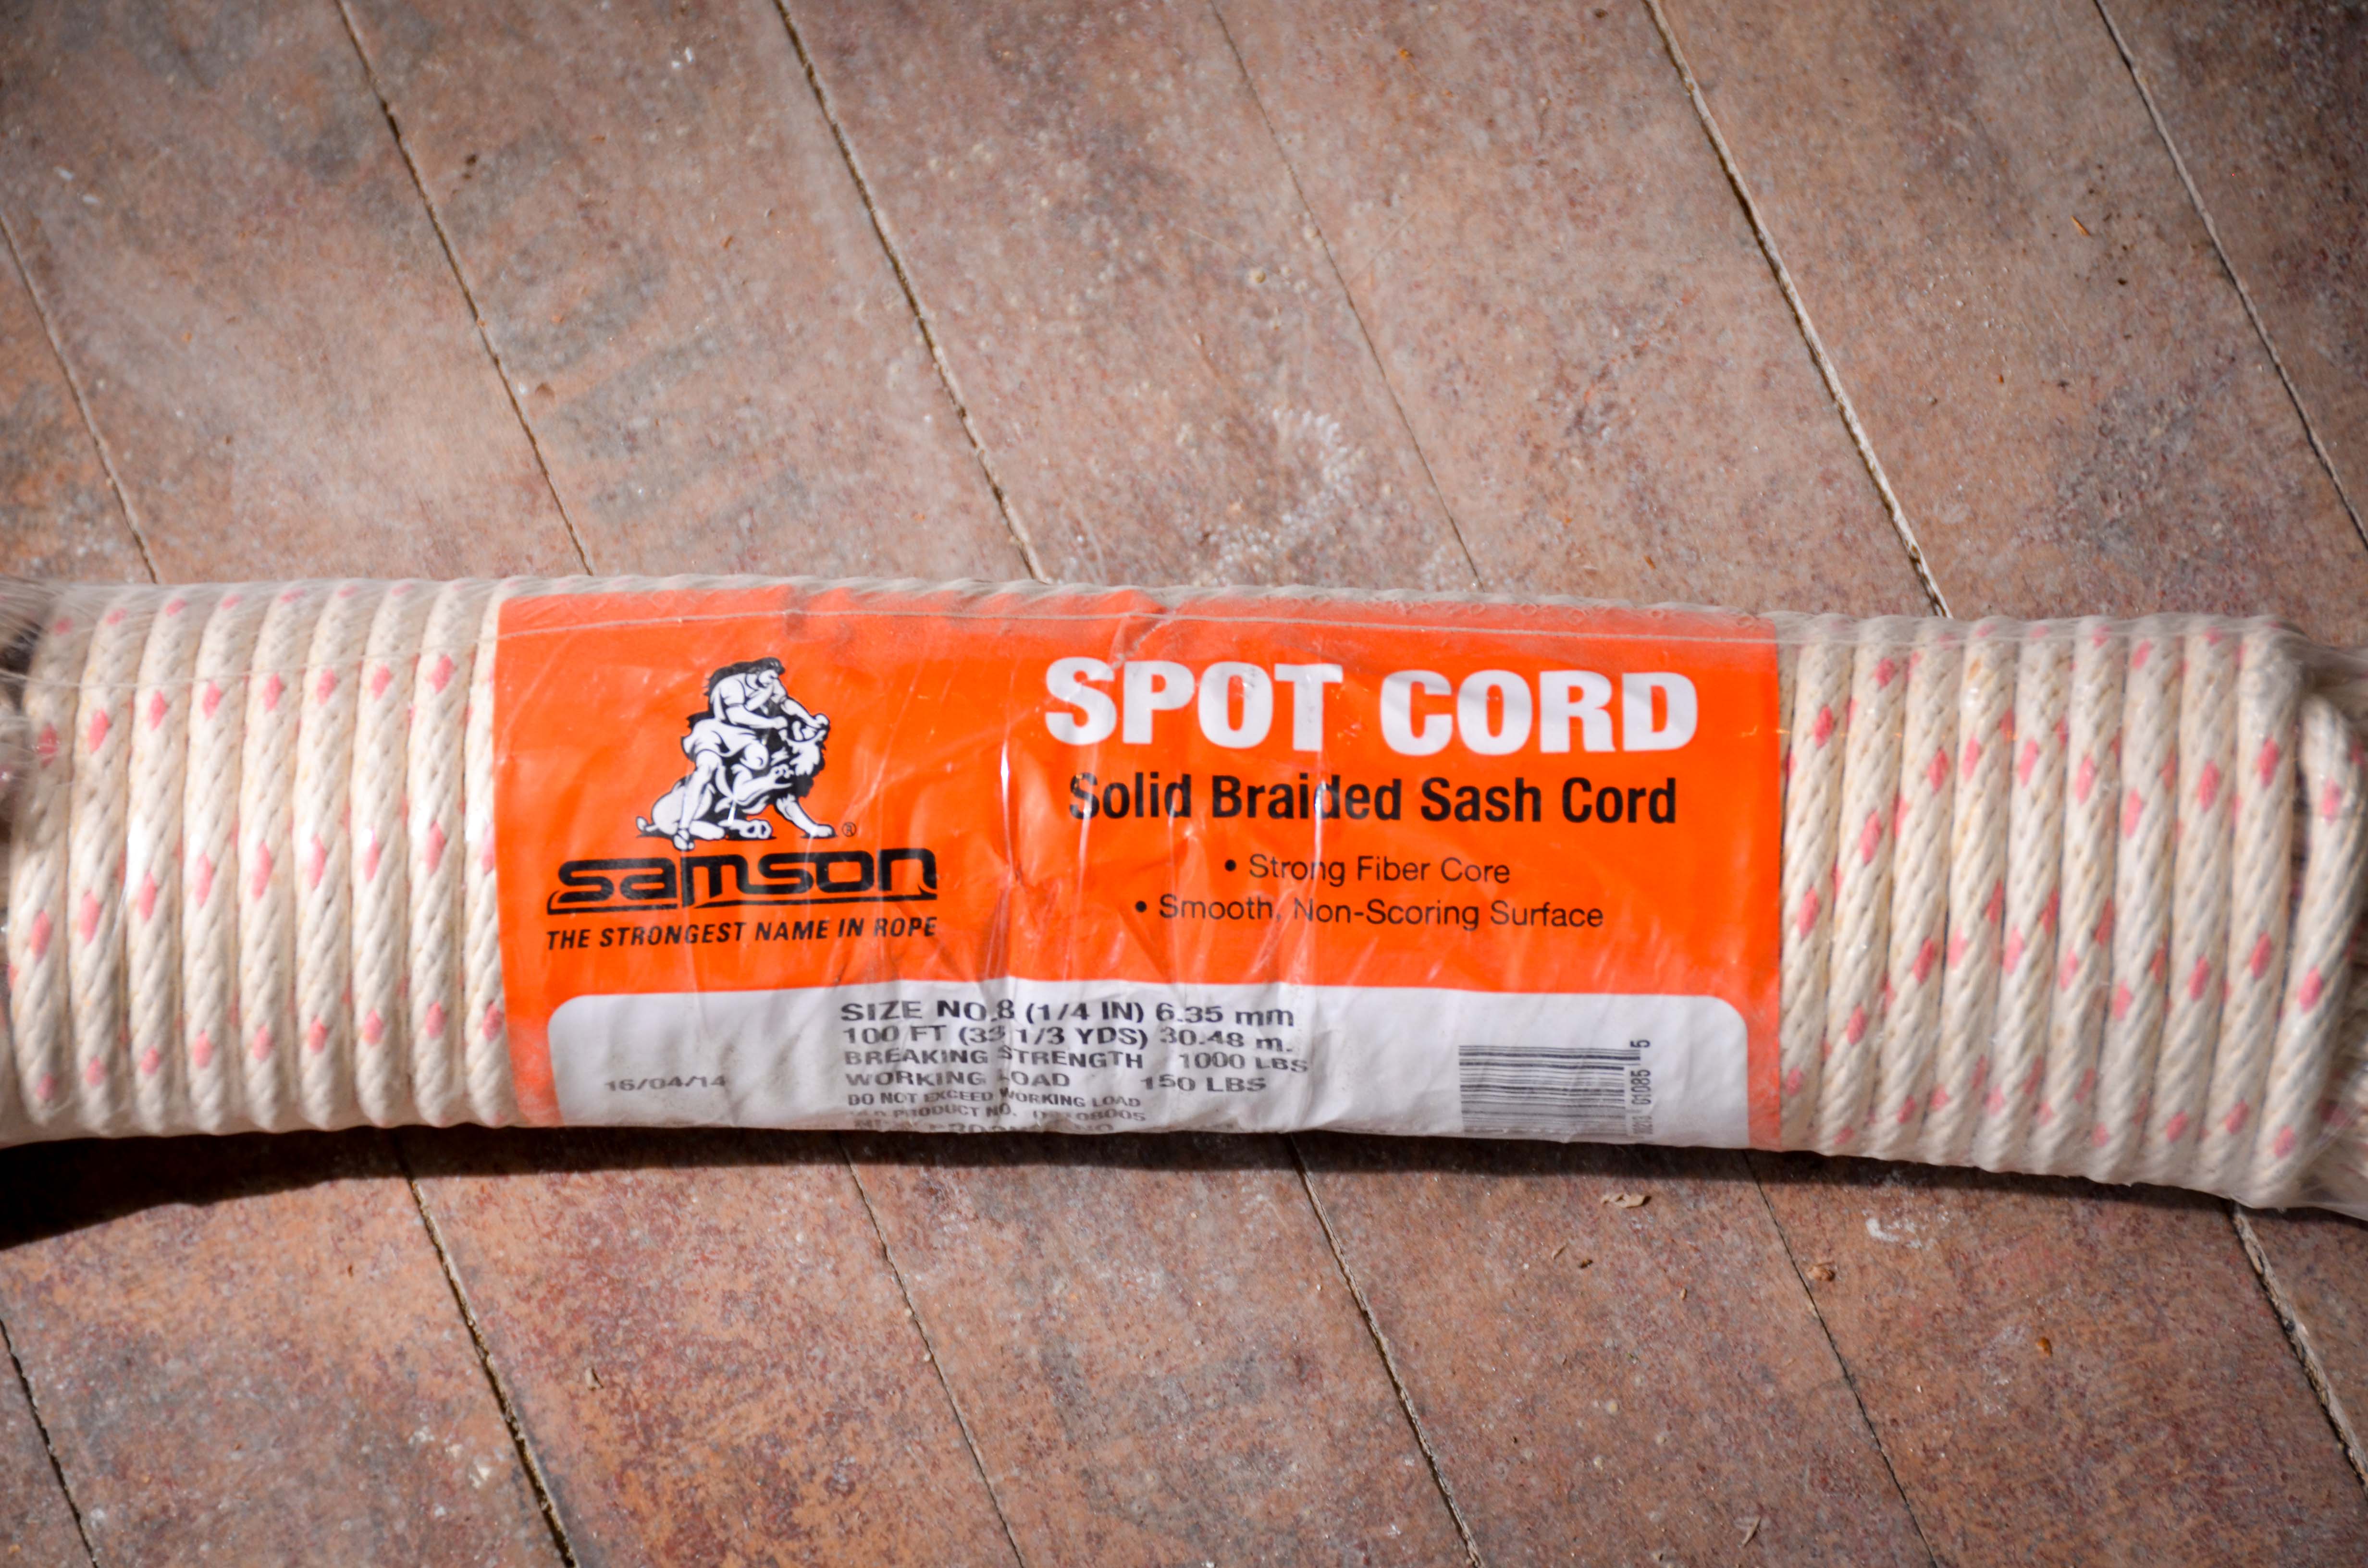
You can tell that this is the same type of rope that was originally used…

The first step (before making ANY cuts) was to fish the rope through the pulley with a small weight. Once the rope is low enough to grab through the weight pocket I pulled it through and attached the sash weight.
I was a little concerned that the fact that I was never in the boy scouts would finally come back to haunt me because I was sure that I would need some special knot skills, but nope…. nothing fancy. I just tied a simple knot which holds the weight solidly.

and another simple knot for the window sash…

The only tricky part of re-roping the weights is getting the correct length of rope. It needs to be long enough to allow the sash to go all the way up and down, but it can’t be so long that the weight hits the bottom of the frame before the window gets all the way up. Once I developed a system for figuring this out, it was pretty quick. After the weights were attached I installed the sashes and made sure everything was working properly. They are snug (which is good), but still move smoothly.
I forgot to mention that we “restored” the pulleys by cooking them in a crock pot over night. This loosened up all the paint and grime. I decided to spray paint the pulleys that will be used in the kitchen windows.

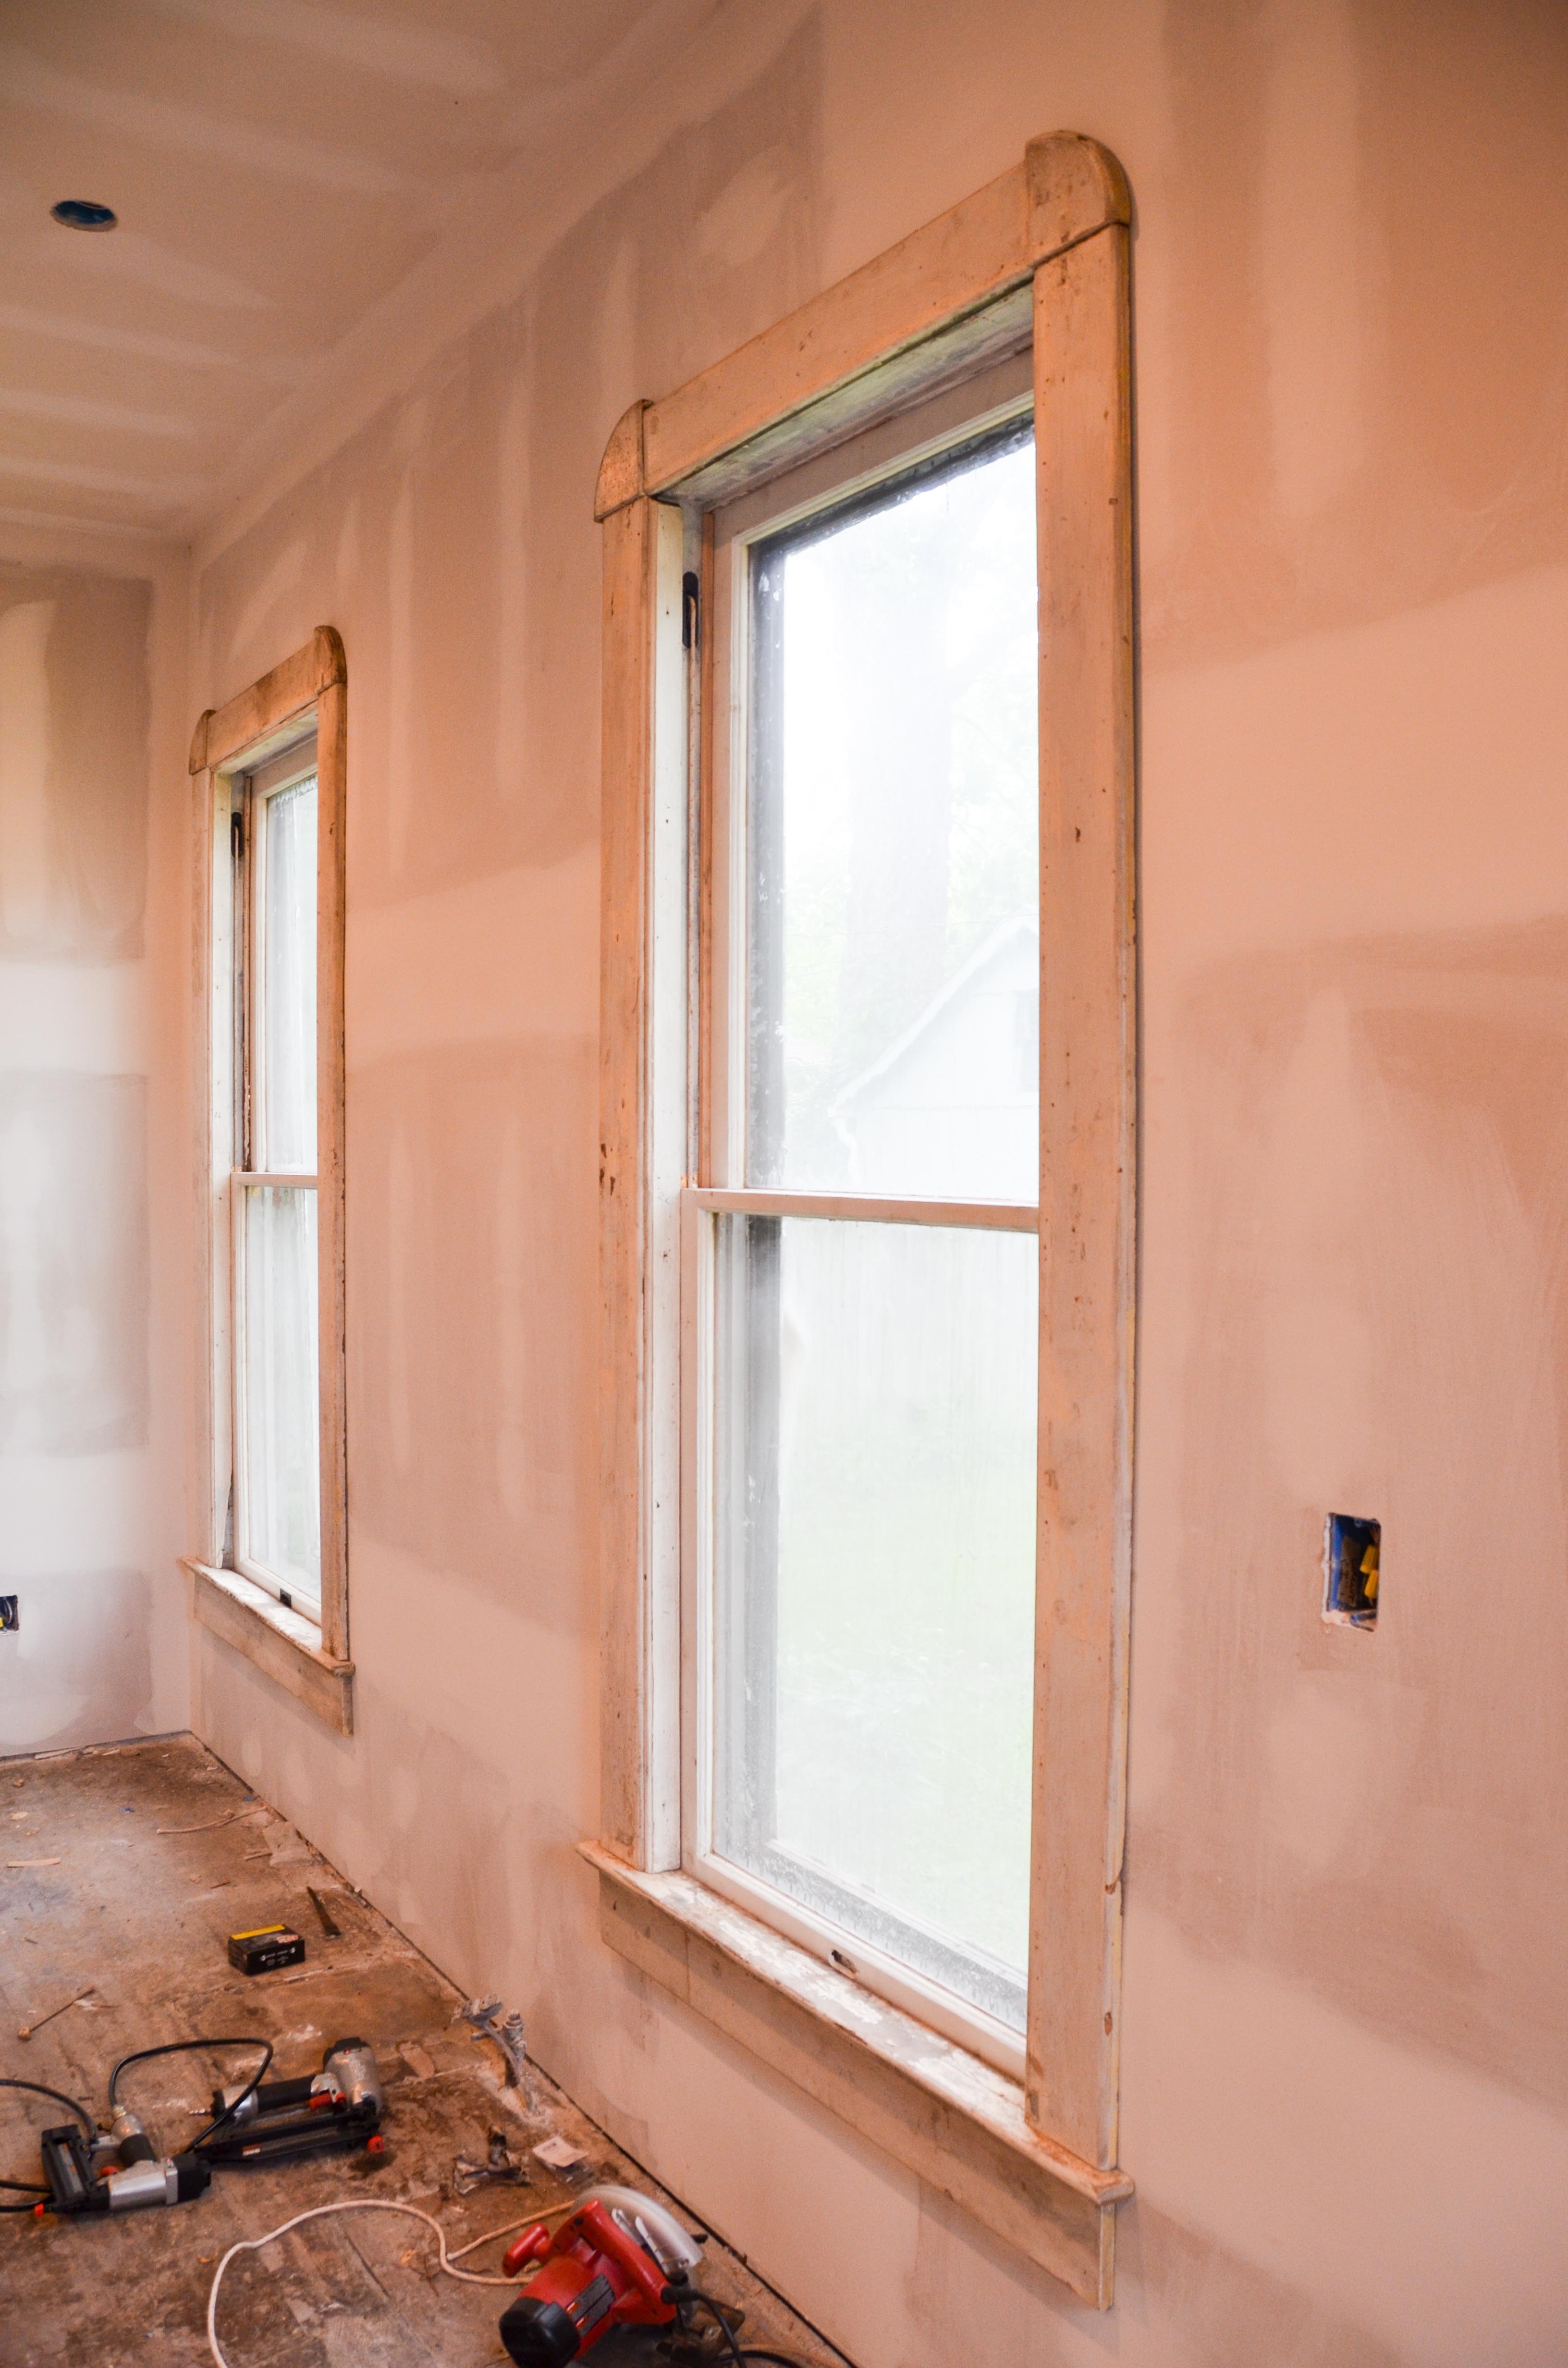
After inserting the parting stop (the small strip of wood that separates the top sash and bottom sash creating a “track” for them in which to slide) I began the most gratifying and exciting portion of the completion process…. re-installing the window casing!
But first, I have to tell you that everything I just described took me FIVE HOURS to accomplish on the first window!!! That seems ridiculous, I know. A lot of that time was spent just getting situated, thinking, figuring things out, and learning the process. The other windows got much faster (I think I can do the weather stripping and re-roping in a little over 2 hours now), but still… it takes time.
The window casing (trim) was removed at the very beginning of the project when we did the initial demo of the kitchen. Since then it has been residing in the garage, with all the other trim and doors, patiently awaiting their moment of glorious return.
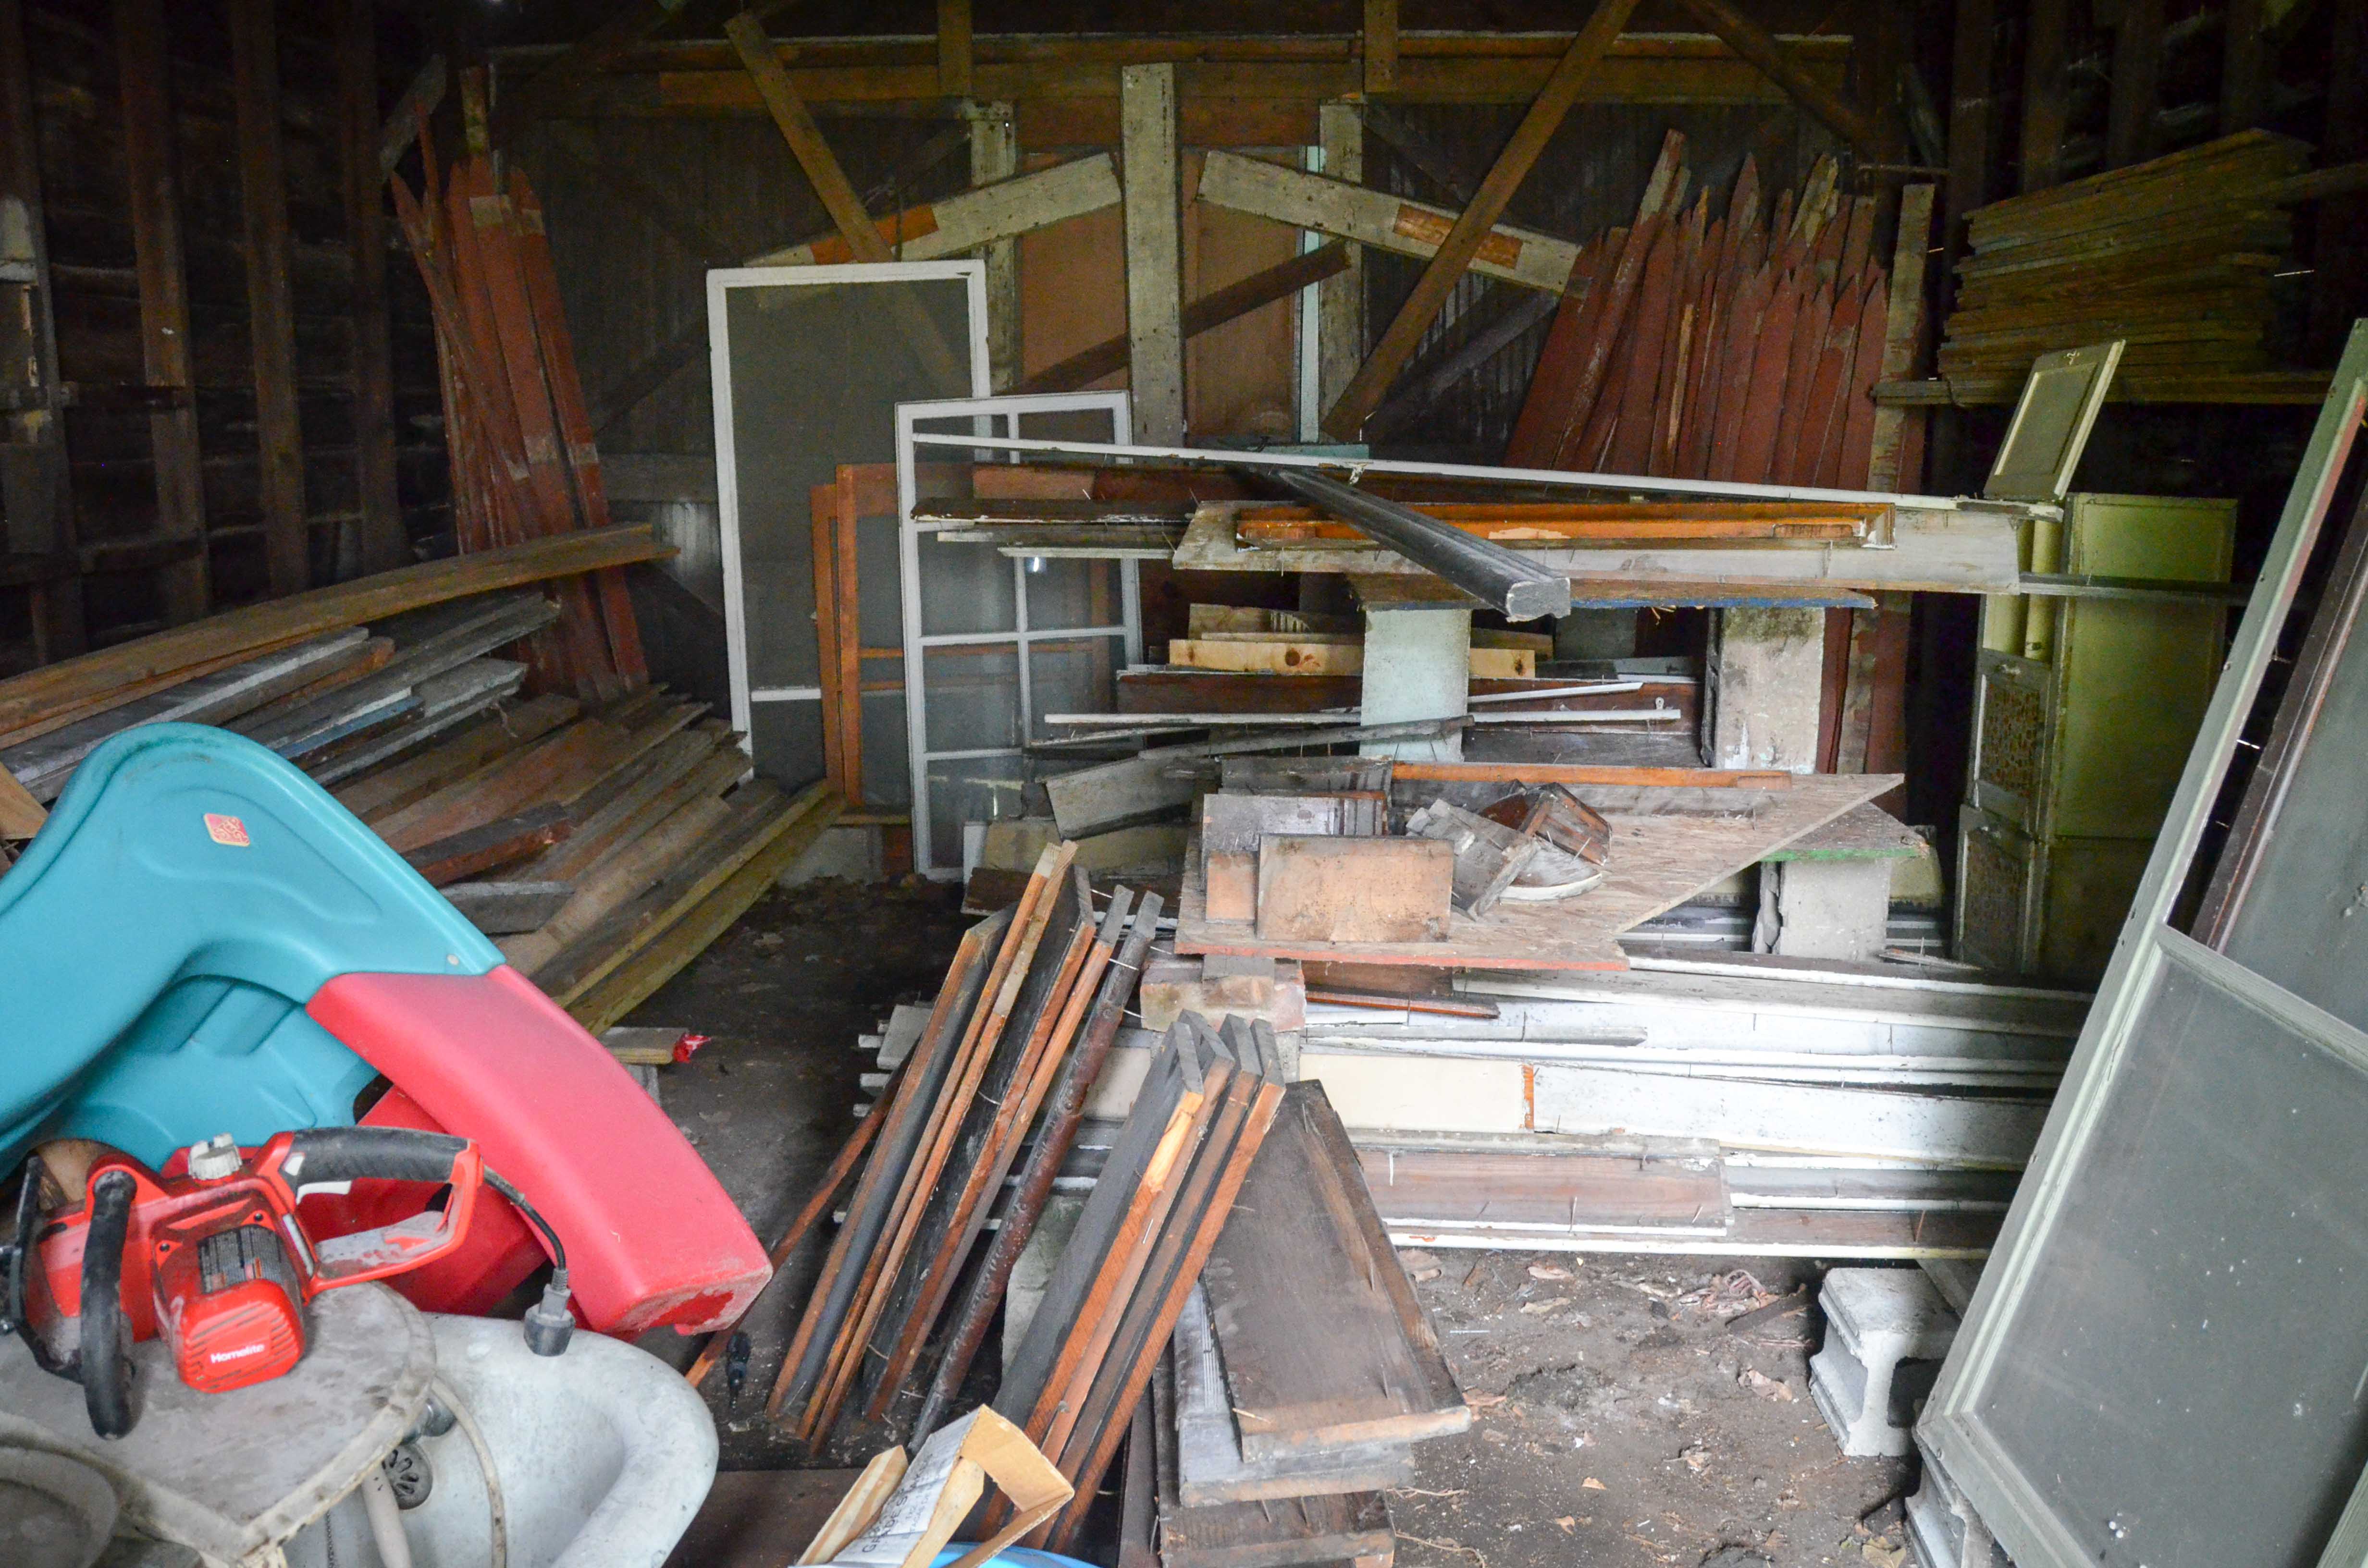
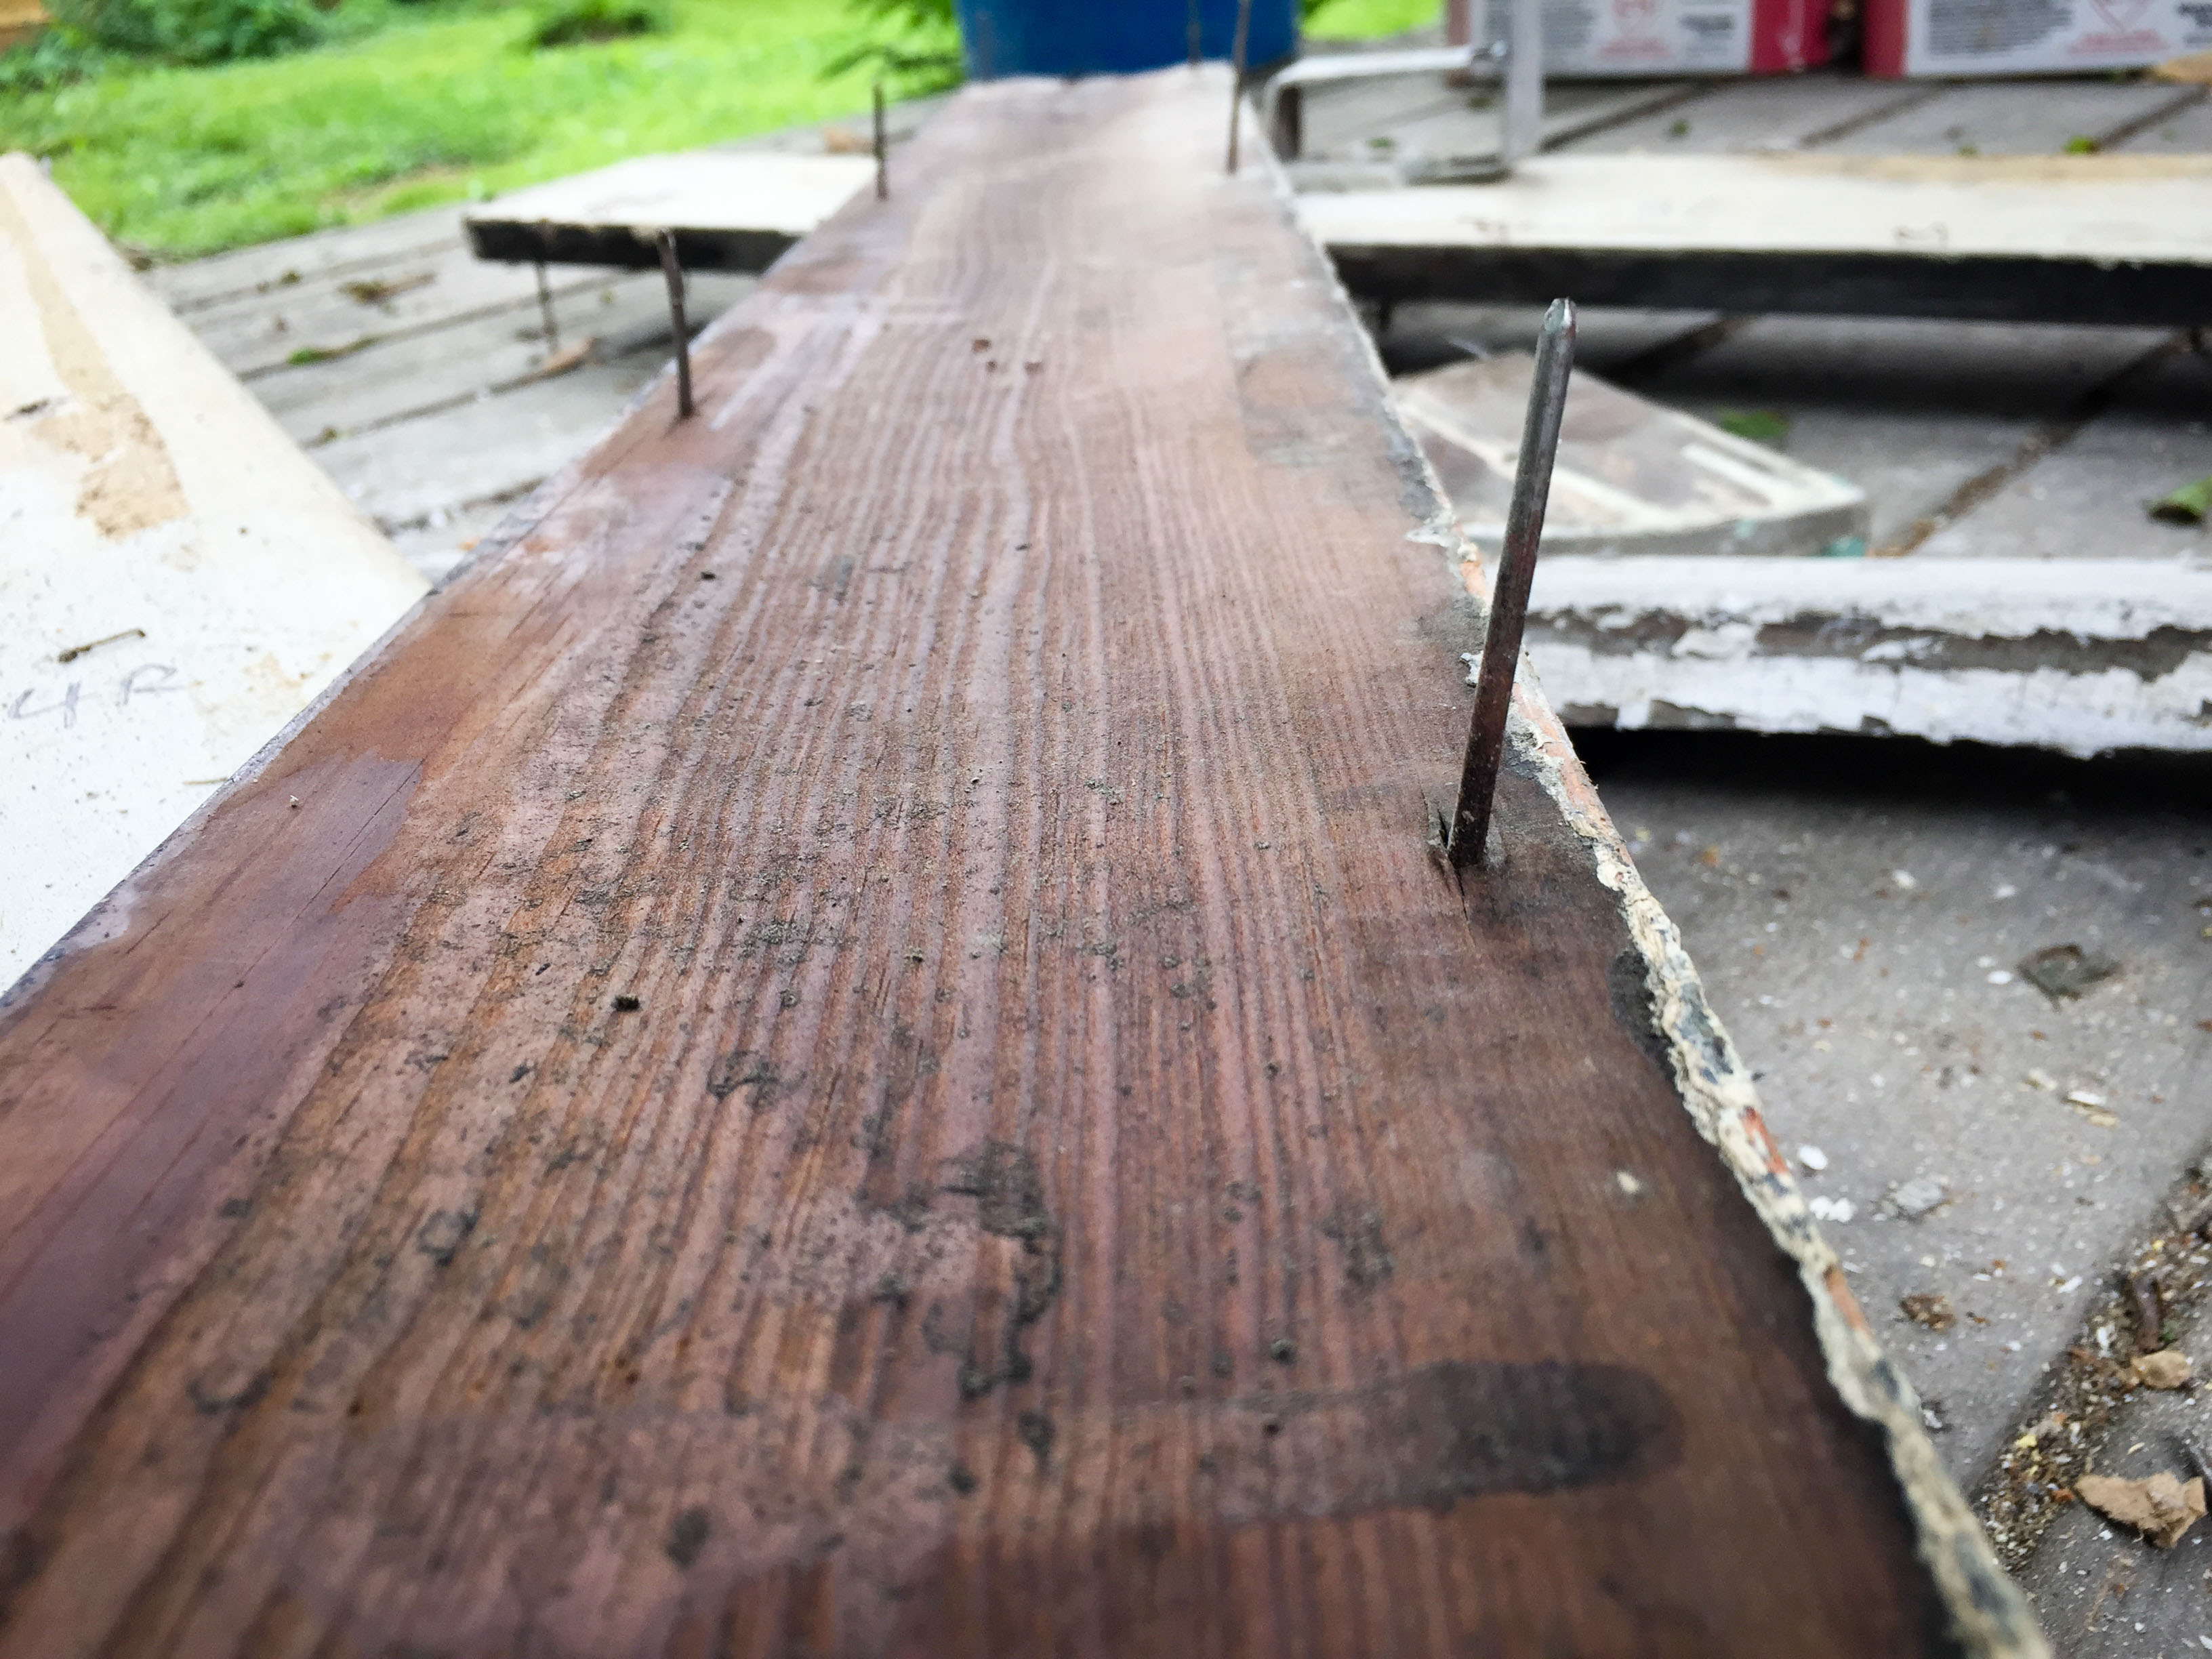
The casing was in rough shape. It had been painted, nailed, duct taped, and stapled to death.

All the trim in the kitchen was already painted and we are going to repaint it white, so there was no need to completely scrape it. It was still necessary to remove all the staples, old nails, scrape off the rough stuff, then sand everything down so that we have a smooth finish when we repaint it.
Here are the trim pieces for one window after a little love…

It was at this point that I flashed back to the last time I installed baseboards during a previous small renovation project. I did most of it with a hammer and nails before finally asking a friend if I could borrow his nail gun. That nail gun made the job ten times quicker, easier, and led to a much better finish result. I needed one of those now! It was also at this point that I realized I was in possession of a Home Depot birthday gift card with enough money to almost cover the purchase of this new toy – thanks Mike and Nancy!
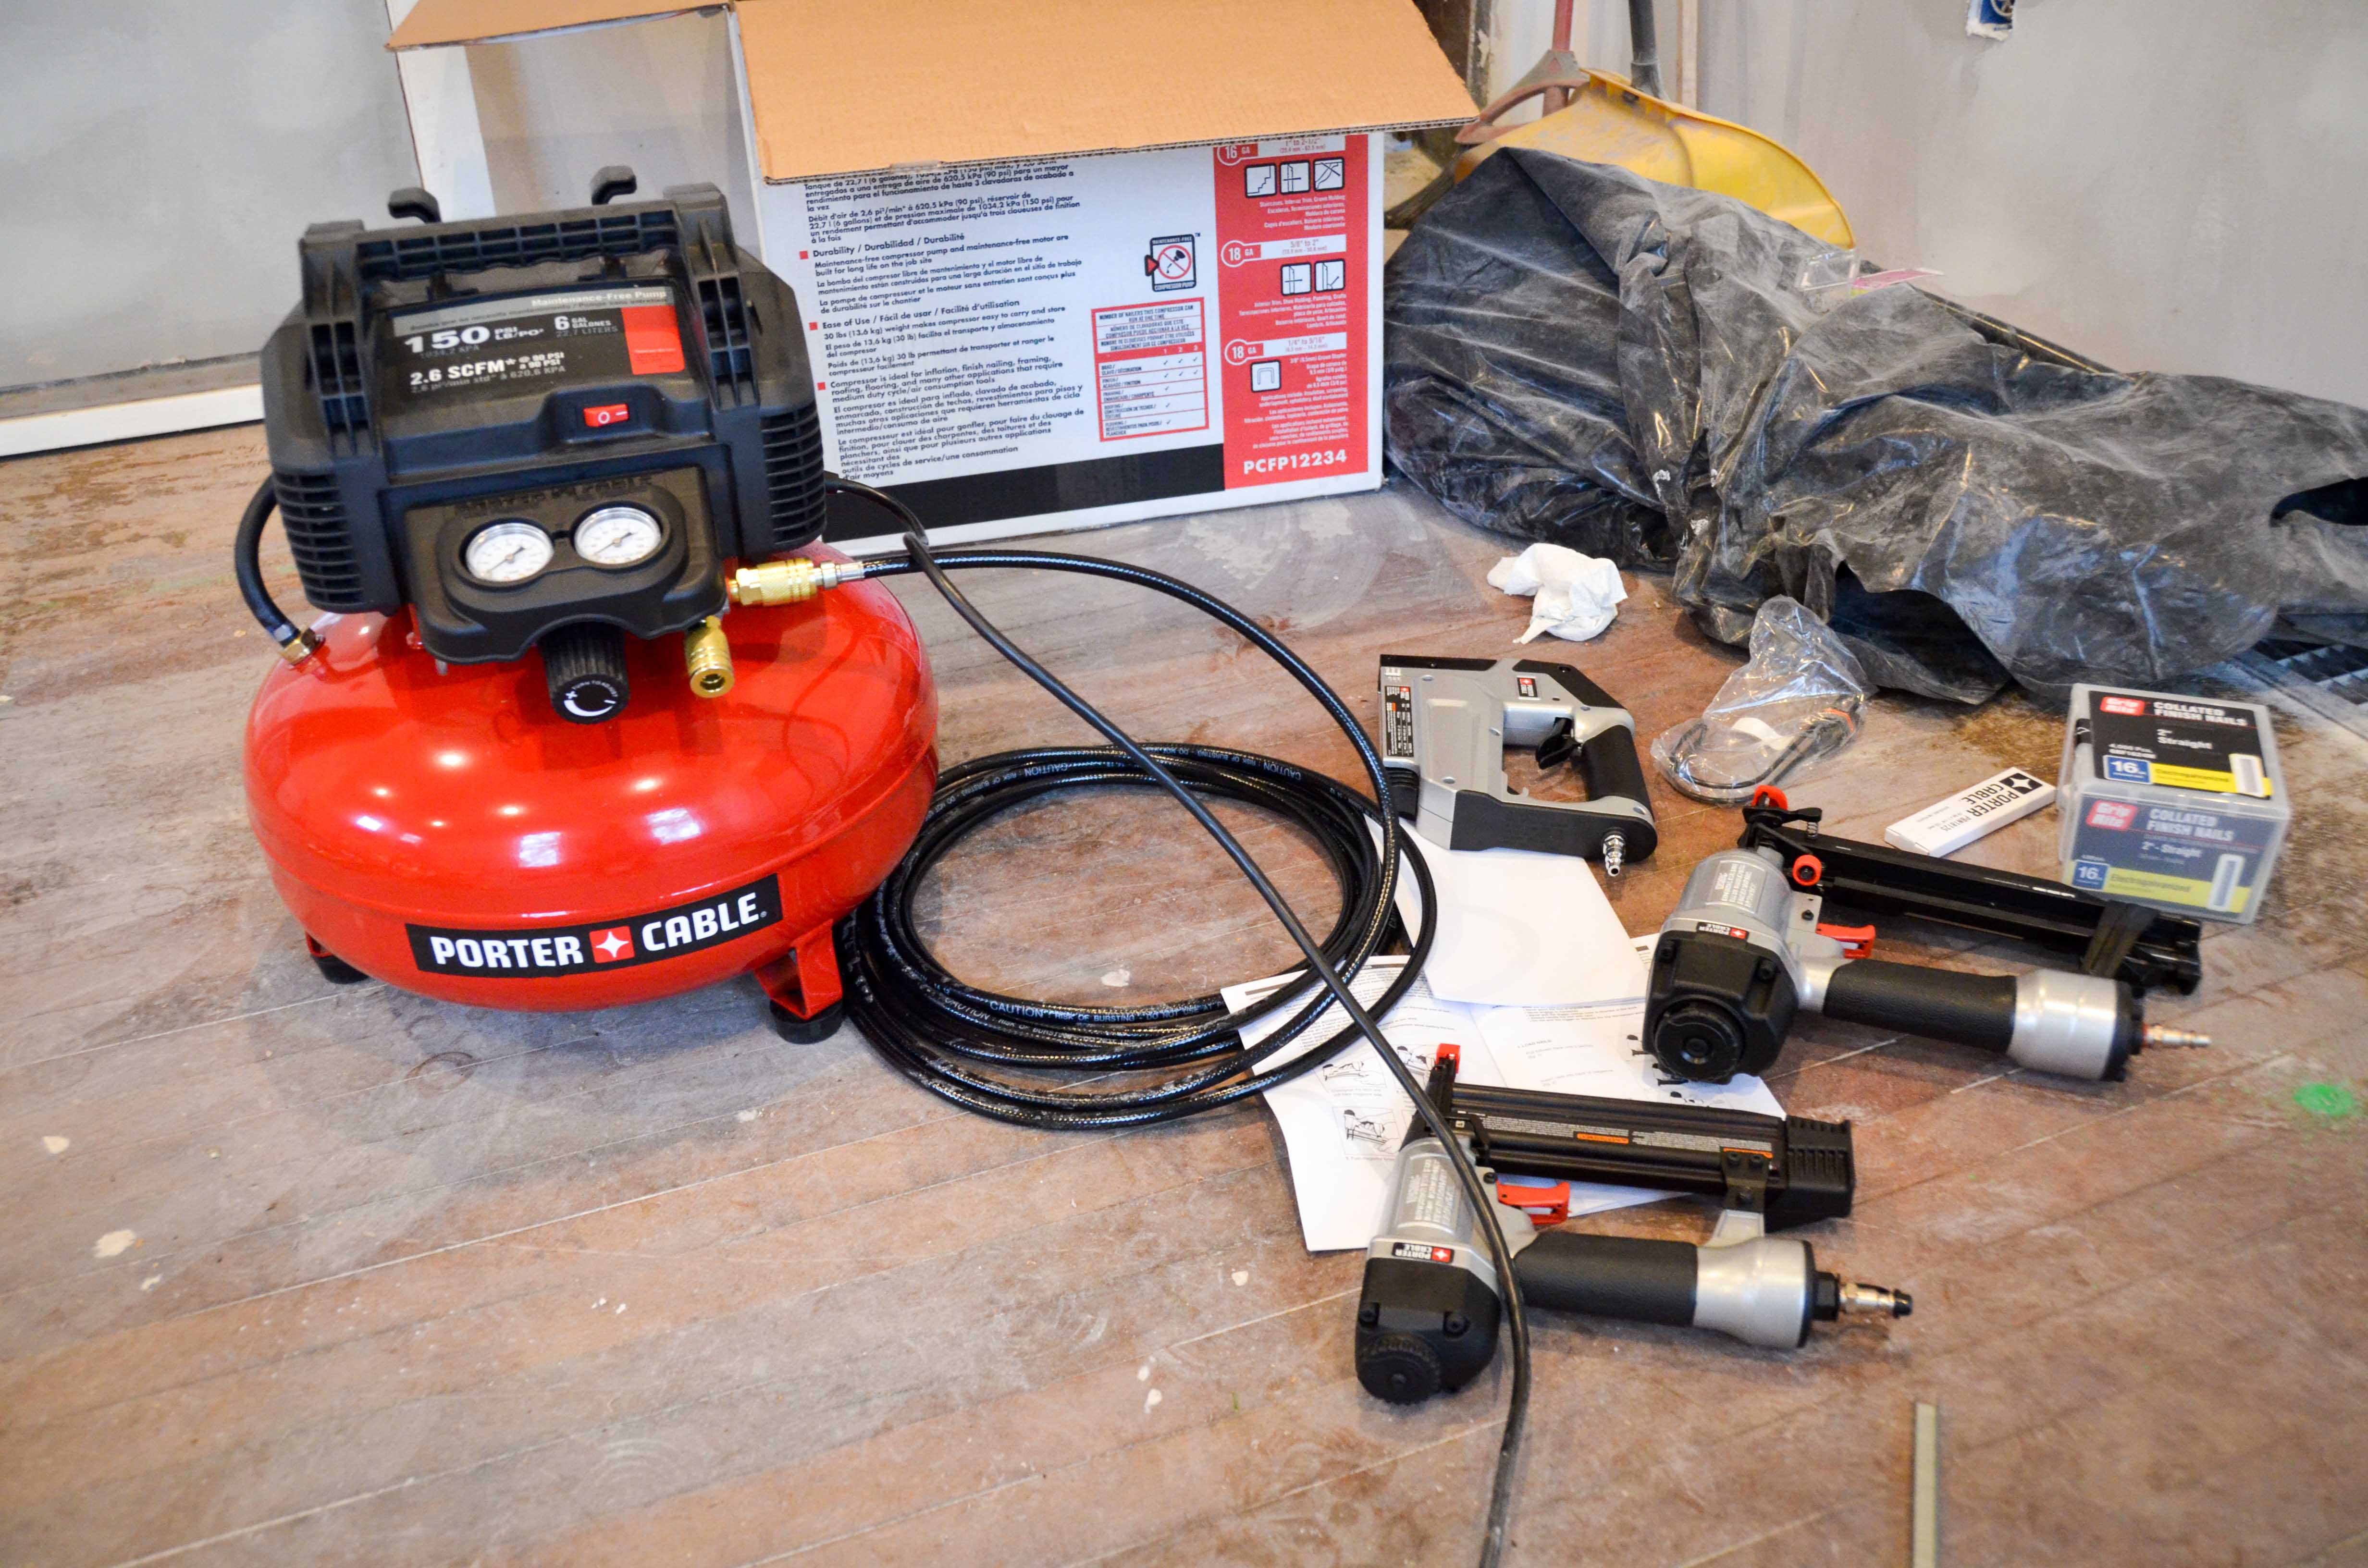
It’s nothing fancy, but it did include two different sized nail guns and a staple gun. It’s all I really need.
It felt great to put up the window casing. It was like finishing the last 100 yards of a marathon, rounding 3rd base and heading for home, or taking a victory lap. It was easy, instantly gratifying, and signaled the last step for each window.

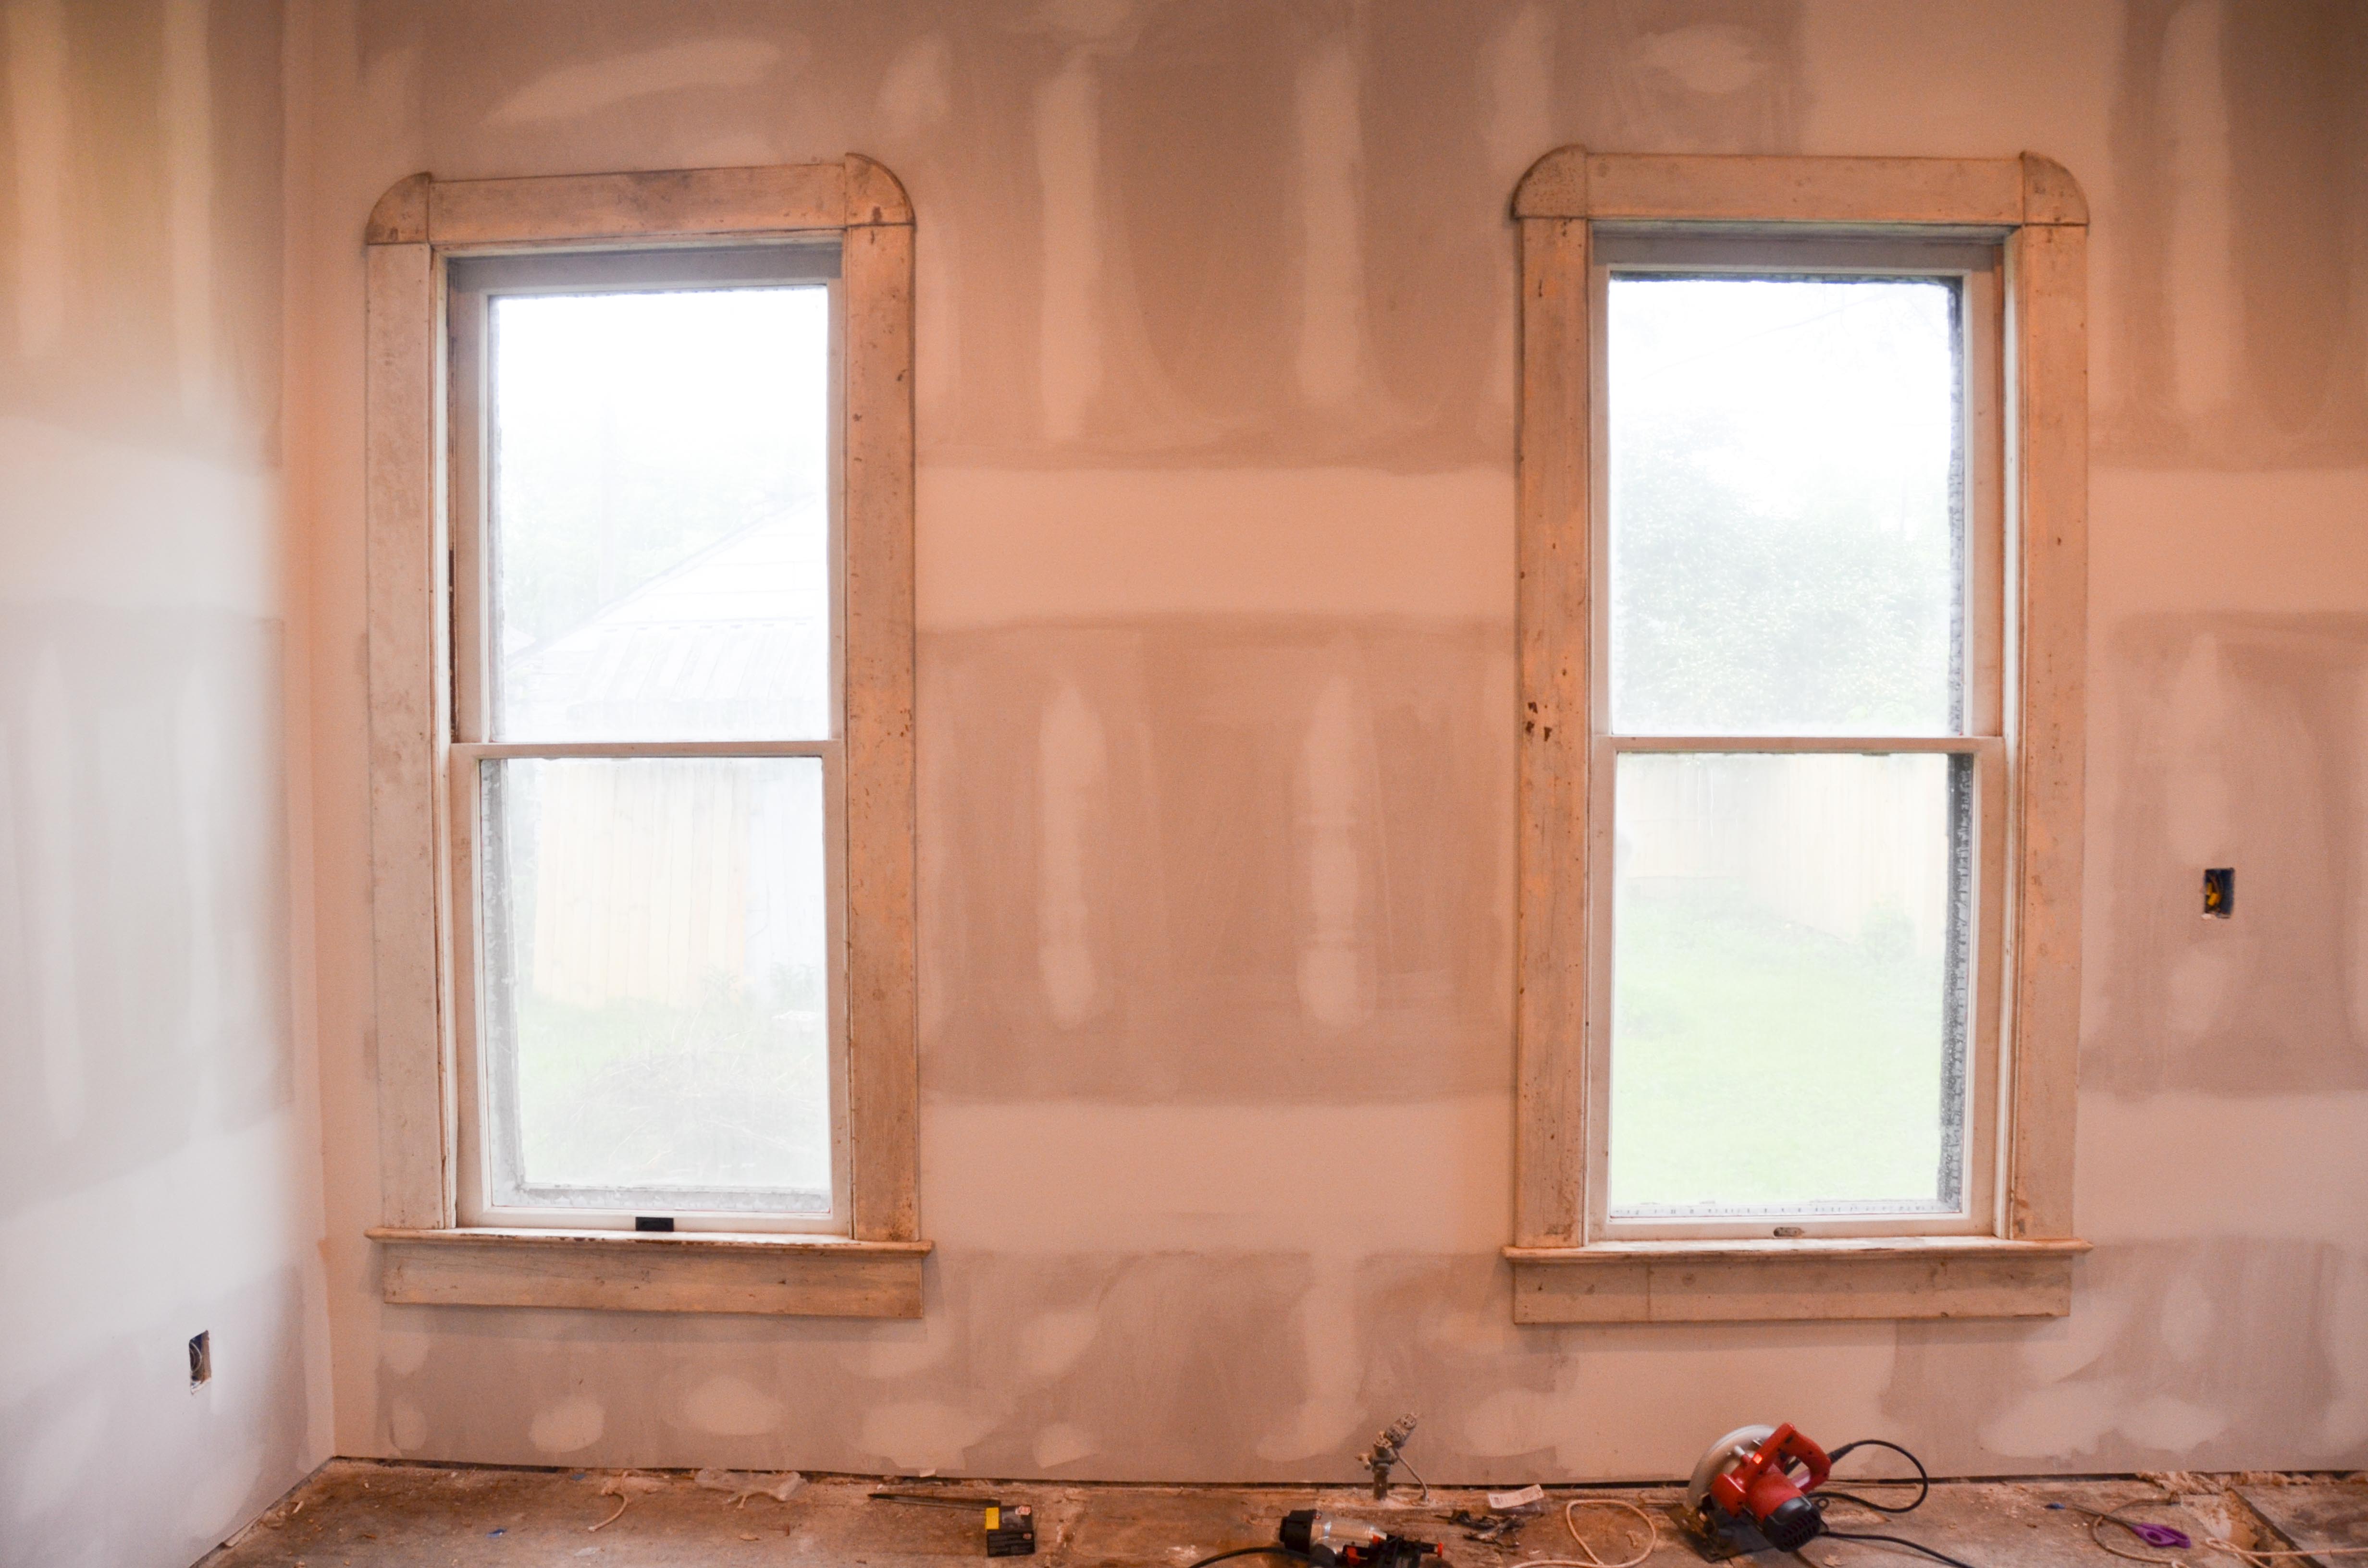
Here are some photos of the final results. Keep in mind… The sashes have been primed, but not the casing. Everything is dirty, including the window panes – which have not been cleaned in months. The casing still has staple/nail holes that need filled. Everything needs a fresh coat of primer and paint. BUT once that is all done they will end up looking like new. In addition, with the new glazing of the storm windows, sashes, and weather stripping, I think they will end up being relatively energy efficient. I guess I’ll know for sure next winter. Bring it on, polar vortex!
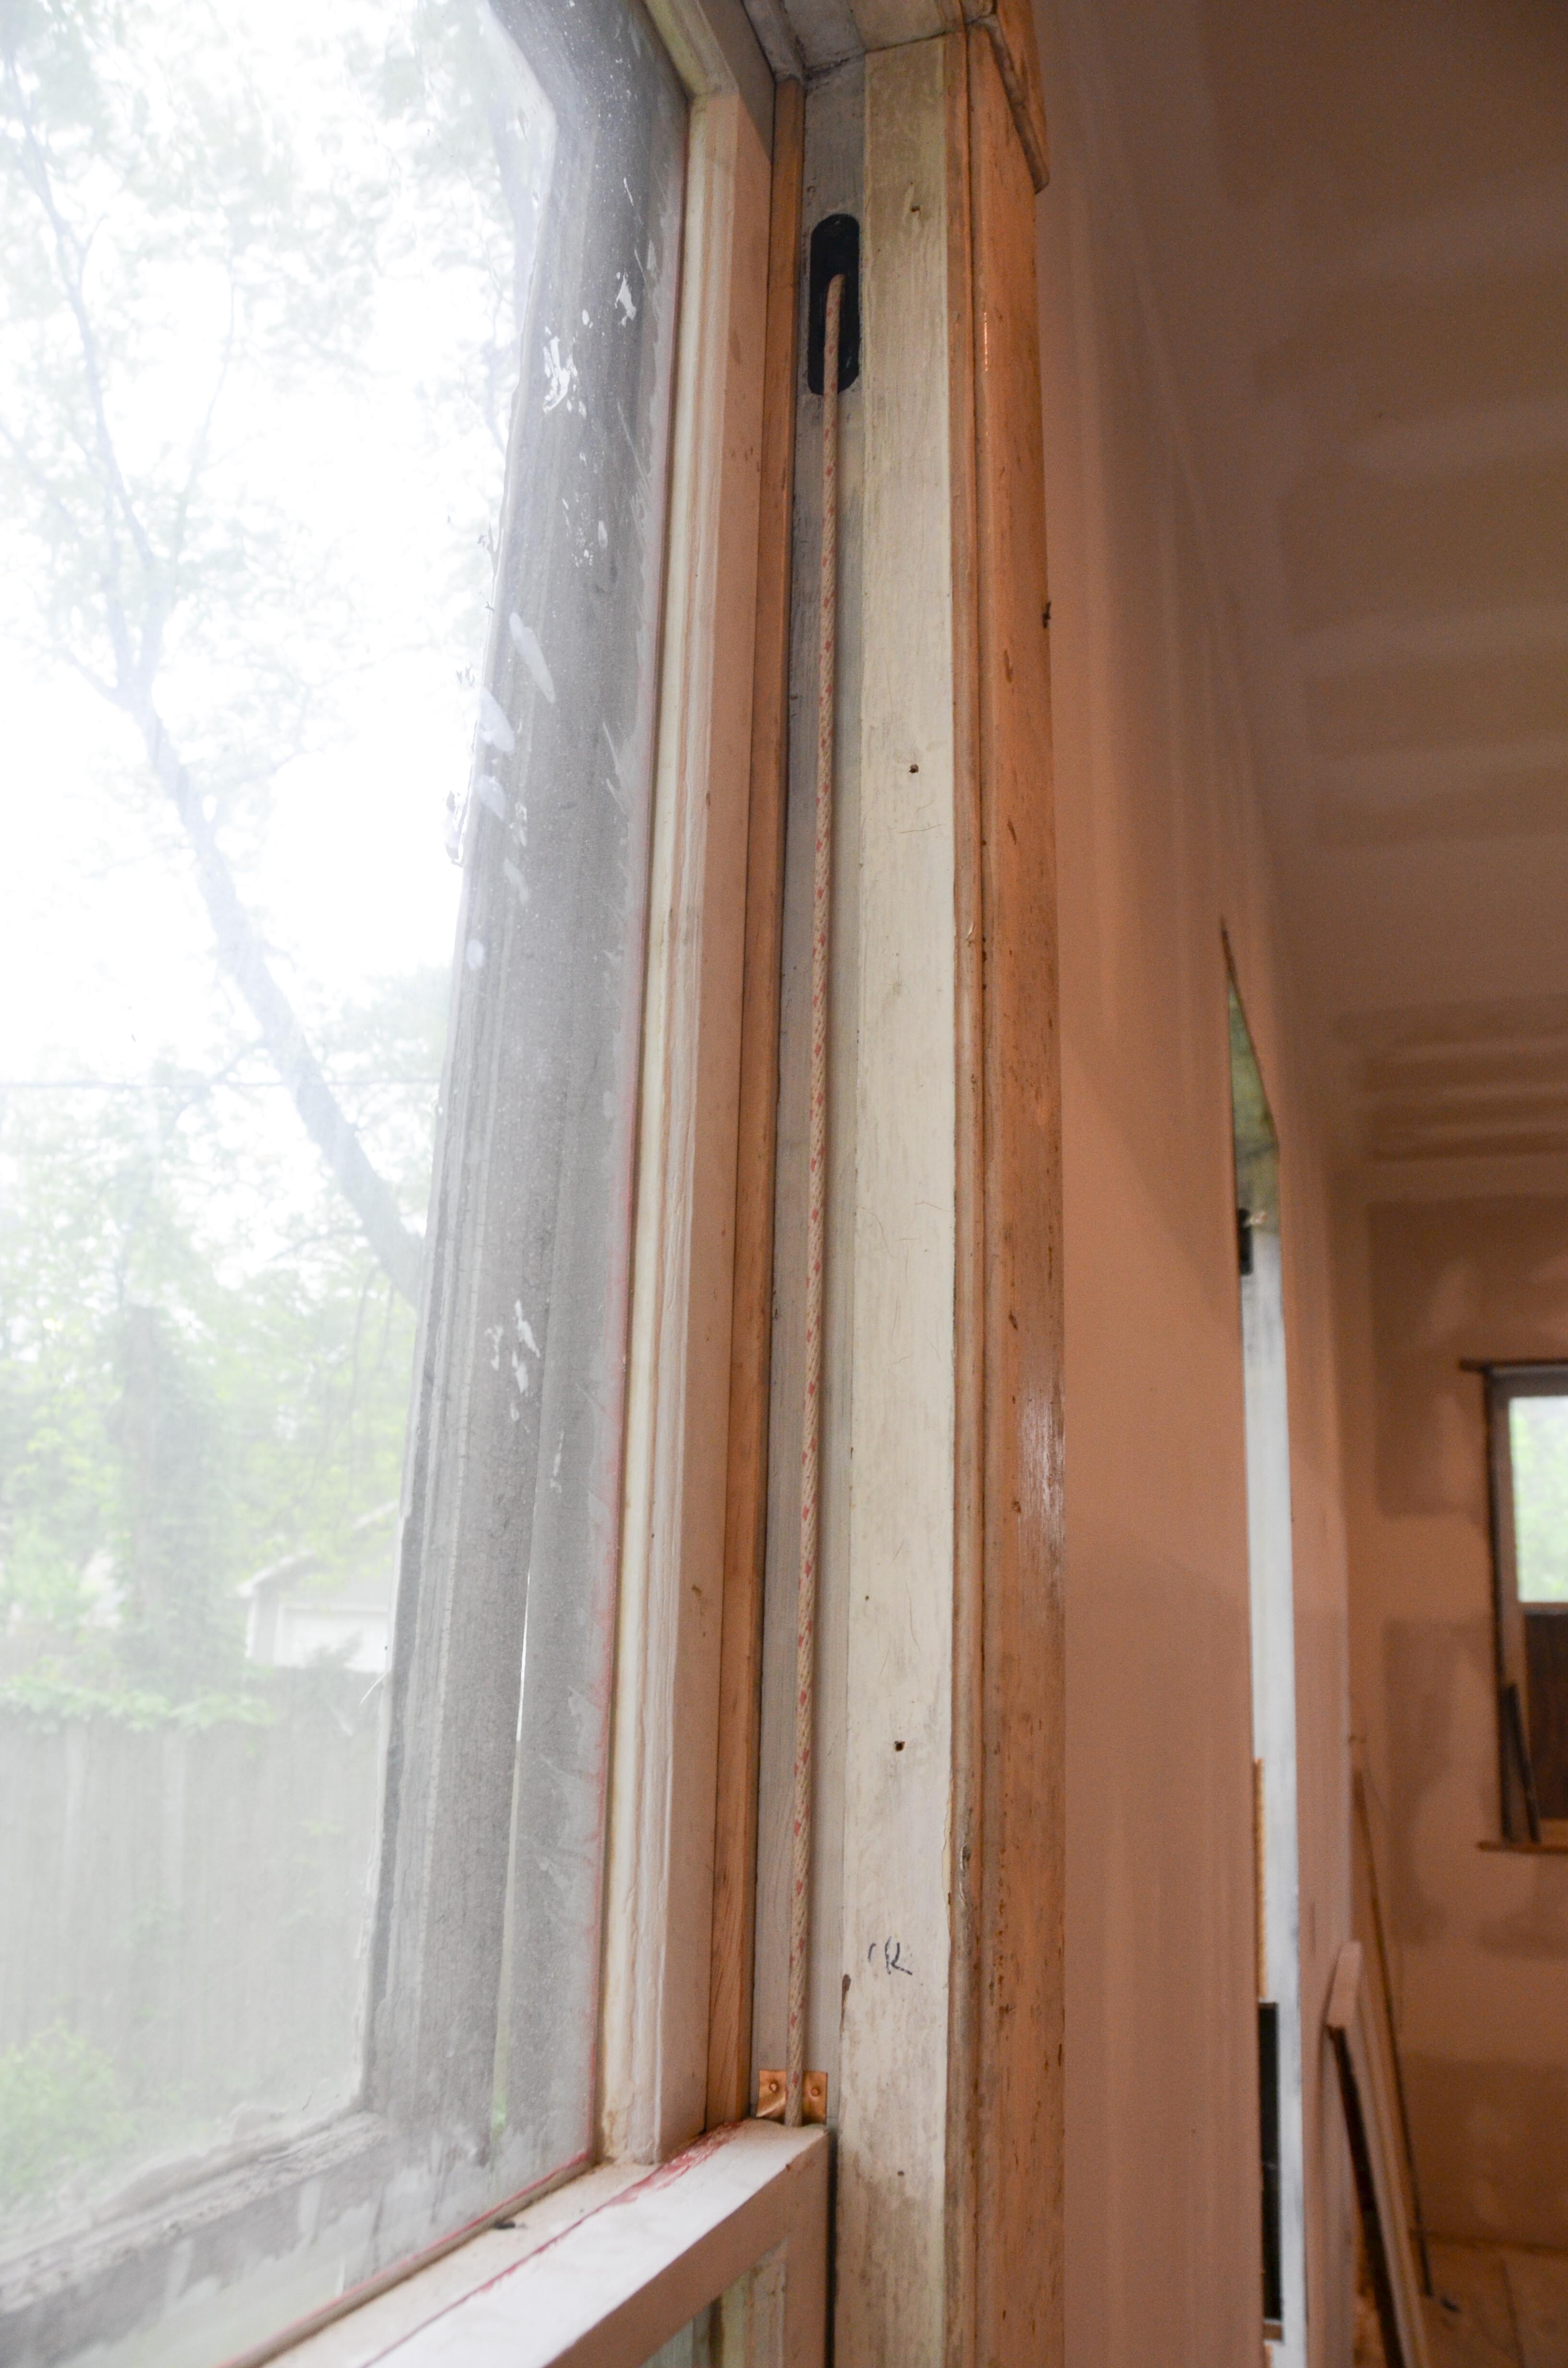
The photo below shows what the spring looks like with the trim completed and the window open.

Amy and I couldn’t believe the difference in the feel of the room once the windows and casing were re-installed.
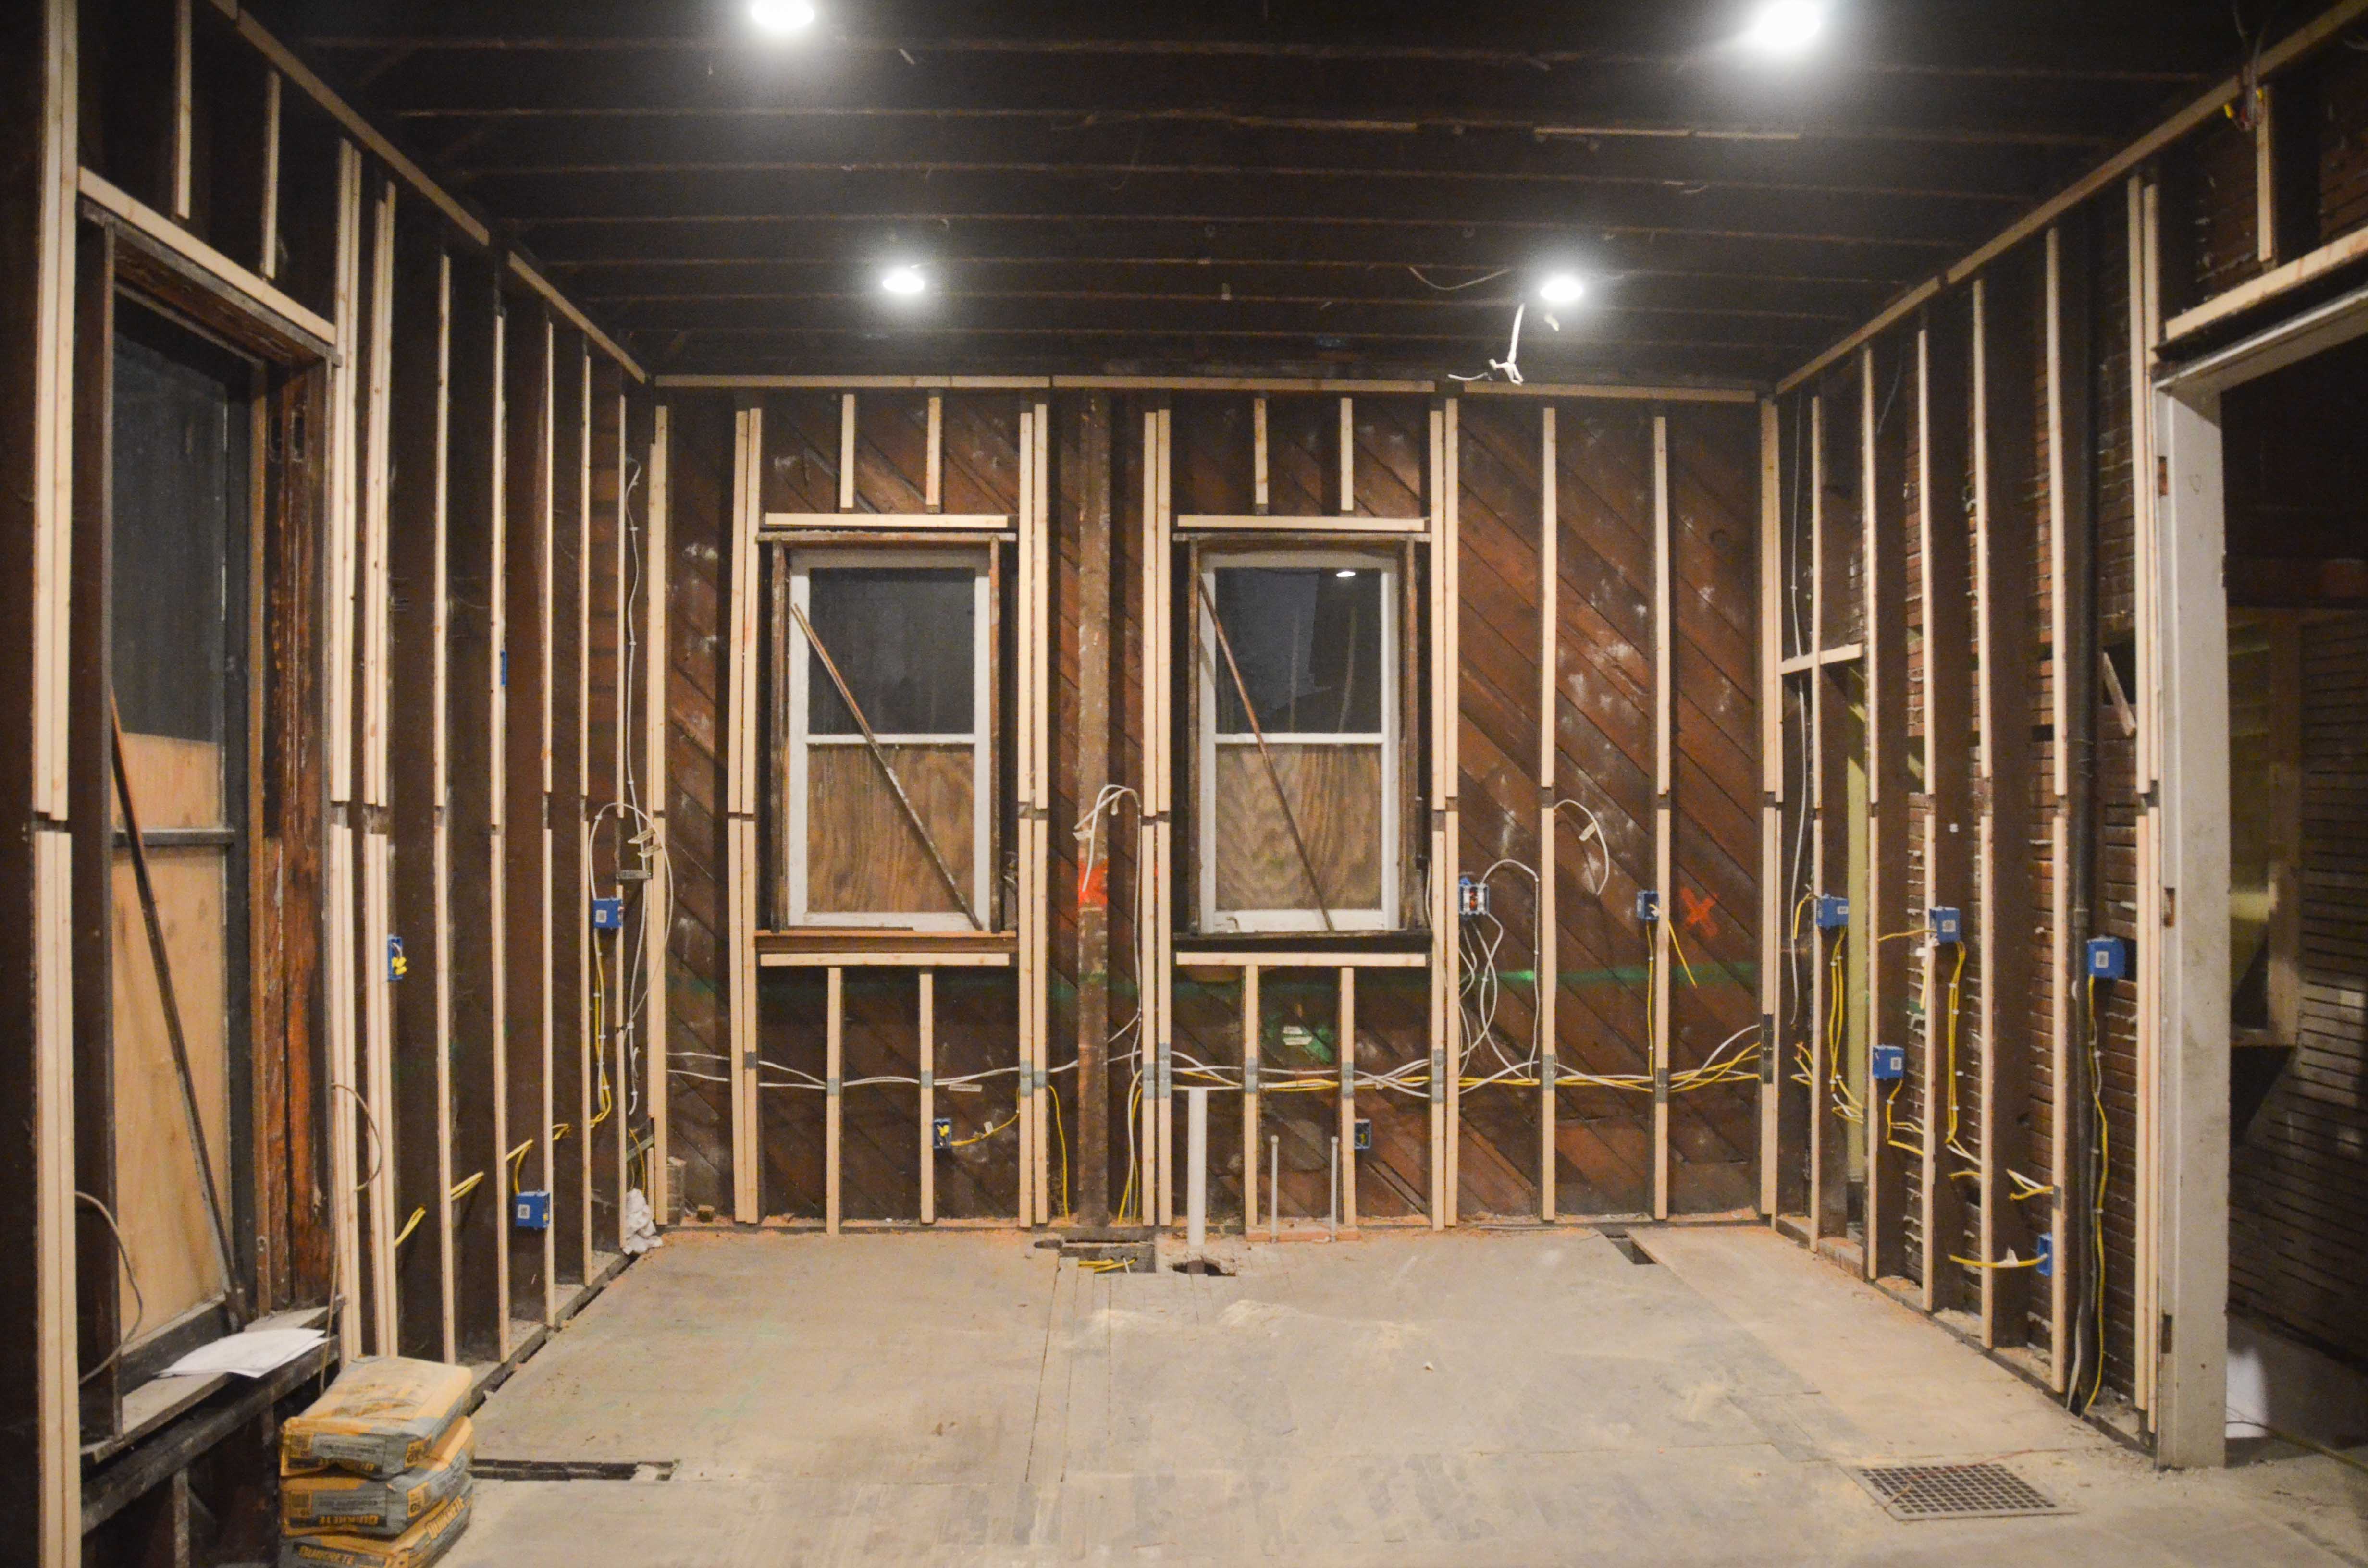
Here is what it looked before beginning the project…
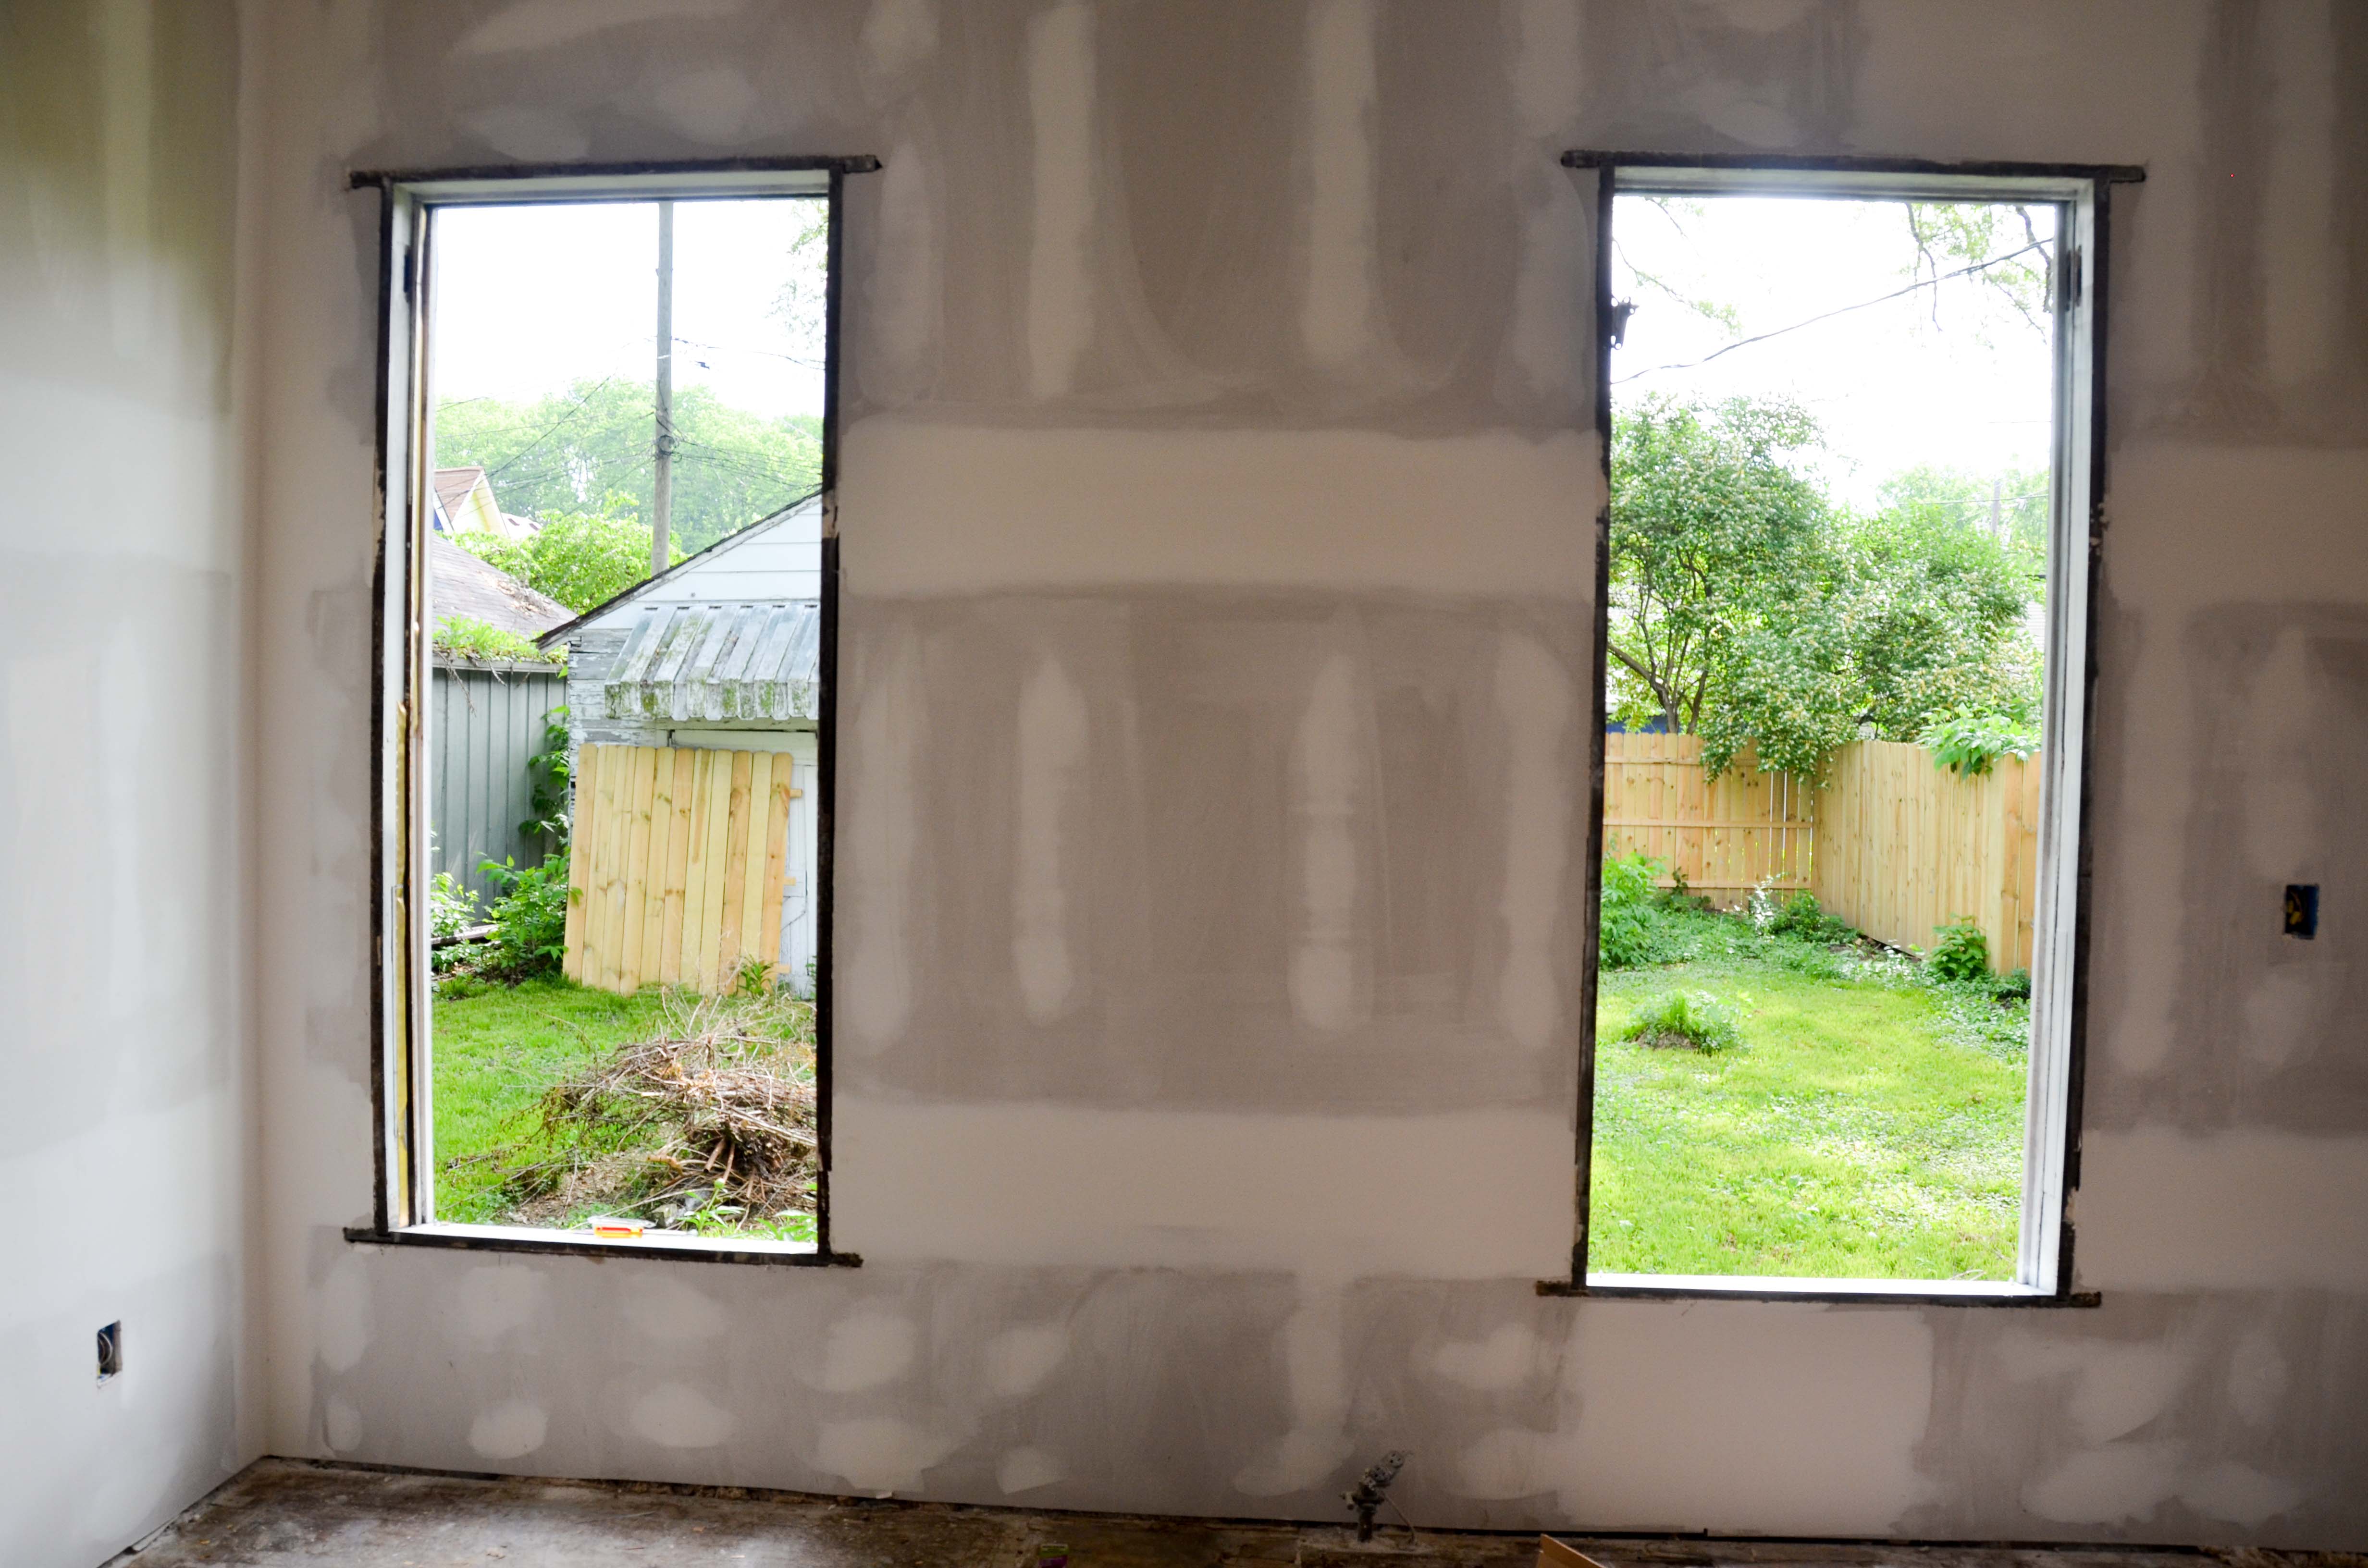
and here is what it looks like now…
In fact, let’s take a quick trip WAY down memory lane. Here is where we started…

This is after we opened up the whole kitchen.

Then we removed the trim, plaster, and lath.

Finally we added electrical, plumbing, insulation, and furring strips (so that the drywall would line up with window and door framing).
Then drywall…

And finally, the windows are back.
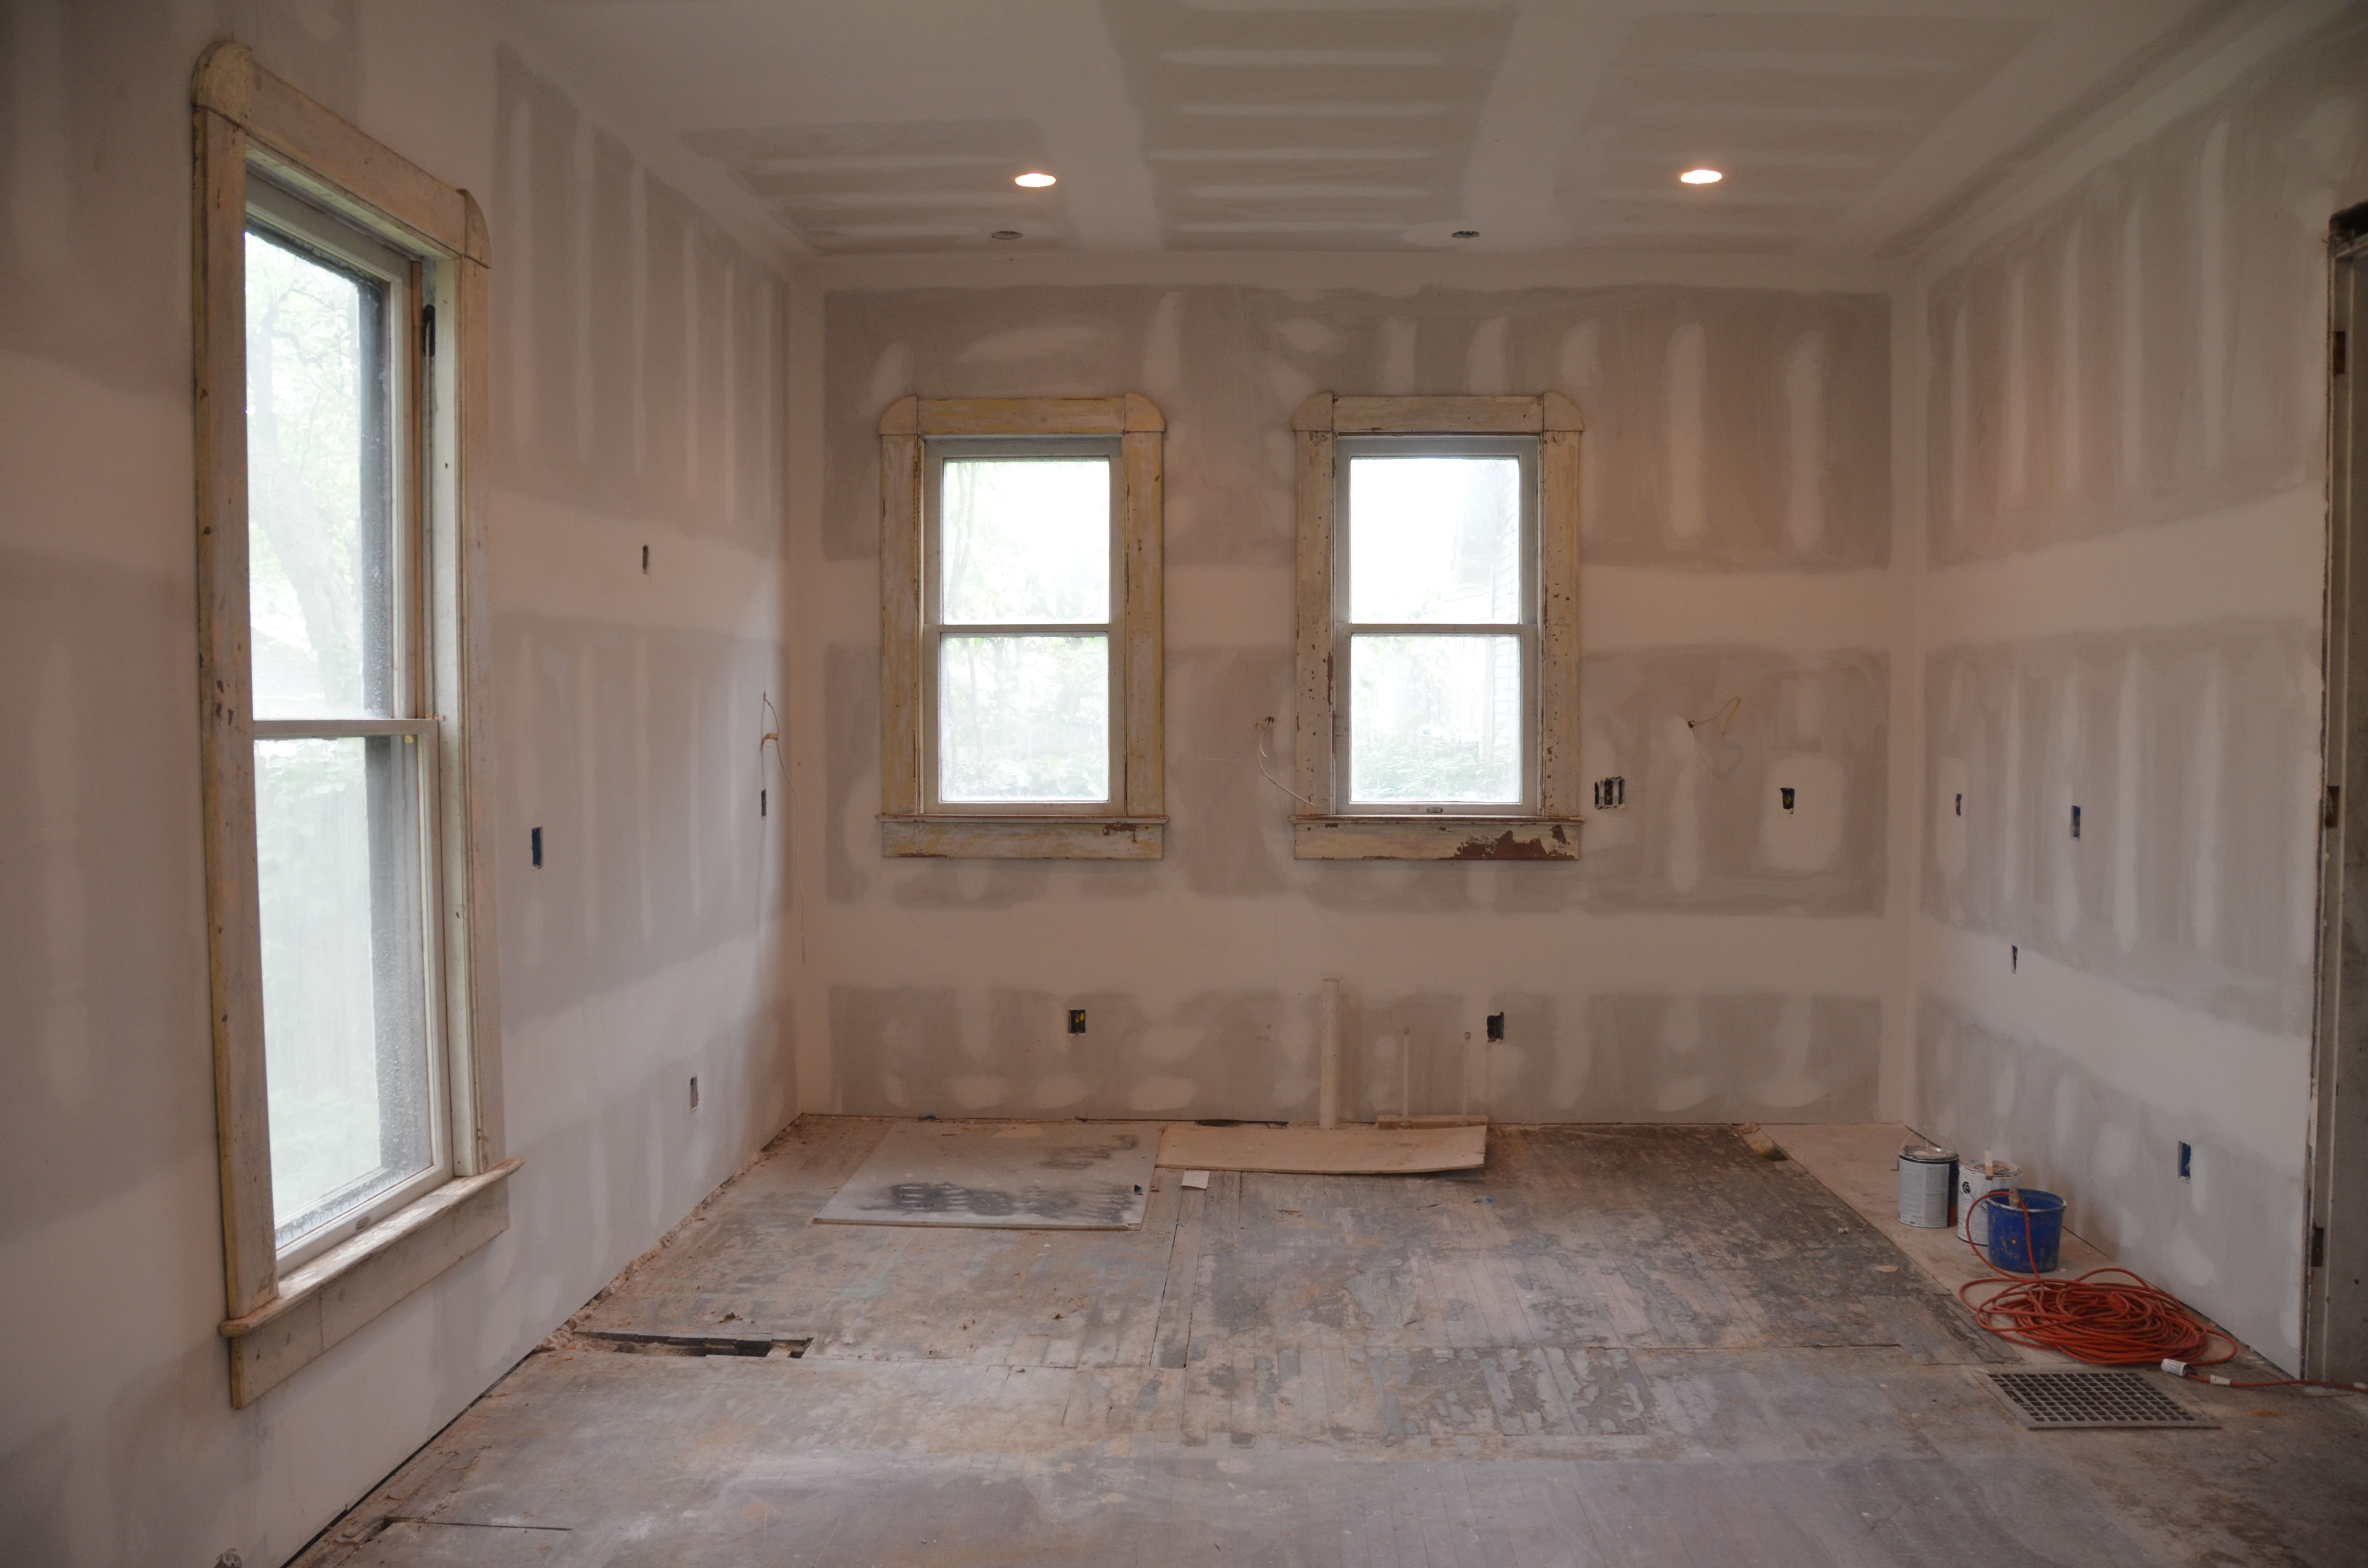
It’s character has returned! It looks like more than just a box now.
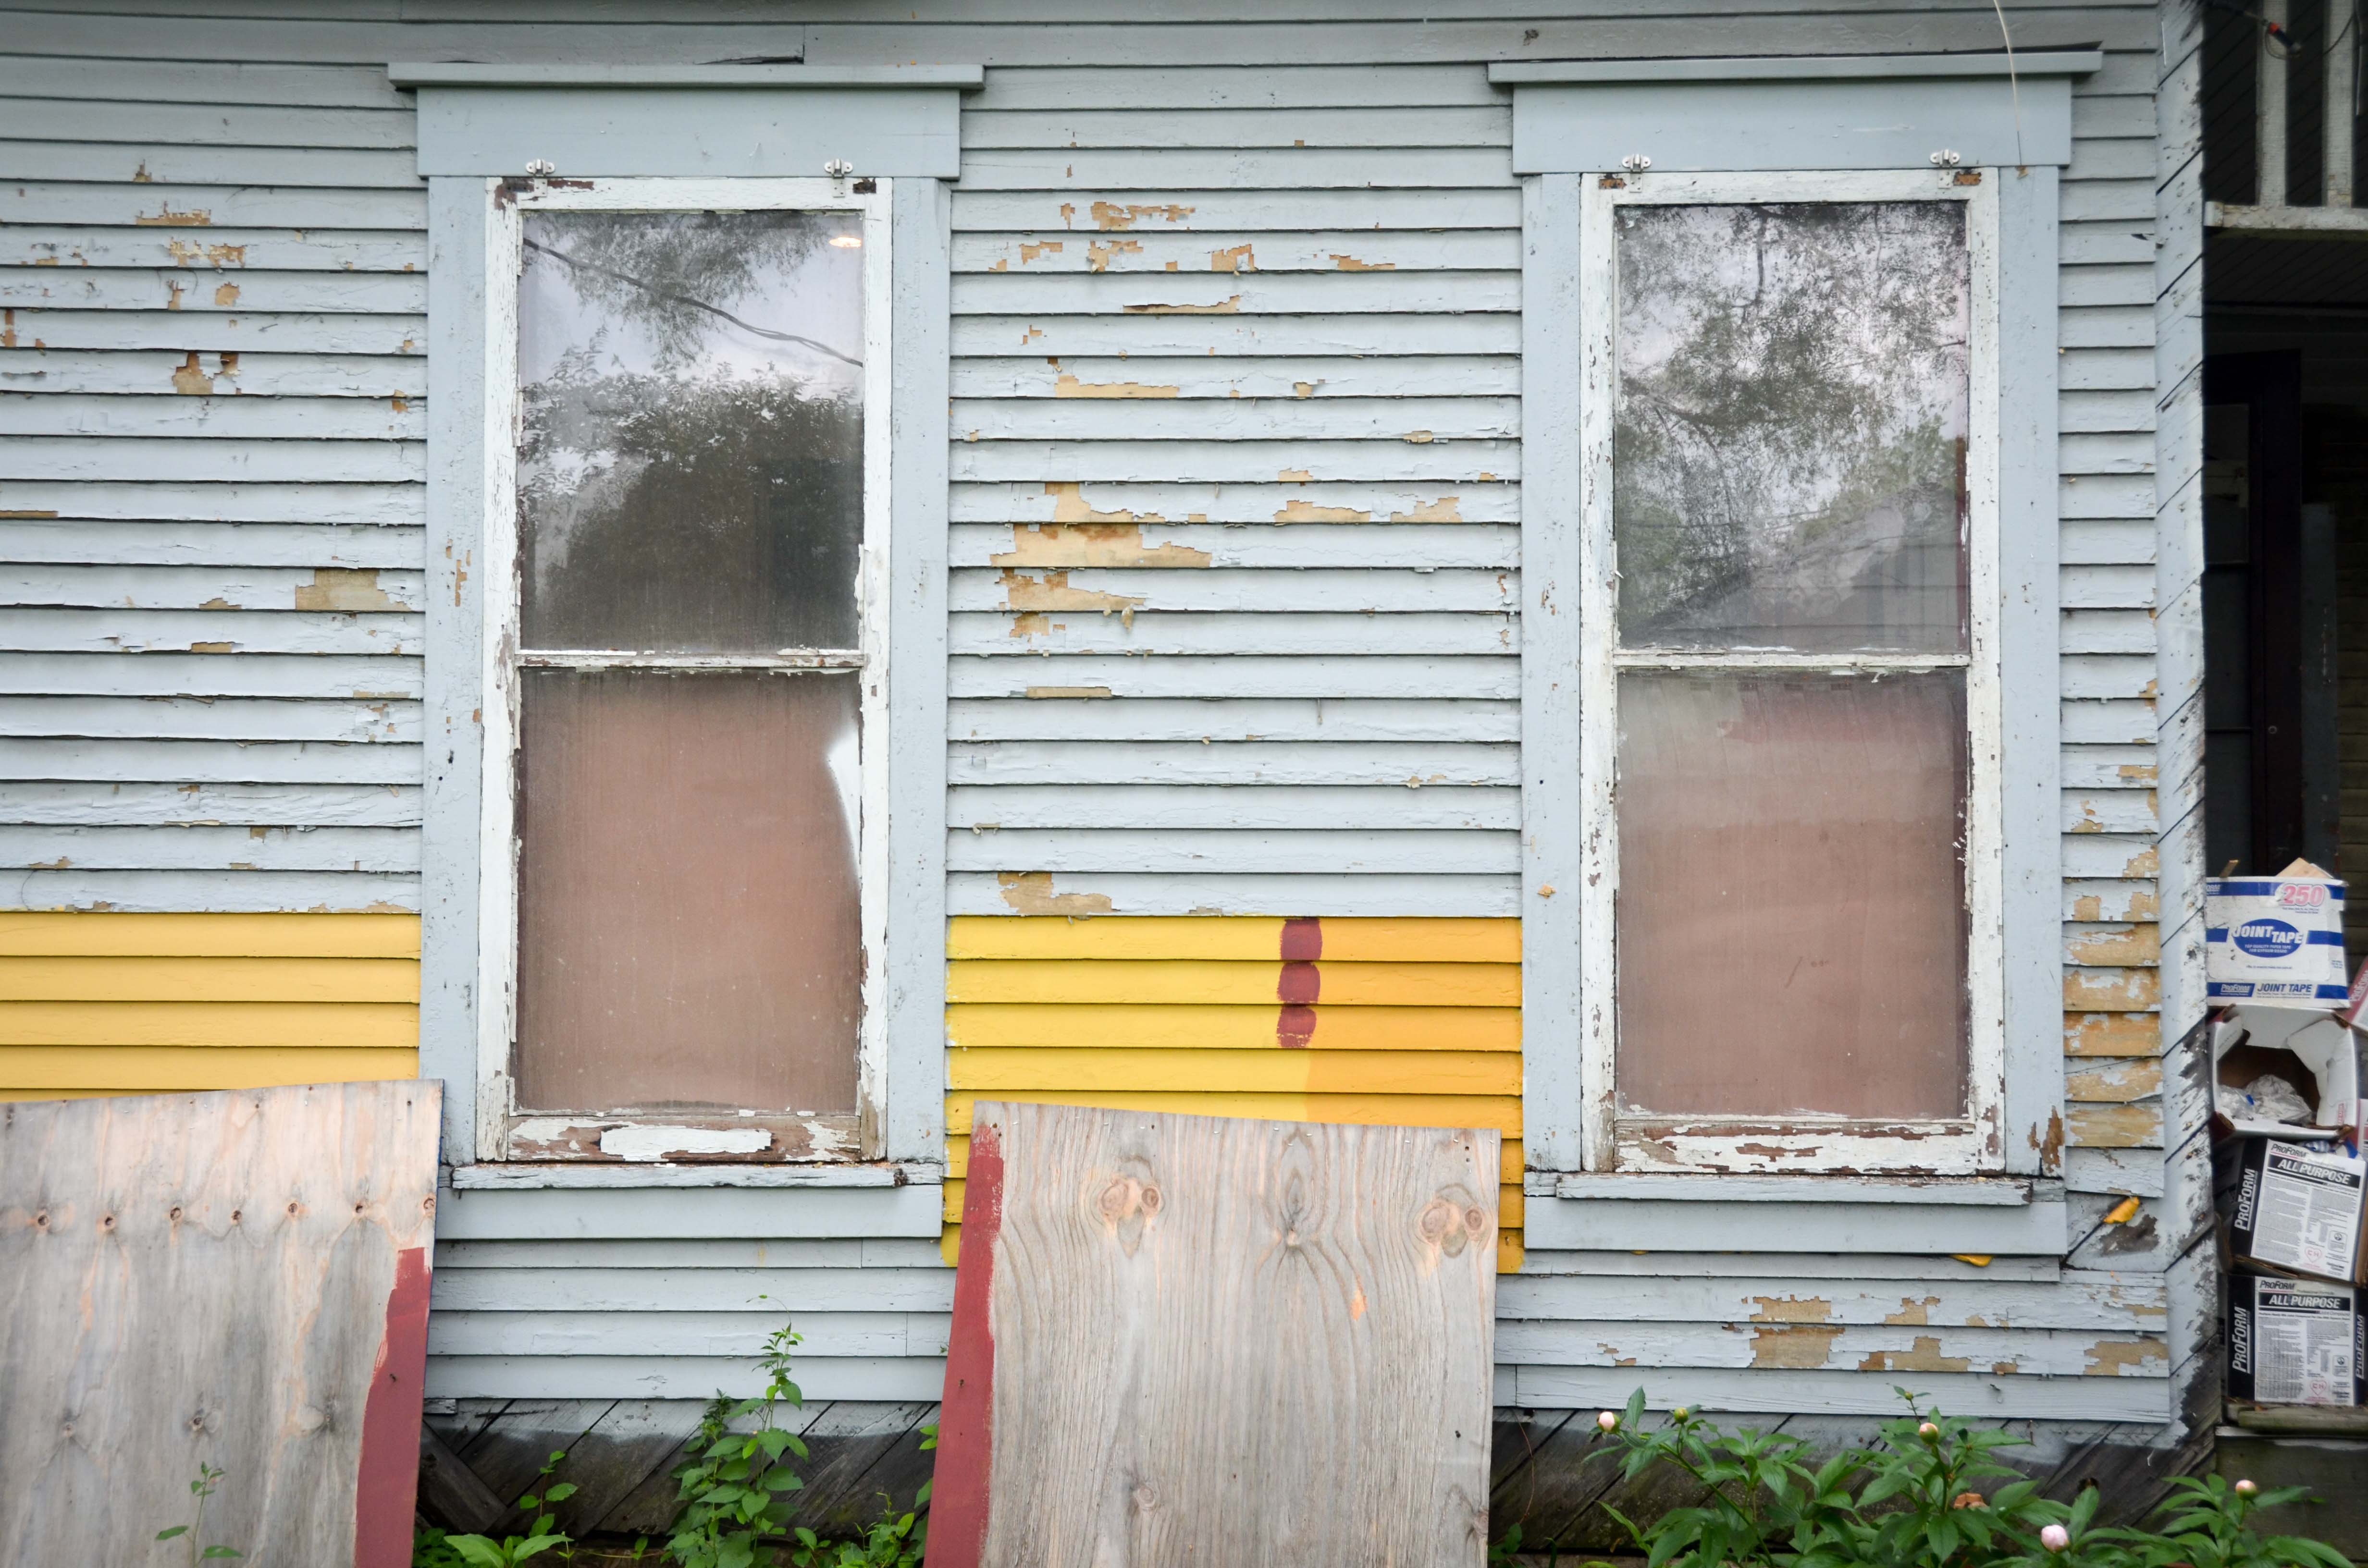
On the exterior, the rehabbed windows have already been painted.

I made the decision to NOT return the boards to the windows. I did this because it is now much warmer and we need to be able to open the windows for fresh air. We have a lot of messy jobs coming up (sanding, staining, painting) that will require ventilation and constantly removing the boards from the windows will get tedious very quickly. Yes, it also means that the house might be a little less secure, but someone trying to force their way in would now need to break through two panes of glass. In addition, maybe having the house unboarded will make it look a little less deserted. Just a little.
We still want to keep people from easily seeing into the house, so I put paper on the inside of the lower sashes. This will allow us to still open the windows when needed.
 It feels good to put closure to the kitchen windows, but I still have a LONG way to go on the windows. I have 7 more sashes ready to be re-installed and I’m working to get those all in this week, but I had to order more sash cord and nails for the spring bronze. I have 4 sashes already glazed and waiting to be painted, 4 more sashes waiting for new glass, and 2 sashes that need repair. There are also still 6 sashes from the front window combo 4 from the master bedroom that haven’t even been removed yet. Once I’m done with all that, I’ll need to go through all the storm windows that were not completed in the first round of storm window restoration… I think there are 12 of those, but they can wait until after we move in. Oh, I almost forgot about the doors and storm doors.
Don’t worry, no need for pitty… I somewhat enjoy the work. I think it is because I know what I’m doing now. The researching and learning was the hard/stressful part. The actual work, I can do that. No problem. And now I am MUCH faster at the whole process, especially since I have completed every aspect of the process from beginning to end.
You can pitty my wife, she’s the one removing linoleum and mastic tar from the floor. That’s way worse!

One Comment Add yours