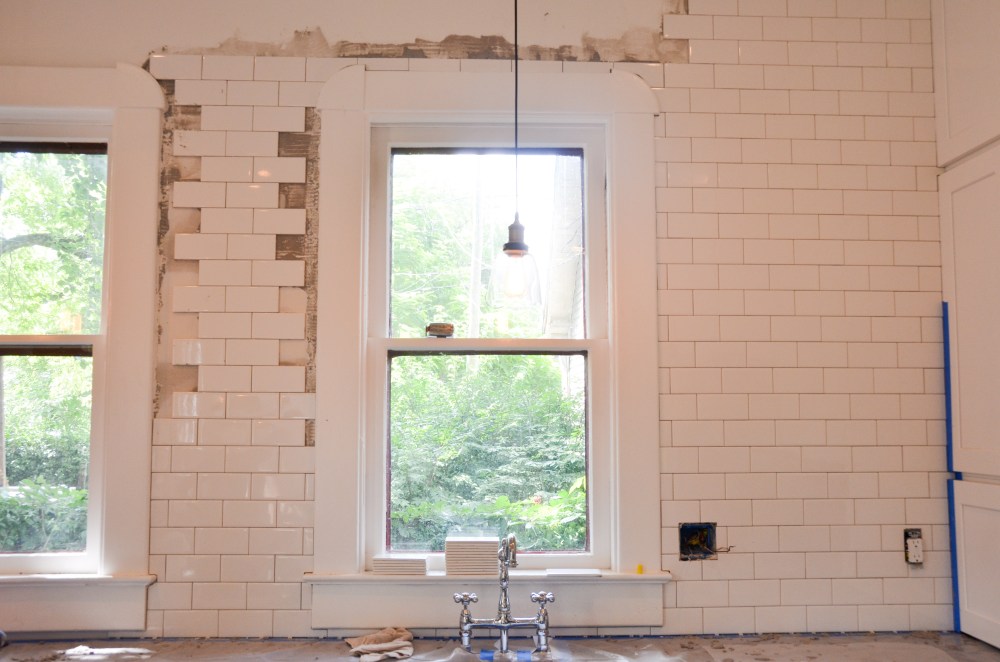
In the past few posts we showed how we installed the cabinets and then cut and installed the butcher block countertop. The next step was to finally add the subway tile. Originally we had just planned to have the tile backsplash go up 18″ on the wall to the height of the shelving and cabinets. But then a neighbor who is also renovating a kitchen mentioned something about tiling all the way to the ceiling. The seed was planted. It grew. It was reinforced by research and many examples of subway tile to the ceiling. Turns out – you hardly ever see subway tile in kitchens that don’t go all the way to the ceiling. Despite the fact that some family and friends looked at us with a look of doubt when we told them what we were going to do, we made a firm decision to go for it.
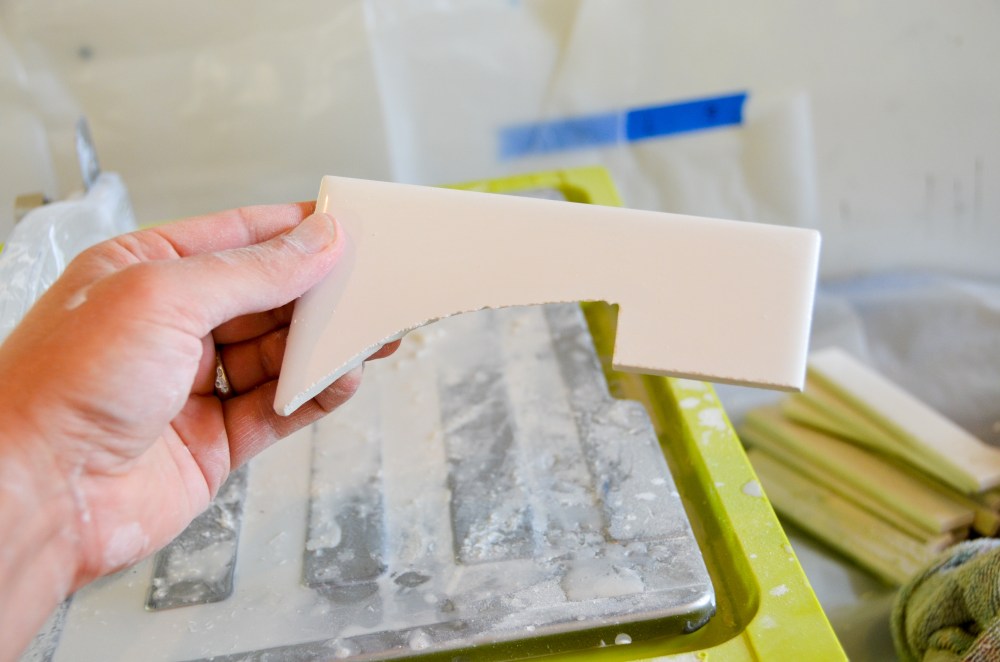
The best thing about subway tile is that it is cheap and classic. Even though we were covering a lot of square footage, the cost of the project was minimal. This wasn’t our first time tiling and we learned a few valuable lessons from previous projects. One – no more cutting tiles by hand. I finally invested in a wet saw!

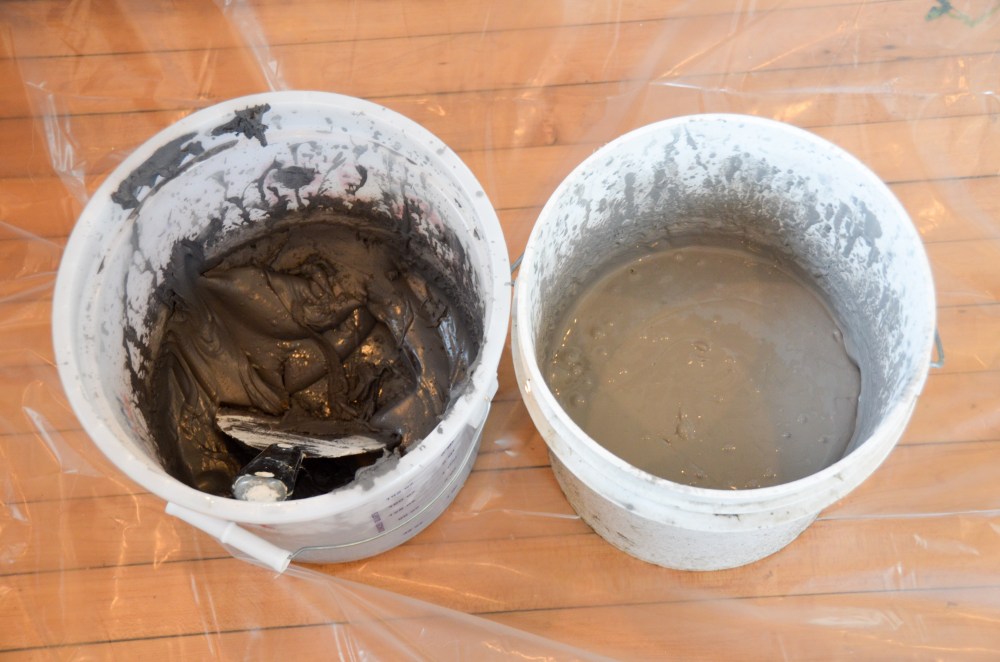
It wasn’t overly expensive and I can probably sell it pretty quickly on Craigslist. Also, we decided to use premixed mortar instead of mixing it ourselves. We were able to get by with one large container of the premix and it saved us a lot of stress since we didn’t have to worry about moving quickly.
Before we could begin we had one last kitchen lighting decision to make. We originally ran electrical for under-cabinet lighting. It turns out that we weren’t going to use it, but we wanted to use one area for a sconce. After finally making this decision, reviewing all the electrical plans, we started to cut out the drywall for the new box. We didn’t get far. Turns out that it was also the location of a double stud from when there used to be a wall between the old bathroom and pantry. There was no way to center a light in between the windows. Not a great start.
 I love that look on Amy’s face. It says so much… I have one of those pictures of me coming up soon.
After an auspicious beginning, we carefully planned (debated?) our plan of attack for the tiles. The tricky part was going to be making sure everything lined up from wall to wall and counter to ceiling. We also wanted to make sure that we didn’t end up with weird stopping/starting cuts at either wall or windows, so we laid out an entire row on the counter to see how everything would line up.
Once we felt good about the plan (we never really feel totally sure) I started with this tiny rectangle next to the fridge…

I know it’s not much, but it was pretty exciting to see the tile up there!
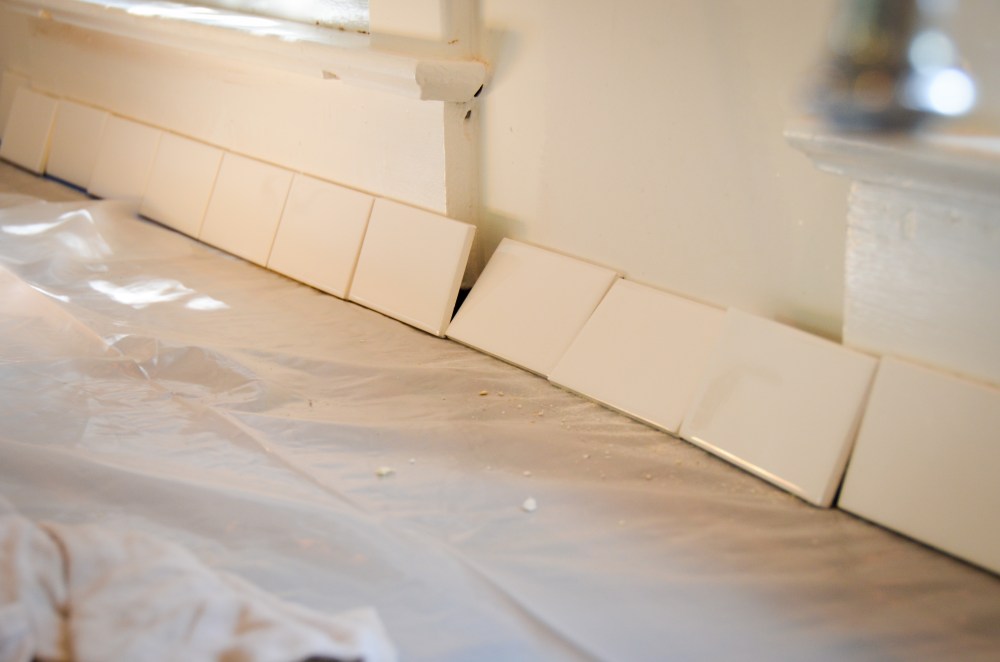
We then began the tedious process of cutting, placing, cutting, placing…

Most of the cuts were straight, but we did have a lot of obstacles to work around, including outlets and window trim.
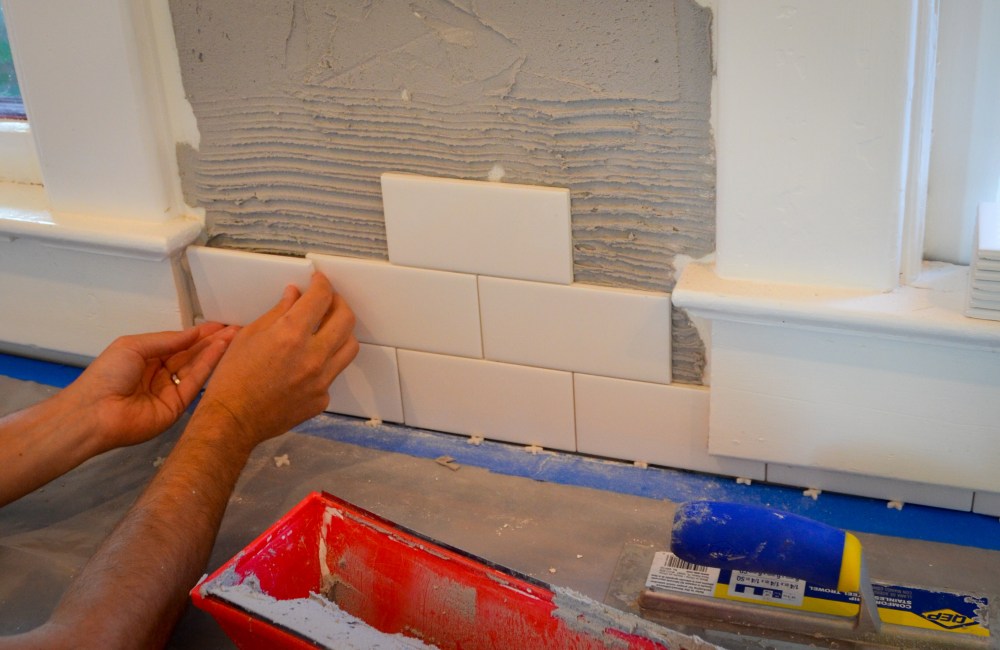
As you can see, the plan was to go up one column to the right of the window, then do the center one and go across to connect above the window. Our reasoning was that there was no way we could mess up because we were literally just stacking tiles on top of each other. They had to line up when we got to the top, right? Well….
Yes and no. They did line up. BUT, we failed to anticipate one other problem. As you can see in the following photo, the tiles crept a little to the right, which meant that we were left with too little space for the last tile in the row.

Ugh! Rookie mistake! I can’t believe we didn’t anticipate that. We must be getting cocky.
We didn’t have a lot of time to figure out what to do next because the mortar was drying with each passing minute. Amy wanted to cut the tile and just make that same adjust all the way to the ceiling. She didn’t think anyone would notice. I vehemently disagreed. I thought that the subway tile pattern was so strong and noticeable that it would stick out right away. In the end, we decided to remove much of the last portion of tile that we had already done and tile across the top so that we could work our way down and make slight adjustments to get us to line up with the bottom. Yep. Nothing worse than undoing your own work.
It was a big pain in the butt, but in the end I think it was the right call. You can’t really tell that center tiles drift slightly… in fact, unless you are looking for it you probably would never notice. It was a tense moment (we always seem to have our most stressful moments in the kitchen), but we gradually recovered and proceeded without further incident. This time we worked across the top and then worked our way down.

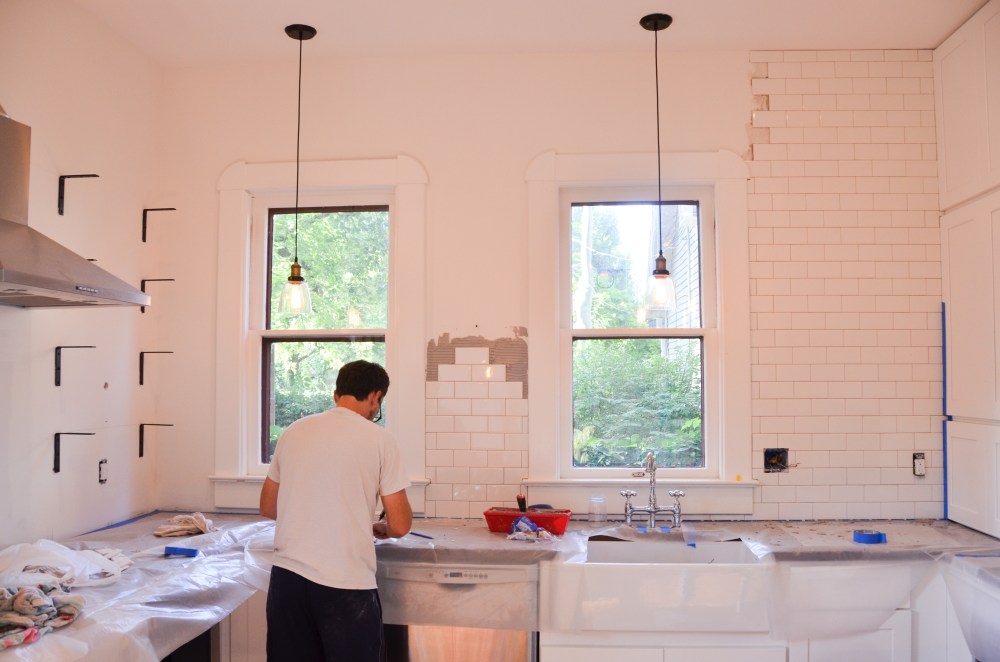
On the wall with the oven and shelves we planned to tile up to the first shelf and up to the vent hood. But, in true Amy and Joe form, once we were done and had lived with it for about 30 minutes… we decided that it looked strange. We thought it would look better if we went up to the 2nd shelf. This lined up a little better with the range hood and somehow just changed the whole feel for the better. Of course, it meant pulling off work we had just done (again) and waiting to complete it later in the week.

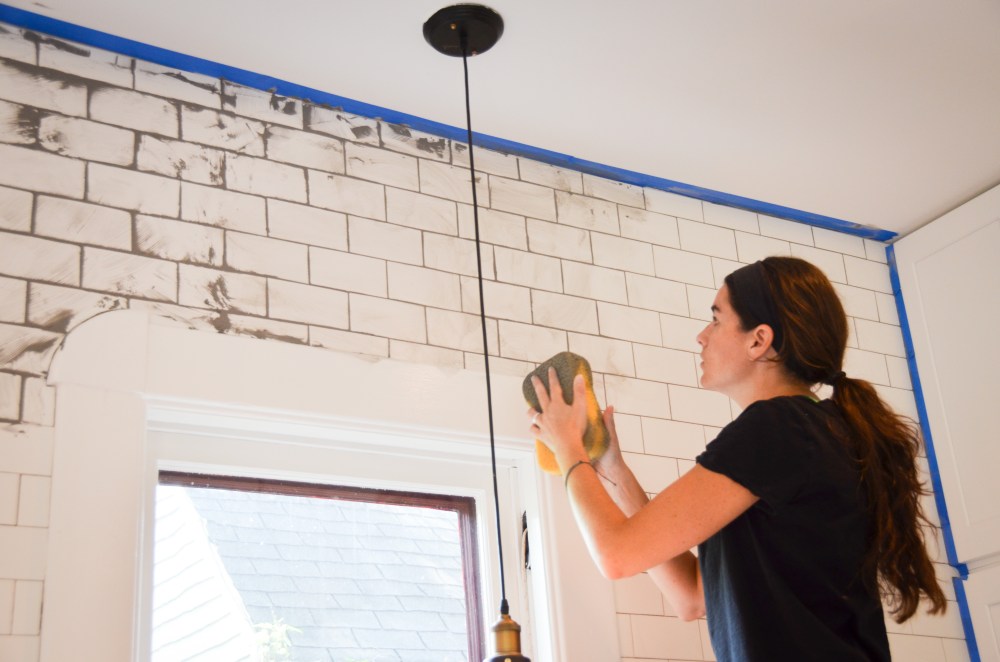
I finished the tile on the oven wall that Wednesday so that we could do the grout on the weekend. We had planned on doing a test panel to help us decide how dark the grout should be, but it was a busy week and we ran out of time. I got two options at the hardware store and we decided on the darker one. We knew we didn’t want white grout because then you can’t even see the tile pattern, but we just weren’t sure how dark to go. We started bold. And then changed our mind within five minutes of having it on. We painstakingly removed the grout from in between the first section of tiles before it dried and then tried the other shade of grey that I had purchased earlier.
It turned out to be just what we wanted (the one on the right in the picture above).
My back was still sore from tiling last weekend and working with the grout certainly didn’t make it feel any better. We eventually fell into a good work flow of applying the grout, letting it set, and wiping it off.

I think there was a point when I got tired of it… and maybe just a little tired of rehab work in general. Can you tell?
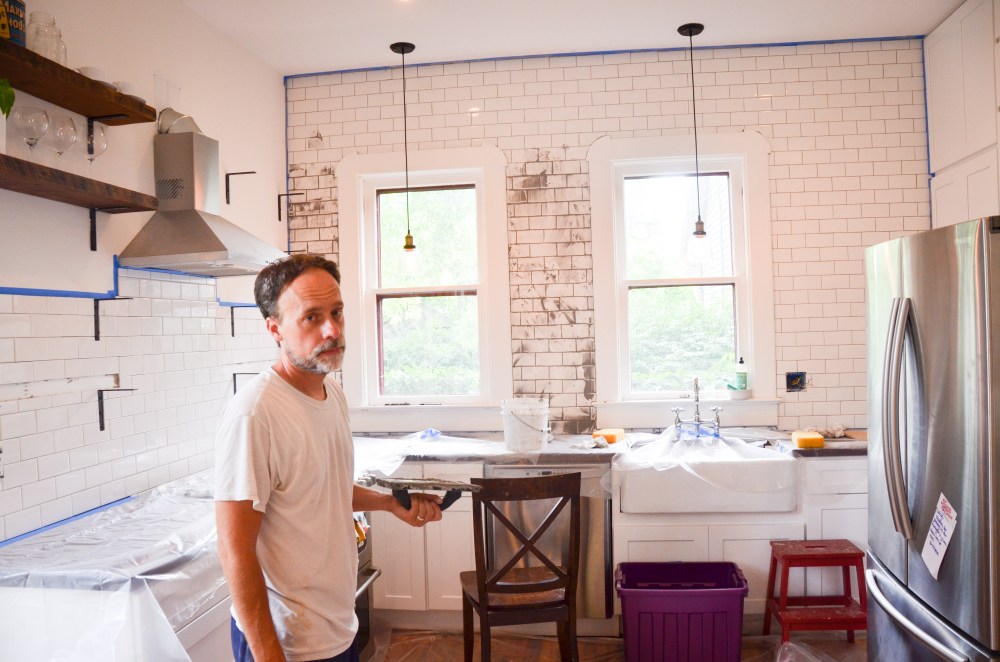
I look so old! So tired! Defeated. This might be one of my favorite renovation pictures. It really captures the joy, doesn’t it?
I will save the final pictures for the big reveal post. We still have a lot of work to do… caulking, touch up paint, and installation of knobs and handles on the cabinets. In addition, we still have a bunch of work to do on the other side of the kitchen – including new baseboards, a bookshelf, the pass-through, and all kinds of decorating finish work.
The kitchen has been a huge project – but the end is near!

Hey Amy and Joe….Love the kitchen tile all the way up to the ceiling. You two are amazing…you really are. It looks fantastic. Hugs
LikeLike
Love, love, love the tile all the way up to the ceiling. Worth all the work. Looks like a kitchen you would see in a historic home. Great job.
LikeLike
Thank you! That’s the look we were going for!
LikeLike
Great Joe pic! Love the look! Tiling sucks! Your job looks great! I tiled 500 square feet of ceramic flooring years ago. I couldn’t walk for two days afterwards.
LikeLike
Before you post that tile saw on Craigslist give a shout!! Kitchen looks awesome!
LikeLike