I (Amy) have always been excited that our house came with it’s original clawfoot bathtub..even though it was in pretty rough shape.
The development of the downstairs bathroom has been a very long-term project. When we purchased the house (before doing any rehab work or making any messes) it looked like this.

Before demolishing this bathroom to allow more space for the kitchen, we salvaged the original cast iron clawfoot tub along with the medicine cabinet (featured in the previous blog post).
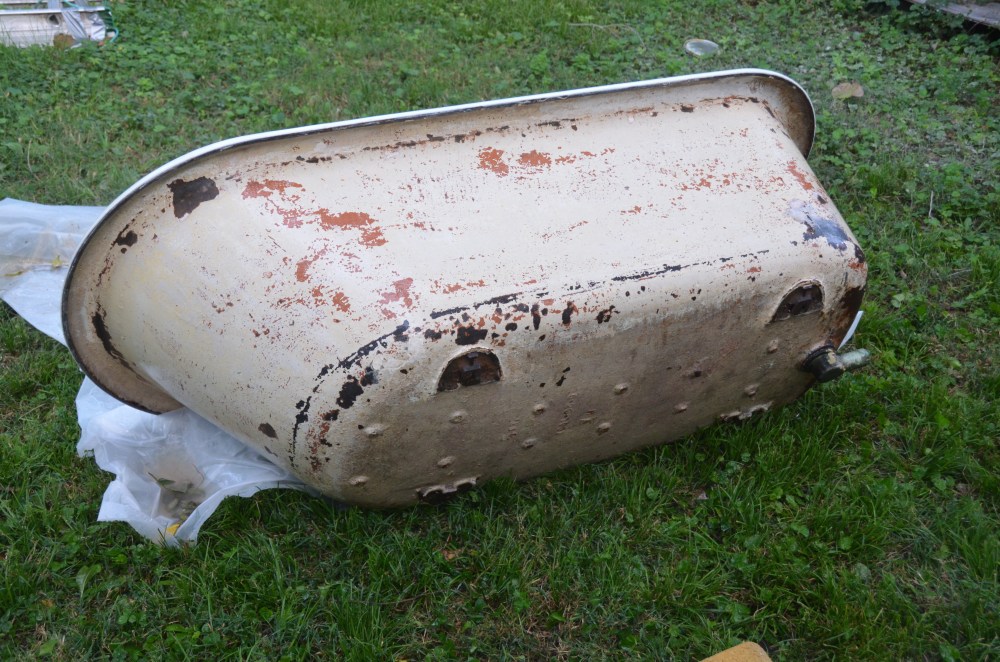
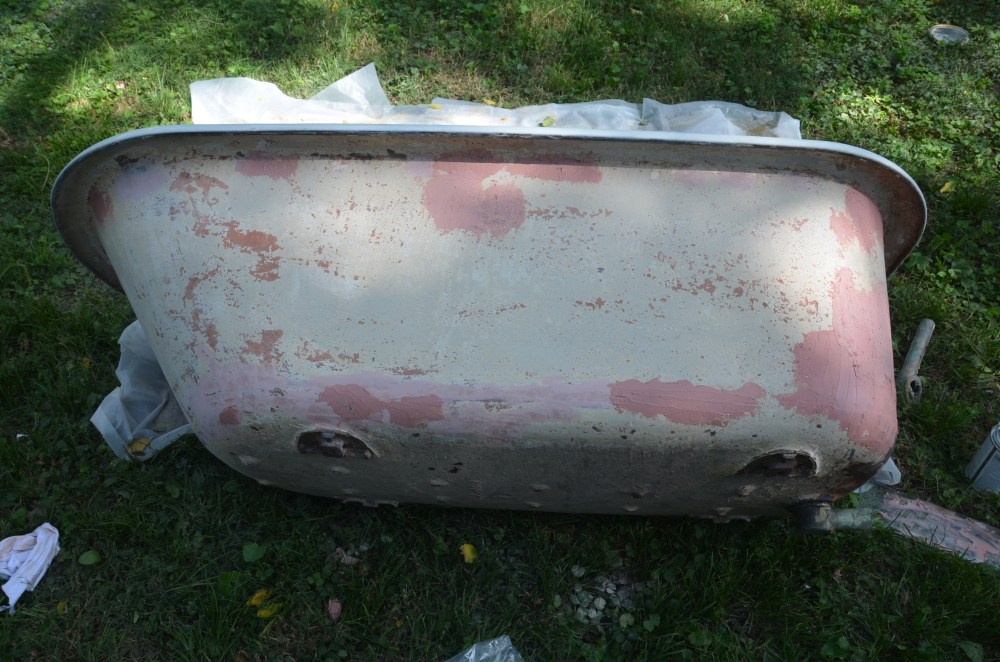
The tub sat in the shed behind the house in this condition for about a year before our house was “habitable” enough to even think about adding frivolous things such as a second bathroom. Here is what the tub looked like when it finally made it out of the shed and into the light of day.

I did a lot of research about the variety of ways people restore old cast iron tubs. The best and most expensive way to do this would have been to send our tub away to have it completely resurfaced. We opted not to do this because (1) it’s too expensive and (2) we didn’t mind all the nicks, dings and imperfections that give it it’s antique character (at least we convinced ourselves of that after reading about the cost of a complete overhaul). Also, removing the antique surface and having a brand new surface baked on feels a little like taking the history out of the tub.
There are inexpensive resurfacing kits that you can buy at big-box hardware stores, but after watching a lot of youtube videos and reading a lot of reviews, this seemed like a short term fix with varying results. A lot of people who chose that route were afraid to scratch their tub and just refrained from using it at all. For us, the best option in terms of cost and daily use was to care for, repair and clean the existing antique surfaces.
The first order of business was to give the tub a good cleaning so that we could see what we were really dealing with. In addition to the chipping paint and rust there was also a ton of plater dust, various debris, soap scum, and “antique grime.”
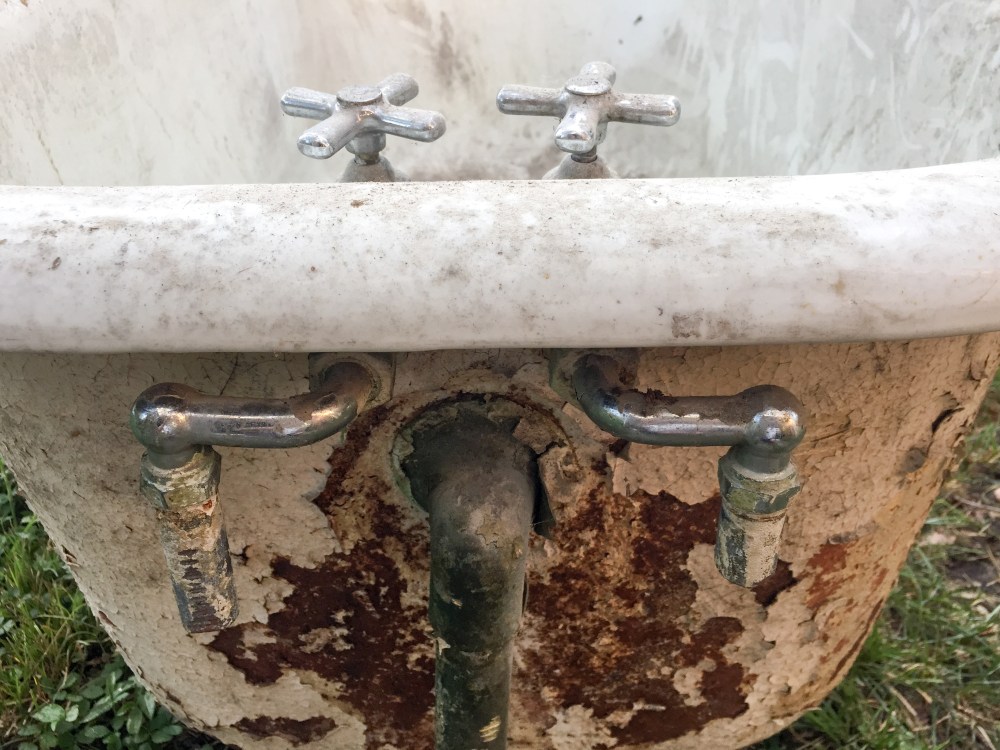
Using a litany of bathtub cleaning products and scrubbers I was able to remove years of scum, producing a sanitary but not completely aesthetic surface. The water and rust stains in the bottom of the tub still remained. More on stain removal later.

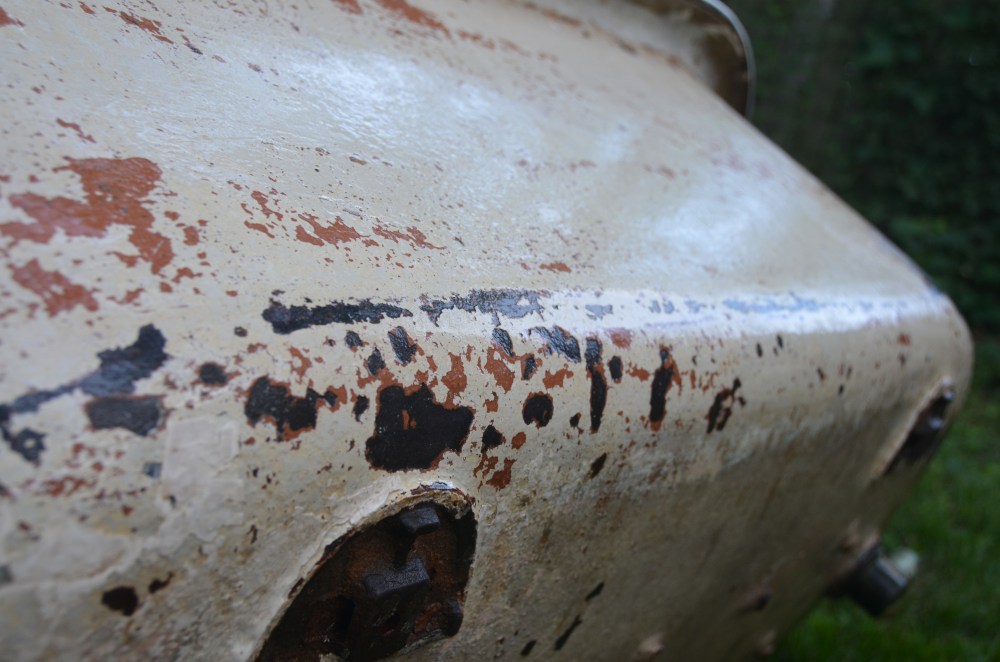
The exterior of the tub is painted cast iron. I wanted to make this surface as rust and paint-chip free as possible before re-painting. There were several layers of paint on our tub, much of which was already chipping off. I went over the surface of the tub several times with a metal scraper to knock off as much of the paint and rust as I could.


After a few hours of scraping, the surface was mostly smooth but still had many low spots or divots where paint had chipped off years ago exposing the metal to rust. Next I used an orbital sander over the whole surface to help smooth out the remaining edges of paint layers.
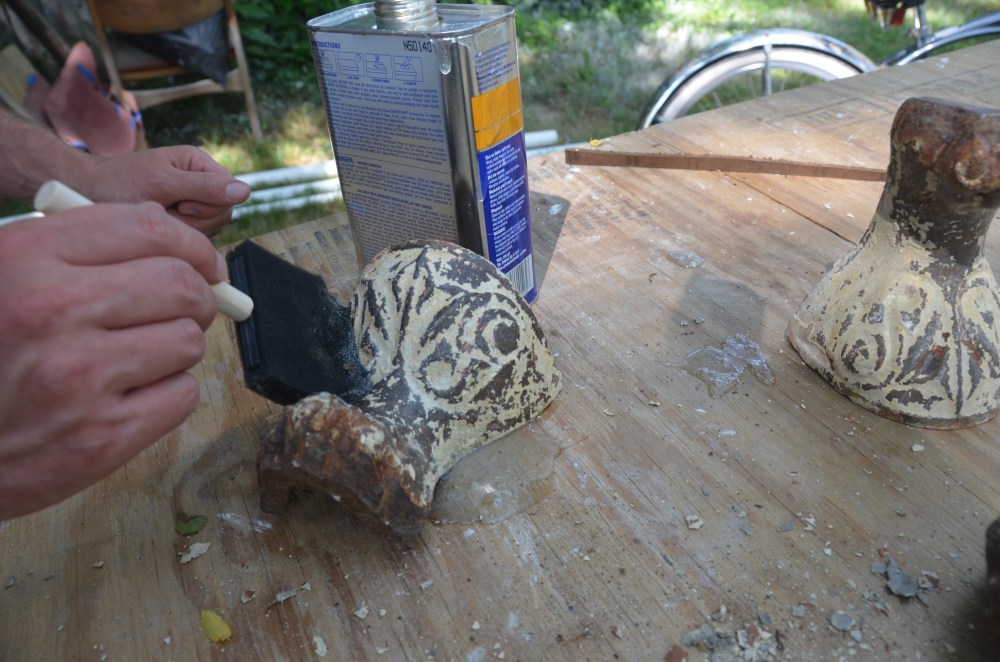
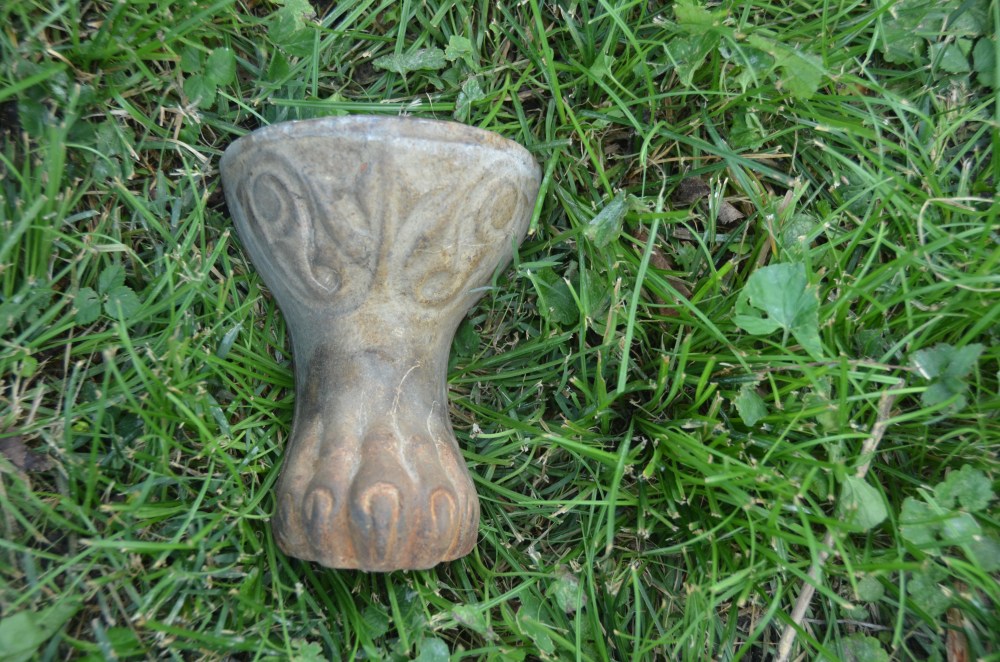
At some point during the scraping I removed the four legs of the tub. You probably didn’t know, but apparently there are a wide variety of claw styles. Ours is technically a paw with talons. You could say we have a “pawfoot” tub. Downright cuddly.
At first it was hard to see the paws in detail since they were covered in rust or layers of chipping paint.

Joe worked his magic with the paint stripper and delicately picked the paint out of all the details.
Meanwhile I filled the divots and imperfections on the outside of the tub with Bondo and then did some more heavy duty orbital sanding. Bondo is what is commonly used to fill dents on car bodies. It also happens to work really well on cast iron tubs.

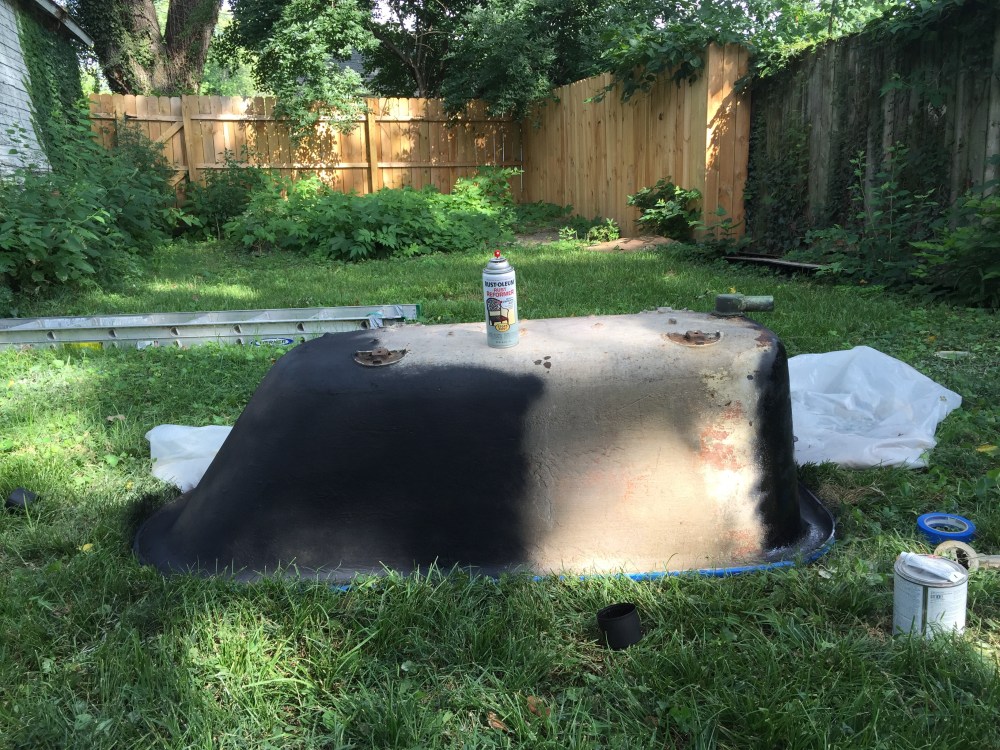
With the surface prepped, I taped off the porcelain edges to prevent black paint from creeping into the white interior of the tub. I applied a few layers of rust protection matte paint and then applied several layers of black glossy Rustoleum spray paint.

That was the fun part.


Each leg is numbered so you can put it back in it’s proper location.

I was happy with how the details on the “paws” turned out.

At this point I really wanted to just take a bath but the tub still had a long way to go. It didn’t stop me from pretending or coerscing Joe from joining in on the fun.

A romantic moment, minus the mosquitos and over grown back yard.

We moved the tub into it’s new and final resting place in the downstairs bathroom and it remained there without fixtures or plumbing for a year and half while we tackled other pressing rehab work upstairs.
Then, one day out of the blue, our plumber called and asked if we needed him for anything. We had just finished the master bedroom (I promise we will post an update soon) and now seemed like a good time to move on to the downstairs bathroom. We painted the walls and ceiling, refinished all the woodwork in the bathroom, and after a day of work connecting new water lines to the bathroom, we now have our 2nd fully functioning bathroom!
Rather belatedly I decided to tackle the rust and hard water stains that I wasn’t able to clean two years ago when I started this project. I spent a day using combinations of vinegar, peroxide, and baking soda to remove the stains. It took several hours of soaking and scrubbing but I’m really pleased with the results. Here is what they originally looked like.

Here is the finished clawfoot tub, including a sneak peak of the new paint color and rehabbed trim…

This is the very first room in our house that has cleaned-up trim. It involved a lot of scraping, sanding, and finish coats of shellac. It’s amazing the difference it makes in the finished quality of the space.

We (as always) stressed about the paint color of the bathroom for months. We finally decided we wanted a dark color and walked into our local hardware store to find a shade of purple that might work. In front of the paint counter, hanging from the ceiling, was a big banner advertising the Benjamin Moore “2017 color of the year.” Turns out it was exactly the color we were looking for!

Coming soon… the bathroom and master bedroom reveal. Also, big progress happening in the kitchen!


Wow, that came out great! The tub looks really good, not even considering that it’s the original finish. The tub in our new house (no blog on it yet, but I never really kept up on the old one either, lol) was recently recoated, and I’m a bit concerned on how it’s going to hold up. I think it was done in-place by a professional, so hopefully its more durable than the home-store DIY kits, but nothing matches the fired factory finish, of course.
I love the shade of stain on the wood. It brings out the grain well, and de-emphasizes the wear and water stains without hiding the character. You have my major respect for not just slathering it with a new coat of white like so many people would do.
LikeLiked by 1 person
What a beautiful job you two did on that bathroom. The before picture of the bathroom would scare off most people from saving that house. Old homes need more people like you two, that see past the negative of older homes.
LikeLiked by 1 person
Looks good! Does the little mermaid come with the tub? She’s adorable! Great pic! You can also use Bondo to glue concrete statues back together. Muriatic acid can eat through about any stain also. Use outdoors only. The fumes are toxic. I cleaned a old toilet that way. Let it soak over night.
LikeLike