Just outside of Lucy’s room there are two nooks on either side of the doorway. After some deliberation in the initial brainstorming process, we decided that this was a good place to put our washer and dryer to create a small laundry area. This 2nd floor location won out because we wanted the washer and dryer to be as accessible as possible. We can now do laundry while being around the rest of the family, while Lucy takes a bath, first thing in the morning, or right before bed. Because of this convenience, the laundry gets done much faster!
The location of the laundry has been convenient, but we haven’t done anything to the space since the day we moved in. (Except we normally have the dryer vent connected!)
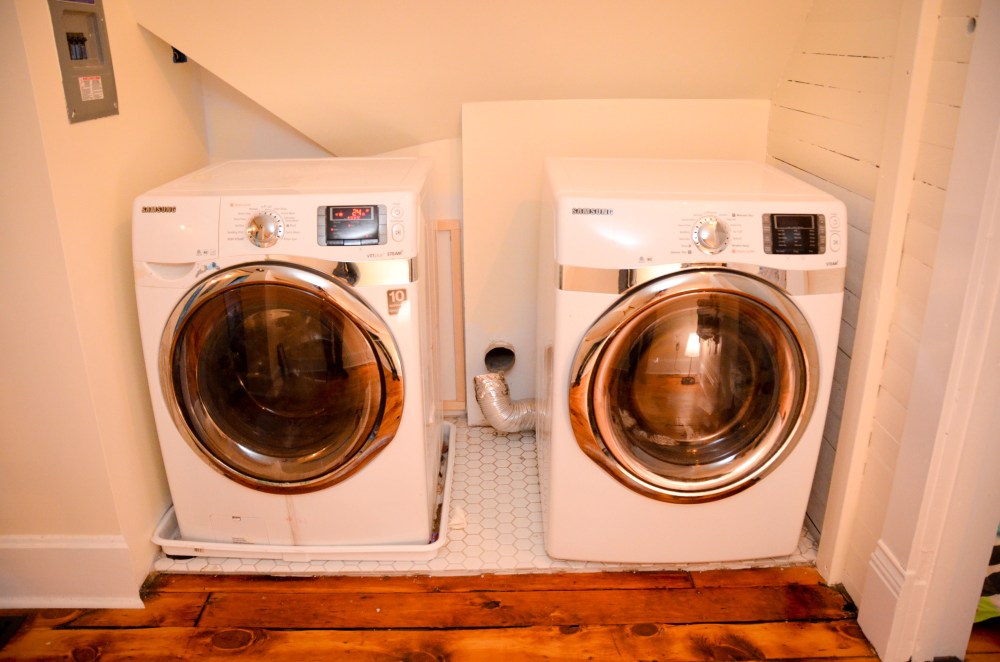

Geez. Ignore the mess in Lucy’s room !
Originally we thought we would want to put doors to close off the washer and dryer so that you couldn’t see them. But, as with many things, we changed our minds. We wanted to have something that made the W/D units look more built-in, but also provide some functional benefit when doing the laundry. Having large doors here would have made the space seem cramped. We went through several different plans for this area, but finally settled on just building storage shelves in between the W/D units and then using a kitchen island counter top to create a folding area. I have already done several custom built-in jobs and felt pretty comfortable in my ability to create something that would work and look better than the current situation.
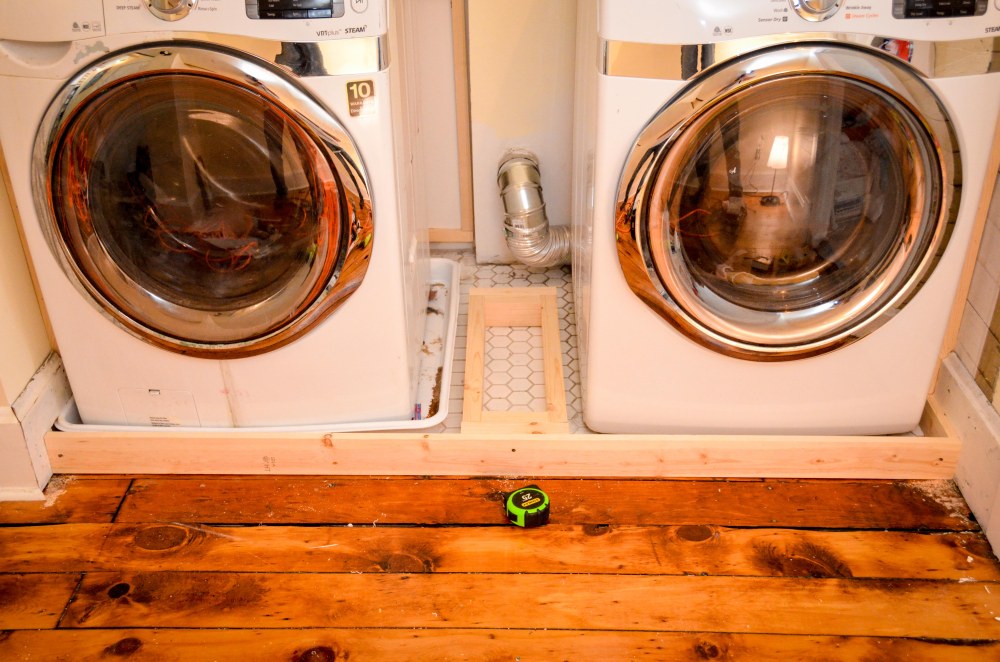
One of the first challenges was coming up with a design that would hide the drip pan for the washer. I salvaged the last remaining pieces of old baseboard, added vertical supports for the counter top, added trim on top of those supports, and added a piece of wood on the floor that would serve as an anchor for the front trim I wanted to add. This is the stuff that takes forever to do, but no one ever sees.

Next, I created a base for the shelving that was tall enough to allow the first shelf to go over the washer pan. A new baseboard was added and secured to the shelving base.
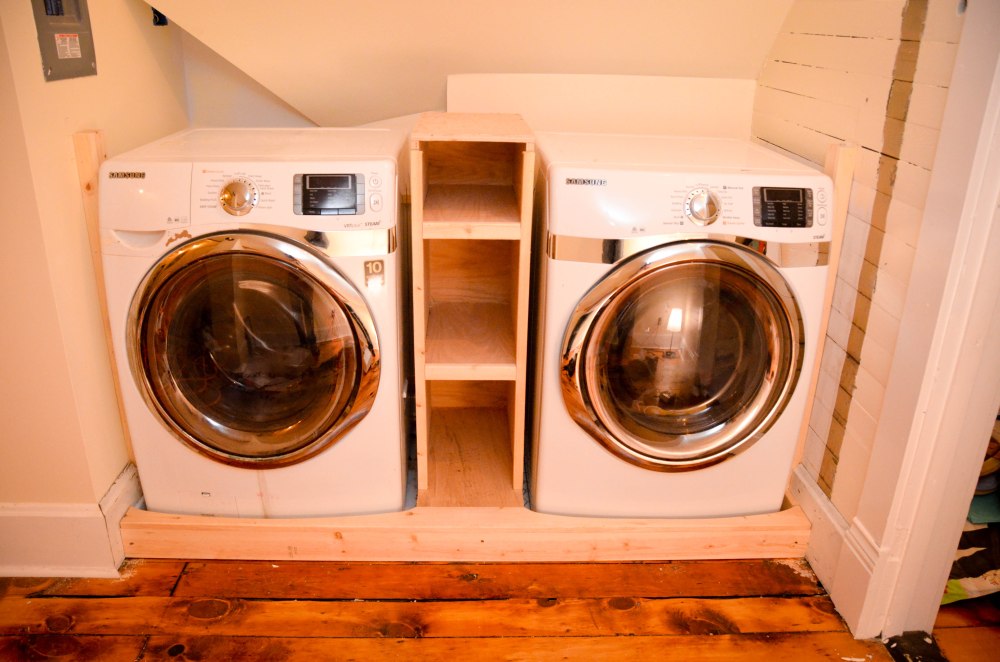
I added a top piece to the new baseboard and scribed the contour of the washer and dryer so that the curve mirrored the curve of the units. I built the shelving tall enough to add support to the middle of the counter top.
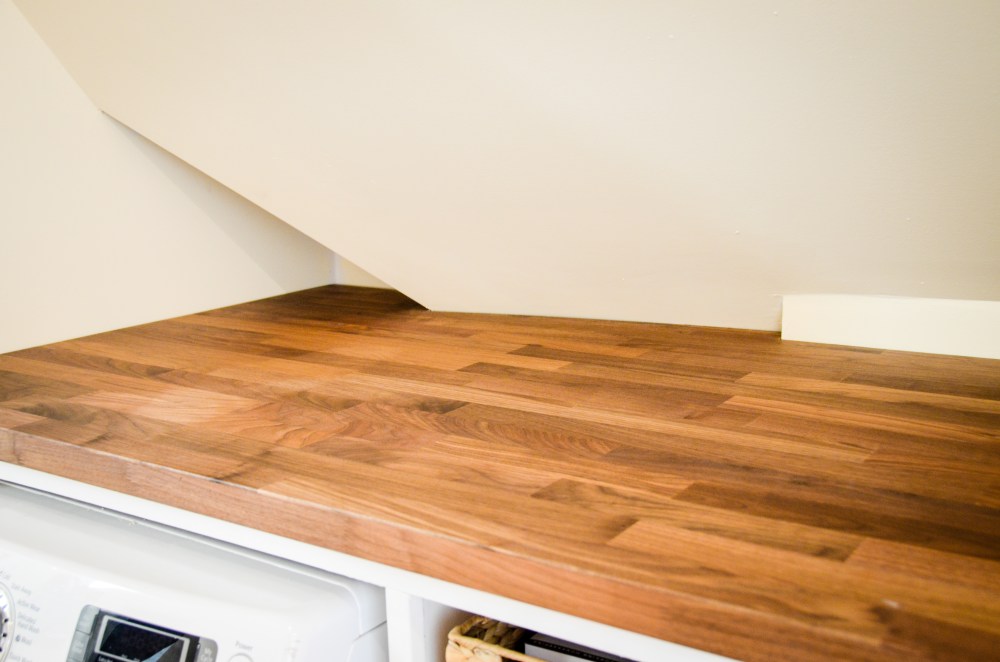
We purchased a kitchen island counter top from IKEA and I began figuring out how I was going to accurately cut the back of it to match the crazy curves, angles, and outline of the back wall. The counter top was heavy and the last thing I wanted to do was move it over and over again to make small adjustments. I decided to use a 1×6 and then scribe the contour of the wall on that. This was a much easier way to make all the tiny adjustments necessary to create a seamless fit.

I traced the outline of the 1×6 directly on to the counter top and VERY carefully made final cuts to the length and width of the butcher block. I don’t have any pictures of this actually taking place because I did it on the porch, while it was raining, and the sun was setting, and I was in a hurry. And if I remember correctly, it was a chaotic moment with the kiddos at home. Oh, and it was dark enough that I needed someone to hold a light while I moved with the saw, which meant I needed Amy’s help.
[Edit from Amy: And I was covered in sawdust…and rain… wearing a dress (no time to change clothes) and sunglasses (couldn’t find the safety glasses)…in the dark.]
[Edit from Joe: Good times.]
After one small adjustment to the width, the counter top fit perfectly. Yay for planning and patience!
This is a good time to mention that one of my goals for this whole structure was that it could be easily de-constructed so that pulling out the washer and dryer wouldn’t be too difficult. Essentially the structure was designed in three separate components. The lower baseboard facade, the shelving box, and the counter top. There are only three screws holding everything in place. To dismantle it all you have to do is unscrew the baseboard and remove it, lift up the front of the counter top, and slide out the shelving box. This allows for easy access to the vent, on/off valves, and the access panel behind the washer.
After a couple more adjustments to the shelves, a little wood putty, caulk, and paint, here is the final result:
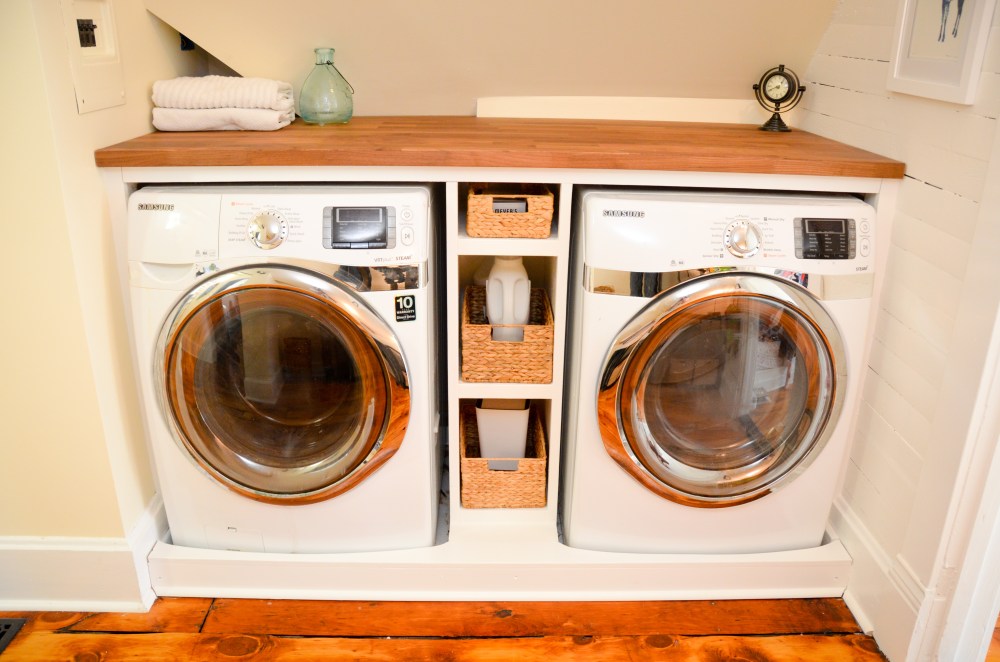

Opposite the washer and dryer is an empty space that we use right now for laundry baskets and miscellanious things. We are purposefully not doing something permanent to this space right now because we have a feeling it might eventually become a closet for Lucy when she gets older. For now, it’s a great place to tuck away laundry that is drying or ready to be sorted.


For more than one hundred years most of the 2nd floor of our house remained unfinished. It was a large attic space and must have provided amazing storage space for so many families. I’m not exactly sure why or how it made it this long without someone finishing the space. As we have proved, this area is more than usable. In fact, the upstairs is such a great feature of the house. With the completion of the laundry area, now seems like a good time to take one last look at the finished common area!
First, to make all this work we needed to relocate the stairs from the master bedroom to the center of the house.
[Edit from Amy: And here you can see where Joe cut the hole in the floor for the future stairs. I was afraid that he would cut the hole around himself like Wylie Coyote and then fall through the floor.]

We are still living with “construction stairs”, so we won’t dwell on this particular feature of the 2nd floor. Just to the right of the staircase is a gable that faces south and the location of a new bathroom.


Opposite the bathroom is the north-facing gable that became Aiden’s room…


Here was the view towards the front of the house and the space that is now Lucy’s room and laundry area…
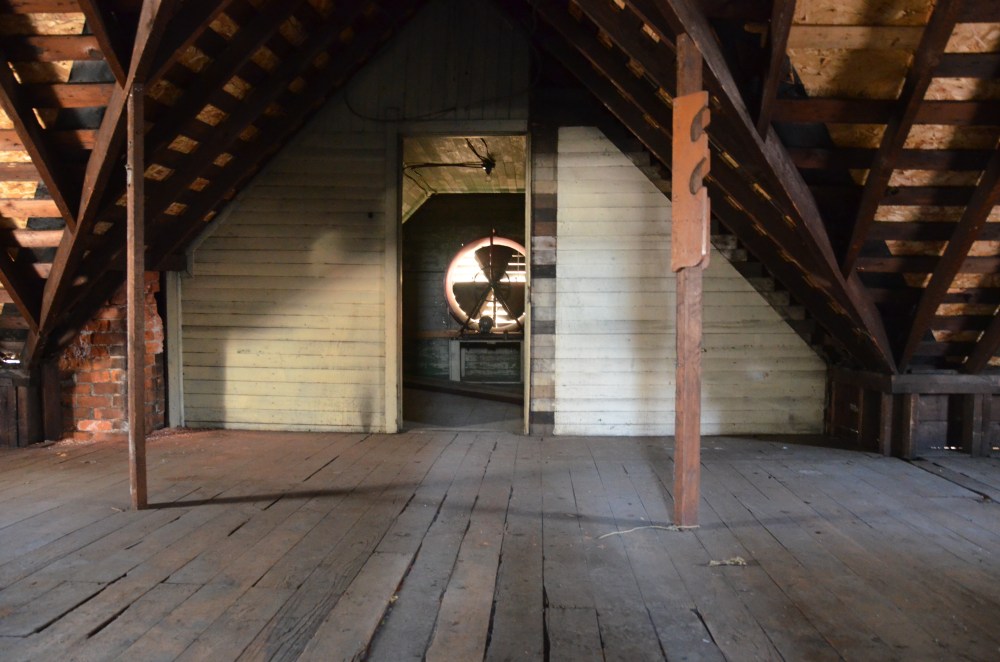
Hard to imagine it would ever be a comfortable place to do laundry and that our little girl would sleep in the dark room where that fan used to reside. With a lot of patience, persistence, and vision… here is what we get to enjoy now.

Standing in the laundry area, here was the view towards the master bedroom…

and now…

A big focal point of the common area is a window near the ceiling that wasn’t even discernable until we removed the siding to reveal this…

On the interior it was obvious there had once been a window, but you had to use a flashlight to see it.

We installed a new window and the entire feel of the 2nd floor was automatically transformed.

One of the other defining characteristics of the 2nd floor is that all the ceilings have peaks instead of a flat ceiling. It seems that many renovations include a flat ceiling to incorporate new electrical work or HVAC. We avoided this with some creative routing of duct work and by using sconces instead of overhead lighting.

If there is one place in the house where it is difficult to imagine or even remember what it looked like when we started, it is this “attic.” There are no good pictures of what it used to look like. It was dark and bleak. The oddities of the space required us to use a pot of imagination and proceeding with our design required a good bit of faith. This pretty much sums up what it looked like. Point the camera any direction and it all looked like this…

And now we can check off this entire area as finished!

To be honest, I’m a little sad to be done with this whole space. It has been one of the most enjoyable and gratifying work of the entire renovation project. Amy and I are drawn to small, quirky, and architecturally interesting spaces and we seem to have an easier time coming up with a strong vision for those type of areas. Additionally, there has been broad creative freedom upstairs because we got to start with a blank canvas. That is not to say I won’t miss stepping over air compressions, saws, and living with a steady dose of saw dust scattered around the 2nd floor!
The only pre-existing room on the 2nd floor (the master bedroom) is basically done, but we are still finishing up the decorating process. Why does that seem to take us just as long as the actual renovating?! Hopefully we can do a blog post soon.
Also in the pipeline, the downstairs bathroom!

Amazing what and where your visions took you both with renovating the upstairs. It’s lovely and interesting. I love all the Nooks and Cranies your home holds. You two are amazing creating an amazing home for your family. HUGSSS
LikeLike
Oh my gosh. I am gushing over this space. Seriously great job!
LikeLiked by 1 person
Thank you, Jessica!
LikeLike
I am impressed at how you’ve worked so well with such challenging geometry. It all looks spacious and well-designed, despite not having a single full-height ceiling! Well done!
I’m also a big fan of your attention to the details. It really makes the finished result better, and I enjoy I’m not the only one who will spend 15 minutes getting a joint or miter cut to fit just right.
LikeLiked by 1 person
Truly a piece of work! You really had the imagination and vision to transform this creepy attic into a beautiful space! I love that you let the ceilings as they are (peaked vs. flat), it gives a sensation of expanded space. I love your use of each nook as a useful space and all the built-ins you made (beds, shelves, laundry area, etc…). I would LOVE to live in such a house!
LikeLiked by 1 person
Wow. Thank you so much for the kind words!
LikeLike
You’re welcome 🙂 We’re French and restoring our rubble limestone barn in order to convert half of it into a bedroom + bathroom, and I am drooling over your beautiful floors. I think we’ll probably have to buy new wooden planks and doubt we can find reclaimed ones, but still, i wish i could have such floors there because they bear history, have been used, worn, mistreated and loved again :-)! (we already have old wooden floors in our stone house’s 2nd floor)
LikeLike