Week 43 – Amy
If you read Mission Electrician Part one you know I’ve decided to do the electrical work myself. The first part and probably most important part of any big project like this is the planning (also mentioned in part one). After planning out all of the circuit loads, deciding what kind of lighting we wanted where, and how those lights should function, I set out to do what electricians call “roughing in”.

This basically means running the correct cables from one location to another while routing in and out of electrical boxes for switches and receptacles. This phase of the electrical work is more strenuous, physical and time consuming than any other part. This step also involves a lot of on-sight problem solving since each room has different obstacles to contend with when planning the best path for your cable. This means I did a lot of standing around and scratching my head before starting any work. I’ve learned that pulling out cable is not nearly as “fun” as stapling it down. Also, another compelling reason to avoid having to remove cable runs is that tearing out cable tears up your hands. I’ve gone though a ton of band-aids for sure.
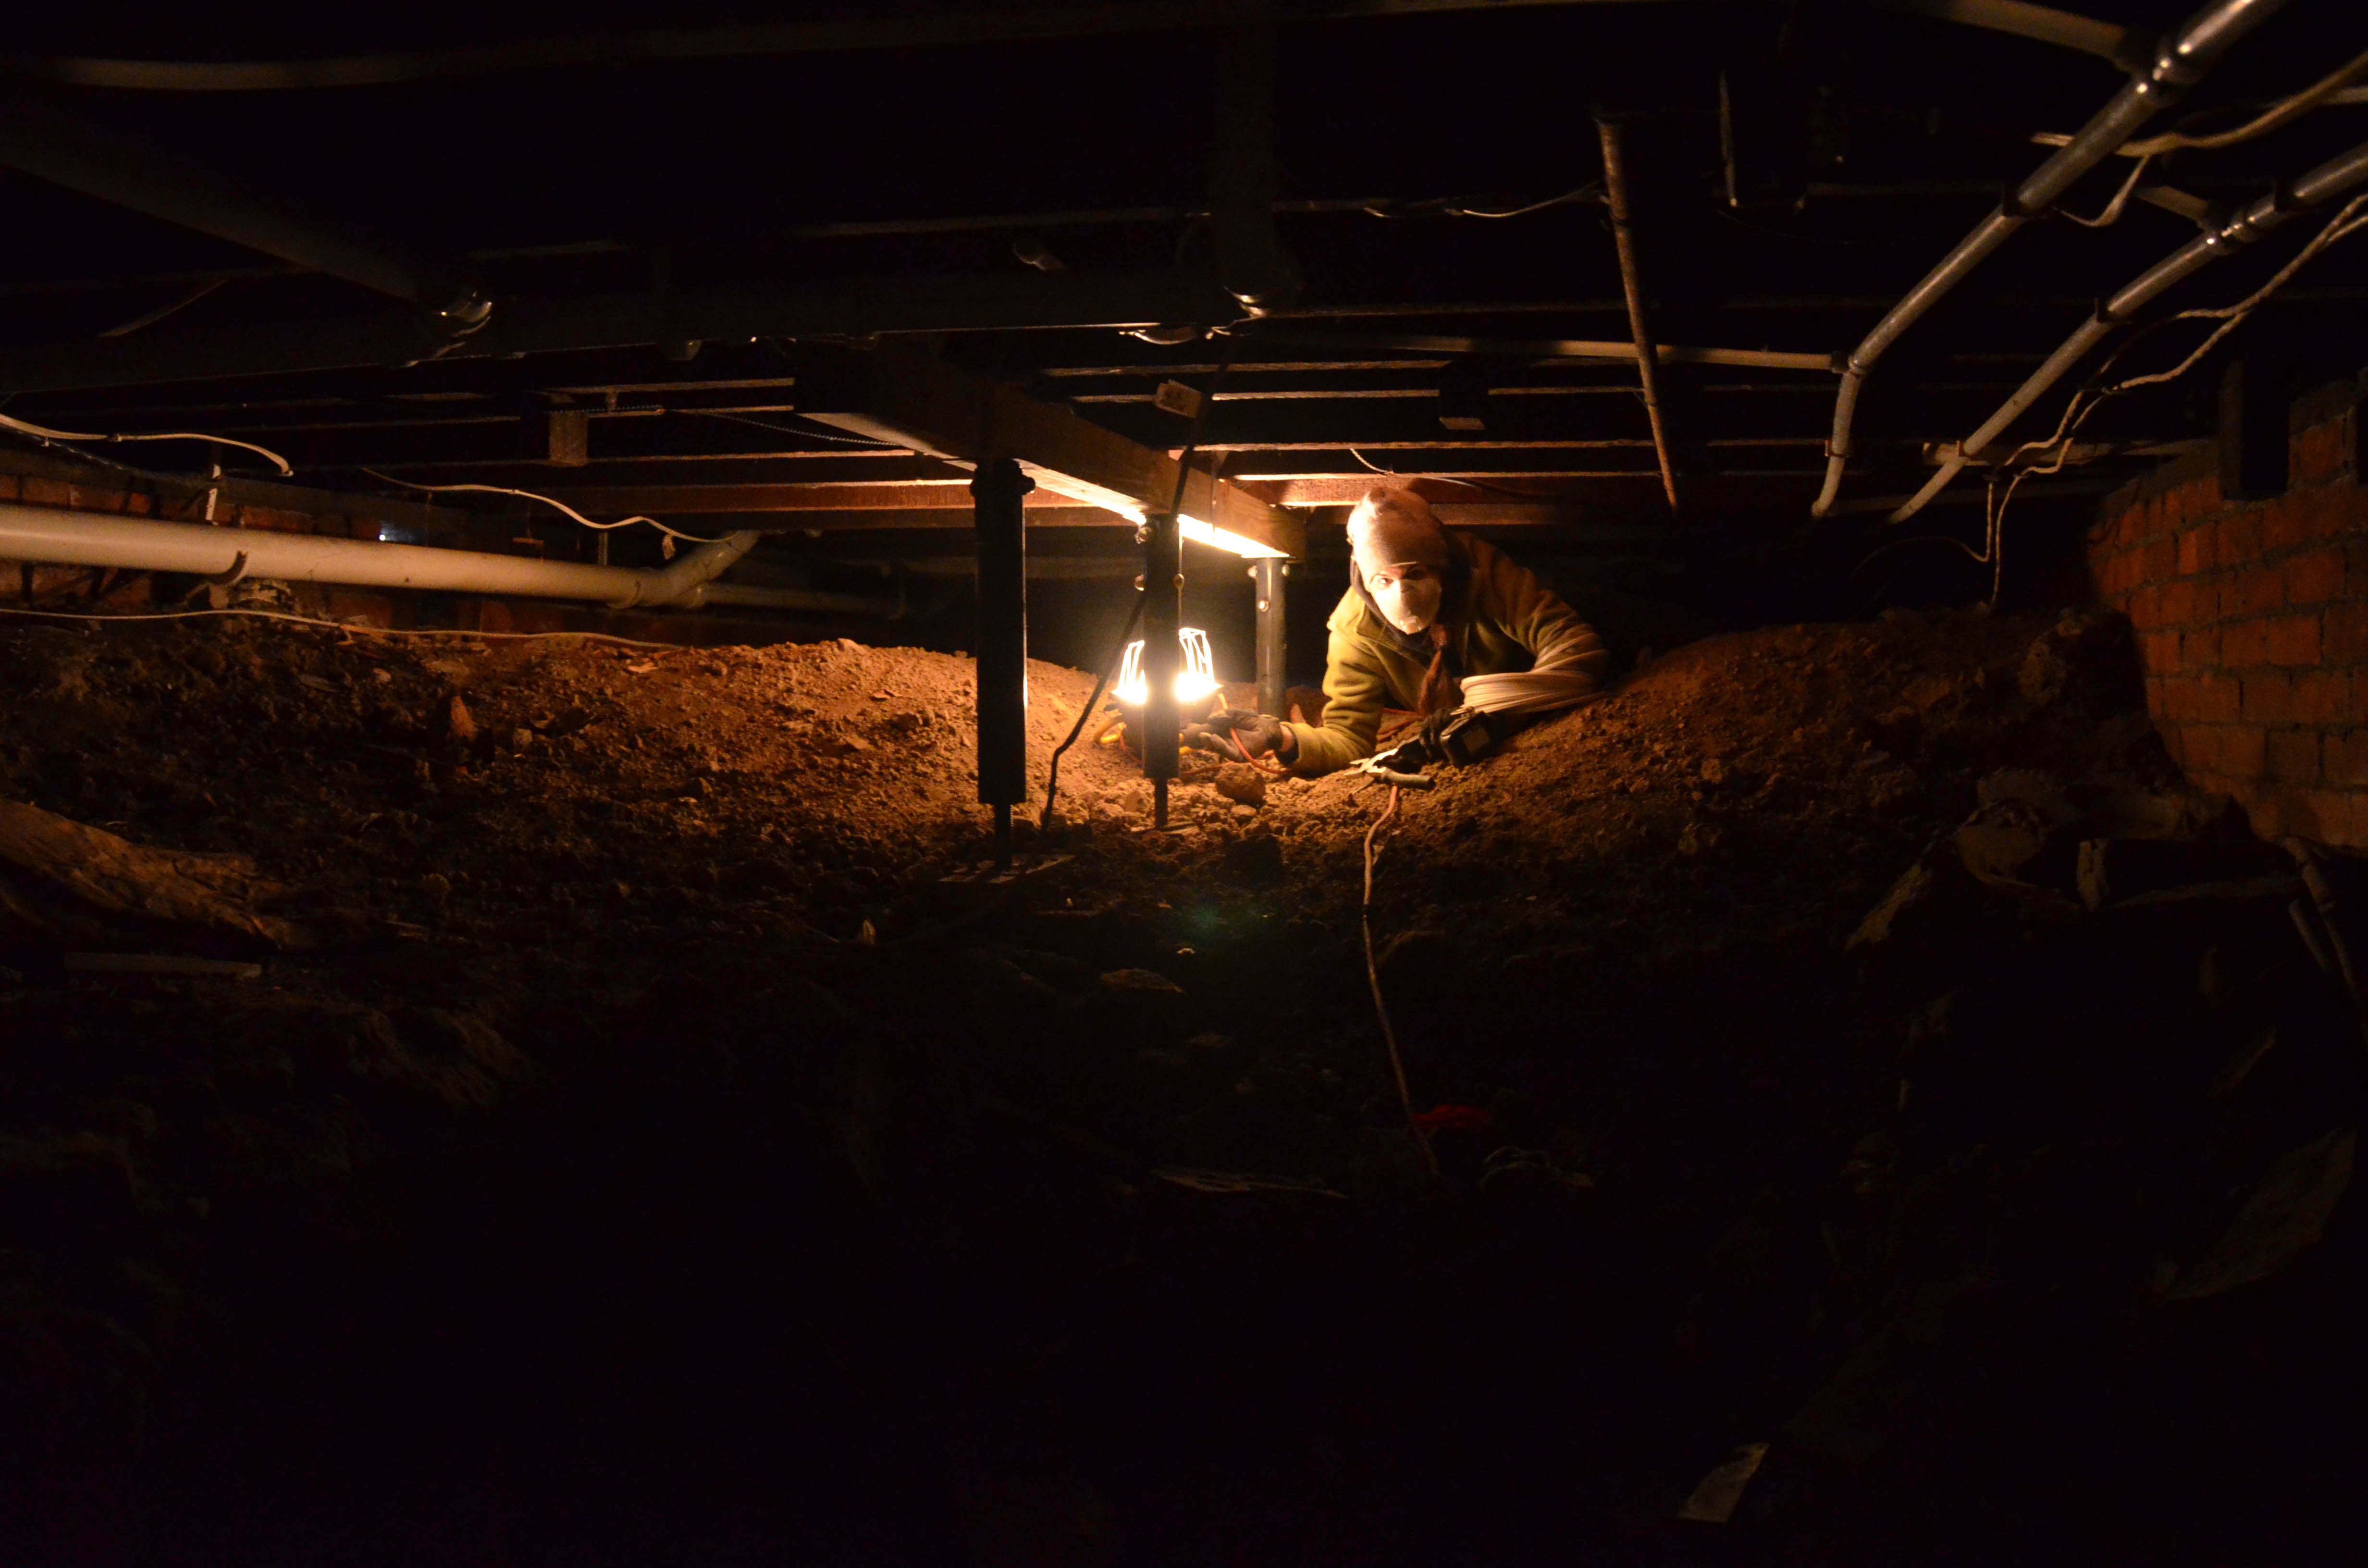
Most of the first floor circuits started by traveling from the service panel and across the house via the crawlspace. There is a reason they call it “crawl” space.

When the cables in the crawl space reached their correct location they would pop up into the walls of respective rooms. This was easy to do in the “new work” framing areas such as the first floor bathroom. I simply drilled a hole through the floor where the wall will eventually be and snaked the cable up through.
Some areas required more elaborate planning and significantly more effort to get from point A to point B. Some tougher areas required army crawling across the crawlspace to the wall where we wanted a receptacle. This was accomplished with the help of my husband who had to knock on the floors above my head to lead me to the exact spot I needed to be. Then, sometimes with my face in the dirt, I drilled a hole into what I believed to be the wall cavity and then fished cable up into the darkness to hopefully meet Joe’s fingers.
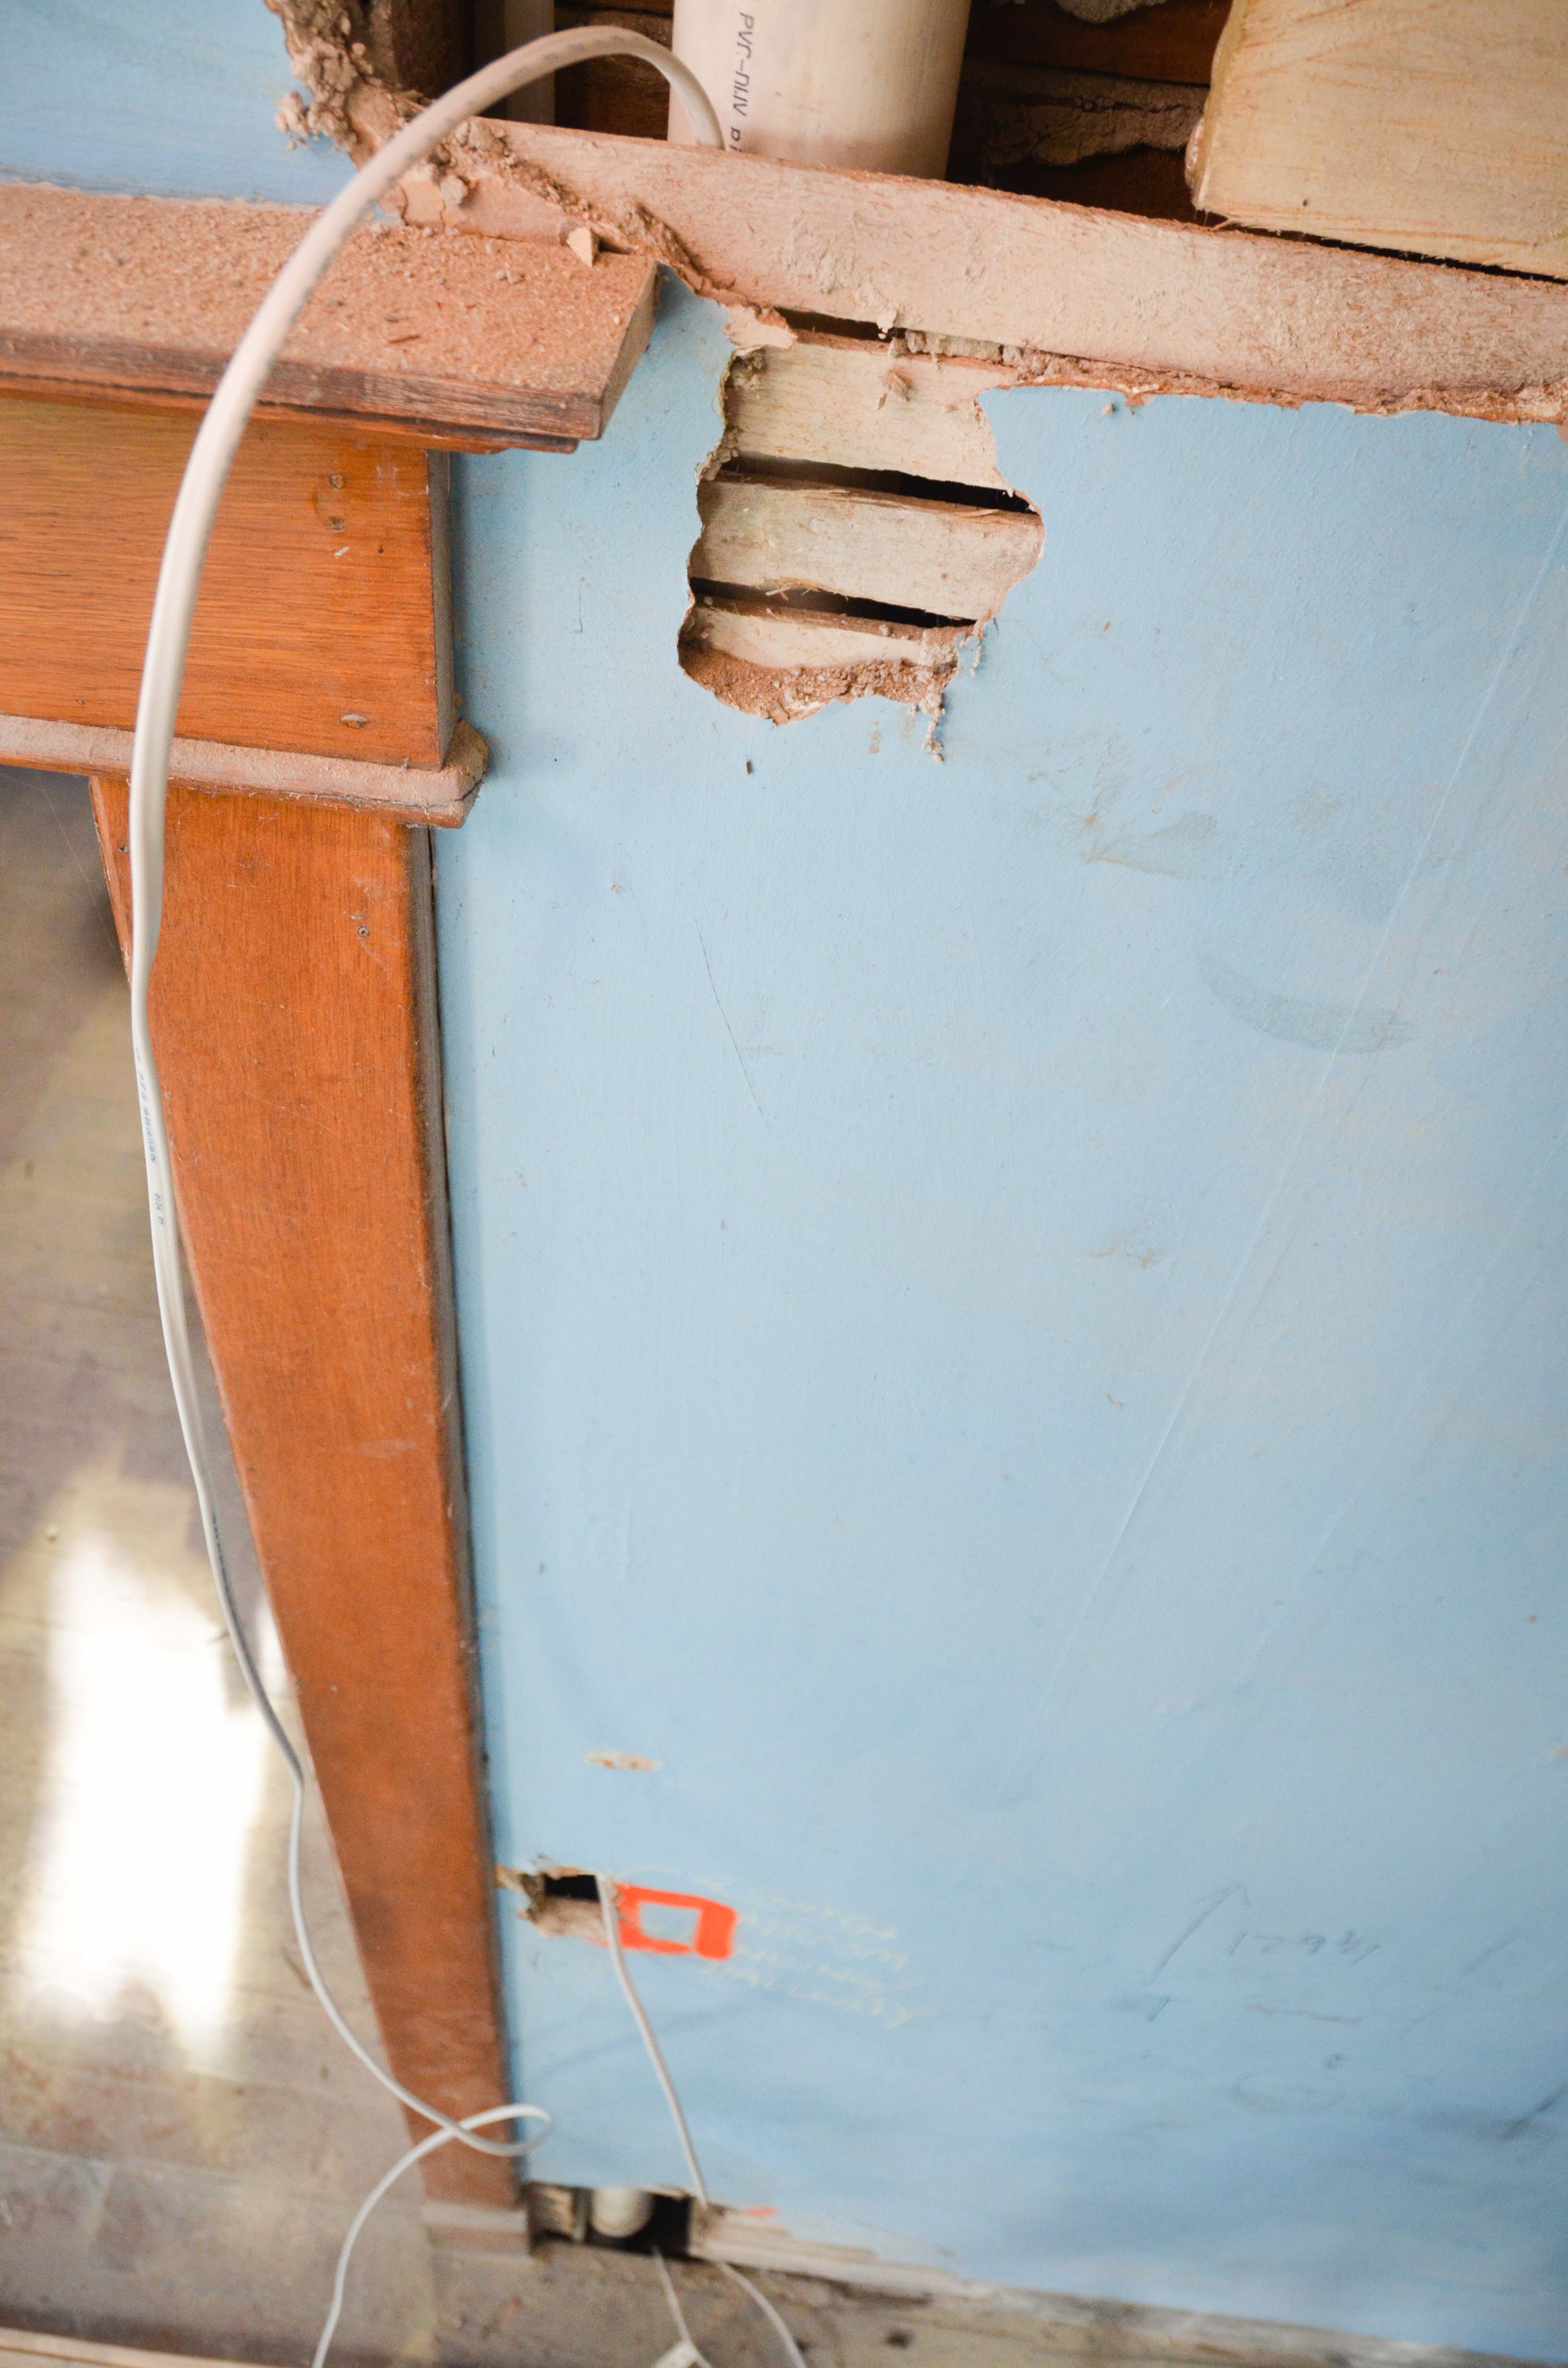
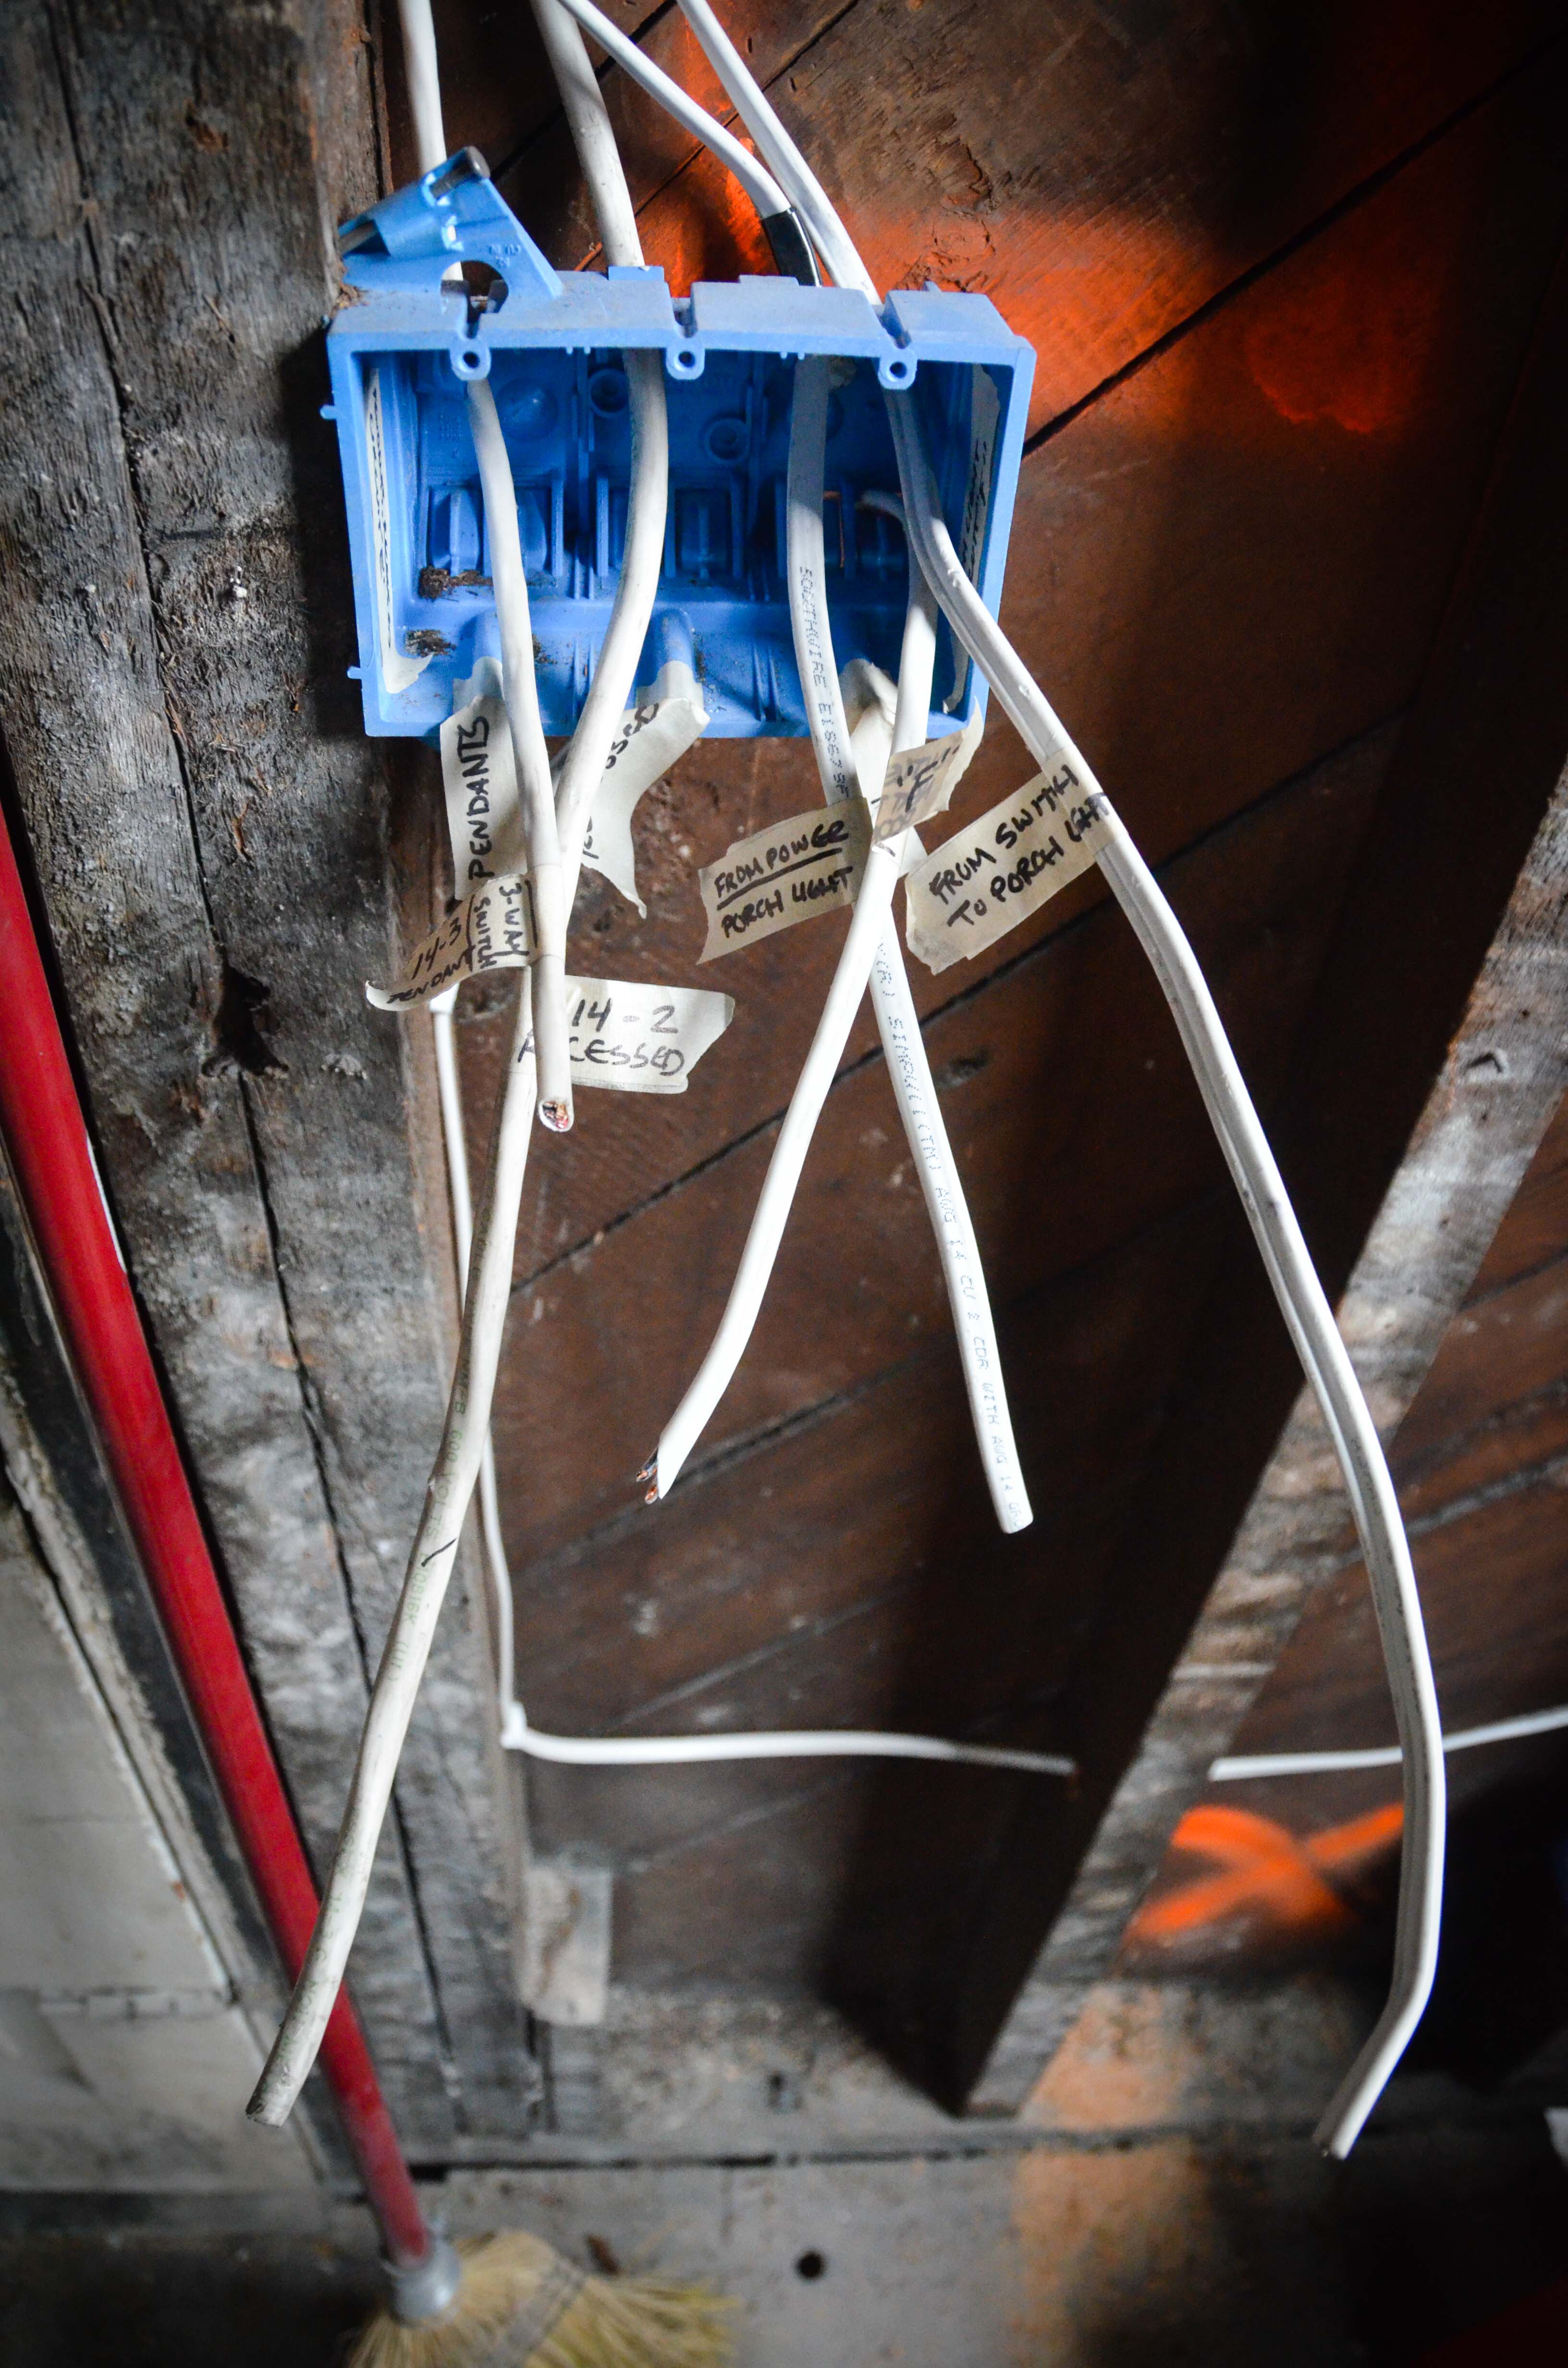
In another location you can see there were already holes in the walls where I could pull cable up from the crawlspace and on to the switch plate area. I love this ugly spot in the house because these holes saved me a lot of aggravation. Here you can see the cables coming in from the crawlspace, fished up through to the switch plate area and then traveling on to the ceiling to eventually hook up with a set of recessed ceiling lights.
We do not have any ceilings downstairs. This means that running cable overhead from a switch on a wall to a ceiling fixture was easy (but still time consuming) work. It was especially easy to run cable where there happened to be old knob and tube wiring because I could strip out the old work and use the existing holes. Drilling new holes is not super difficult but it is a little tiring once you’ve done a dozen over your head on top of a ladder. I always tried to use existing holes if possible.

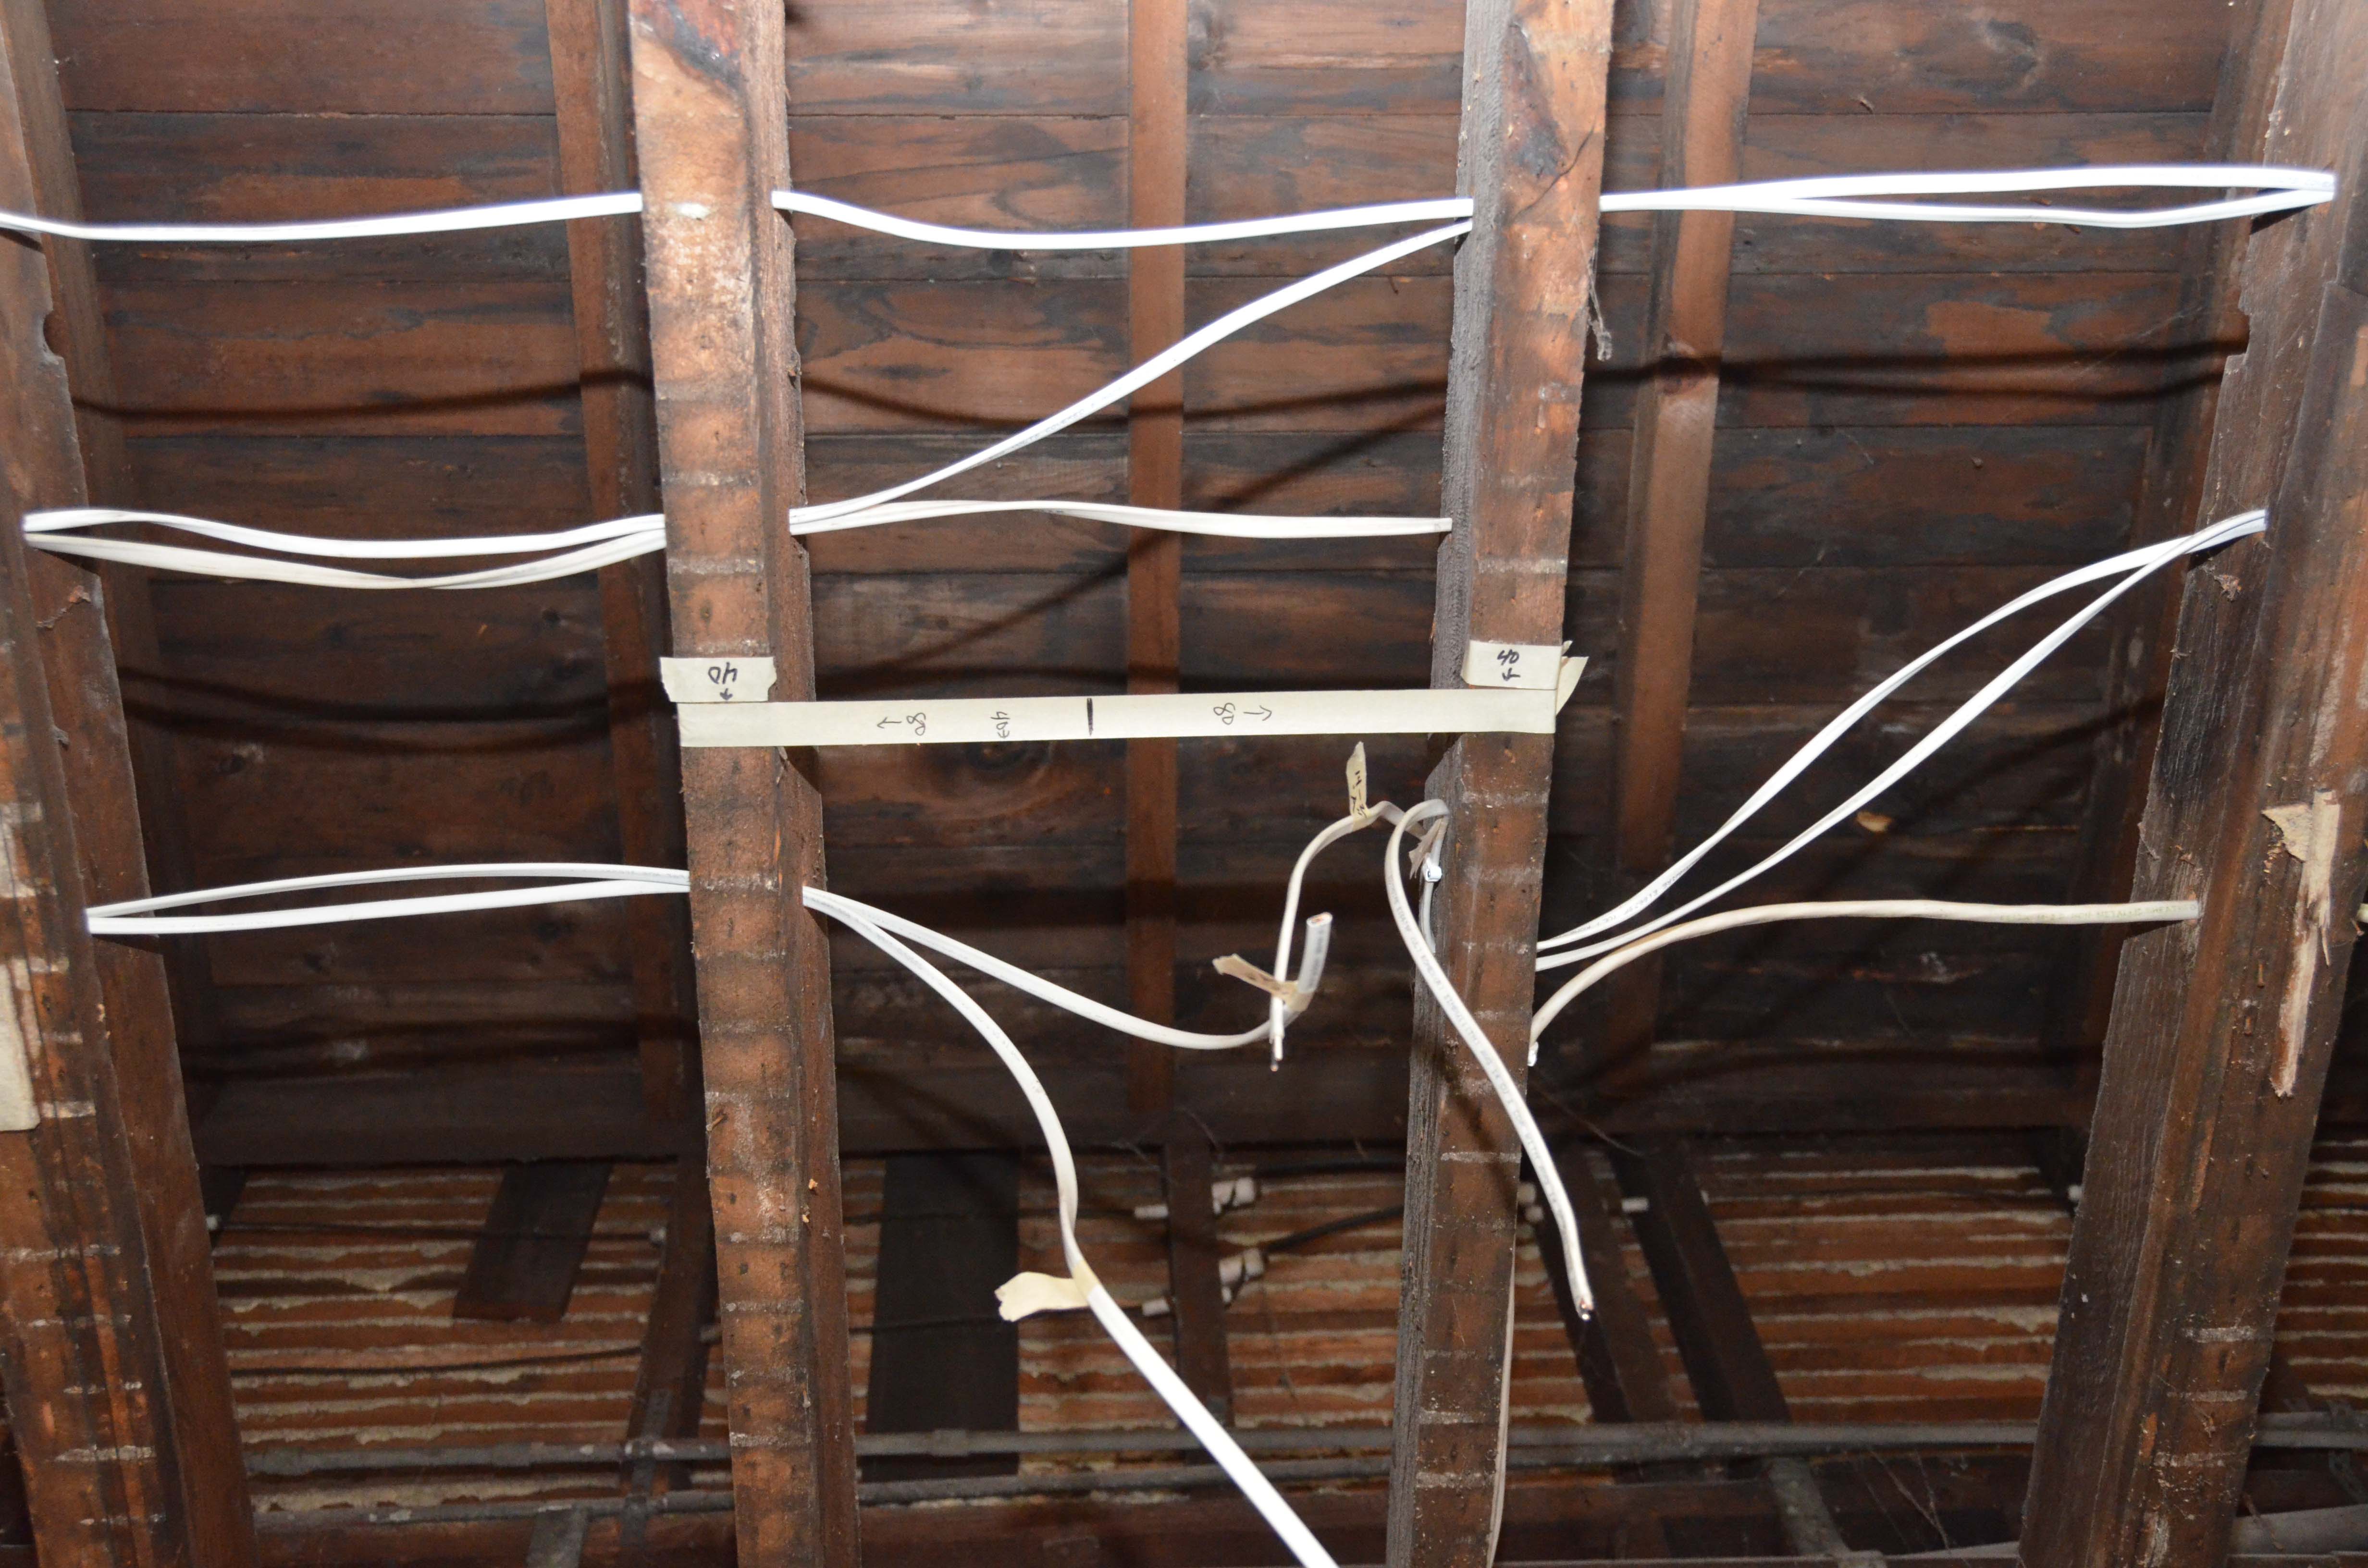
Here you can see that I’ve run cable for the recessed “can” lights that we will install in the kitchen ceiling. I used a mixture of old and new holes to make these runs. You can also see some of my measuring and notes on masking tape. This shows me where I will install the housing for the recessed lights.
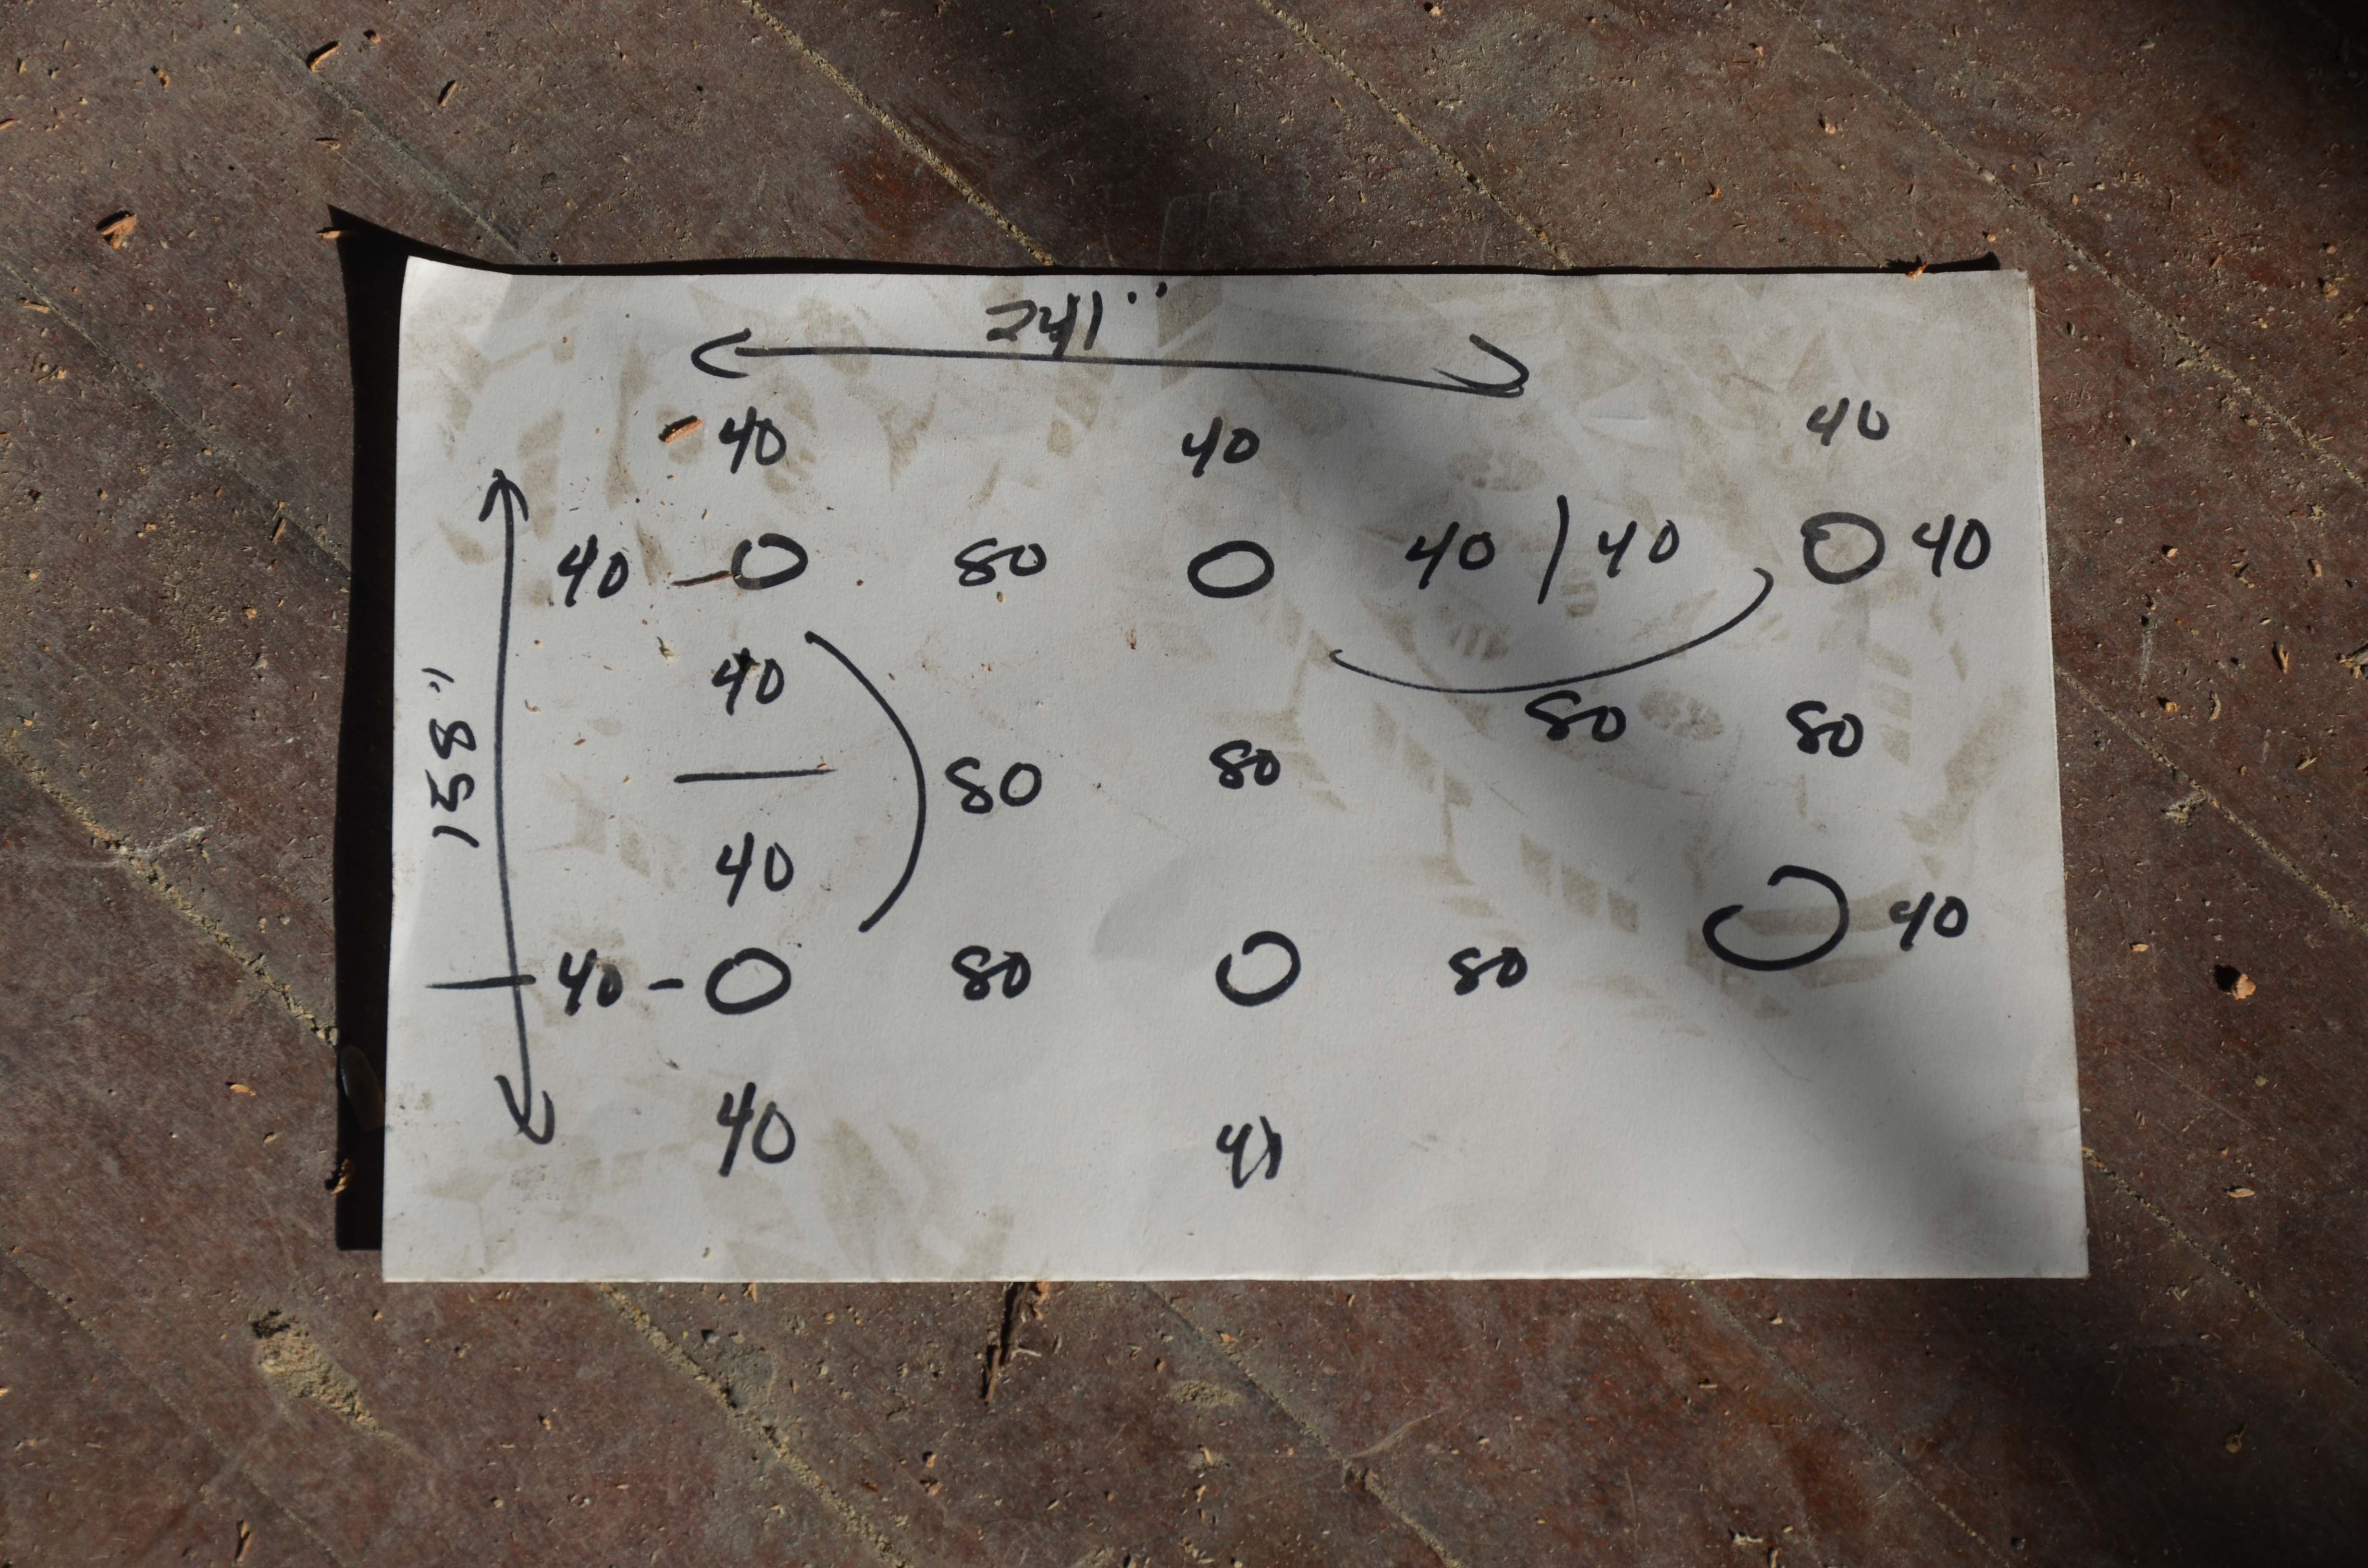
Here is a picture sketching out my plan for spacing out the ambient lighting in the kitchen. The lights will be 40 inches from the wall and 80 inches from one another.
When a cable reached an electrical box (for switches and receptacles) I was careful to label each cable. The last thing I wanted was to forget what a cable was for or where it came from. Some of my boxes got a little squid like in appearance. These pieces of cable will be trimmed down later.
You might recall in this post that our architect was once quoted as saying, “What you really want is layered lighting.” I was not at all ready to hear those words on that particular day. But, as it turns out, he was right. I DO want layered lighting. You might not know, as I did not, that there are different levels of lighting.
Ambient lighting is for lighting up your room- otherwise known as general lighting. Usually this is one flush mount in the center of the ceiling (AKA a boob light) or a series of equally spaced can lights. Then you have your task lighting such as a pendant over the kitchen sink or a well-placed light where you plan to cozy up and read a book. The third layer of lighting is accent lighting. This is not a necessary layer but a nice decorative touch where you want to highlight something special such as artwork on a wall, a fancy fireplace mantel, or lighting inside of a built-in cabinet. Some task lighting or accent lighting can be done, and usually is done, with plug in lamps using existing and well planned receptacles. But when you’re doing the wiring yourself it’s easy to add a sconce on a wall where you know you will want light. Heck, why not go ahead and wire it to a three way switch too! Oh, and who doesn’t like under cabinet lighting? I do! Or come to think of it, I also like up-lighting, let’s throw in some of that. And while we’re at it, since my son always forgets to turn off his lights when he’s done reading in bed, let’s go ahead and wire in a convenient switch right next to his pillow. Make it a three way switch too… because, why not? Hooray for custom DIY!
This picture is a good example of layered lighting design. It also illustrates how easy it can be to get seduced and carried away by layered lighting. These people have lighting under their counter top and illuminating their feet. Holy cow.

While doing elaborate wiring and custom three tiered lighting scenarios takes way longer than slapping up one center boob light in each room it is also generally much more expensive to have done since it takes TIME. Luckily for us it’s not a whole lot more expensive since materials are relatively cheap and all the labor is FREE!!!! FREEE!!!!
*Insert maniacal laughing here*
While we’re talking about kitchen lighting, let me just say that the kitchen was a beast unto itself. I believe that it took me more time to wire the kitchen alone than it did to do all the other rooms in the house combined. Whereas one circuit will cover multiple rooms in other areas of the house, the kitchen has 5 separate appliance circuit runs, two dedicated GFCI circuit runs for my over the counter receptacles, and 1 circuit with two sets of three way switches for the lights. That is whopping total of 8 circuits all in one room!

The lighting circuit alone was really the most time consuming of all. There are six can lights on a three way switch (ambient lighting). There are two pendants on a three way switch (task lighting) and there are under cabinet lights on a separate switch plate (task/accent lighting).

The kitchen also required some elaborate corner turns of the cable in between two studs. I was dreading this task and trying to conjure up ways to avoid it but when it came down to it it was pretty easy.

Adjacent to the kitchen is the porch. In order to run cable down to this future fixture I fed my cable from an existing switch box in the kitchen and threaded it down into the existing hole above the porch. This seemingly simple task required wiggling my body like a snake through a laughably small hole in a closet on the second story and into this area to gain access to the porch overhead. Fun.

There are a variety of existing receptacle outlets throughout the first floor. We are using those locations for new receptacles and we are also adding new receptacle locations where we think we might want additional outlets. Some of these were installed in the wood floor, some in the wall like typical receptacles, and one even embedded in the molding.
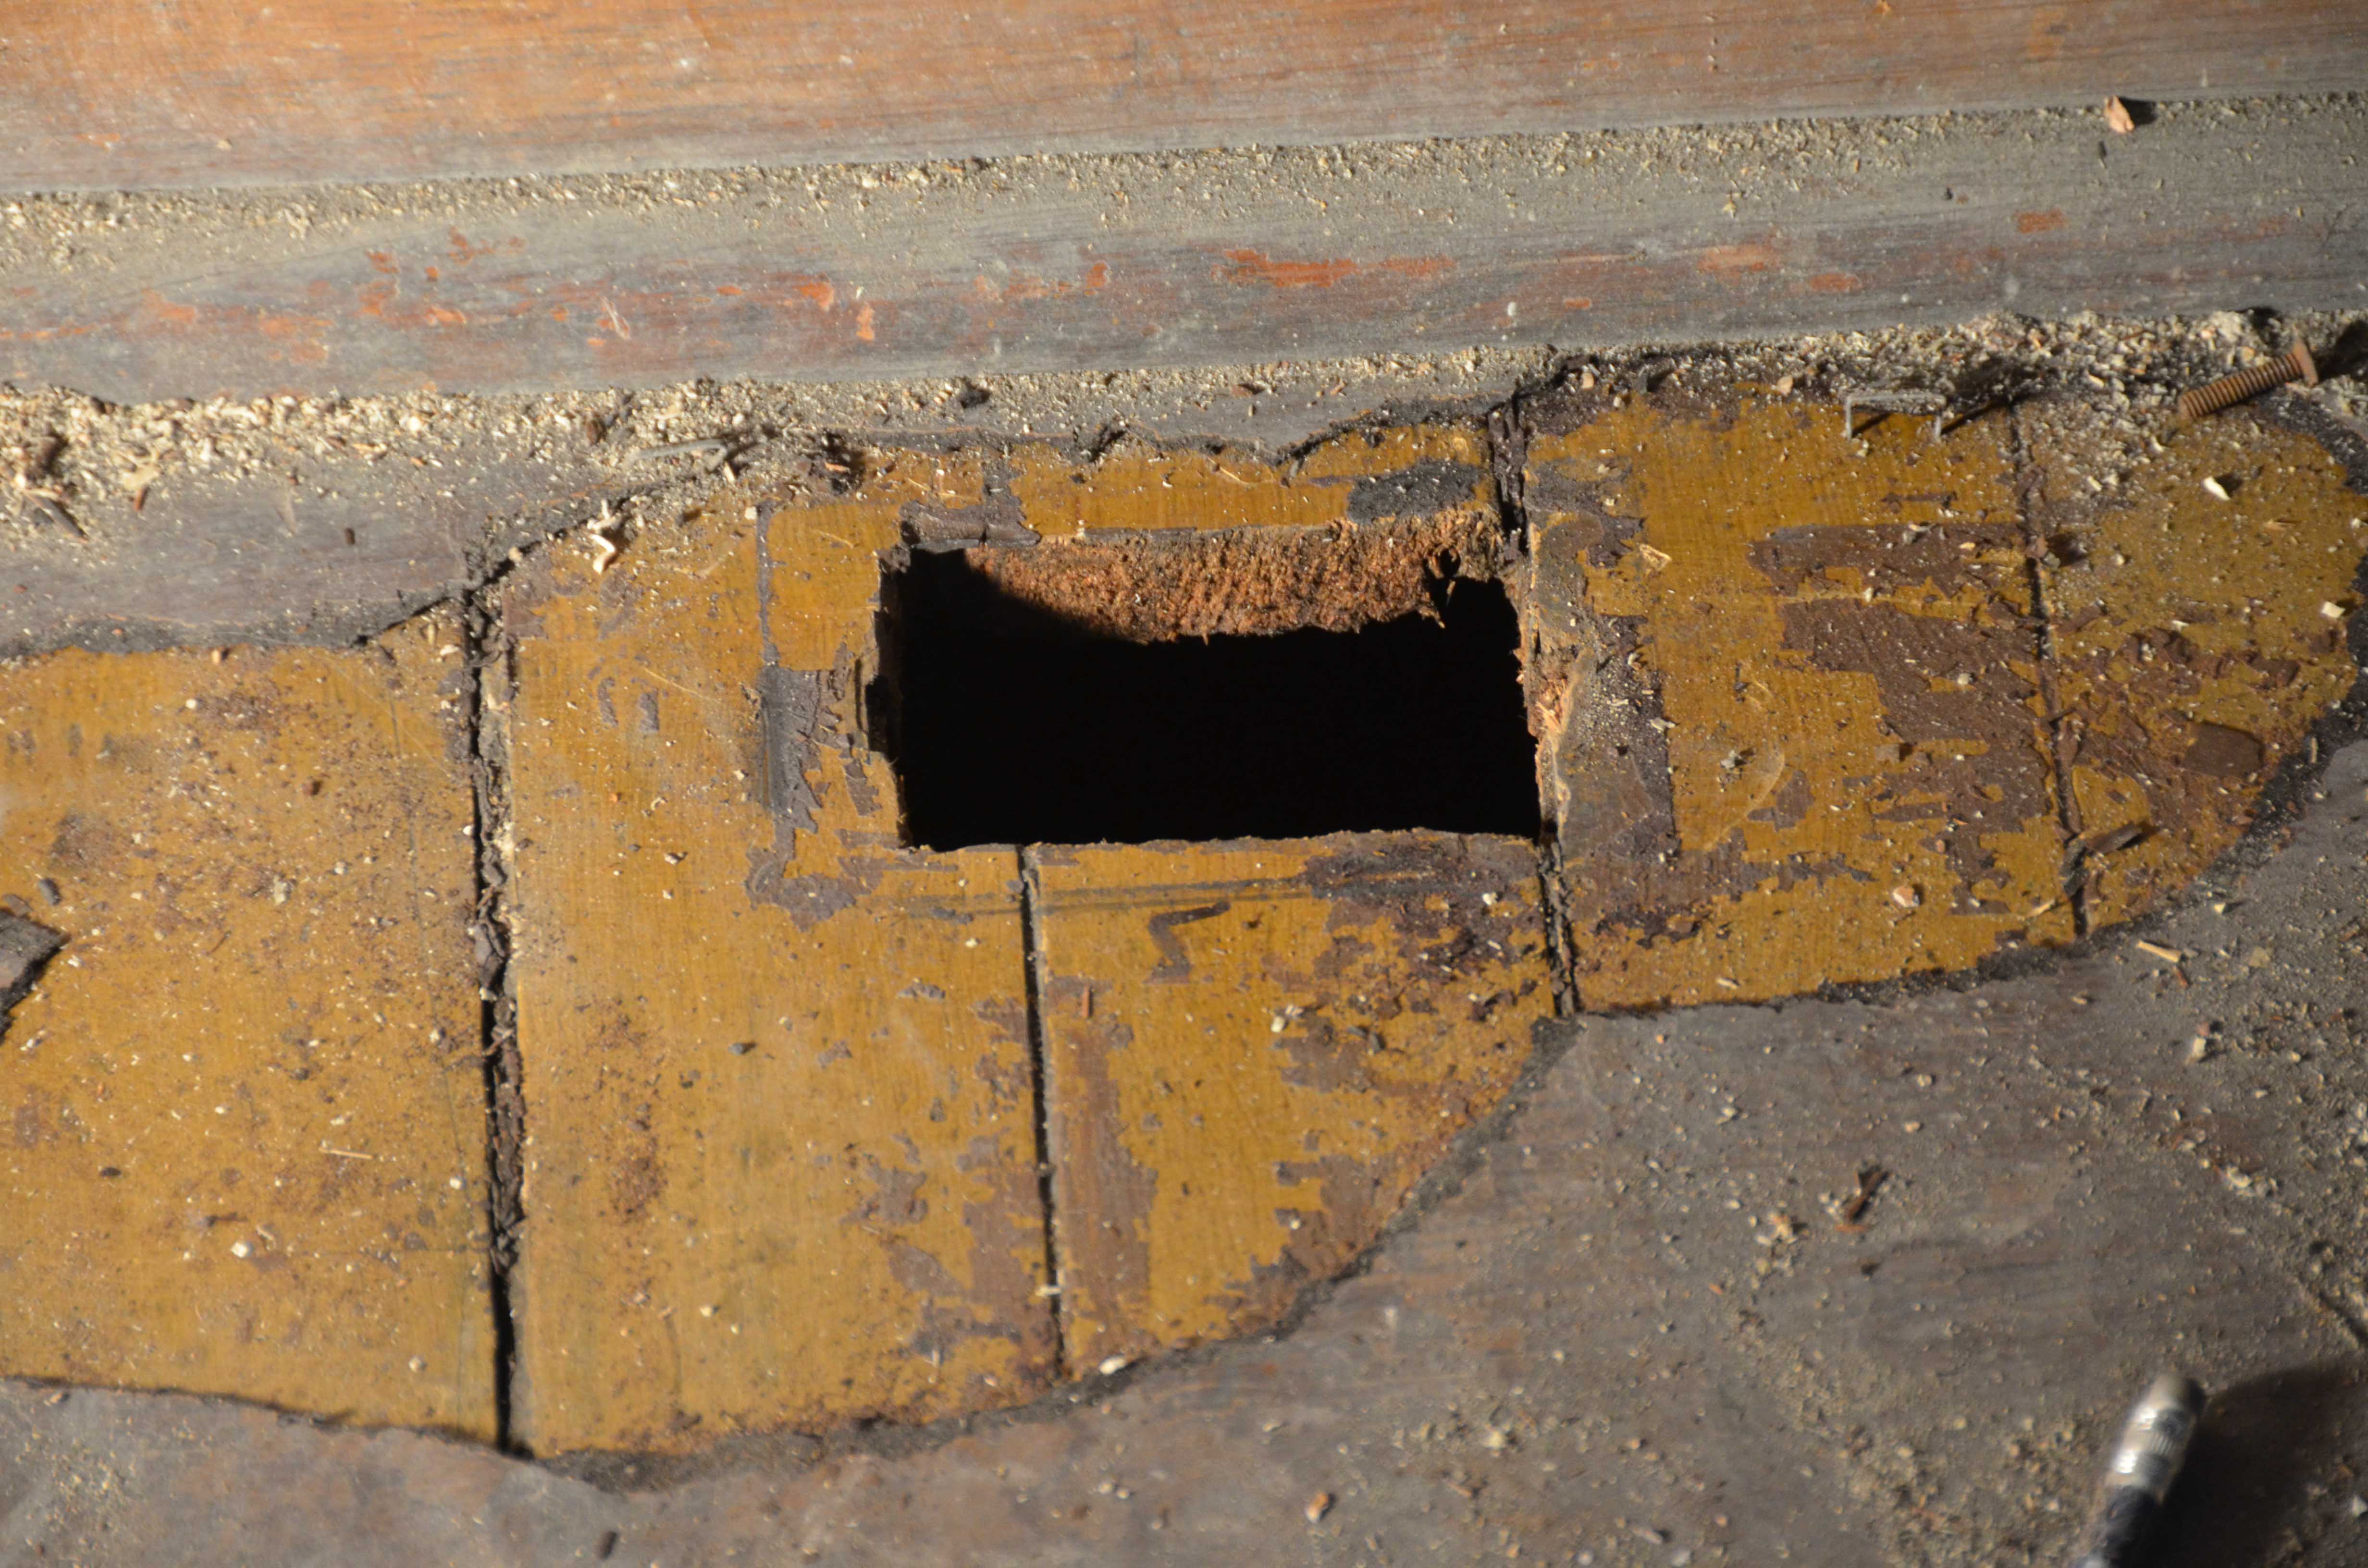
These old receptacles required some serious disassembling. Many were actually plastered in place for who knows what reason. This meant that we had to chisel them out while trying to limit damage to the surrounding plaster and lath. Most had 100 year old screws that were plastered over or painted over and nearly impossible to unscrew without throwing a tantrum and or counting to 10. Sometimes I left walls looking like a wild animal had clawed its way in. The picture below shows some damage but others were far worse. Also, apparently I really have a thing for “X” marking the spot, like twice.
[Edit from Joe: I quickly took over all responsibilities dealing with receptacle placement and plaster removal]
Next, the old receptacles holes needed to be cut to fit newer and larger modern electrical boxes. Thanks to Joe for doing that work for me.

[Edit from Joe: Creating new holes in the wall was actually way easier and less destructive to the plaster. Our plaster seems to be very strong and hasn’t crumbled around new holes as we once feared.]
Then we ran the cable from the crawlspace into the floor receptacle holes and into any easy access wall receptacle locations.

We used a a fish tape to sneak cable down from the ceiling where access from the crawl space was blocked. (HVAC locations thwarting most plans for easy cable installation)

At this point I have to mention something that anyone associated with construction or renovation knows all too well. What you think will take one hour will always turns into two (or three). Climbing up and down the ladder takes time. So does finding your hammer….again. Untangling the extension cords or dragging a light with you as you work also adds up.
You also never allot time you need to scare off perpetrators and robbers who seem so real in the moment but who turn out to be merely the effects of strong wind on an old creaky house. Yes, I hear things, and I threaten them. It can get kinda spooky when working in an old boarded up house alone, especially at night when you have to carry a lamp on an extension cord around to see.
One of my close friends told her husband about me working on the house alone and reported back that her husband was worried about me (which is nice, thanks Doug) and that I should at least carry pepper spray (which is probably good advice). I mentioned this to my husband (who never seems to worry about me, come to think of it) and he laughed.
[Edit from Joe: Hey! That makes me sound insensitive.]
When I asked him why he was laughing he said:
“I’m worried for the safety of the person who does try to attack you!”
That’s sort of fair to say. To be completely honest, I did shout out to an invisible intruder. I was very clear that I would not hesitate to run my drill through his body and warned him to take me at my word. I also gave him the mom business by shouting, “Don’t make me come up there!” Long story short – I went up there. I must have really scared him. By the time I got up there, he was gone.
So, the rough in work is nearly complete. A few minor loose ends to tie up, some nail plates to hammer on and a couple more walls to fish tape down into. The next step will be installing the housing for the recessed fixtures and “making up” the electrical boxes. Then we’ll be ready for insulation and drywall.
Meanwhile, I’ll stock up on more band-aids and try not to drill anyone to death.

3 Comments Add yours