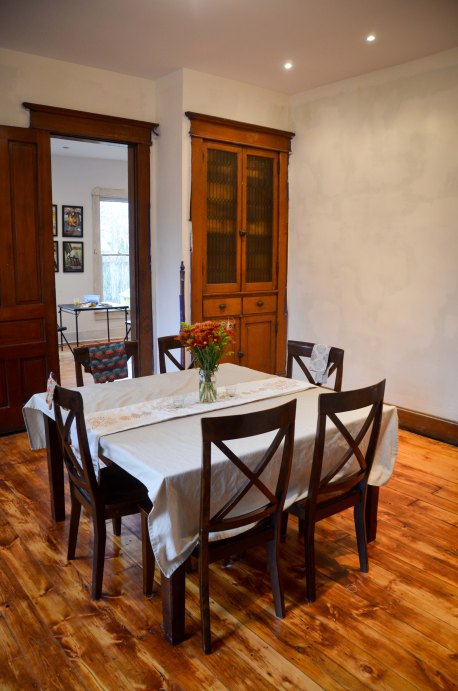
At first glance it might have seemed like there wasn’t much to be excited about when we got our first look at the dining room, but once we got past the initial layer of dirt, debris, and clutter, there was a lot to like about this space. For one – it is a really good size! Plenty of room for a large dining room table.

There is a lot of light, even with boarded up windows and awful curtains.

And of course the biggest feature of this room is a beautiful built-in cabinet.

It took a ton of work and time to get where we are now.
The first step, as it was in EVERY room, was to remove and rehab all the windows. This included removing the glass, reglazing, painting, cleaning up the hardware, and installing new ropes for weights and spring bronze for insulation.

The dining room had it’s fair share of electrical work, including new outlets, light switches, and recessed lighting.

Every surface in the dining room needed serious attention. Amy volunteered for the very unglamorous job of removing the mastic tar that was left over from areas of old linoleum. This was a painstakingly slow and unpleasant experience!


Another huge issue in the dining room was the condition of the plaster walls. They were the worst of the entire house and the plaster repair was one of the most labor intensive jobs of our renovation.


After Amy primed the entire house we were finally ready to sand and refinish the floors.

Despite the fact that the trim was still a disaster and the walls were only primed, just having clean floors and walls suddenly made this rehab house feel almost like a HOME. It felt like a huge step forward.

And that’s when we moved in.

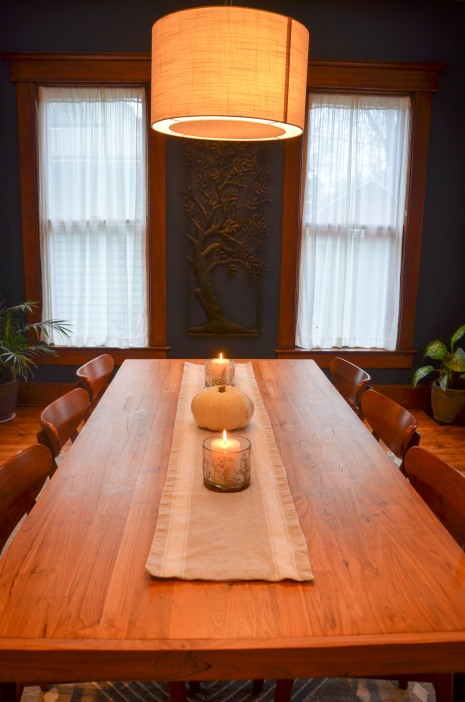
After we finally unpacked everything we were ready to use the dining room for actual dinners! The picture below was from our very first Thanksgiving in this house!
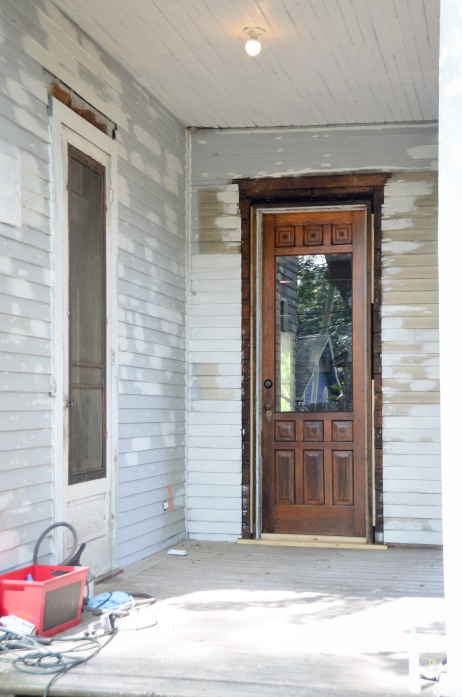
The next big project was to return a door and a window that had been swapped at some point many years ago to turn the house into a duplex. The picture below clearly shows the outline of a door, but with a window in it’s place.

For the trim, we originally thought we could just get by with deep cleaning it. But in reality there was so much paint, grime, and general damage that we decided to go ahead and scrape it, sand it (many times), stain it, and refinish.

At this point we have scraped, sanded, and refinished 5 of the 6 rooms that have the original trim. Once again, like all things involving renovation, it has been a tedious process. Extremely tedious. But the end result is certainly worth it.
Now for the reveal!
Here is the view of the dining room as you enter from the front vestibule.

The dining room was difficult to furnish. We didn’t want to spend a lot of money so we had to be persistent and wait patiently for sales and/or damaged floor models.
This sideboard is from West Elm and originally cost way more than we wanted to spend, but after waiting around forever we happened to get it at 40% off as a floor model with slight damage to one of the corners. The corner was easy to fix and now you wouldn’t be able to see it unless we pointed it out to you.

The table has a similar backstory. We looked around FOREVER and this one kept popping up on our radar, but it was WAY out of our price range. Last year, the day before Thanksgiving, I was walking through the mall to get Amy’s phone repaired and saw this table again taunting me through the doorway of Crate and Barrel. This time it was marked 50% off as a floor model. Since Amy didn’t have her phone I couldn’t even call her to ask her if I should get it. I bought it, went to go borrow a truck, came back and put the table in the truck, drove home and surprised Amy as I pulled into the driveway with a new Thanksgiving table just an hour before company arrived from out of town.

One great thing about the table is that it can reasonably sit anywhere from 6 to 12 people because it expands on both ends.
The built-in cabinet is still the highlight of the room. We were never able to figure out a way to make the inside of it look clean and fancy to use as a display cabinet, so we went the more practical route and put up curtains. This means we can store large kitchen items in the cabinet without worrying about what it looks like. The lower cabinets are used for Lucy’s craft supplies.

The dining room chairs we got on sale and are the same type of chair that we have at the kitchen table, but just a different style. We did that intentionally so that we could seat more people at the kitchen table and use chairs that somewhat match. The rug was the final piece of the puzzle. Amy and I are picky about rugs. Really, I guess we are picky about everything. Maybe “deliberate” is a better word? Anyway, we saw this rug on the floor at a store, we both liked it right away and bought it right then without thinking more about. That never happens!

In our previous house we had a formal dining room, but decided the space could be better used as a playroom. Like many people, we just ate all our meals in the kitchen. In fact, after we bought this house we briefly considered turning this dining room into the kitchen and using the old kitchen space as an area to put a kitchen table. Glad we didn’t do that! There is something special about having a designated space where the family sits down to dinner every night that is removed from the distractions of computers, TVs, and separate from where the food was prepared. Dinner is a special time when we take a break from the hectic schedule of our lives and come together to reconnect with family and friends. It deserves its own room.


holy moly, you have exquisite taste…..and are tenacious to boot…congratulations neighbors
LikeLiked by 1 person
Wow, that really turned out great! I know all the details are so tedious (like stripping and refinishing millwork, but they really make the difference between a showplace and one that’s “flipper grade”.
I also think the paint color, while dark and bold, complements the woodwork really well. I think choosing the right paint color to work with the trim is something people with natural wood overlook, and may be a factor in pressing the “easy button” of doing white woodwork, which matches any wall color.
Lastly, it looks like the curtains on your built-in are on the outside? Have you considered putting them on the inside to let the leaded glass show? You could even just stretch thin muslin that would provide some privacy for your contents but not bind against the shelves.
LikeLike
Thanks for the comments, Seth. As we have worked through each room and refinished the trim it has really made a big difference in the overall feel of the house. Yes, choosing paint color with white trim would certainly be easier! Each room has taken us a long time to paint because of the task of trying find colors that would complement the trim as well as work well with the colors of neighboring rooms.
Actually, the curtains ARE on the inside in the built-in. The leaded glass was really just a muslin or something, not real leaded glass. We scraped it off because in person it looked very yellowed, old, and fake.
Thanks for reading the blog!
LikeLike
This is so gorgeous, congrats! I love everything, from the floor to the furniture and paint choice.
LikeLiked by 1 person